[Part 4.3] Building A Website in Craft CMS - (Useful Plugins Part 3 - Relabel)
In [Part 4.2] we checked out Reasons, which brings some advanced conditional logic with an easy point & click interface to our content management in the dashboard. We got it installed in our build, and looked at how flexible and easy to use it is.
In [Part 4] we looked at NEO one of the most powerful fieldtype plugins available for CraftCMS, we saw all it could do and got it installed on our build.
In [Part 3] we installed Craft and removed the demo fields/sections and templates so that we have an absolutely bare platform to start building upon.
In [Part 2] we covered some of the basics of using the Twig template engine, setting up advanced routes, and of course the eye candy Live Preview.
In [Part 1] we went over the very basics of Craft CMS, what it is, pricing, sections, assets, globals, entry-types, fields, and field-groups.
In [Part 4.3] we're going to checkout another great plugin that enhances the process even further: Relabel. This plugin can be used in conjunction or independent of NEO, but it sure does make working with NEO even more robust than it already is.
Relabel
Relabel allows us to change the name and instructions that appear for a field in the dashboard while maintaining it's shortName in the code. That means we can greatly simplify our code, avoid repeating similar code, and get to re-use the same fields in different areas even if they have different purposes as long as they are the same type of input.
Installing
- Start by downloading the necessary files by clicking here.
- Unzip the files and open the folder.
- Find the folder relabel and upload it to your server in craft/plugins/
- Open your dashboard and navigate to Settings > Plugins
- Find relabel and click install
Relabel is now all setup, there is no further configuration necessary.
Putting Relabel Into Action
You've probably noticed in some of our previous articles in this series that some fields had the name shown with a Strikethrough and wondered why those fields appeared that way where as others did not. The reason as you may have guessed by now, is that those fields are using the Relabel plugin

To use Relabel after installing, simply click the gear icon on the field and select Relabel.

You are then presented with a popup where you can change the Name and Instructions shown to your content editors in the control panel. In this example we opened we relabeled the Color field to make it a bit more descriptive for it's particular use-case.
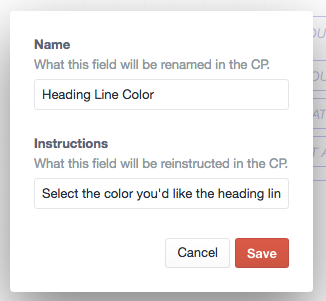
As you can see below, even though the shortName of the color field has been left unchanged, it has the updated Name and Instructions for our content managers in the dashboard.

Just like with Reasons in our previous article, there is no additional code we'll have to worry about for this particular plugin as it is all handled strictly within the dashboard.
I HOPE YOU ENJOYED & LEARNED SOMETHING!
As always If you've reached it to the end of the article, given it's not particularly short, I'm going to assume that you enjoyed reading it. Please go ahead and UPVOTE the post, RESTEEM if you think your followers would also find value in it, and make sure to @FOLLOW ME to make sure you don't miss the upcoming articles in this series where we'll get much more in depth and even build a site together from the ground up! EXCITING TIMES!
Thanks to all of my followers both new and old, I hope to continue to bring you quality content that interest you, feel free to comment any requests for any particular topic you'd like to read or learn about if you believe I may be able to answer it for you. Cheers!
Thanks for the article, found out something new :)
thanks for sharing as usual :)
Yo shade! more koala tea. cool. :)
@sasha.shade got you a $1.63 @minnowbooster upgoat, nice! (Image: pixabay.com)
Want a boost? Click here to read more!