How to make a Christmas Advent Calendar! || DIY craft with tutorial!
Greetings to all steemians!
Welcome, December! Time to build our Christmas tree, start to hang those Christmas ball, lights and more! And time to open your advent calendar gift! Since I live here in Europe, I get used to it, their traditional advent calendar usually for kids and for adults as well. Mostly it's a chocolate advent calendar and some shops sell a cosmetics advent calendar and more. We used to do it with my hubby every year though we are not a kid anymore LOL! But at this time, I'm thinking of a different one. Maybe I find it boring just buying an advent calendar in the market which is already in a box and you just open it every day, eat your daily chocolate LOL!


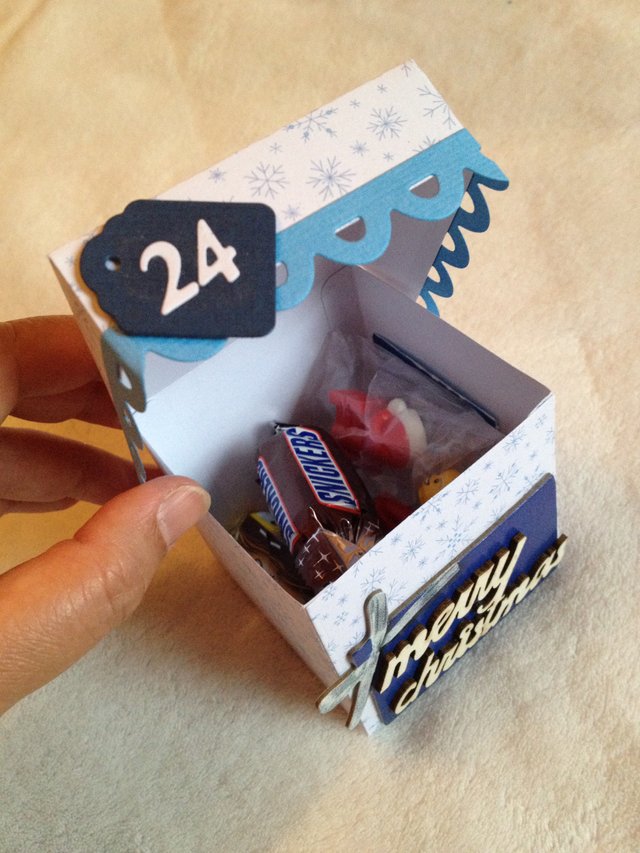
So what I did was, I bought a small box of assorted chocolate with 25 pieces and a lego advent calendar. This is the box of a Lego advent calendar. Inside are different kinds of figurine including Santa Claus, and the instructions to build are given in each cover of the box. So I cut the instructions in the Lego box and put it along with the chocolate in my DIY boxes. 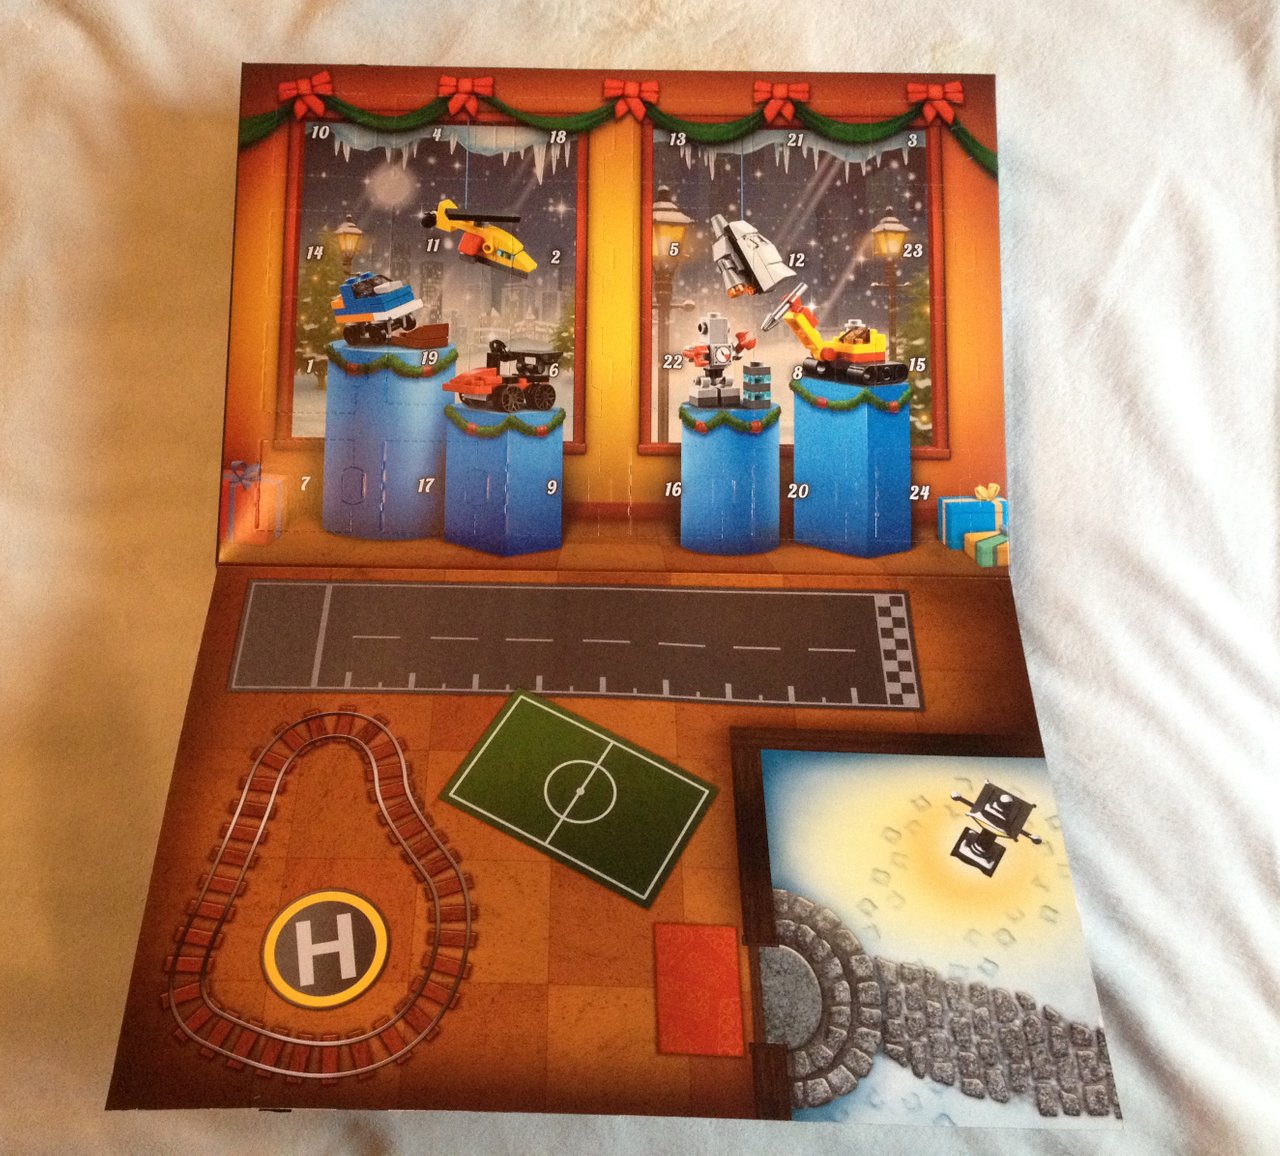

Actually, this craft was a rush! I started to make it on the last day of November and finished it yesterday, on the first day of December, LOL! Cramming attacks me and finally came to this idea a snowy Christmas design with a blue theme. It's hard to use my die-cut machine, my plate gets harder coz I used it many times. So my hubby helped me to run over the machine, 24 times! But the rest of the small die-cut design, I was the one who runs it over my machine which is easier than the boxes design. And I added some details and embellishments for the rest of the design.
And here are the materials that I used to make this project! Let's get started for the tutorial, and if you might wanna do this project, enjoy and be creative, good luck!

My materials and tools:
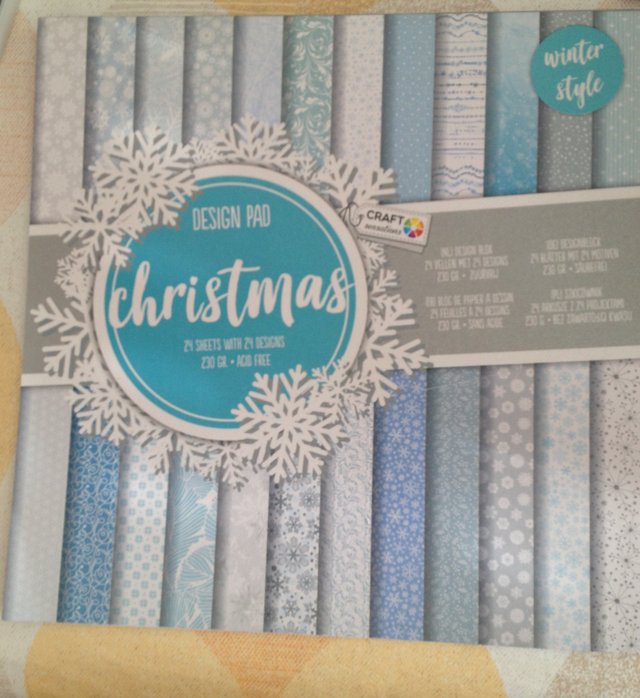
- Papercraft (I'm using a paper from craft sensation company, 24 pieces, 12x12 inches, and 230gsm)
- White, light and dark blue cardstock in any gsm.
- White glue or stick glue
- Pair of scissors
- 3D foam tape ( For the embellishments)
- 3D Stickers
- Christmas ribbon ( blue and silver)
- Bone folder
- Die-cutting machine (I'm using a Sizzix brand, or any machine will do)
- Die-cut snowflakes design
- Die-cut numbers design
- Die-cut box design
- Die-cut corner design
- Die-cut tags design ( I'm using two kinds of tags)
The instructions:
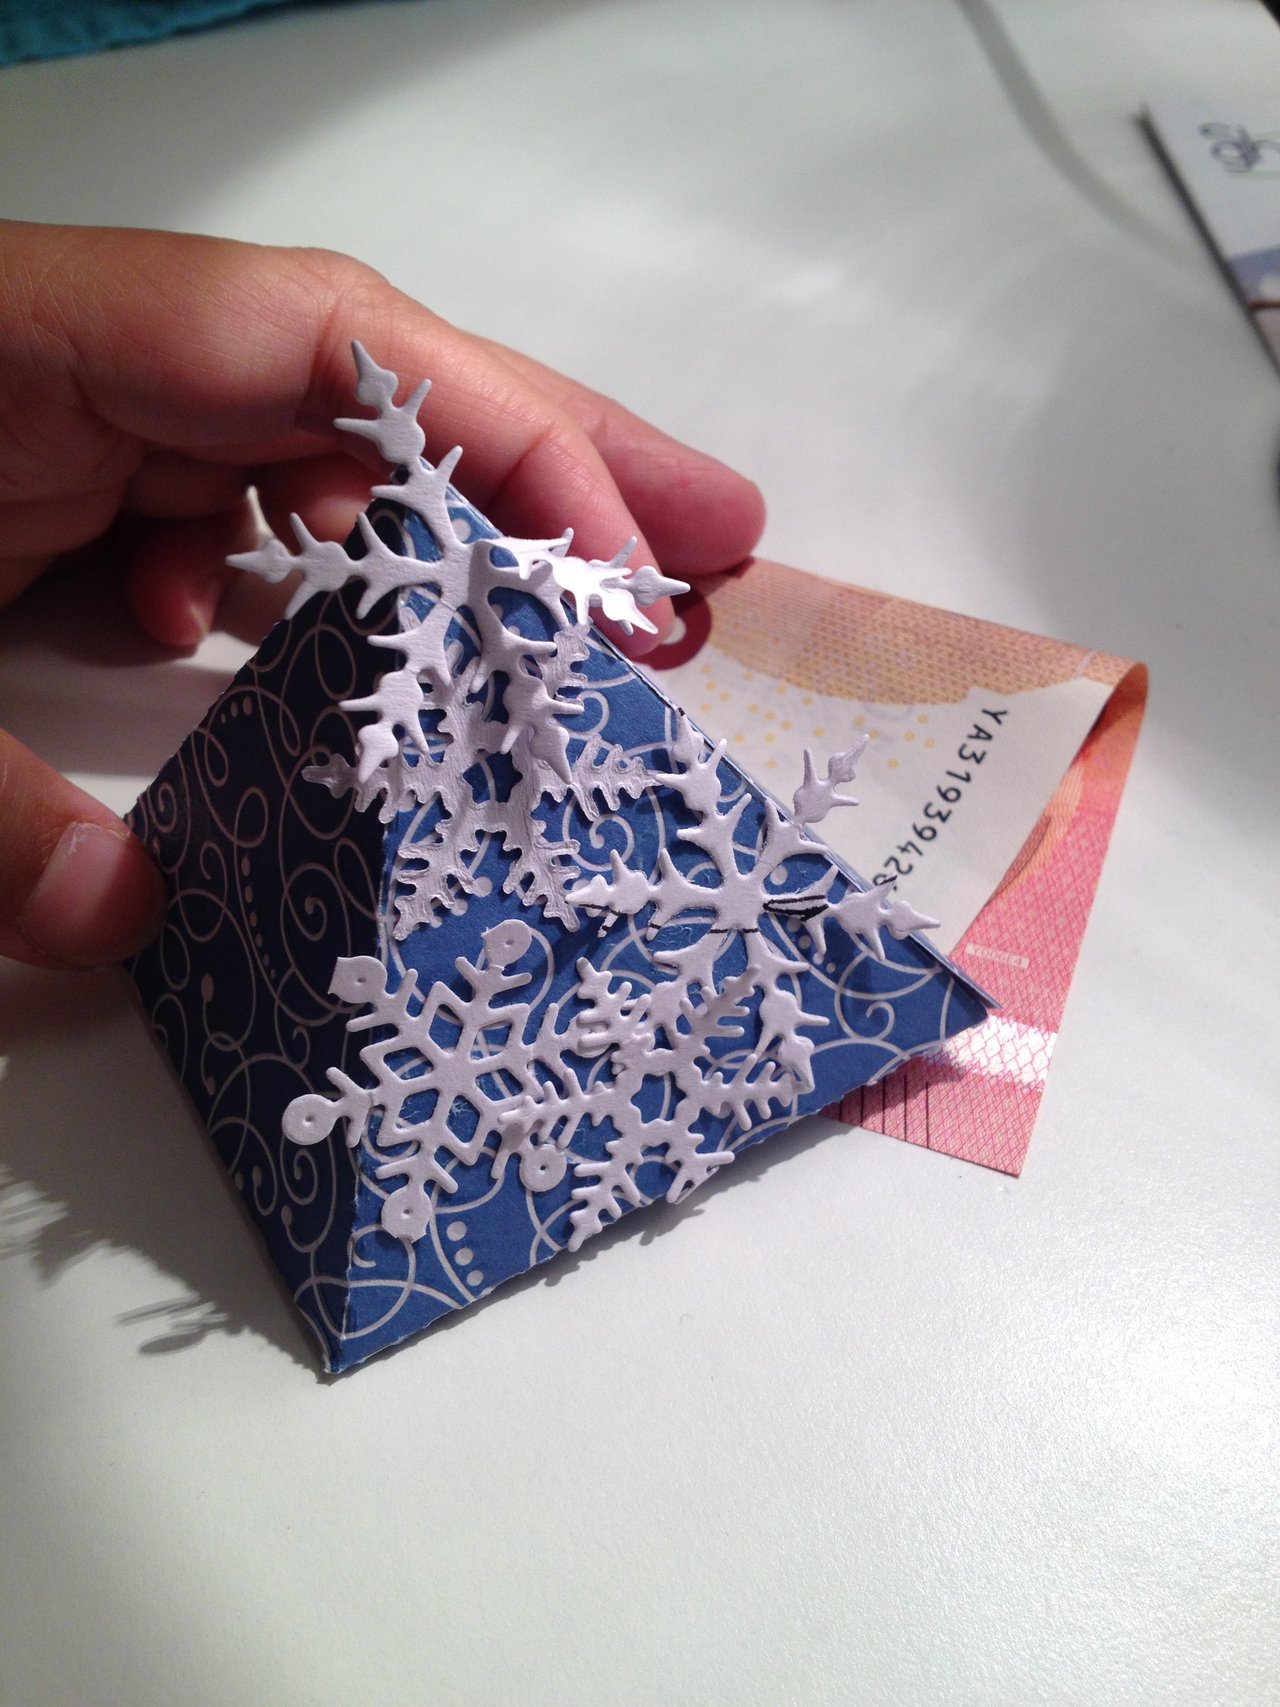
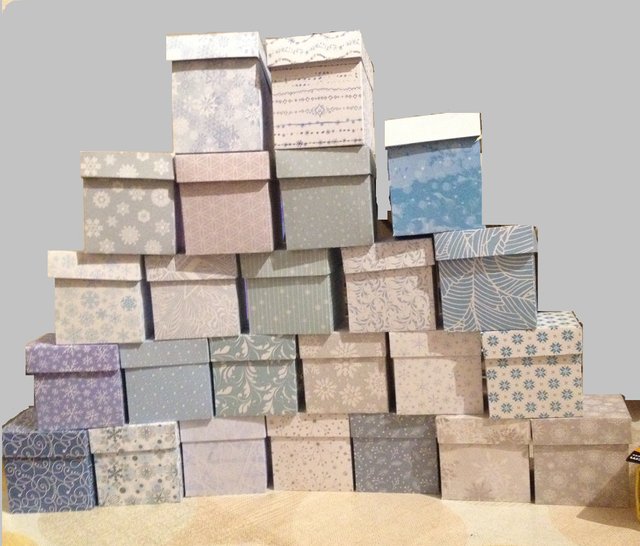
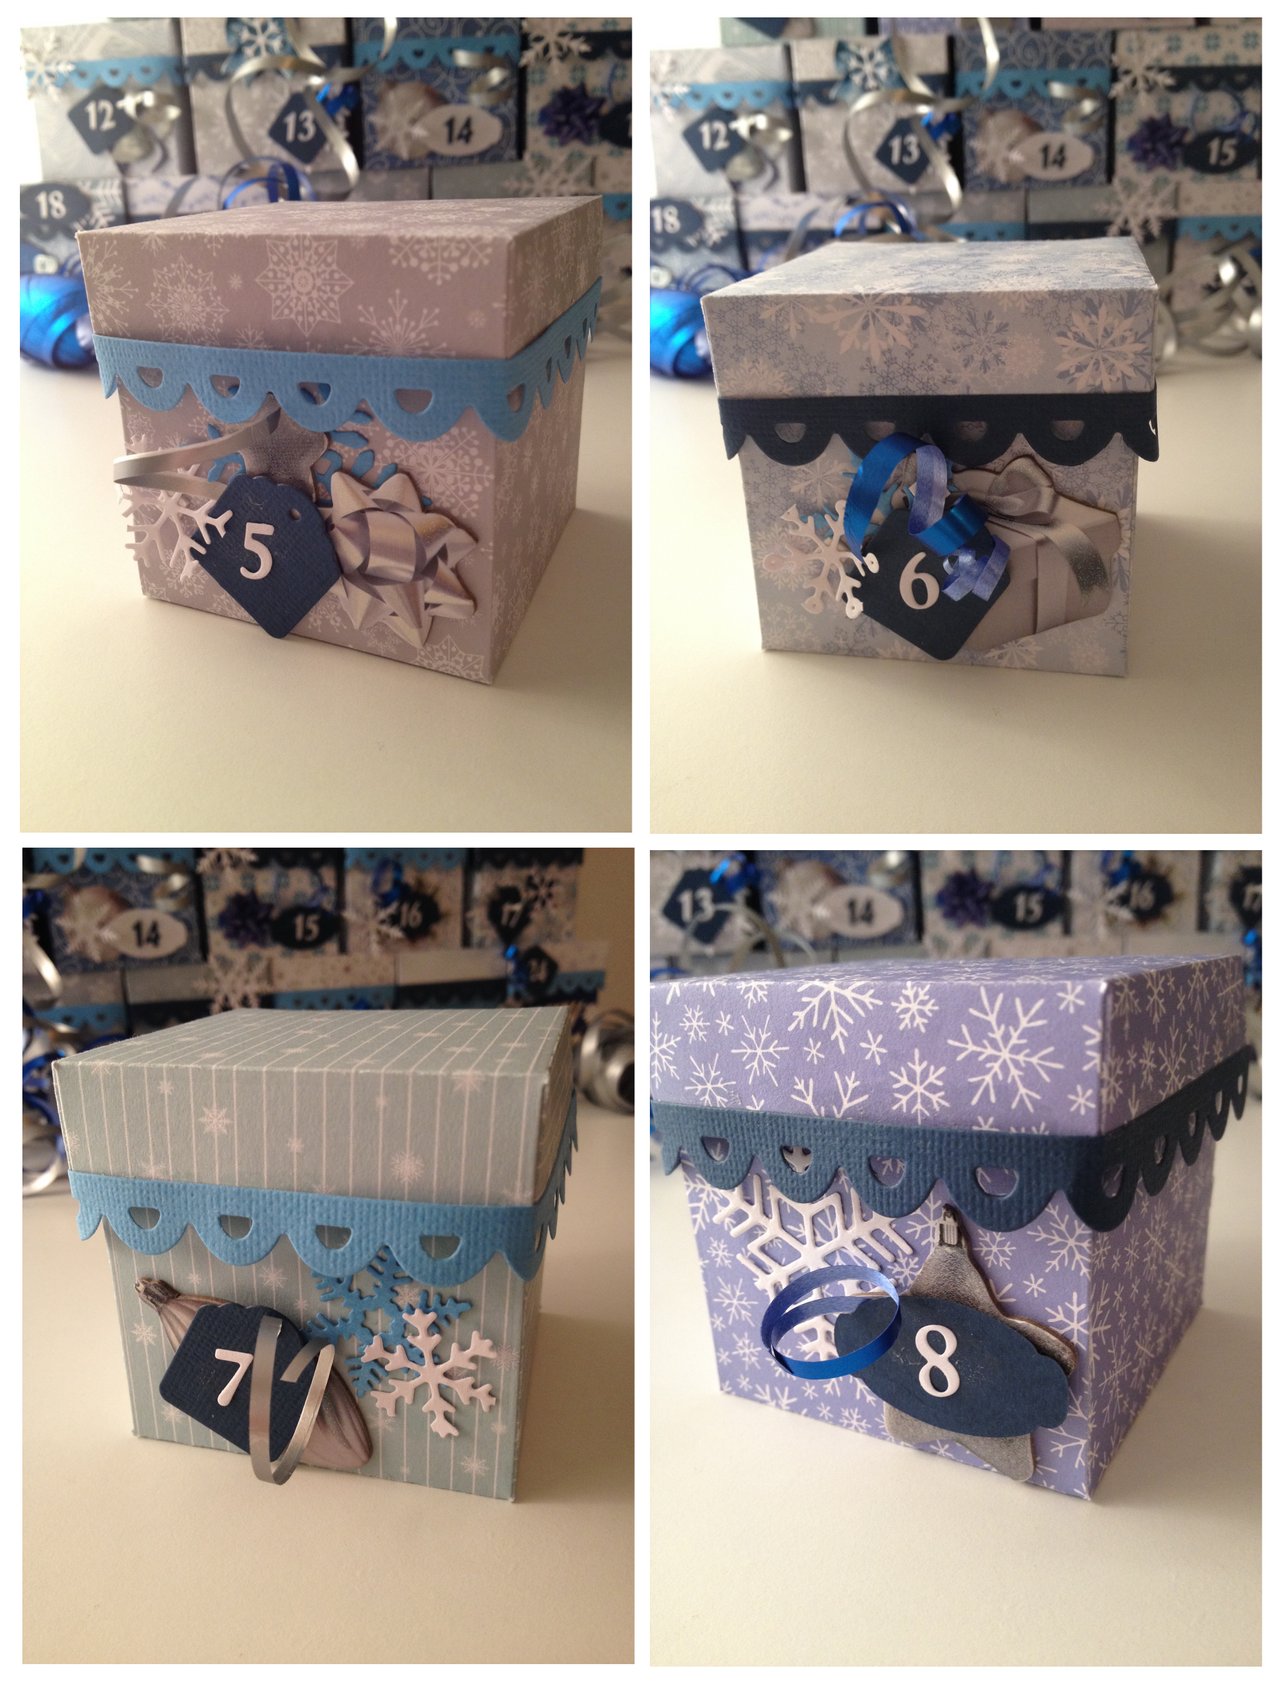
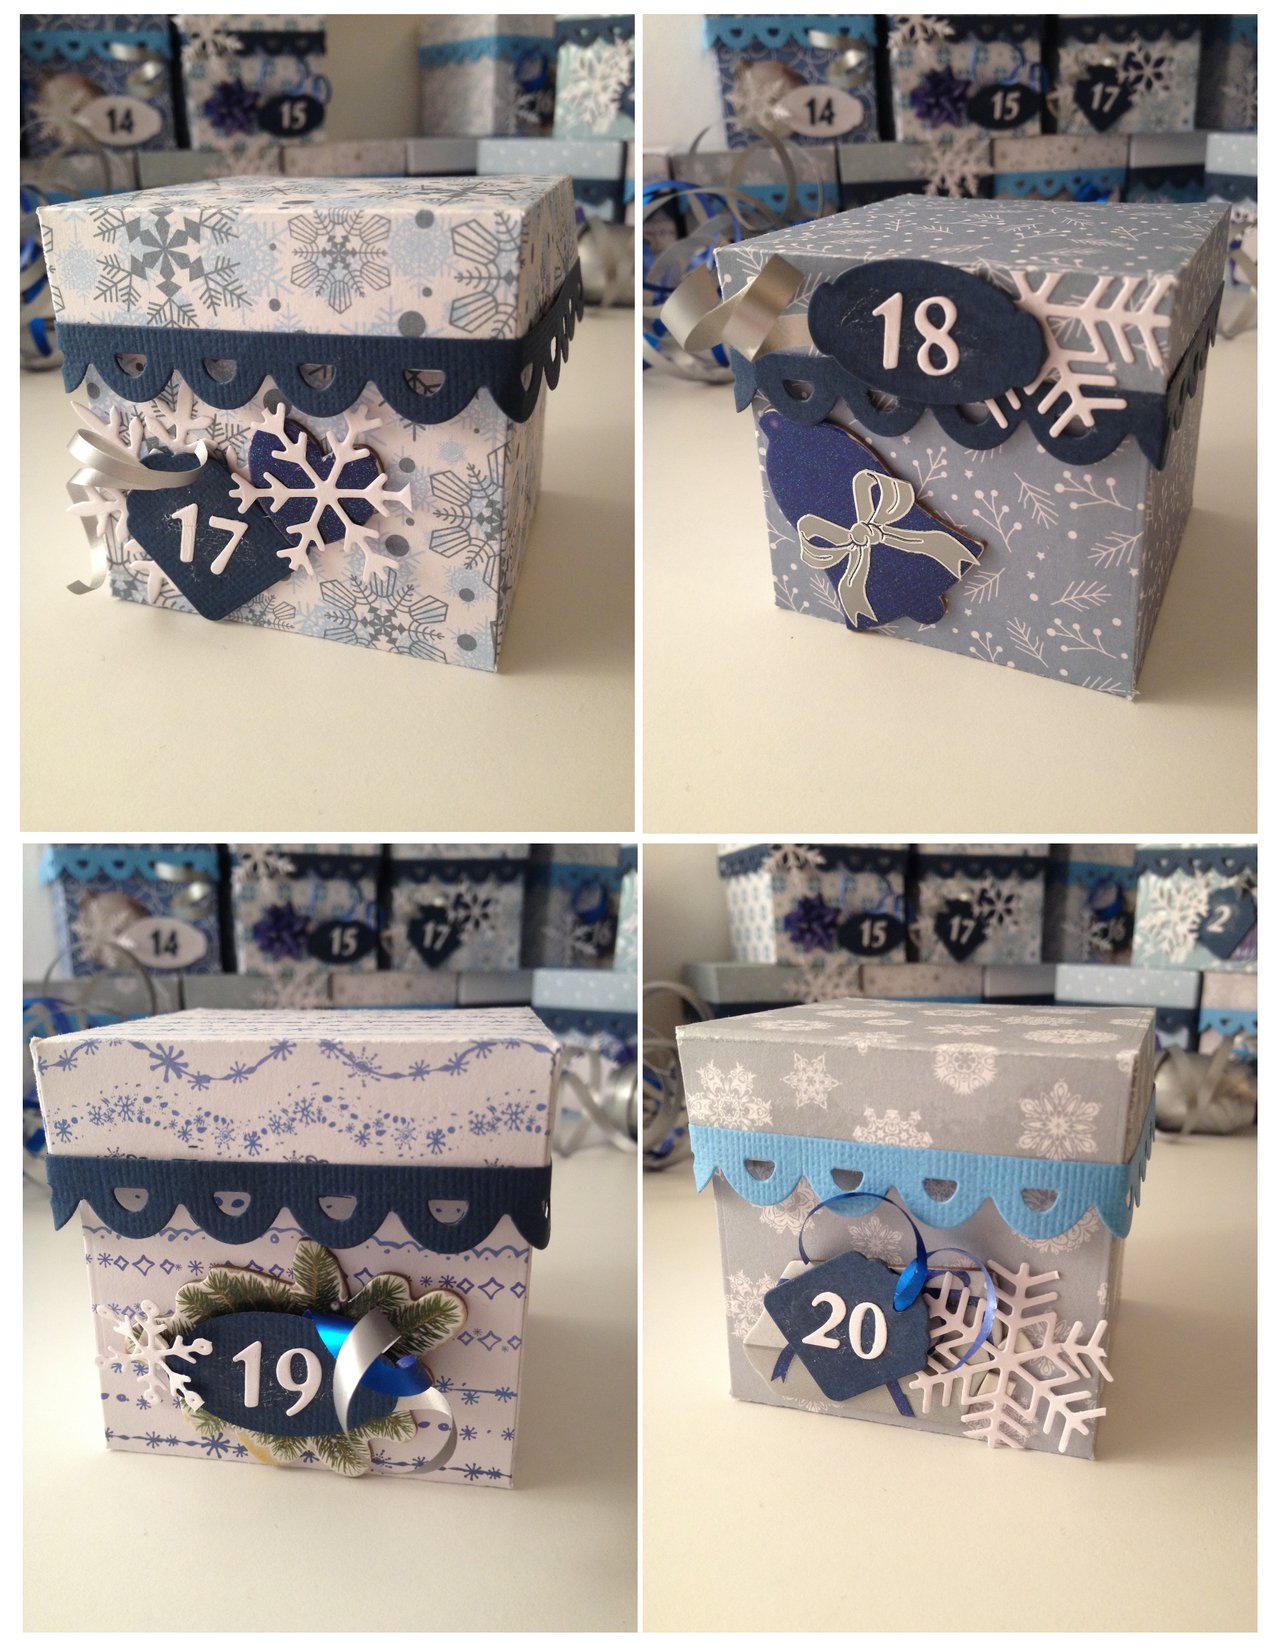
- I chose this theme with snowy blue Christmas for my paper design. Grab all the 24 pieces of designer paper and the die-cut box design then start to run it to your machine for 24 times if you are using thin lits die-cut. I cut it many times because my paper is 230 gsm and I used thin lits dies. But if you have a thick die you can cut the design paper for 2-3 papers at the same time. But mostly for boxes, it's always come with thin dies. Opppsss! I also added one pyramid box, which is optional, normally in advent calendar it's only 24 boxes but I do it 25 the bonus one, LOL!

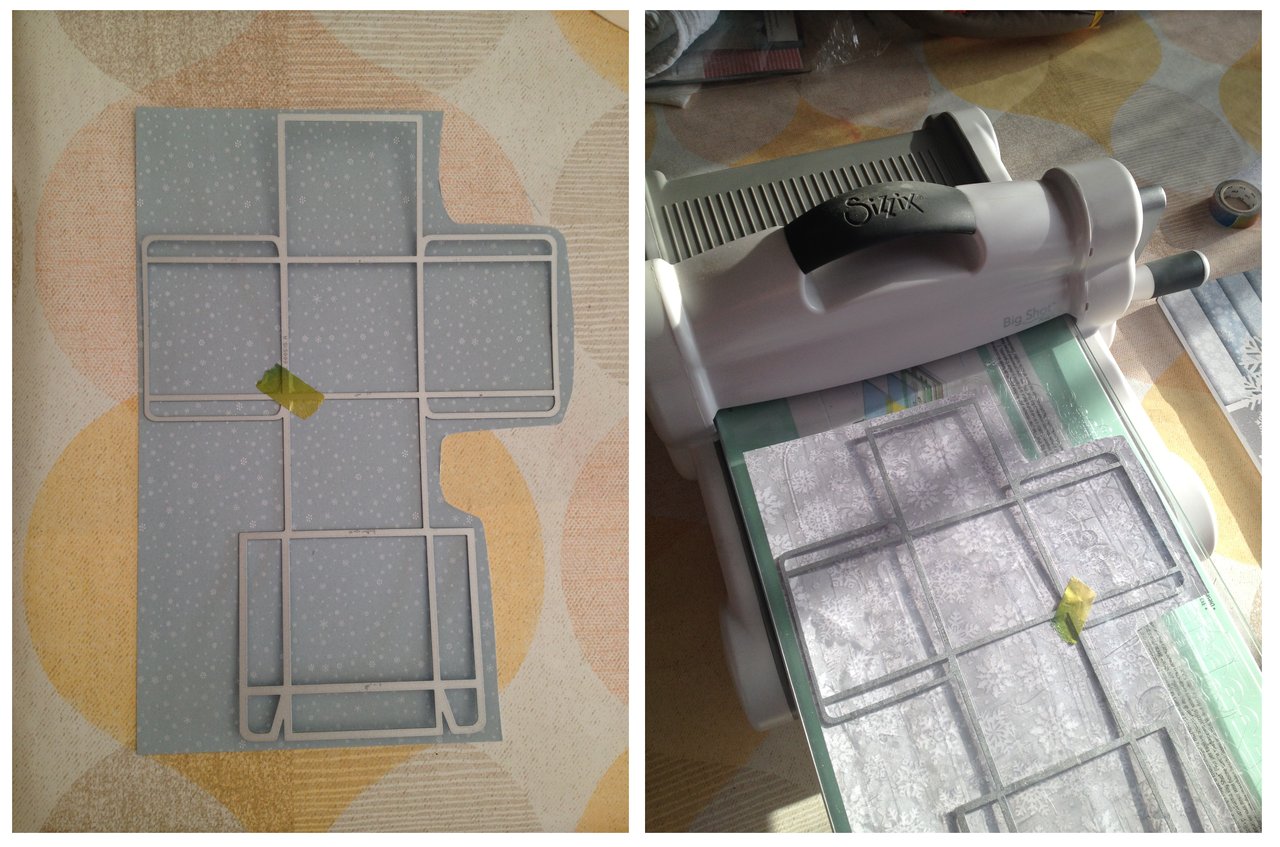
- So here are my 24 boxes using die cut machine. And now it's time to fold the crease using the bone folder. In case you don't have a bone folder, you can use any object to fold it but make it slowly or else it will crack the sides. That's why it's better to use a bone folder in any craft. But it's an optional, no need to purchase it. After you are done with folding, stick the sides to form the boxes using any glue. I prefer a white or stick glue than a double-sided tape. It's more rigid than the double-sided tape especially when you put something a little bit heavier in your box, it will hold still.
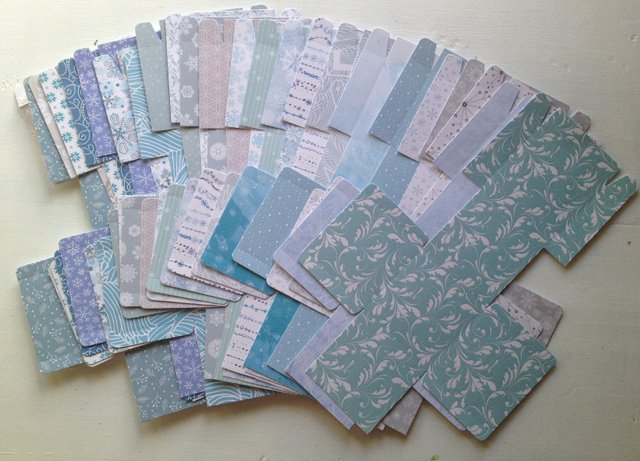


- Once you are done in forming the boxes, now it's time to add the corner design in your box to add some details. This is optional but if you find it nice, you can design it whatever you want.


- Next will be the cutting of numbers, snowflakes, and the tags. Actually, I cut these numbers many times LOL! Again you will need from 1 to 24 numbers, 24 tags, and some snowflakes for design. Here are some of my finish dies.
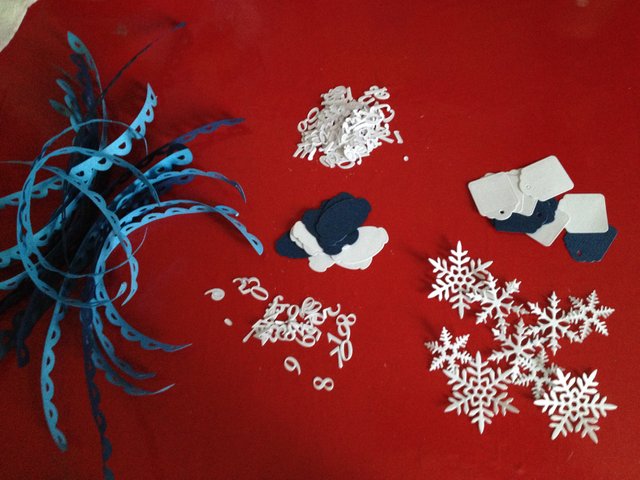

- Time to decorate! Stick all the stickers in each box, add some snowflakes, tags with the designated number and ribbon for the finishing design. I use the scissors to curl the ribbon and stick it at the back of each tag. In sticking all the embellishments, use a 3D foam tape for the 3D effect and the design will not be flat and boring. But you can also use glue if ever you don't have 3D foam tape available.
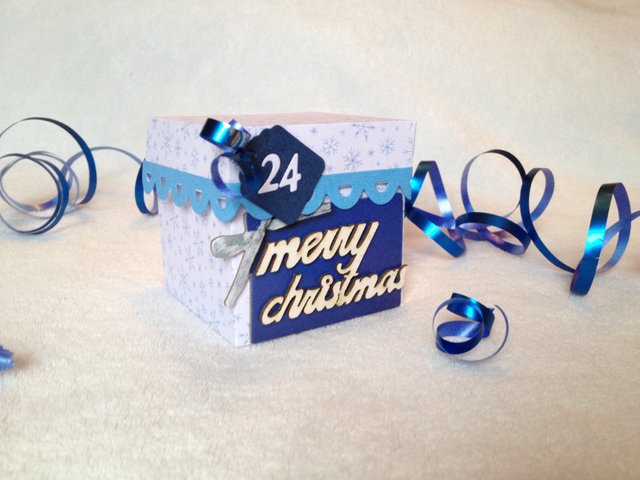

- For the final touch, put the chocolate and the lego with instructions inside the box, then stick a foam tap for the closure. I decide not to use ribbon for the closure of each box since I already added a small ribbon with the tags. You can alternate the color of the paper especially the corner design of the box, but I mistakenly stuck the dark blue in number 18 box. I mix the color of tags and numbers depending on the color of designed paper.


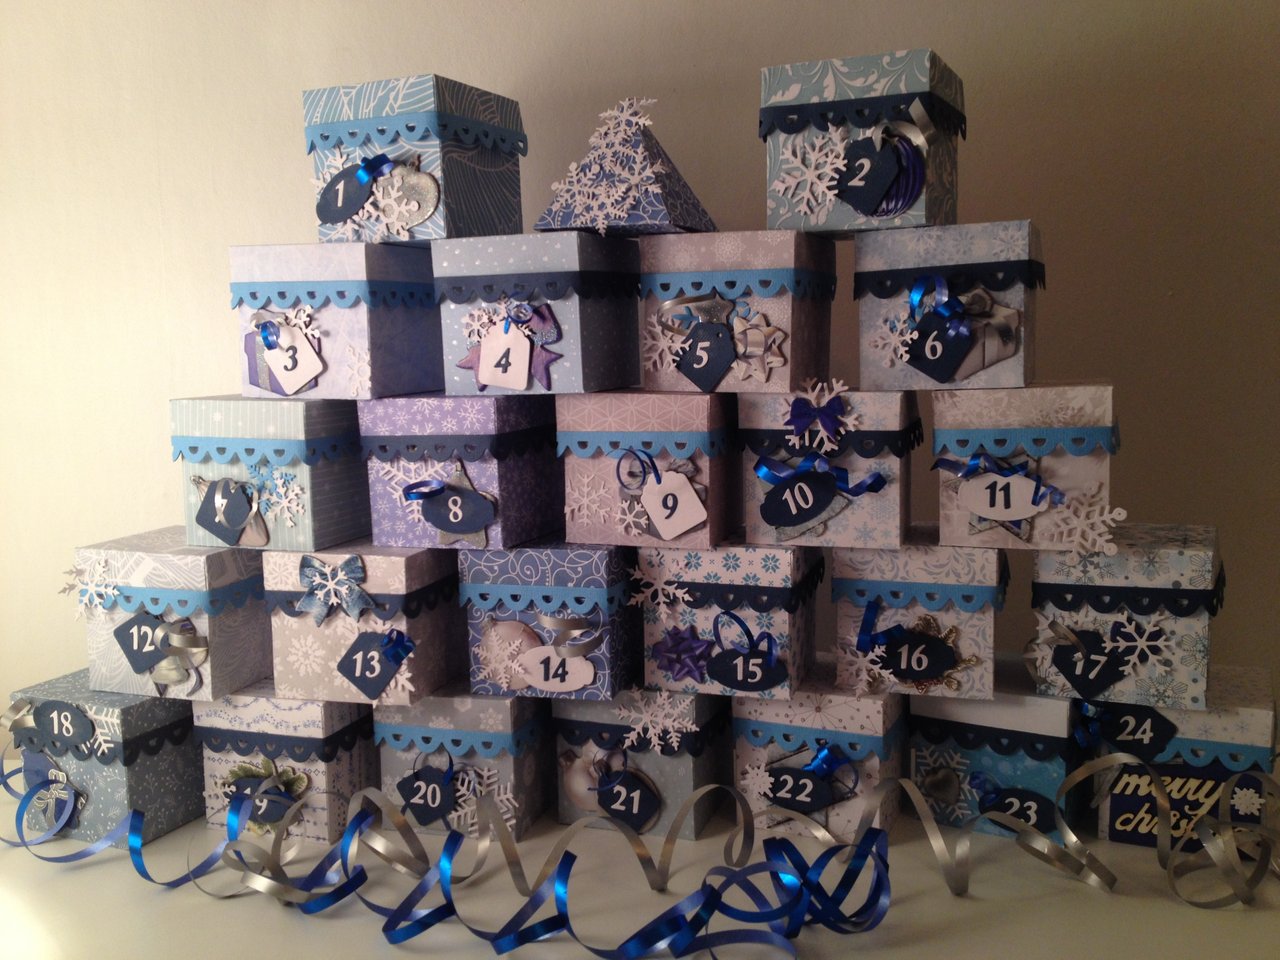
And the project is done and ready to offer! Yesterday and today, my hubby already checked his advent calendar! He was happy especially the effort I made for the boxes!
How about you? What idea did you make for Christmas? Share your thoughts and feel free to comment about it. Let's make the Christmas different and enjoy your crafting! Have a nice day ahead and thanks for dropping by in my art blog!
##Here is the outcome of my project! See some photos below!


Note: I save my left over paper for my future craft! I just cut off all the excess part. 
Thanks for dropping by!


Keep calm and be creative! 

This post was made from https://ulogs.org
As a follower of @followforupvotes this post has been randomly selected and upvoted! Enjoy your upvote and have a great day!
Thank you for your support @followforupvotes
Congratulations! This post has been upvoted from the communal account, @minnowsupport, by tonie from the Minnow Support Project. It's a witness project run by aggroed, ausbitbank, teamsteem, someguy123, neoxian, followbtcnews, and netuoso. The goal is to help Steemit grow by supporting Minnows. Please find us at the Peace, Abundance, and Liberty Network (PALnet) Discord Channel. It's a completely public and open space to all members of the Steemit community who voluntarily choose to be there.
If you would like to delegate to the Minnow Support Project you can do so by clicking on the following links: 50SP, 100SP, 250SP, 500SP, 1000SP, 5000SP.
Be sure to leave at least 50SP undelegated on your account.
It certainly looks like a very authentic and arty idea! Congratulations and all blessings to you guys!
Thanks you, and thanks for dropping by...
Good creativity!!!
Posted using Partiko Android
Thank you @carlagonz