DIY: DIORAMA - For Saint Seiya anime figurine (with step-by-step tutorial)
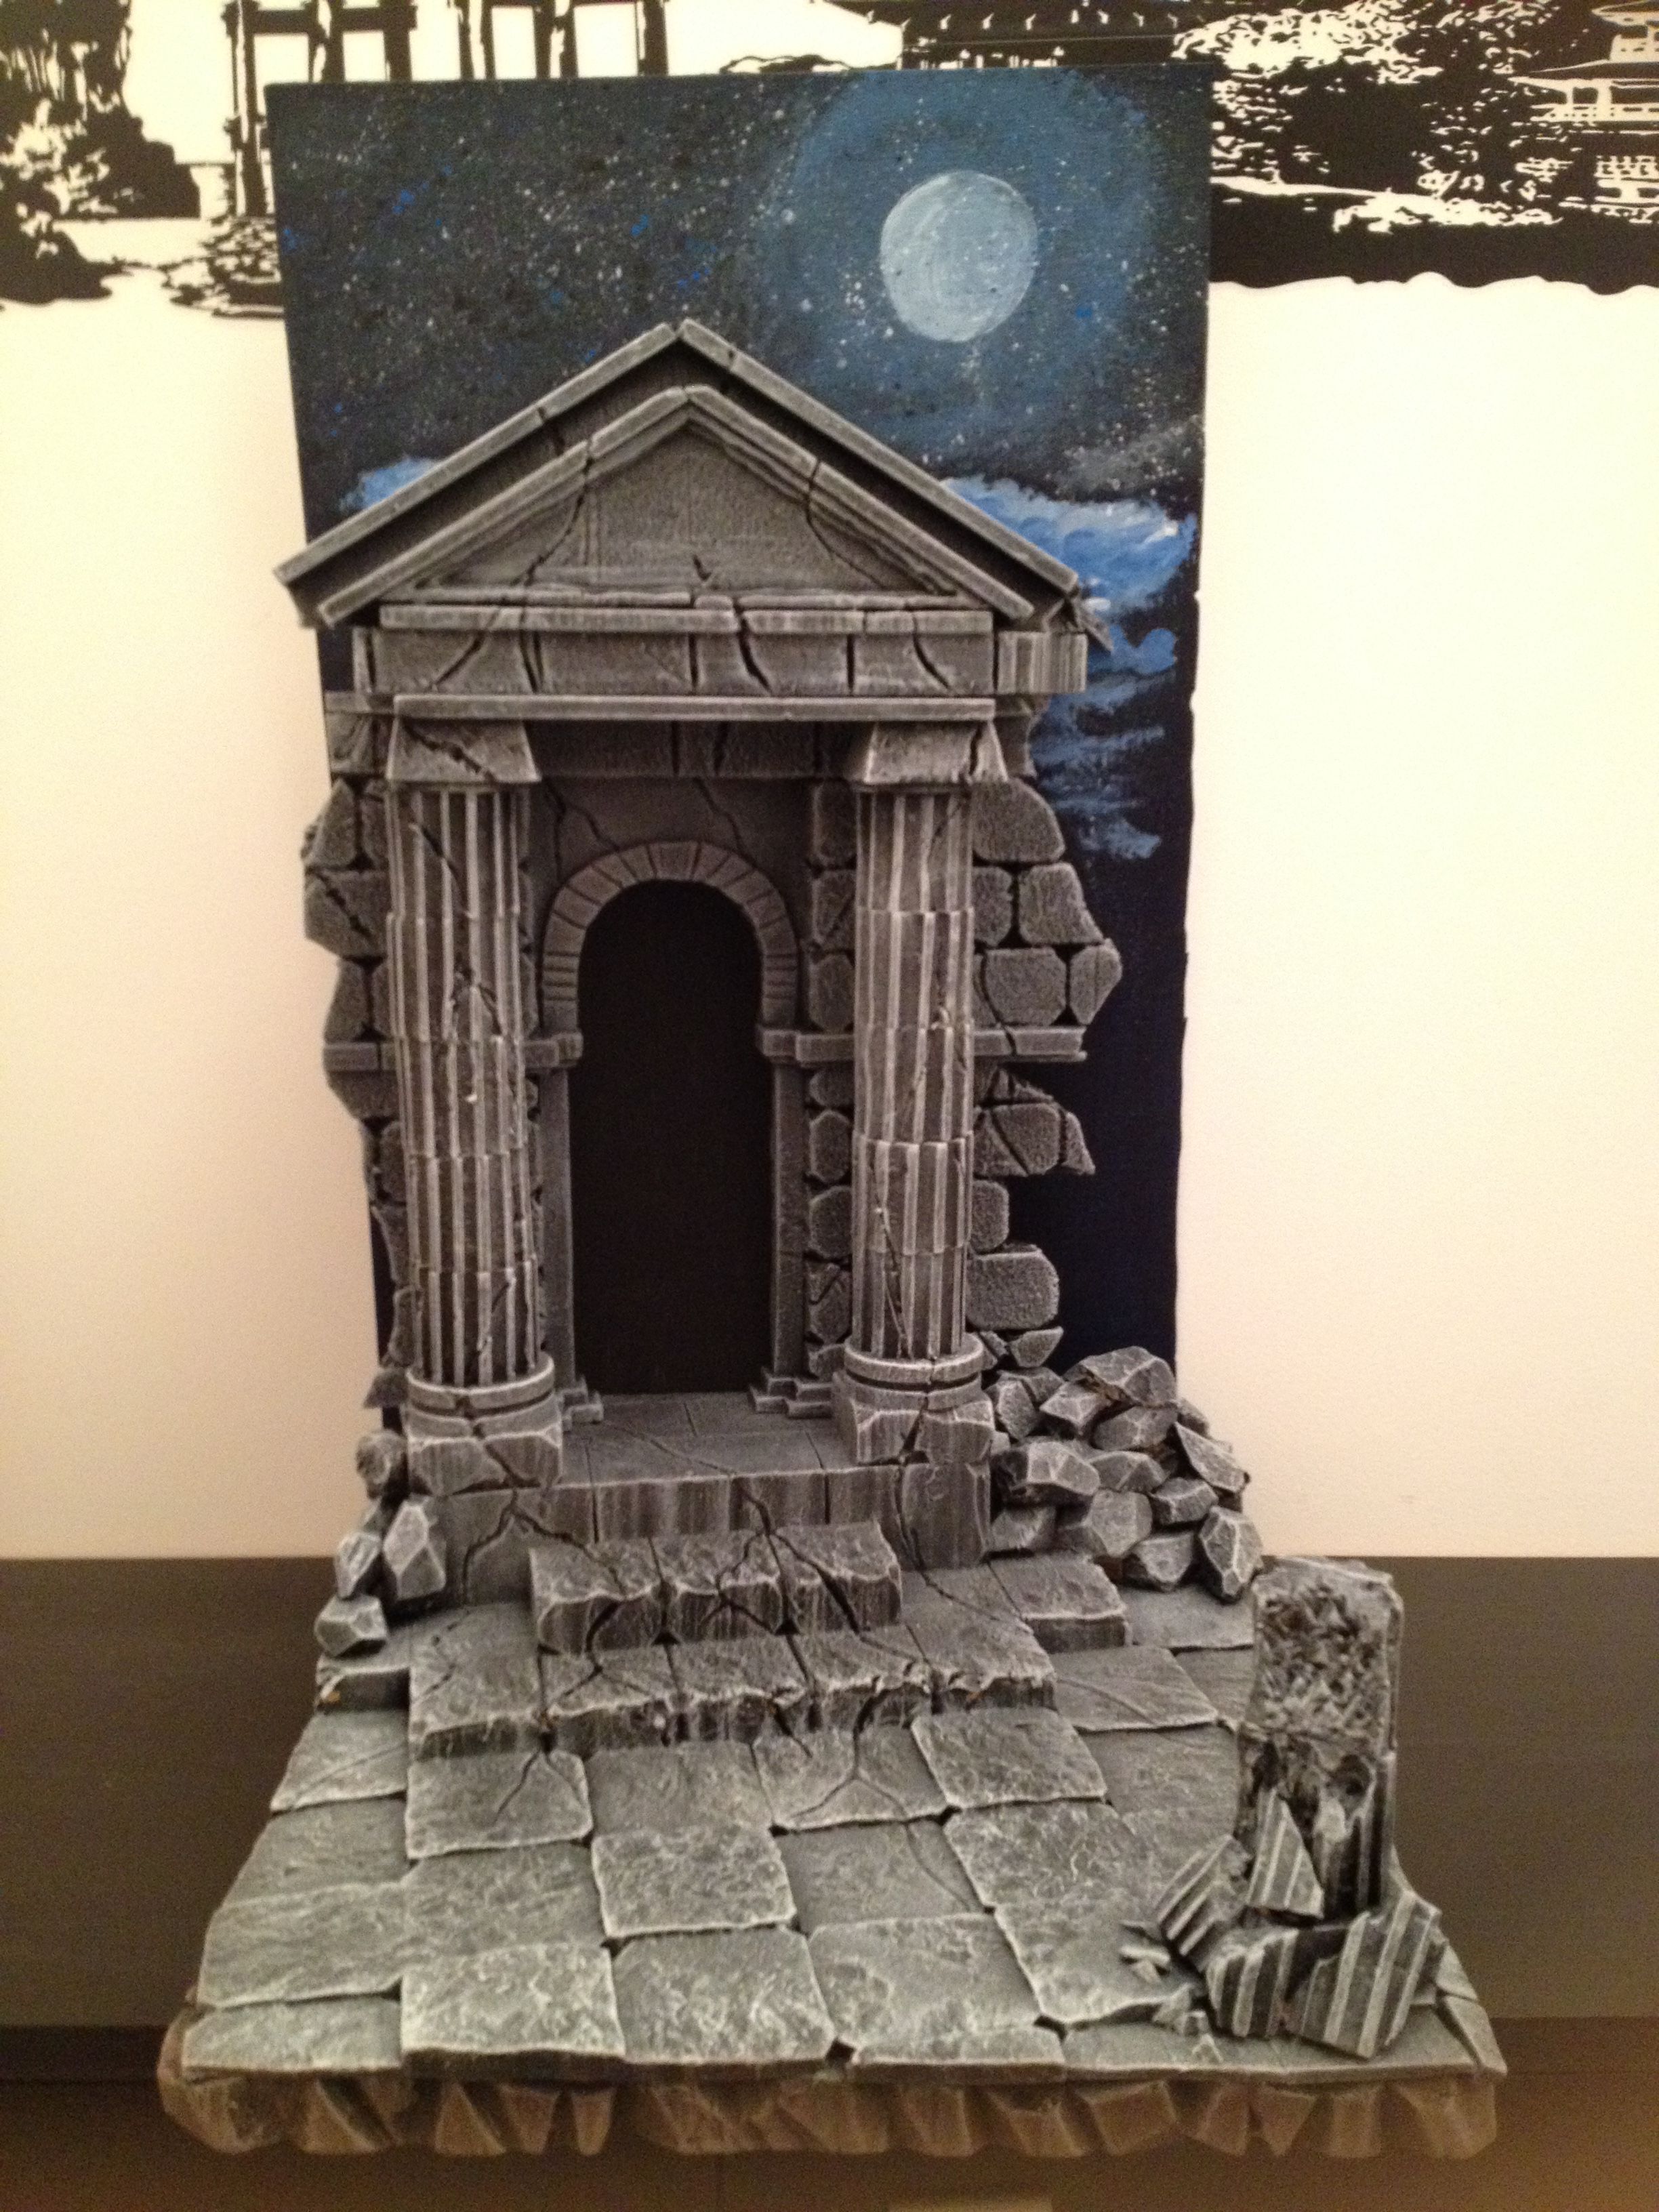
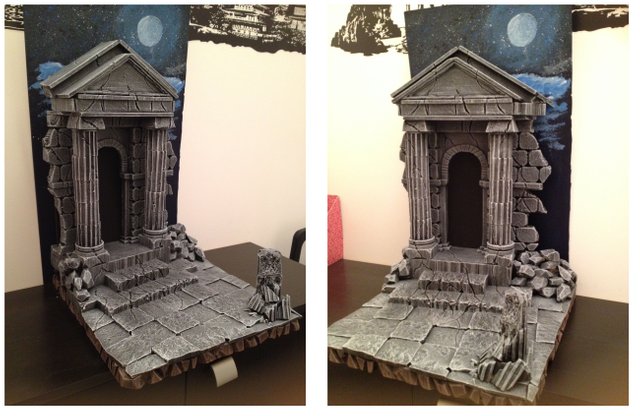
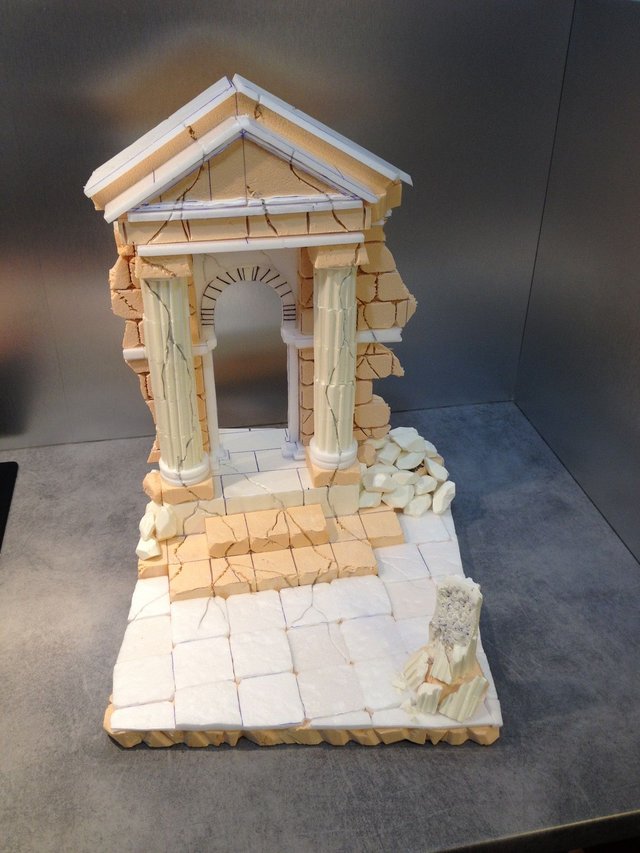
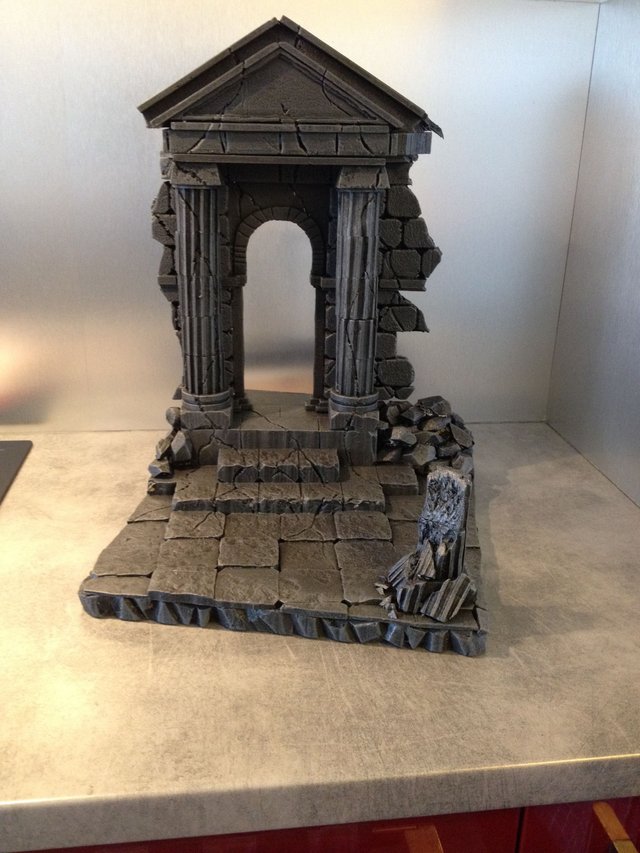
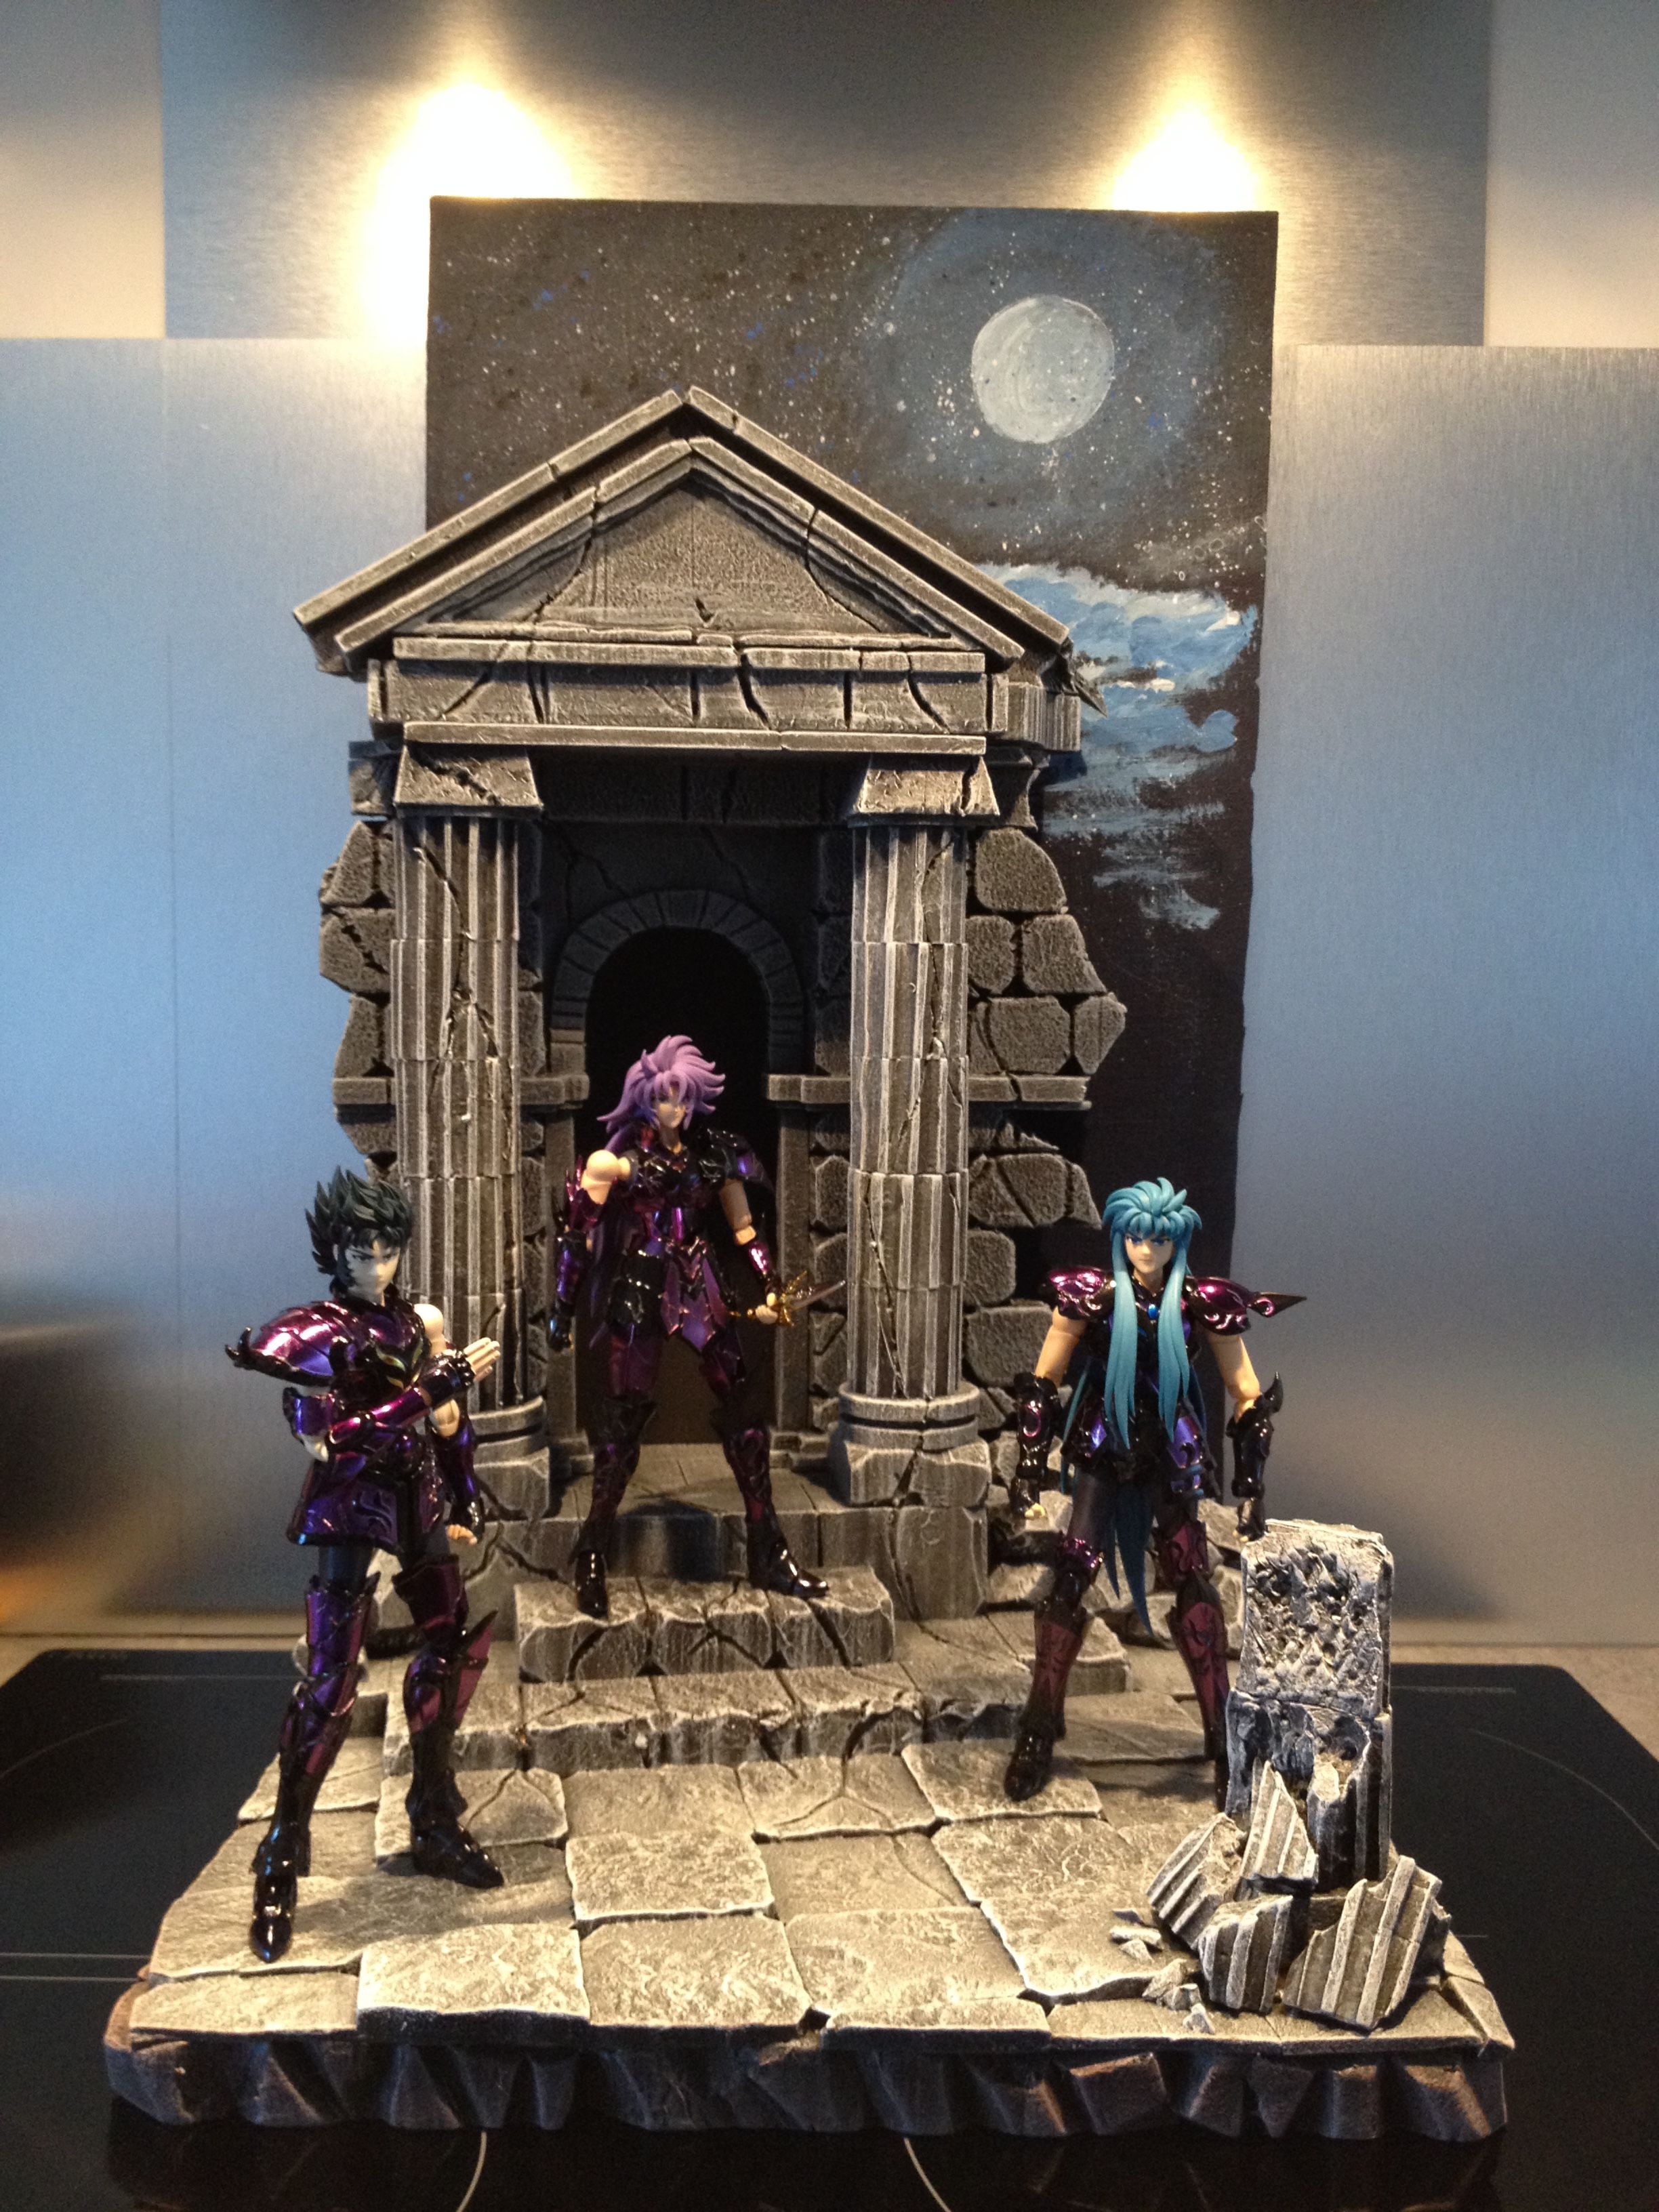
Good day everyone! It's been a while since I didn't make any post. And finally, I'm back on the track! So today, we are going to finish the series of the blogs that I started last month ago and dedicated to Saint Seiya. We will make a diorama to display the collectible figurines.In this project, my husband taught me and helped to finish this project since I was sick few days ago. A big gratitude to him for being a part of this project. If you are a big fan of anime, this will guide you on how you can display your figurines with your diy diorama. Here's my finished product photos.
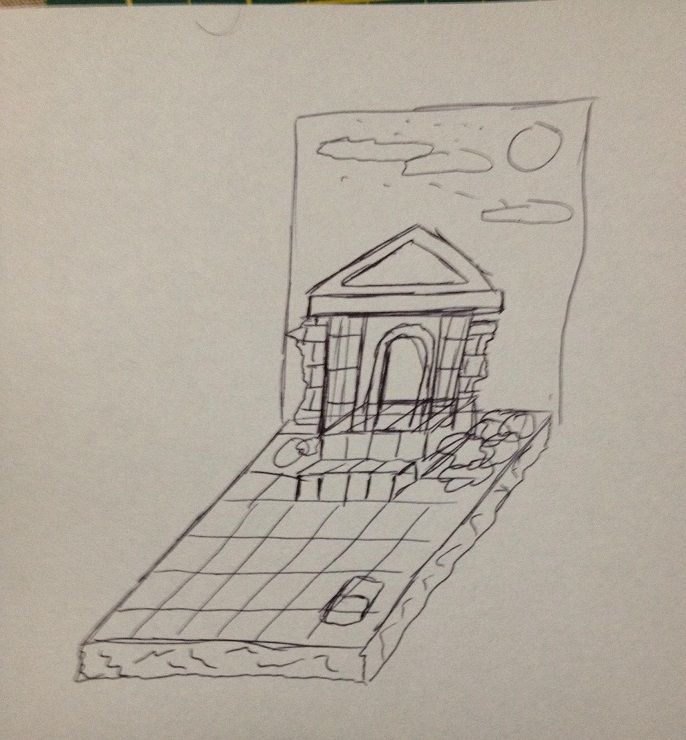
But before we start, we must set the basics, and a small sketch of what we want to create will give us the path to follow for the future. Hope you follow the instructions, it will take long to make this project.
Now that we know where to start, these are the materials we needed:
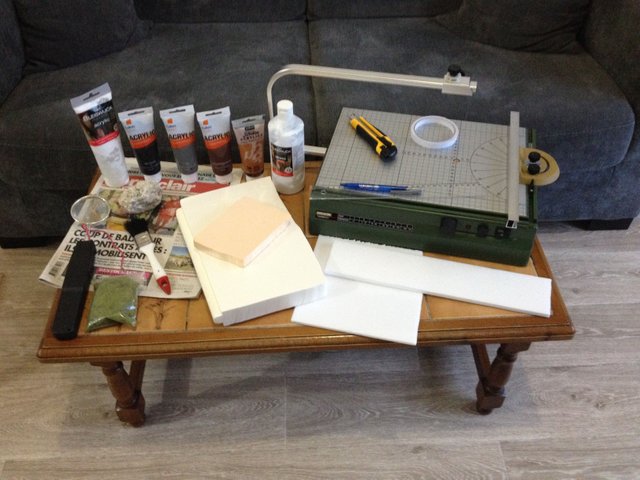
Materials:
- Acrylic paint (white, gray, black, dark brown, light brown)
- paint brush
- gesso (under coat of paint)
- cutter
- double-sided tape
- ruler
- pencil
- thermo cutter (machine for cutting polystyrene hot wire)
- stone (to give texture to polystyrene)
- newspaper (to protect when painted)
- polystyrene (different thicknesses).
note: there are two types of polystyrene as you can see in the photo.
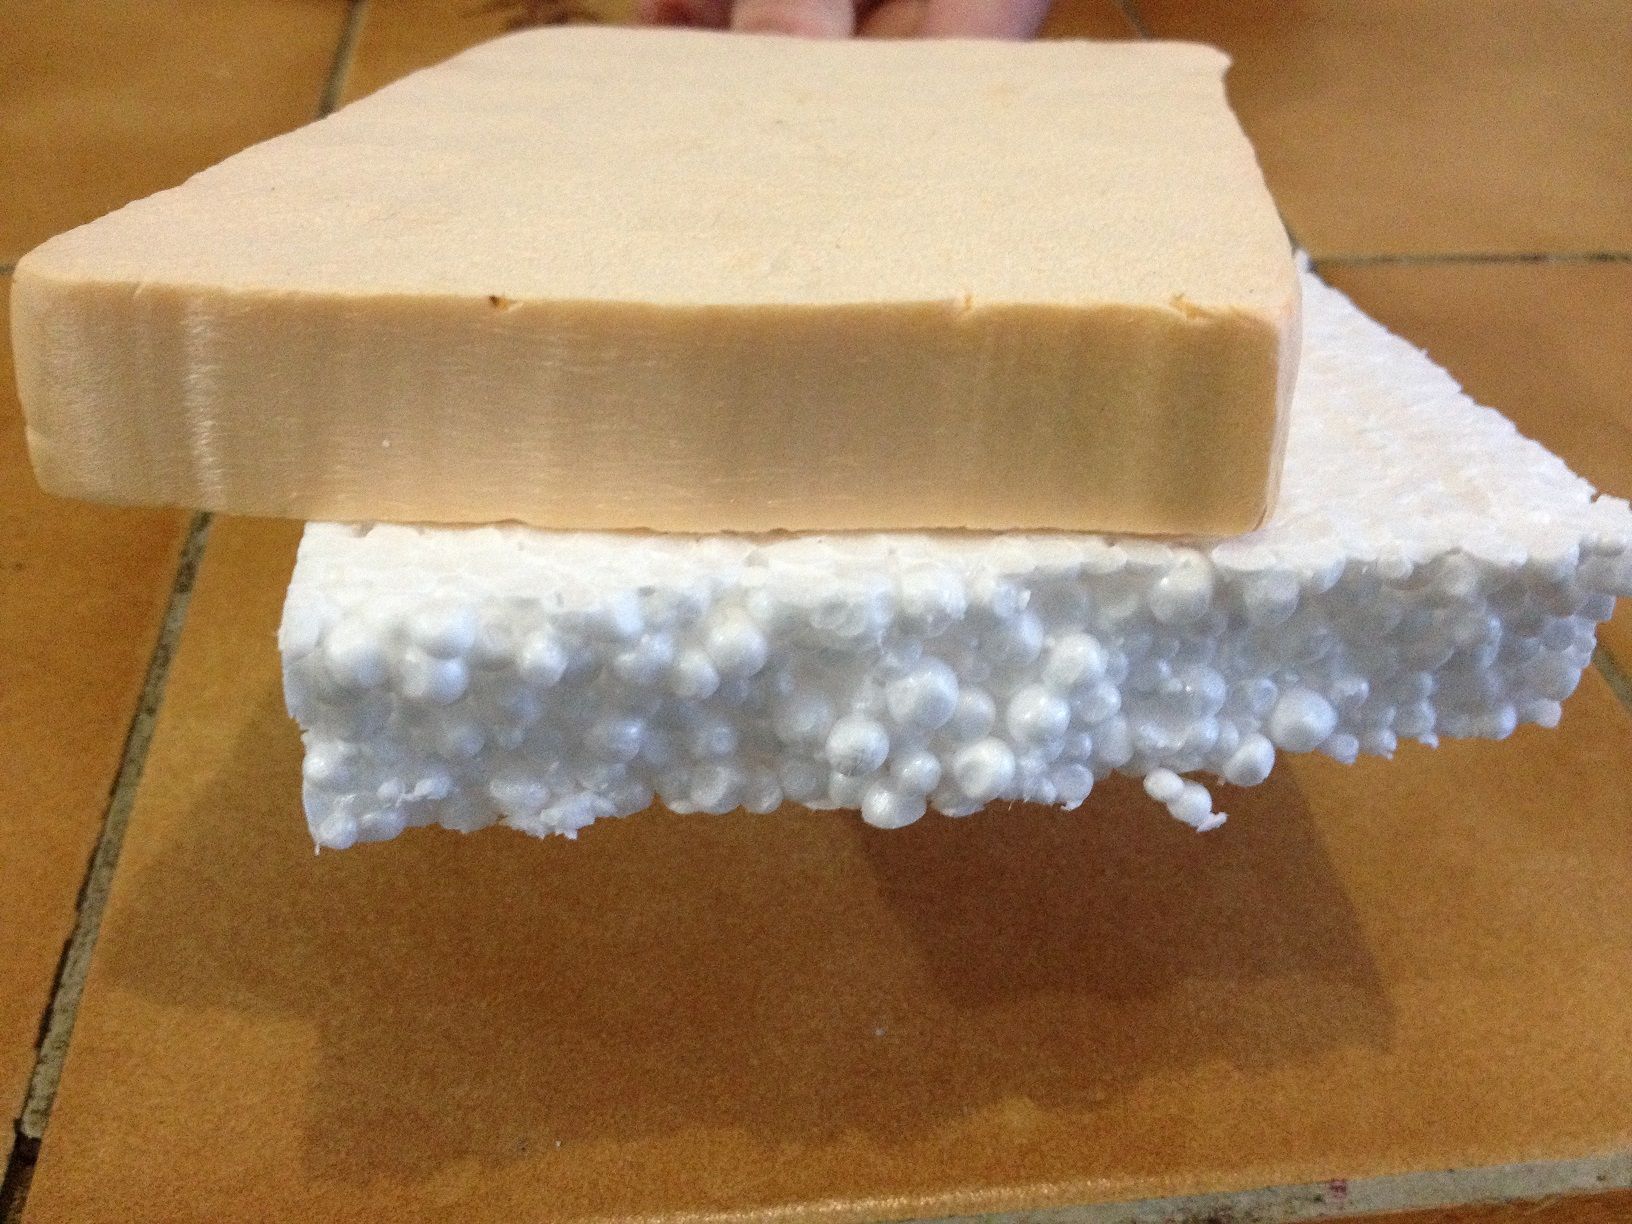
Expanded polystyrene (white with balls) and extruded polystyrene (beige, smooth). Prefer the extruded polystyrene, if you do not want to have a small snowball storm at home lol! are you ready? Let's begin!
The process:
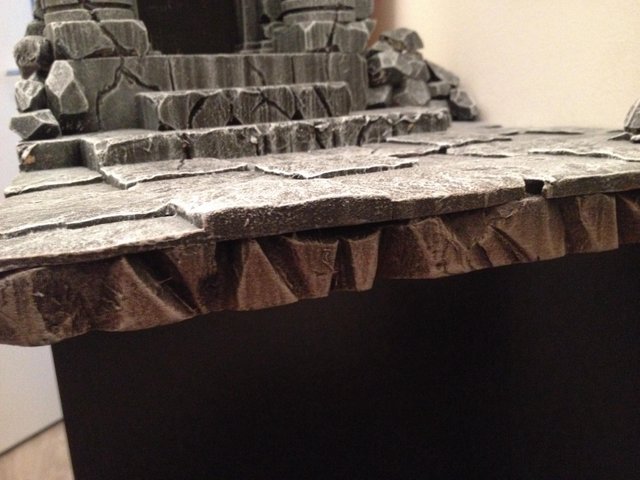
I chose to create a set for a showcase type Detolf from Ikea whose dimensions are: Width (32cm) x Depth (35cm) x Height(48cm). Trace the dimensions of the base on a large polystyrene board (1m x 60cm got it from a cheaper store) and start cutting with the help of the thermo cutter. 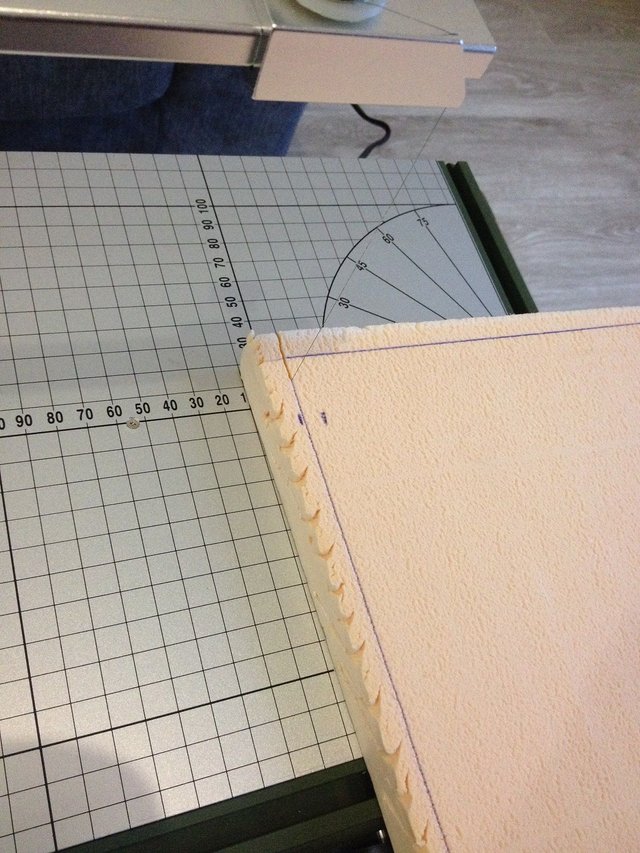
Once the base is ready, "break" a little edge with cutter to give a little texture and create the floor of the decor.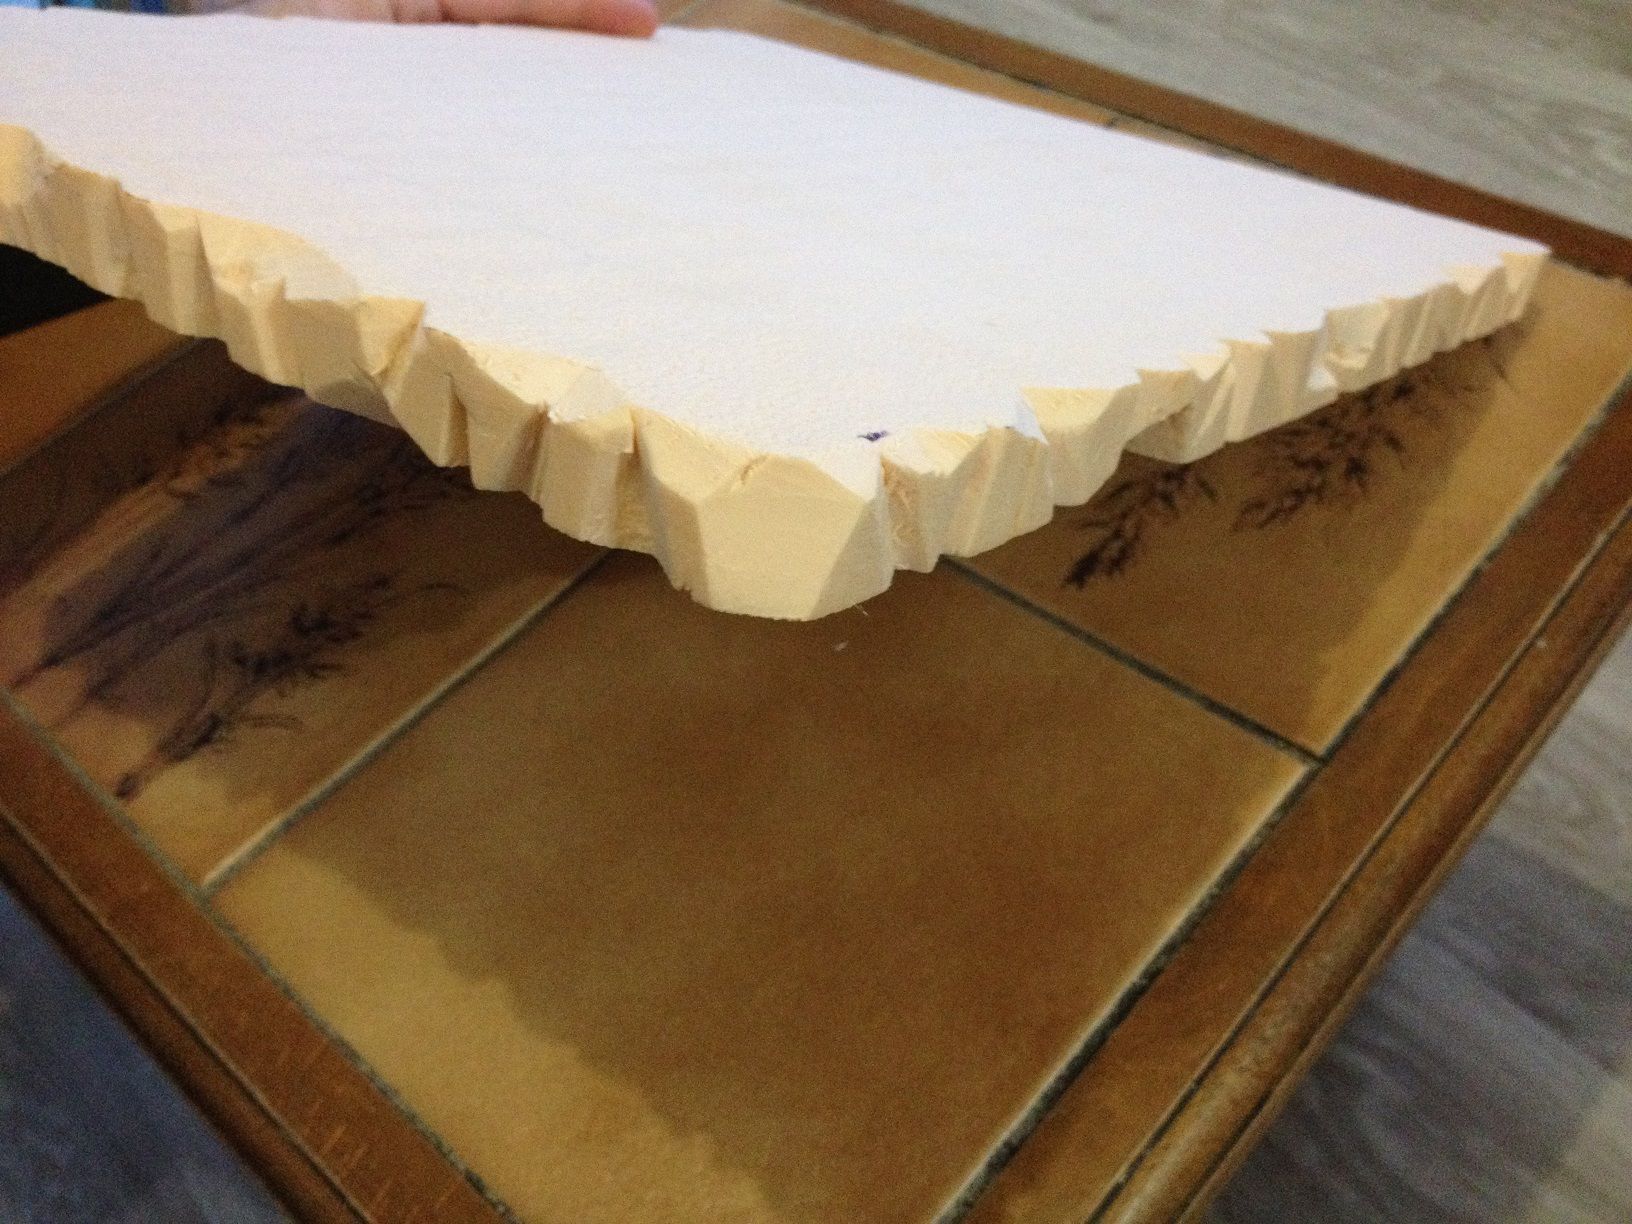
We are still in the cutting section, so we will prepare the various elements of the base of the decorations. Floor slabs, parts of the staircase in front of the temple, columns, temple walls, roof, and rocks.
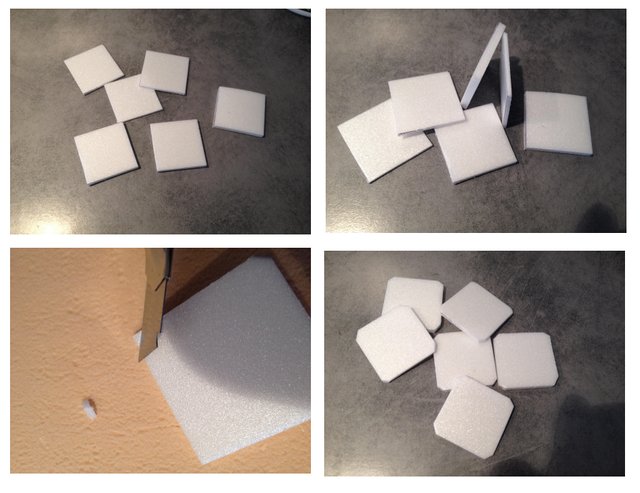
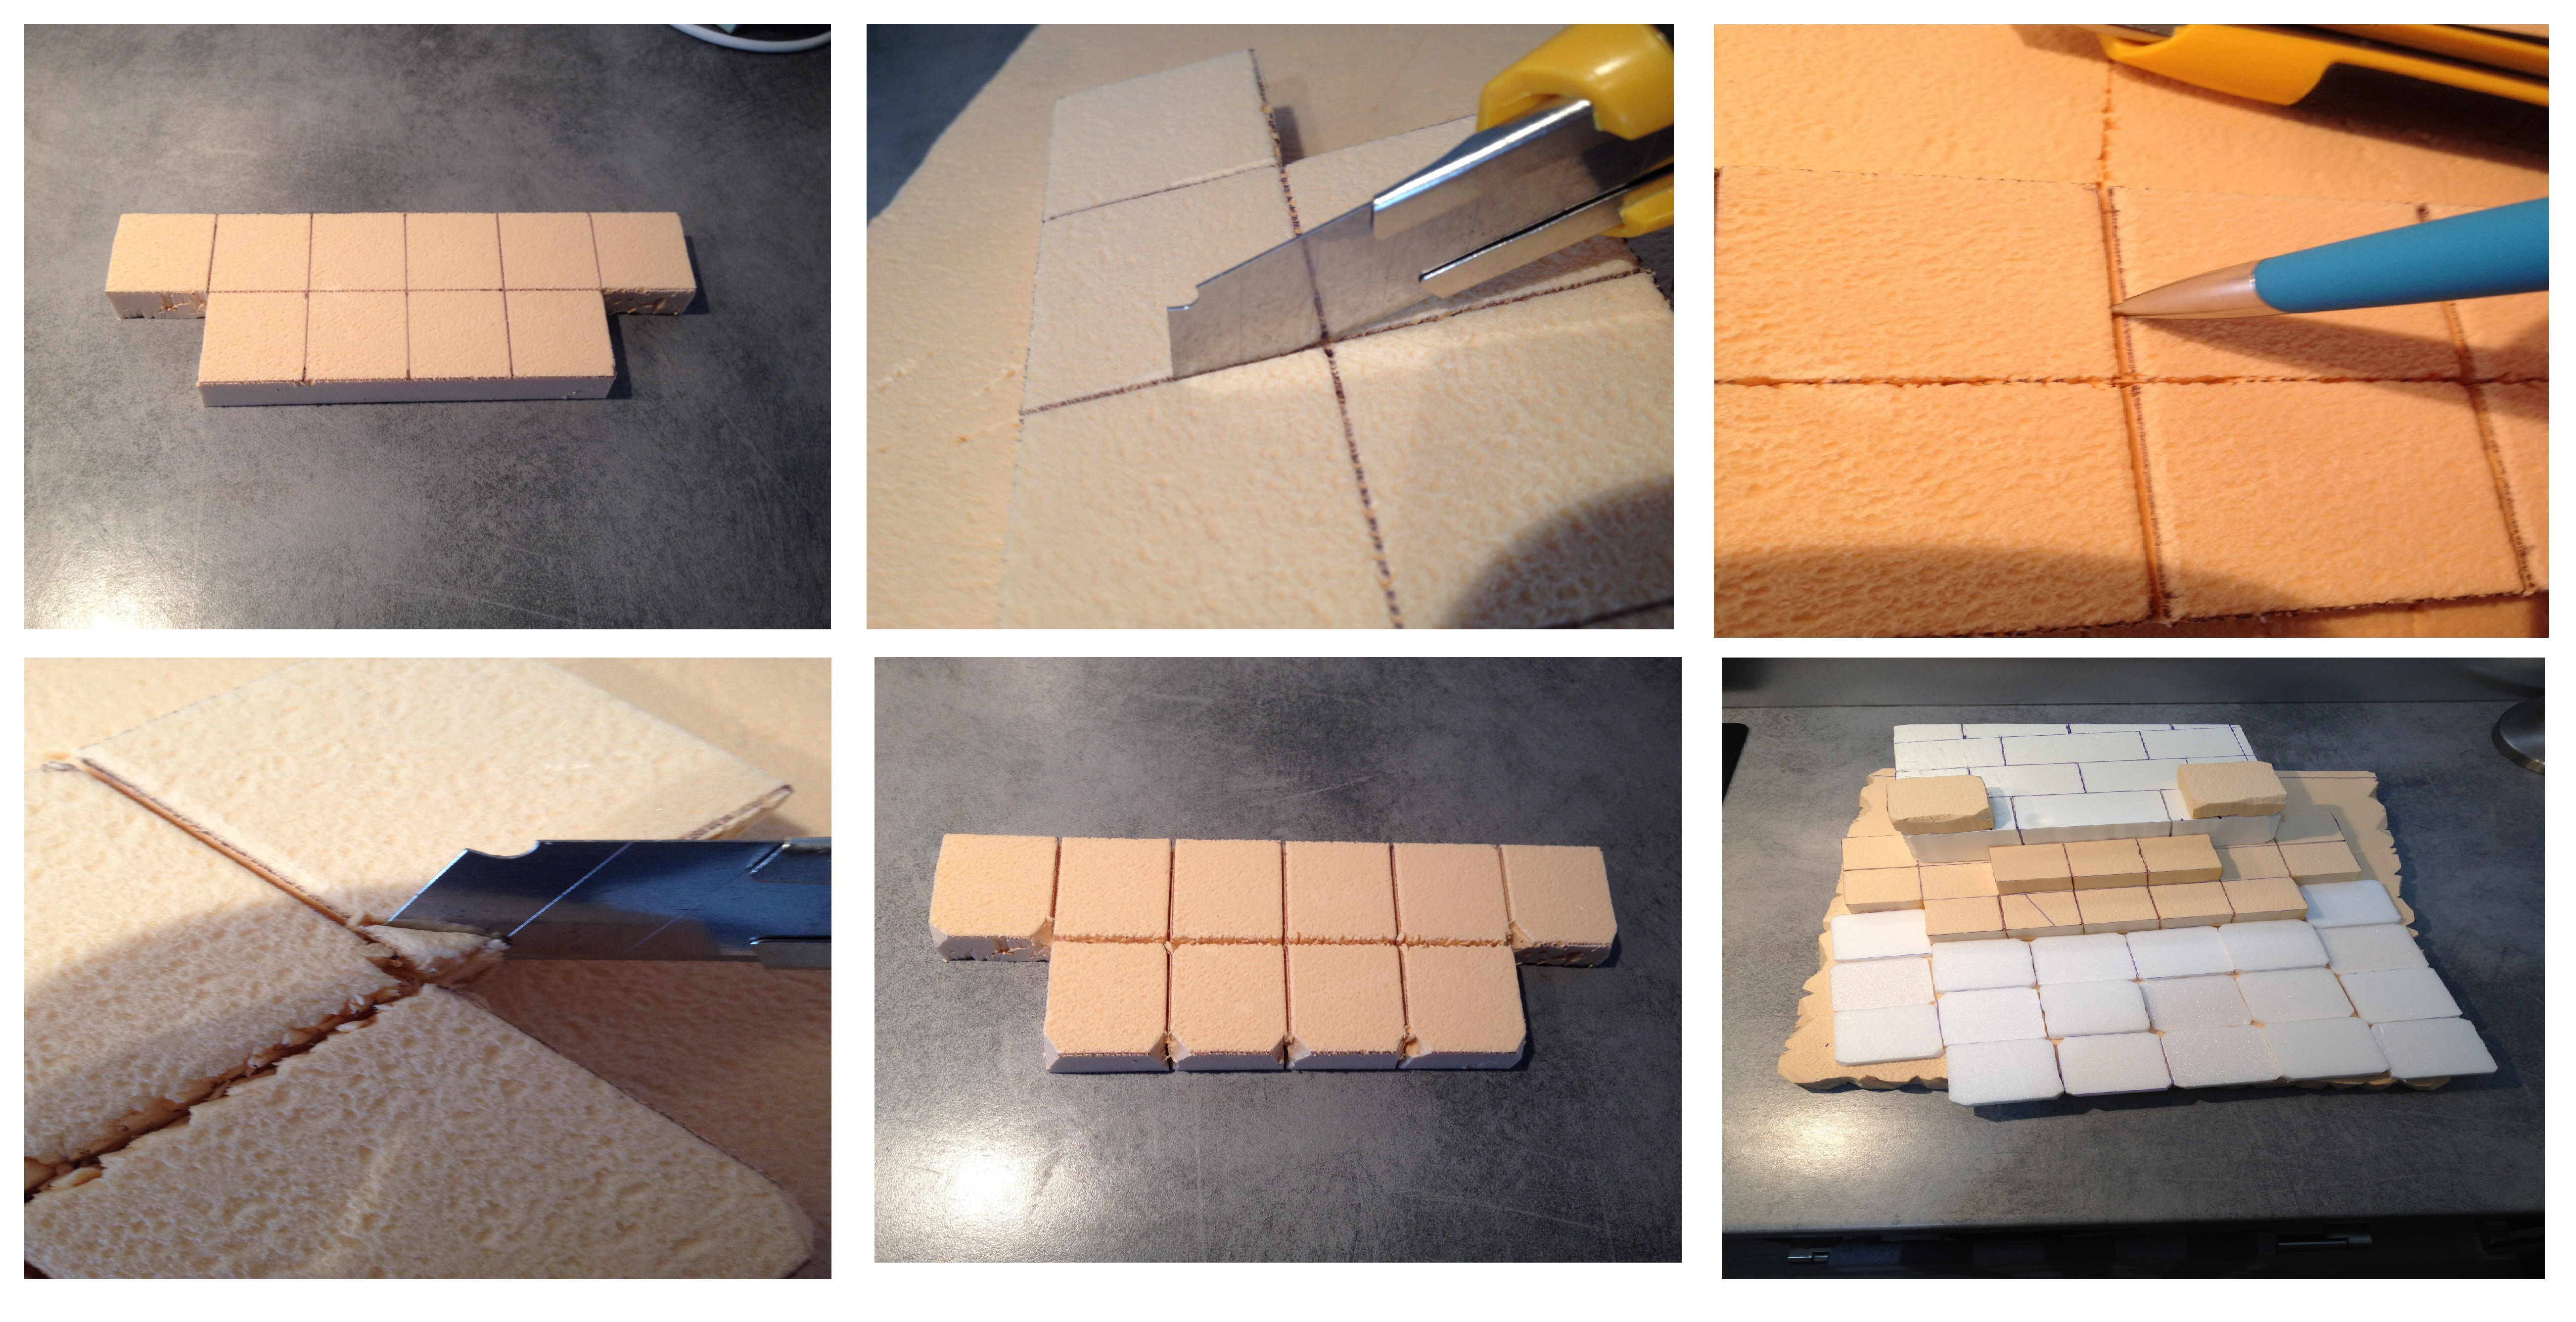
For the slabs, take 3 different thicknesses of very fine polystyrene, also called Depron. There are 3mm, 6mm and 9mm. I made slabs of 5cm x 5cm, always use the thermocut. Then with the cutter, cut the 4 angles more or less roughly.
Why are slabs of different thickness? Well, because we want an old, damaged decor, which has suffered the effects of time. So, some slabs have sunk into the ground.
For parts of the stairs, use different thicknesses, 2cm (salmon color) and 4cm (beige color). Use thermocut for cutting. Nothing fancy, drew squares of 4cm x 4cm but don't cut them completely, just the outline, to keep a big solid block. Then, with the cutter, cut about 0.5cm deep with the slabs, to give the impression that they are well separated. And reinforced the effect by passing with a pencil of wood in the cuts made previously. I have cut out 2 blocks of 5cm x 5cm in thickness 2cm, to make the base of the columns. The base of the temple is cut in the thickness of 4cm, it allows to add a step to the staircase. And we can start to shape the base of the diorama:
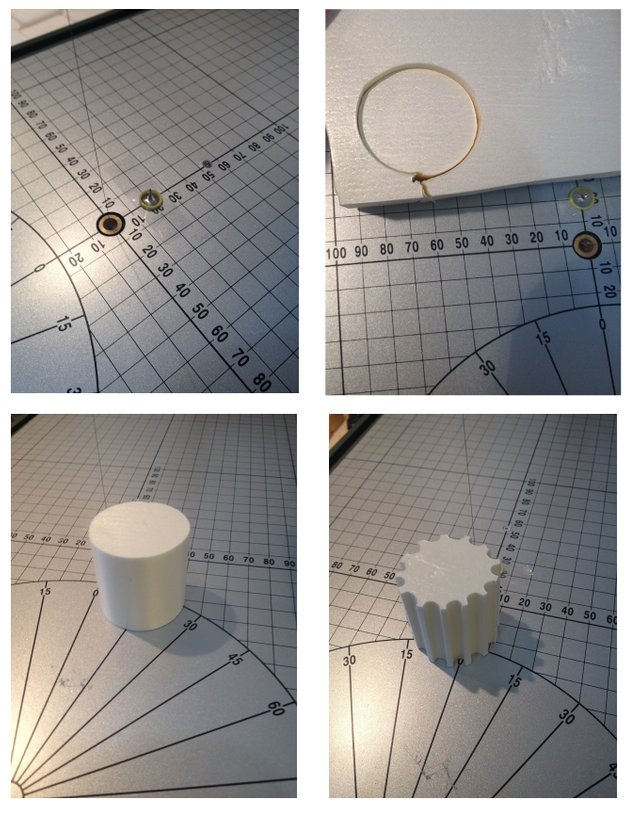
- For cutting columns, a little tip with the thermo cutter.
If you want a 4cm diameter column, place a thumbstack 2cm of the cutting wire, glued with tape, then we just plant the piece of polystyrene. Then just turn the block so that the cut gives a nice cylinder. We use here the thickness of 4cm, it allows to have a good height of column with 4 pieces. A smooth column is beautiful, but a Greek column is better, so we will change a little. Always with the termocut, we will cut small semi-circles to give the following appearance:
Let's proceed to the temple design now.
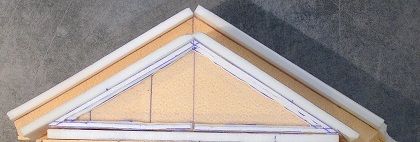
For the roof, make first a triangle in a thickness of 2cm. Followed by a second triangle, bigger but still in the same thickness. And Depron 6mm thick to do the top of the roof. And Depron of 3mm to make the contour relief of the first triangle.
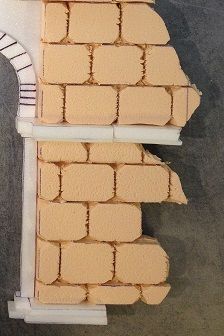
For the walls, let's proceed as for the stairs, draw a 2cm thick polystyrene, then cut them using with the termocut. And, as for the slabs of the stairs, cut 0,5cm of depth and accentuated with the pencil of wood. We then obtain beautiful bricks. Again, with the cutter, cut the angles more or less strongly.Some cuts do not seem straight, it's better, it will give an old effect later. We will also "break" a little our walls, our temple is not new, it has suffered time, so with the cutter we will cut some bricks on the sides.
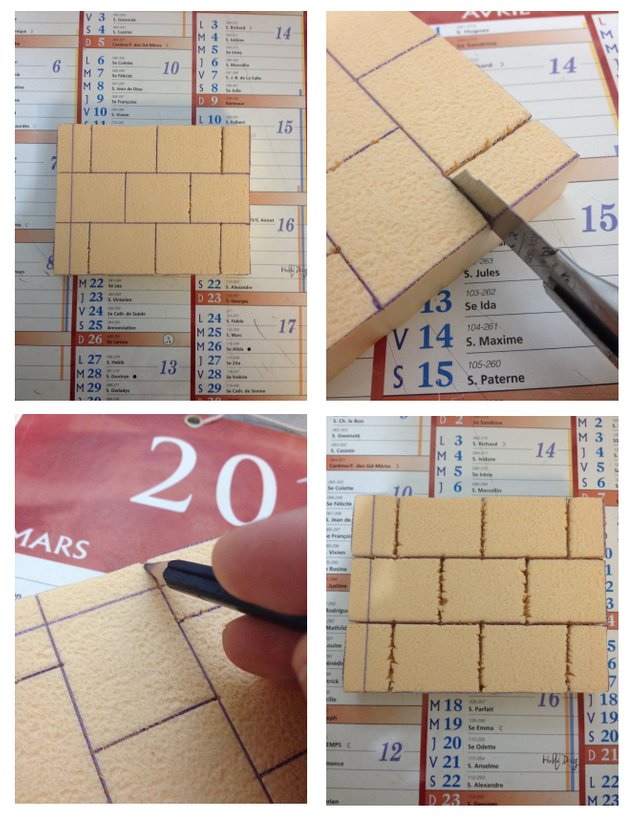
We also used Depron to give texture to the walls of the temple. Insert a thickness of 9mm on a thickness of 3mm at half of my walls and two thickness of 6mm at the base of the walls. By making them wider than the 2cm width of my bricks.
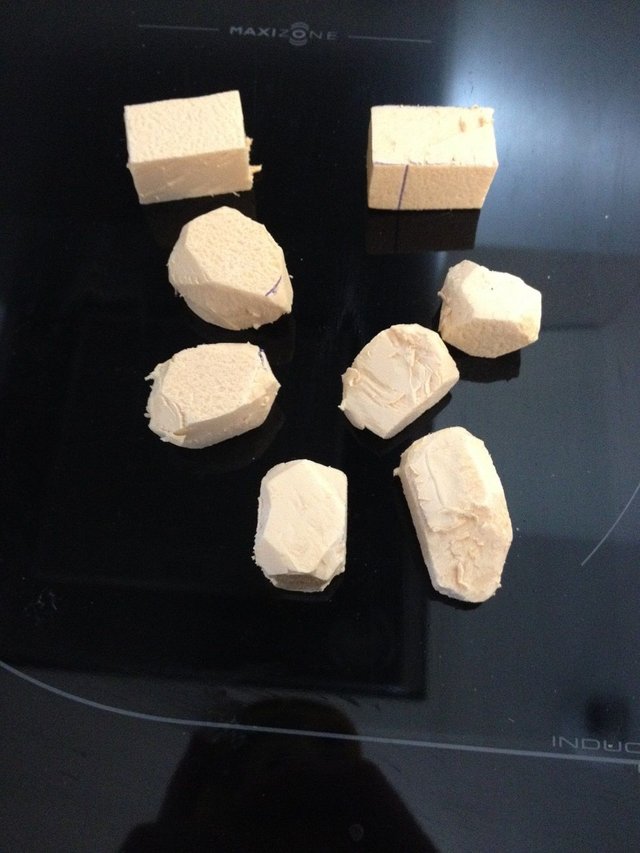
- For the rocks, use small piece of 2cm thick, using the cutter a bit anyhow, by cutting on each side.
That's it, all our elements are ready, we can begin the assembly with the double-sided tape.
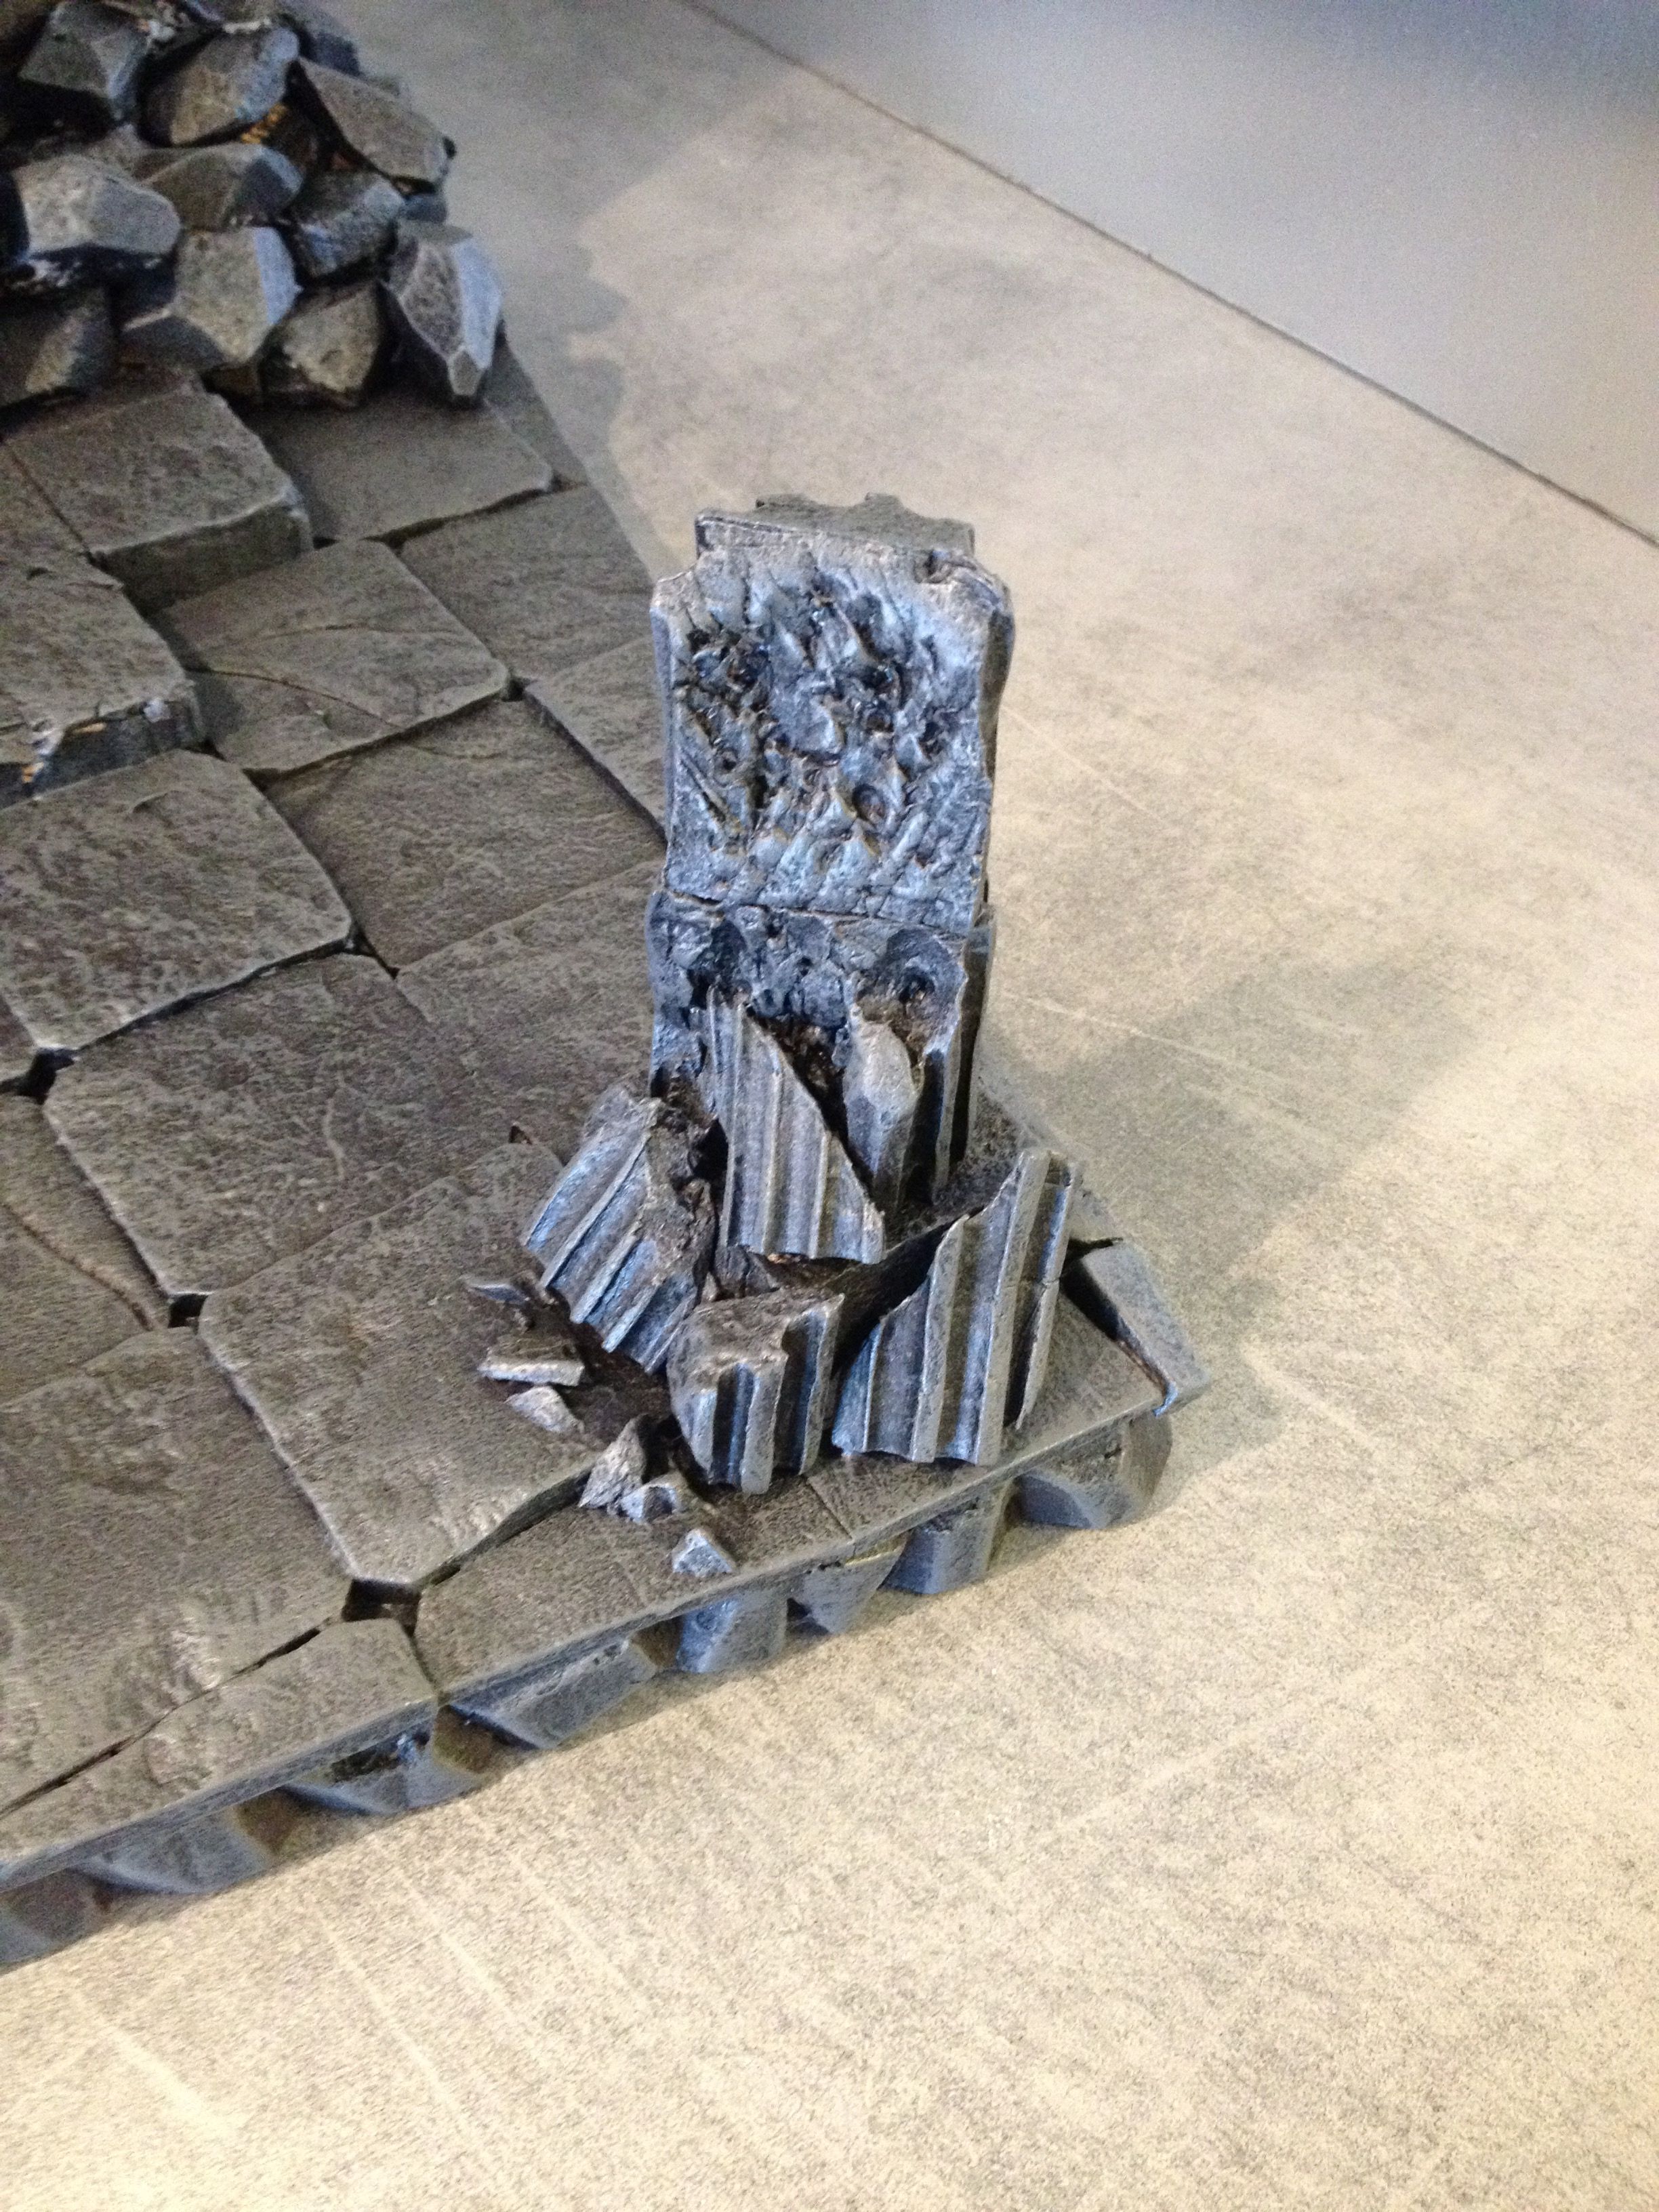
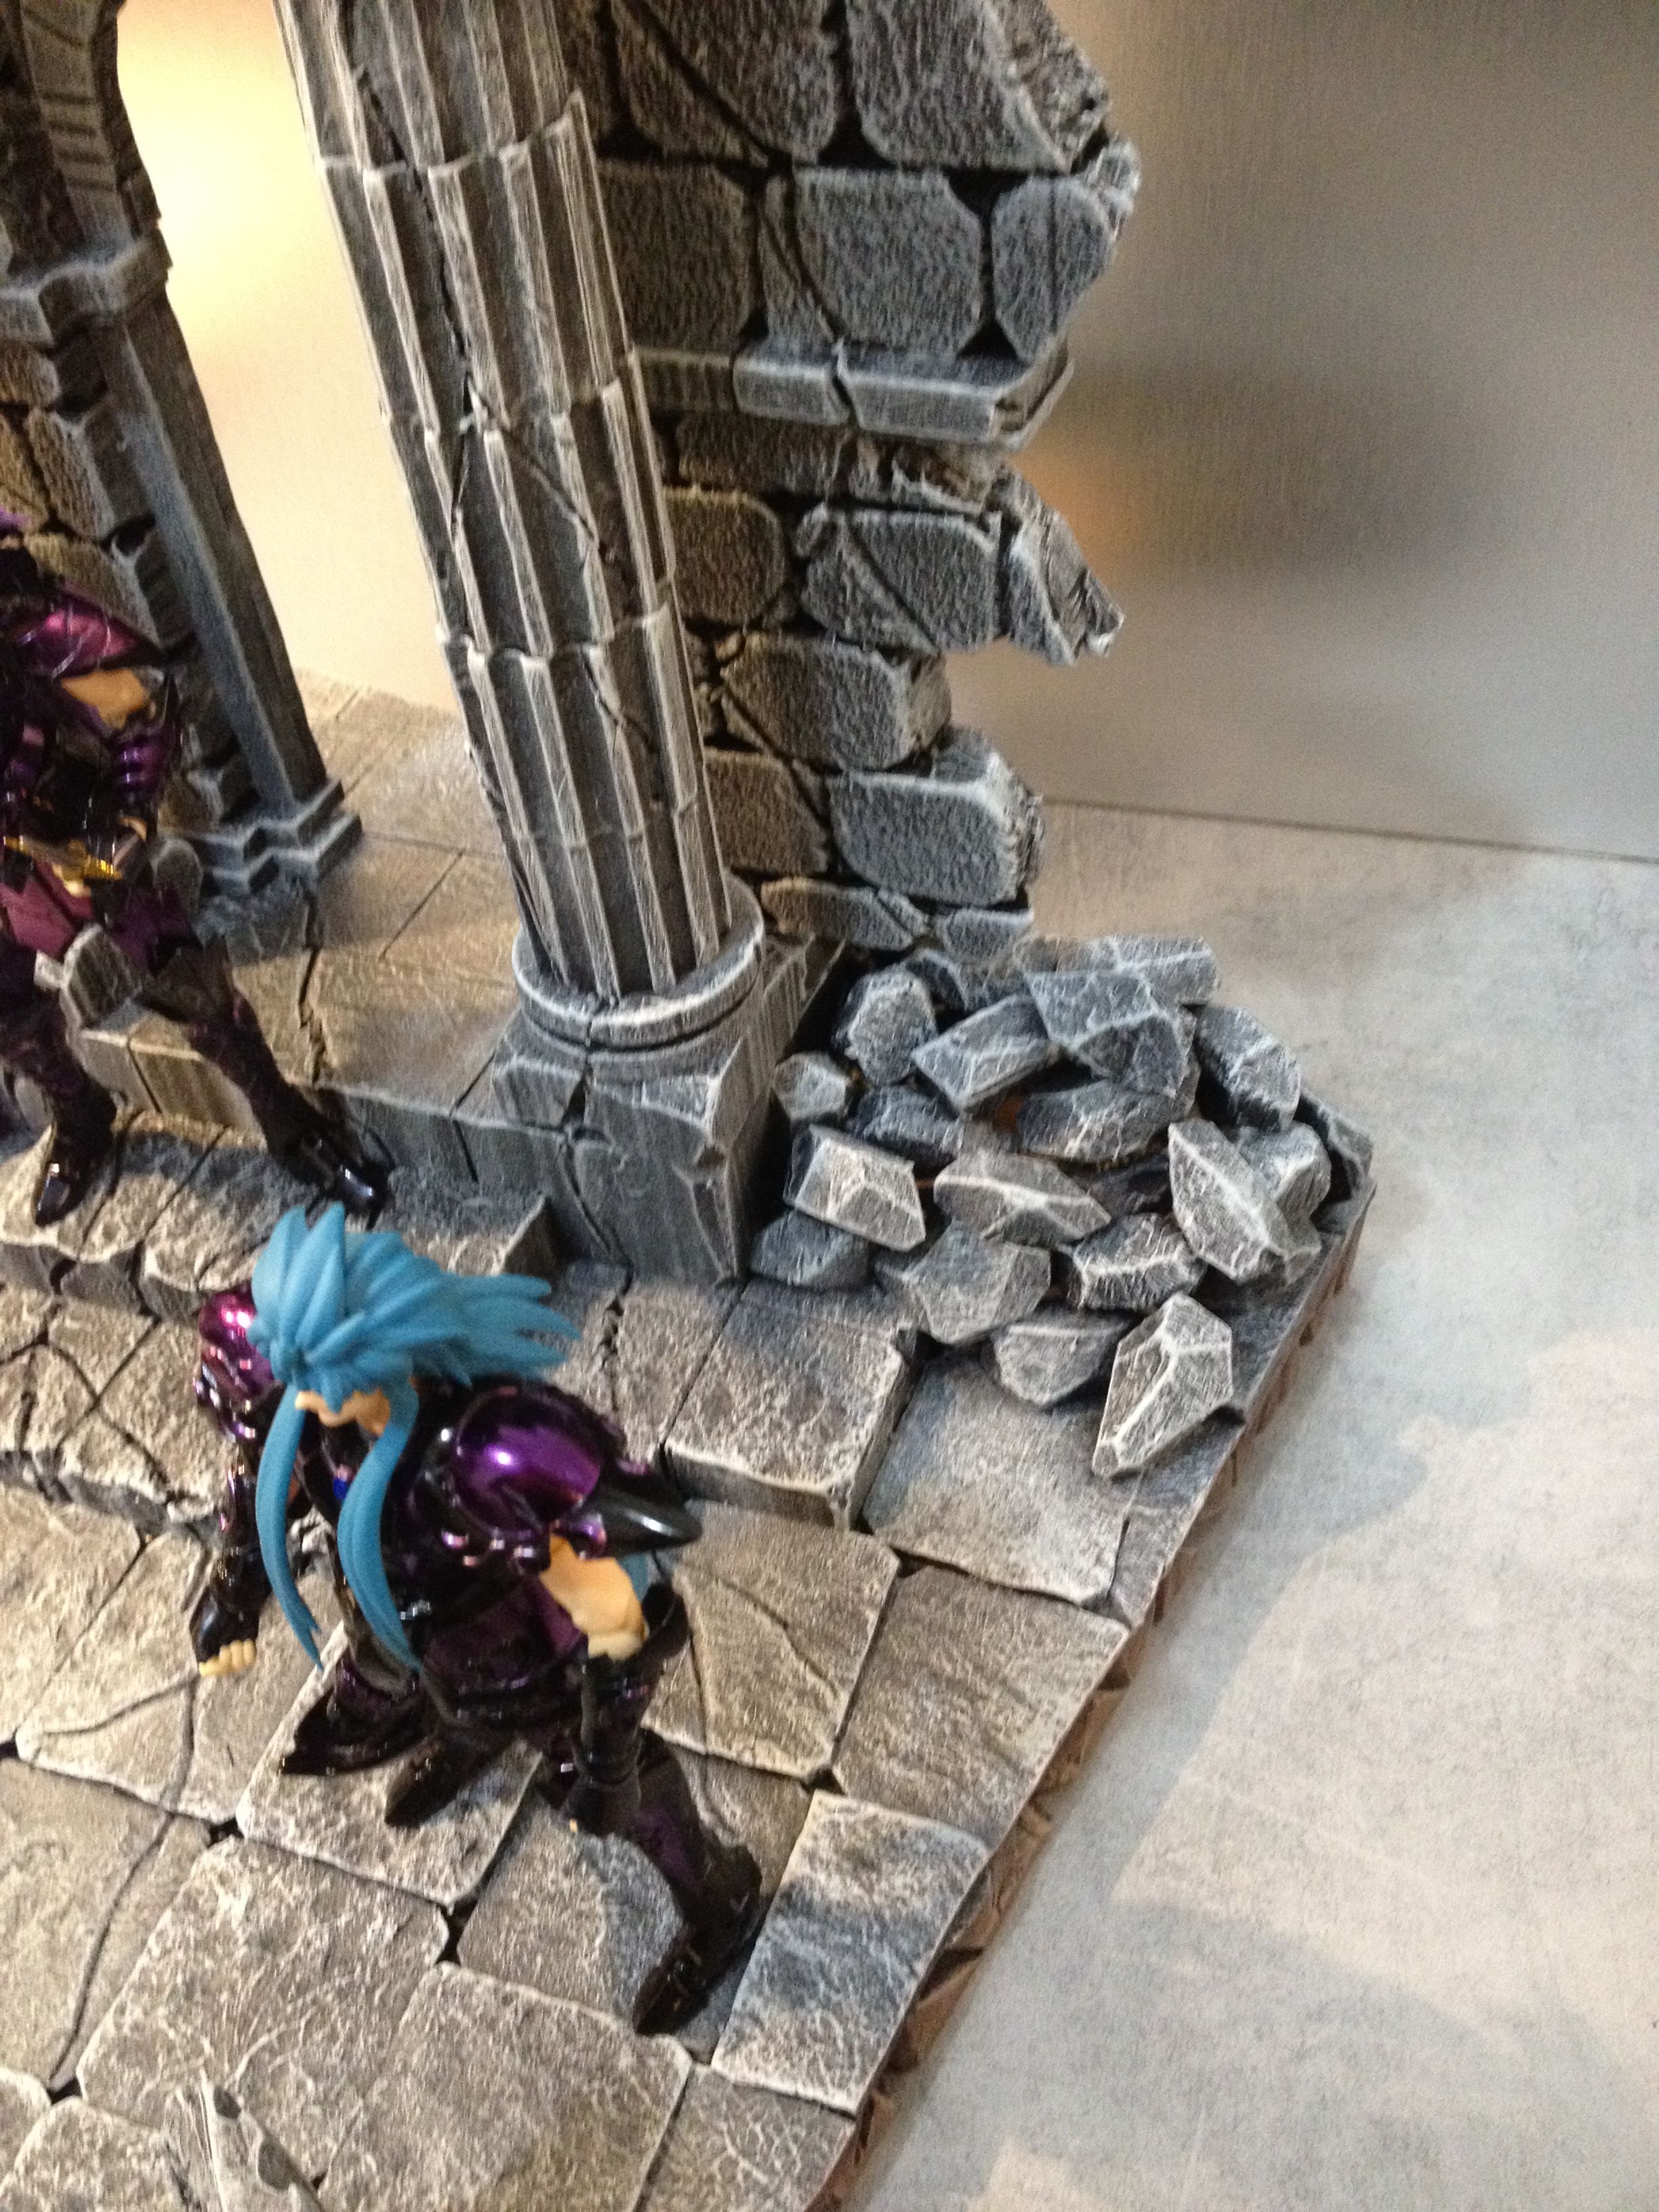
We put the base of the temple with the stairs, the slabs randomly, then the columns and finally the rocks (again, a little as you want). I had 2 pieces of column, I used them to make a destroyed column in the foreground on the diorama. I just used the cutter to break the pieces, which I left at the foot of the column, a bit crumbling.
We notice that I have not yet stick the temple on the diorama. It will be more convenient for the structuring and painting parts that will follow. Painting the back of the columns while the walls of the temple are laid down would have been very difficult.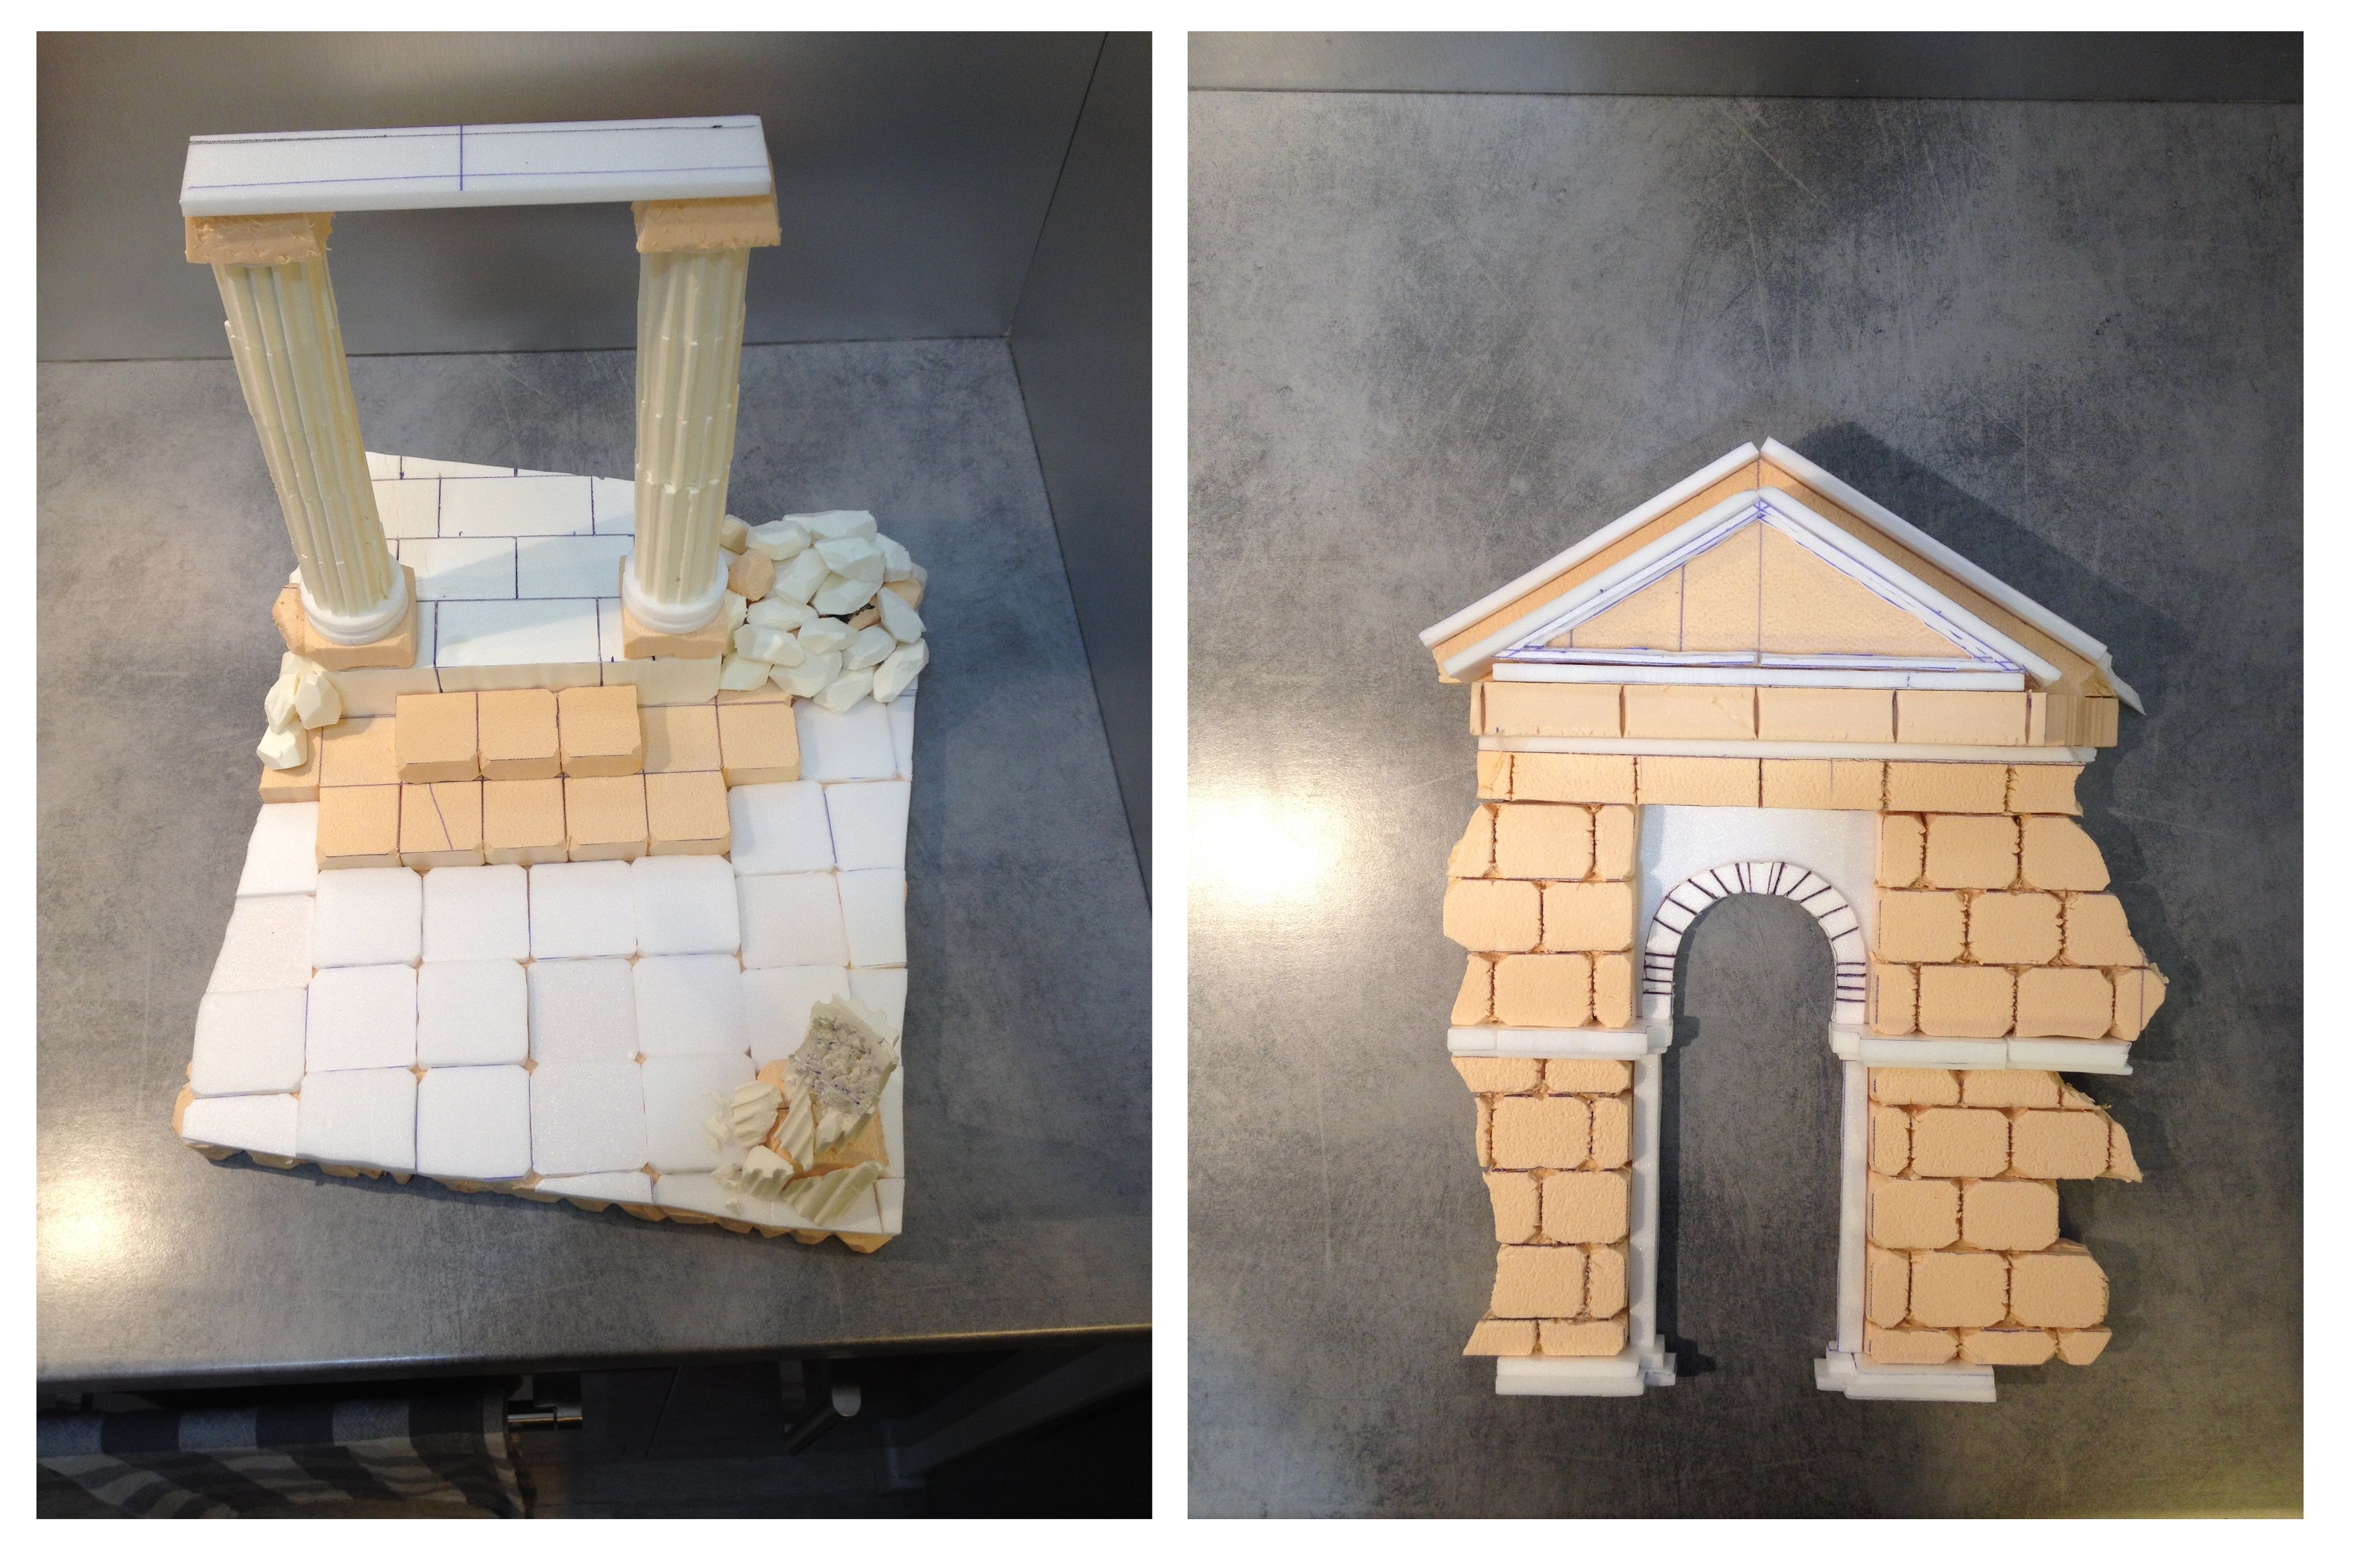
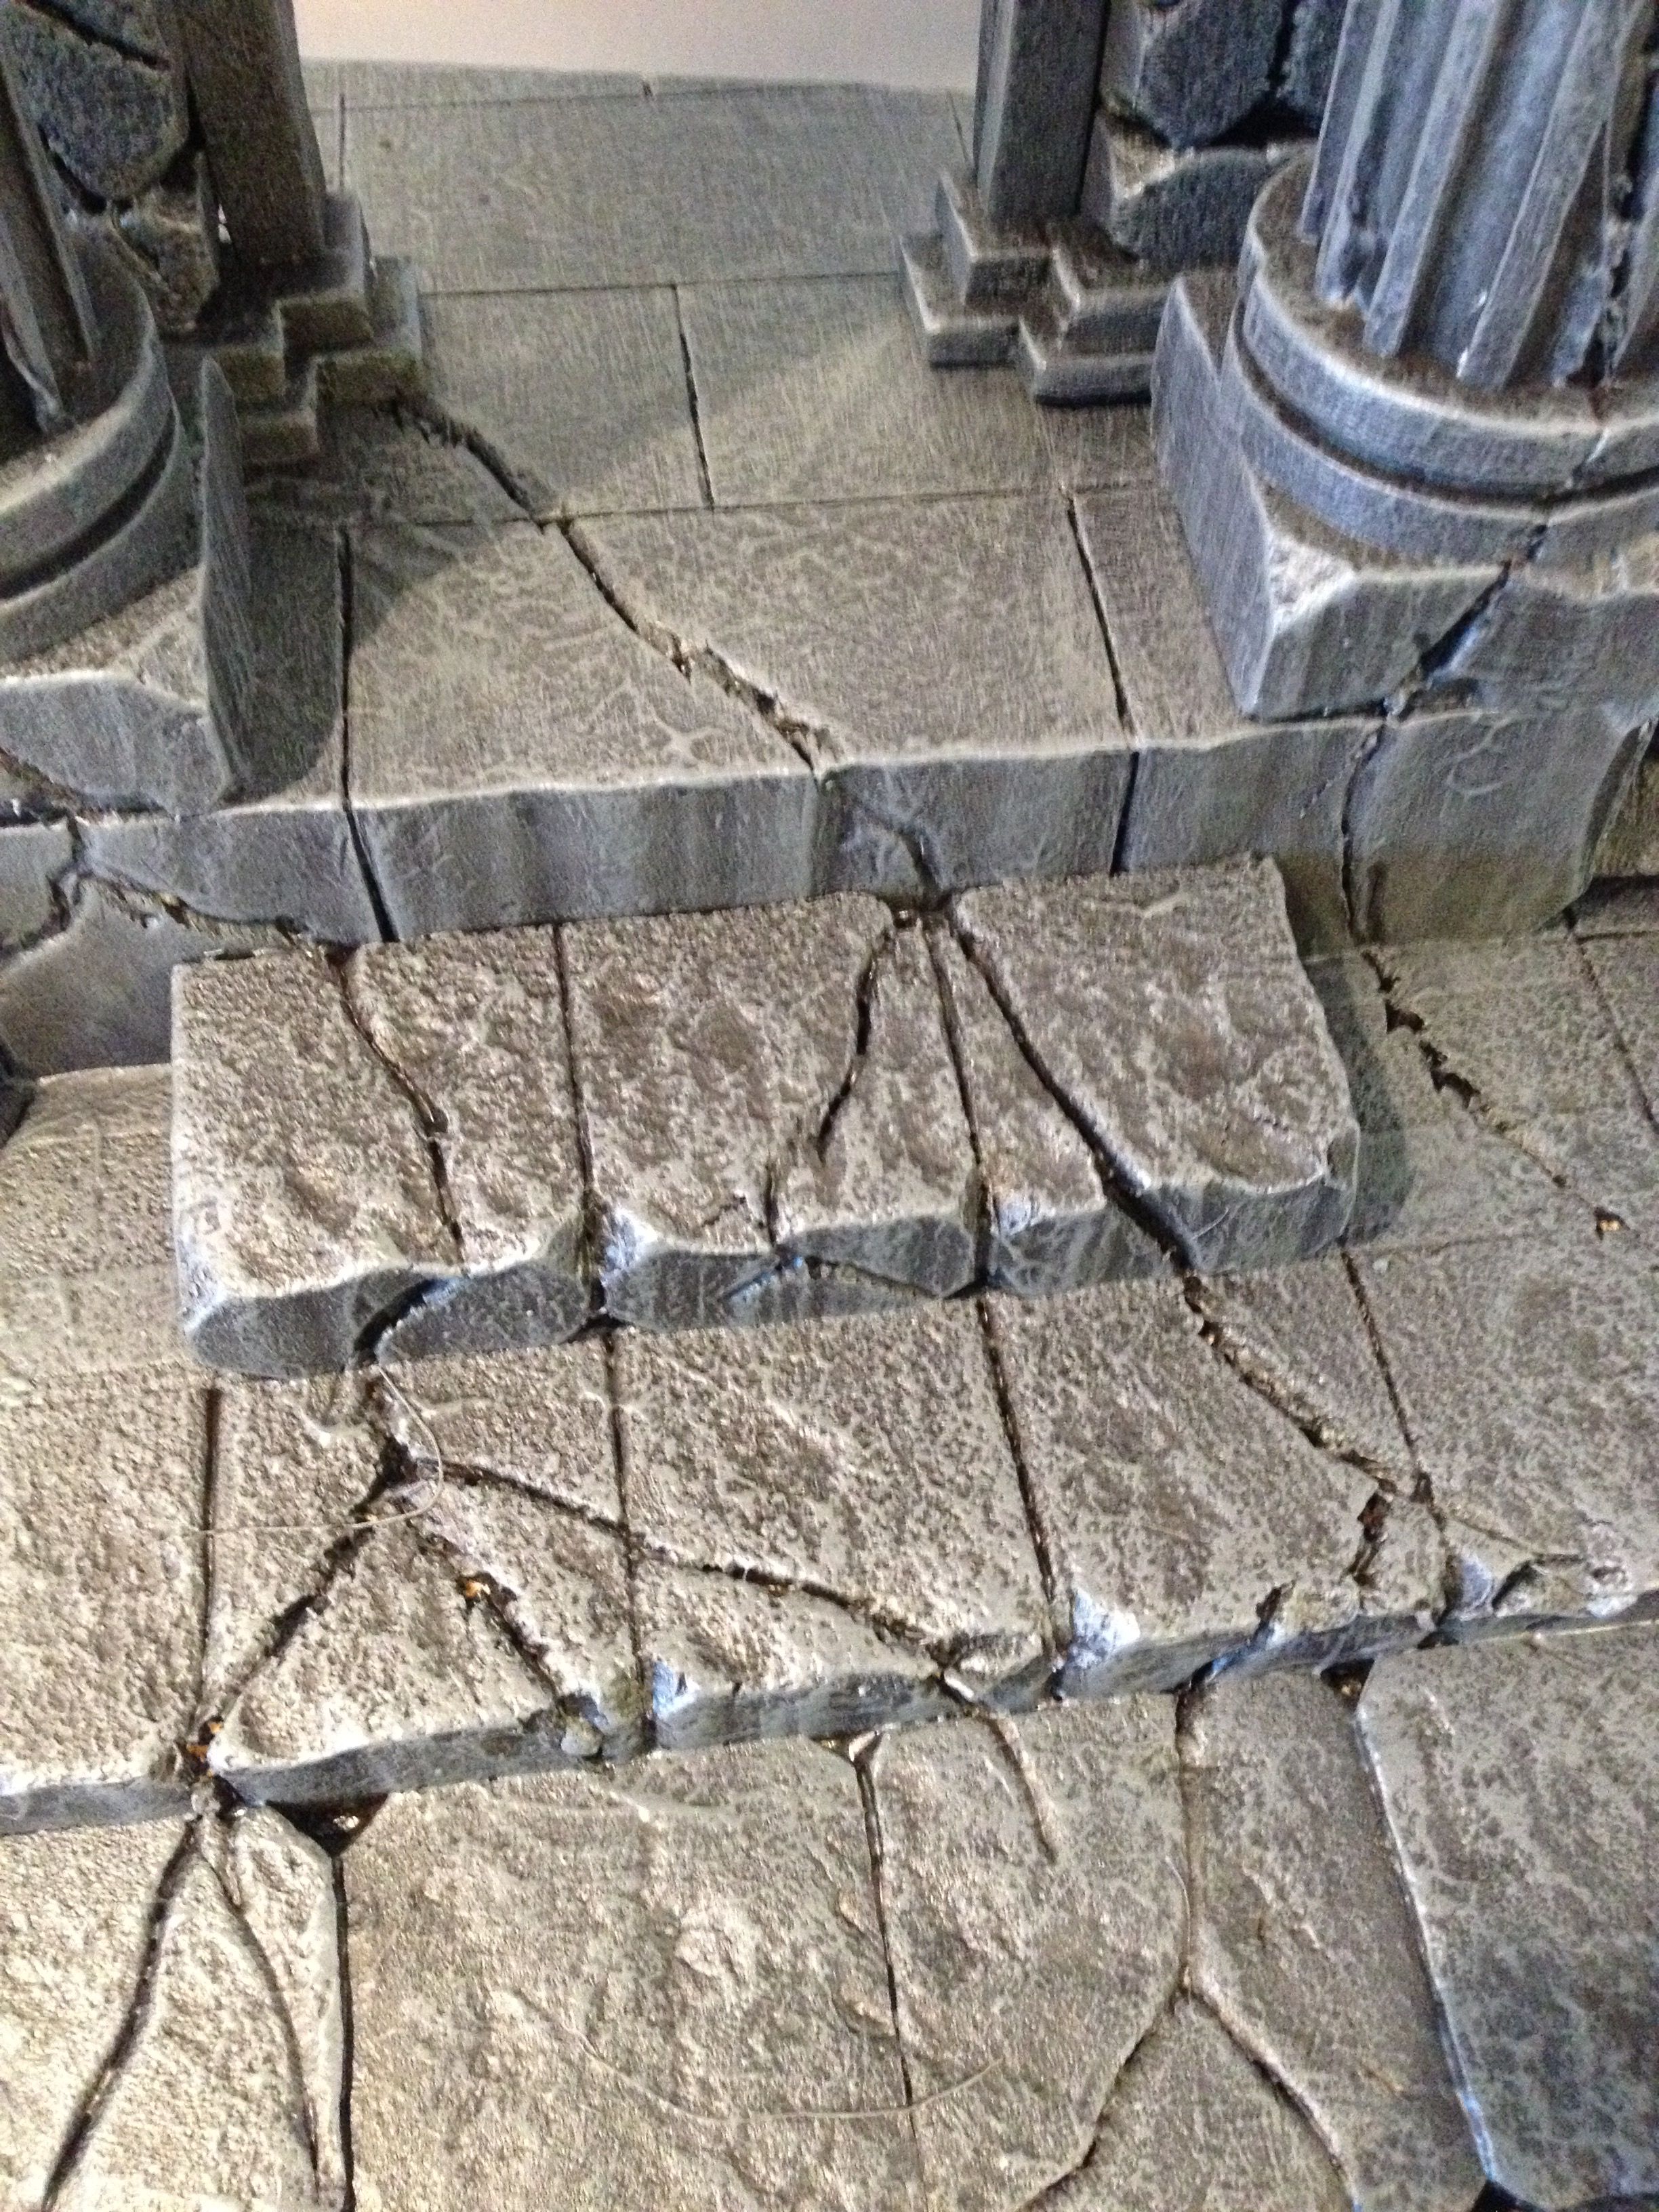
Our diorama is taking shape, but it is still a little too "beautiful" for the moment. We will structure it. In other words, we will damage it. For that, the cutter and stone will help. We will start with the cutter and we will cut cracks in the temple to give it a ruinous appearance. We go frankly, on the stairs, the columns, the roof, we incise with our 0.5cm deep, then as usual, we pass our pencil of wood for well marked all that.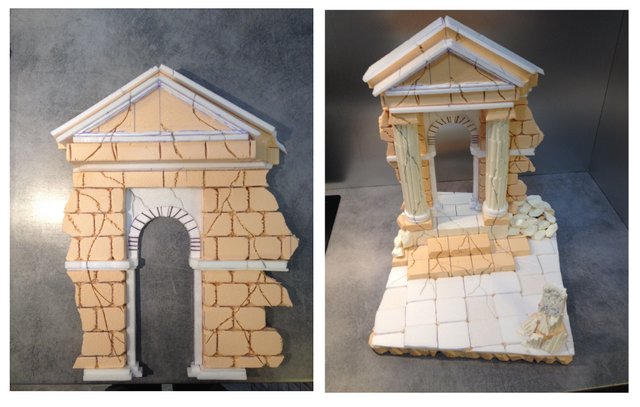
Then we will use our stone. I can't wait to know why. "But what are we going to do with a stone? "Well we will use it on the slabs of the diorama.We will first roll it with the palm of the hand all over the slabs, then we will tap lightly with the slabs. We will give an old look to our decorations.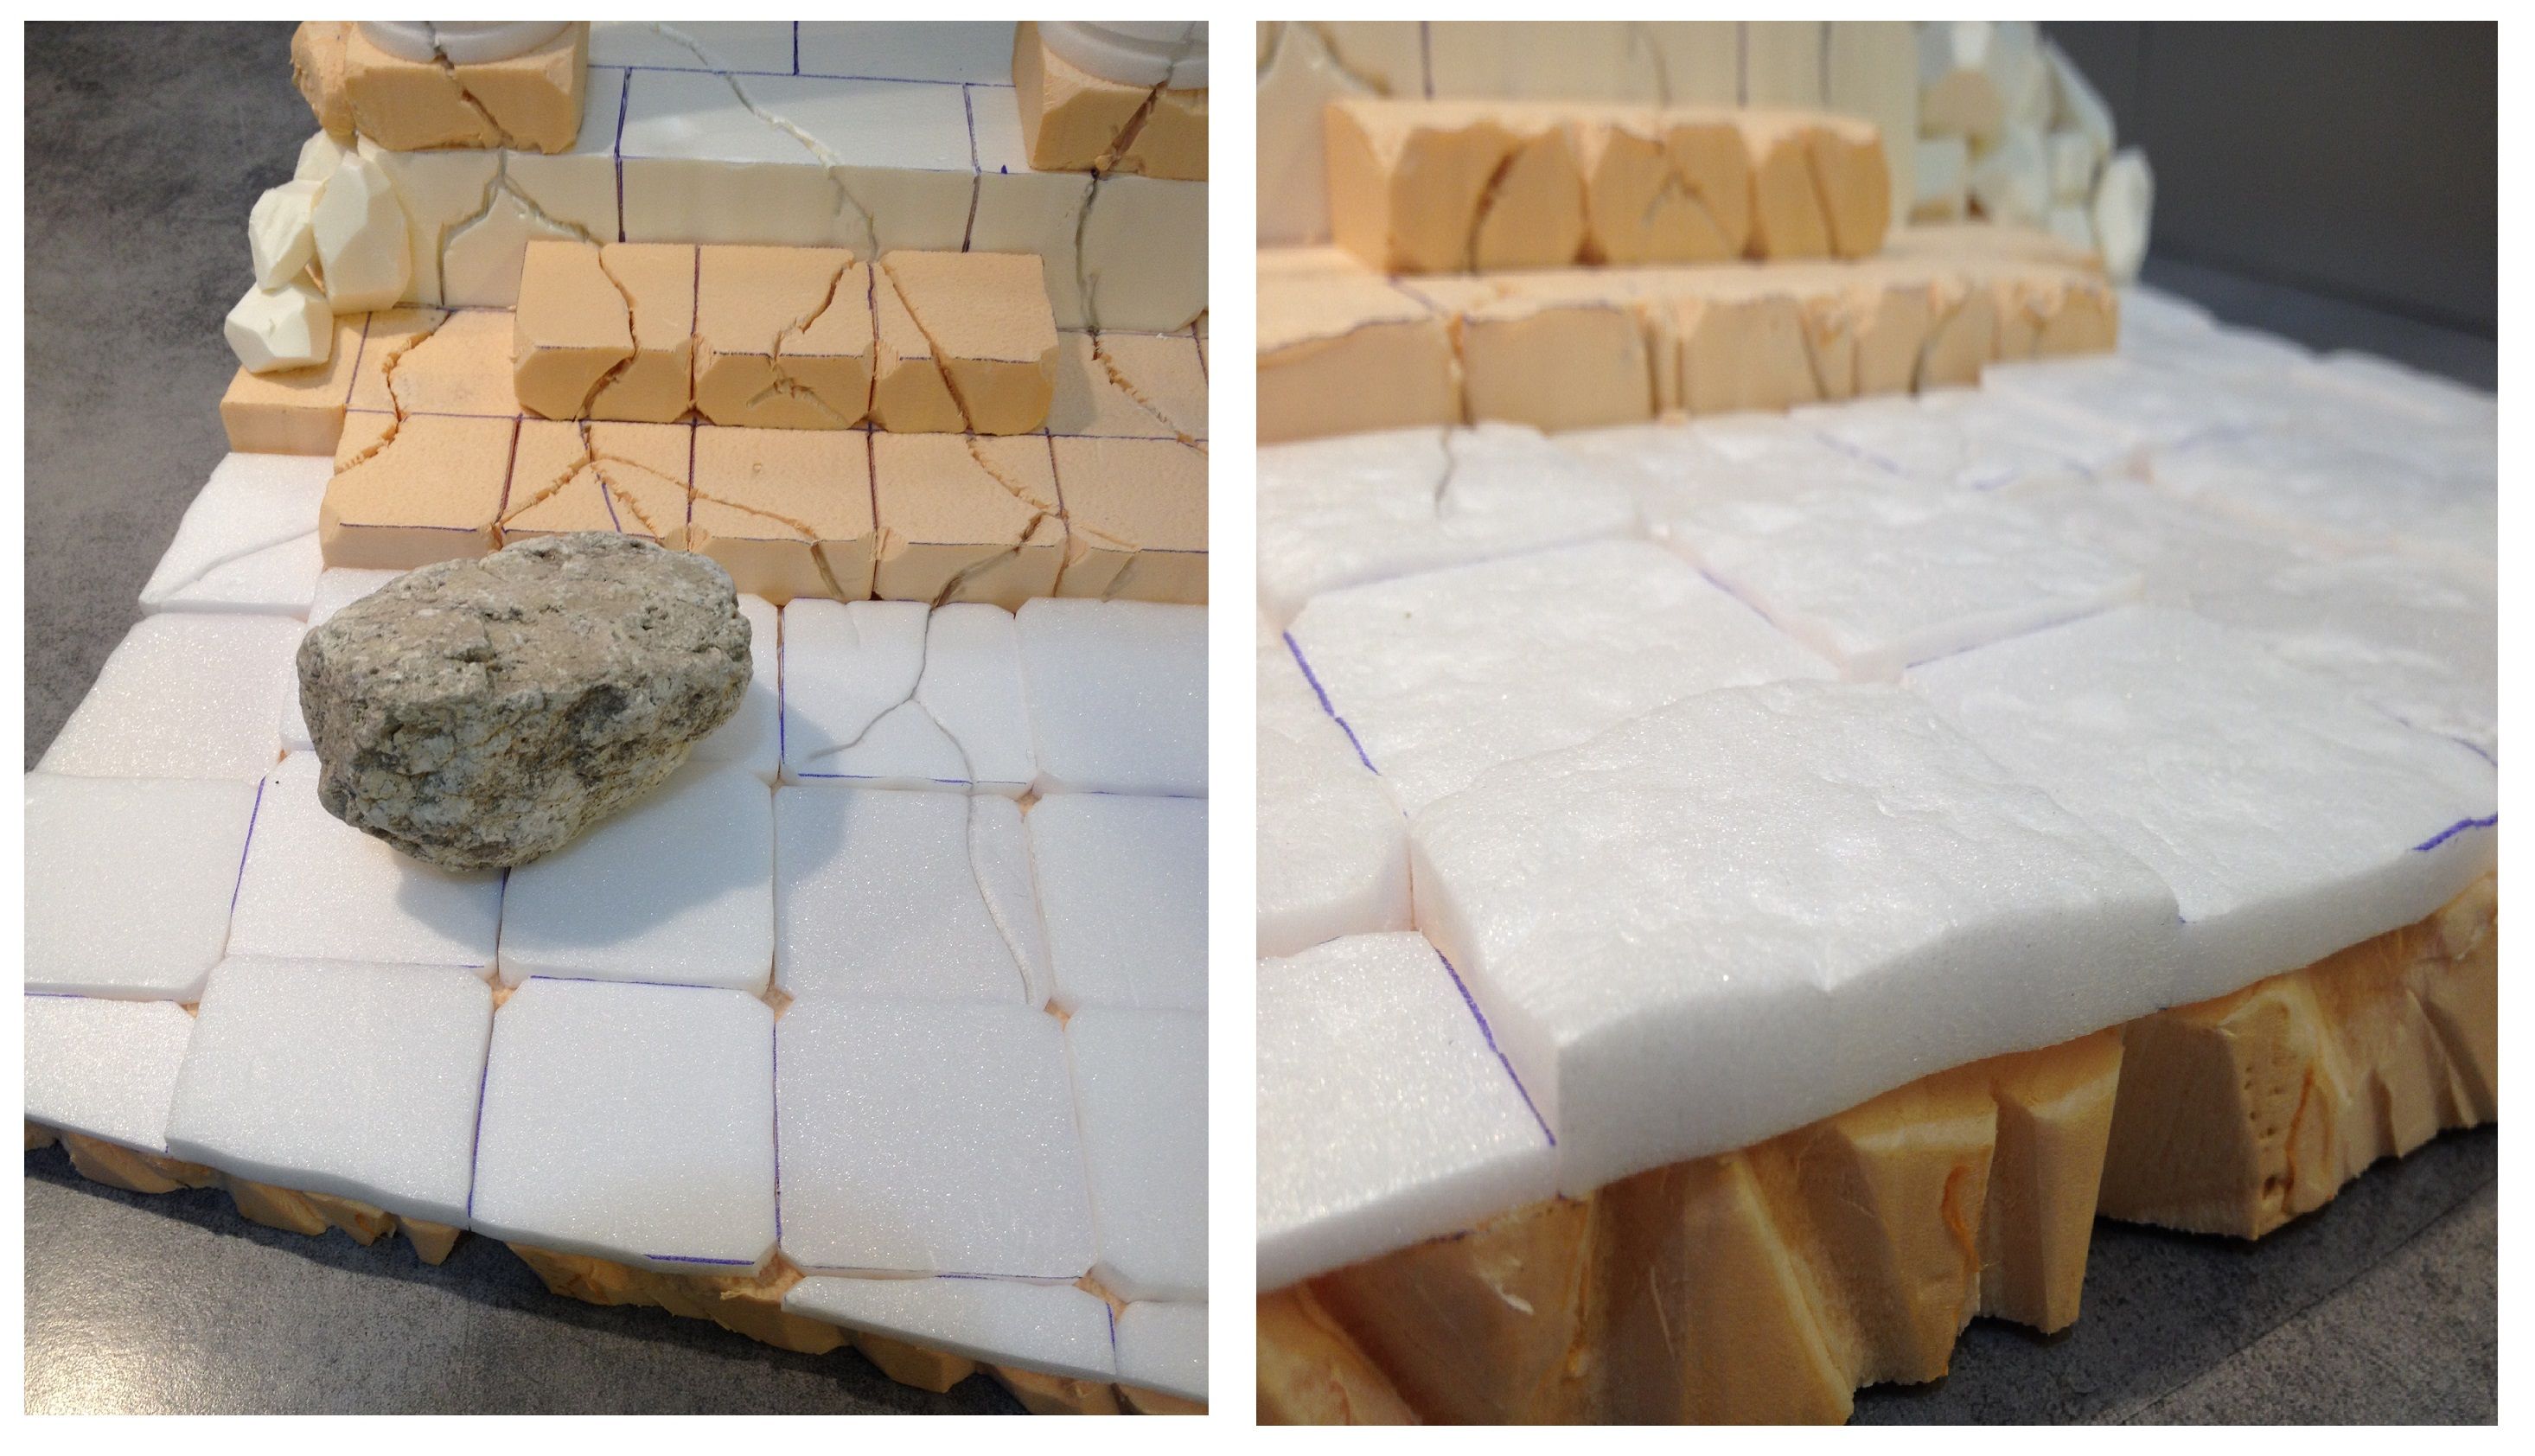
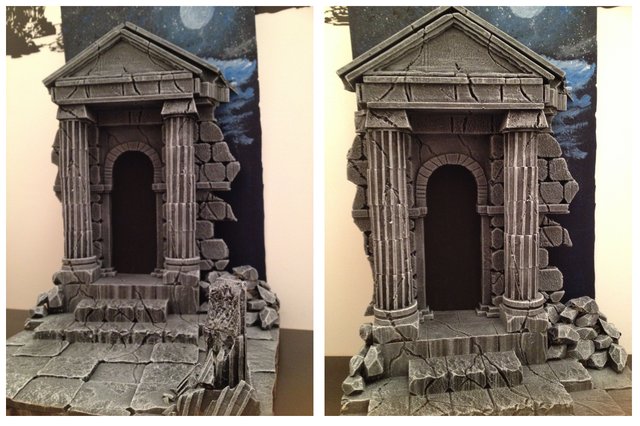
The cutting - assembly - structuring part is over and that is what our decor looks like:
We can now proceed to painting !!!!!
It will take several layers of color to get the desired result.
1.) Black layer.
At first, we will apply a layer of black paint on ALL the decorations.
(Including the base under the slabs). Attention, we will not use the brush as a painter, otherwise, we will leave the marks of the brush and it will not be pretty. We will rather gently tap the brush on the set to cover it completely. We let it dry one night to be quiet.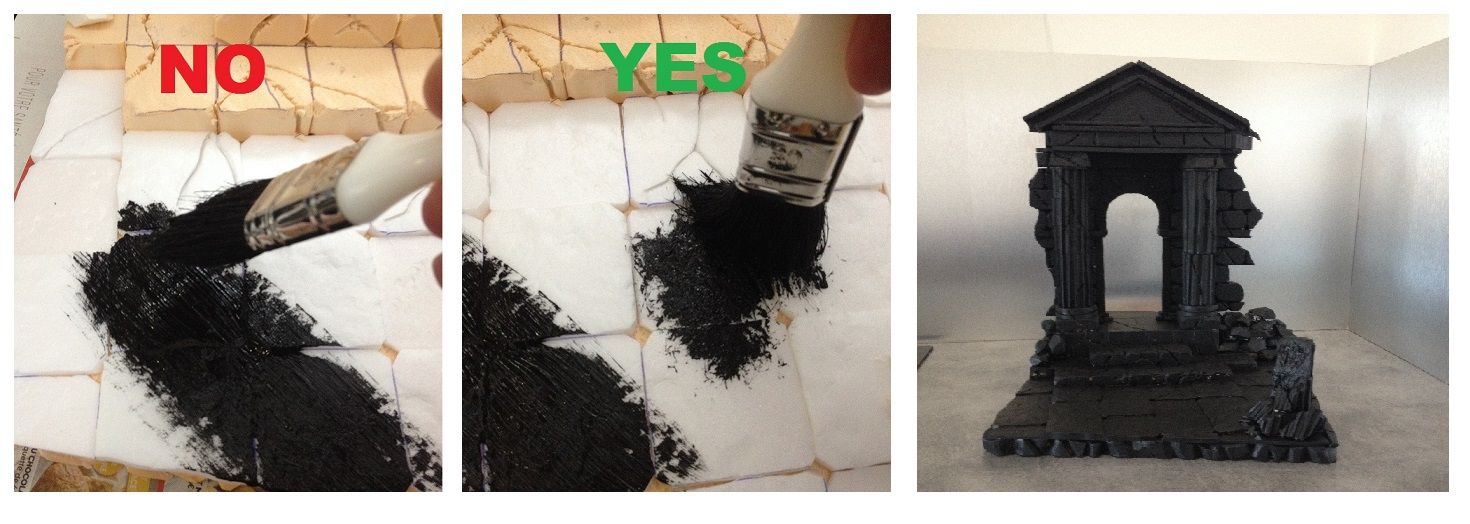
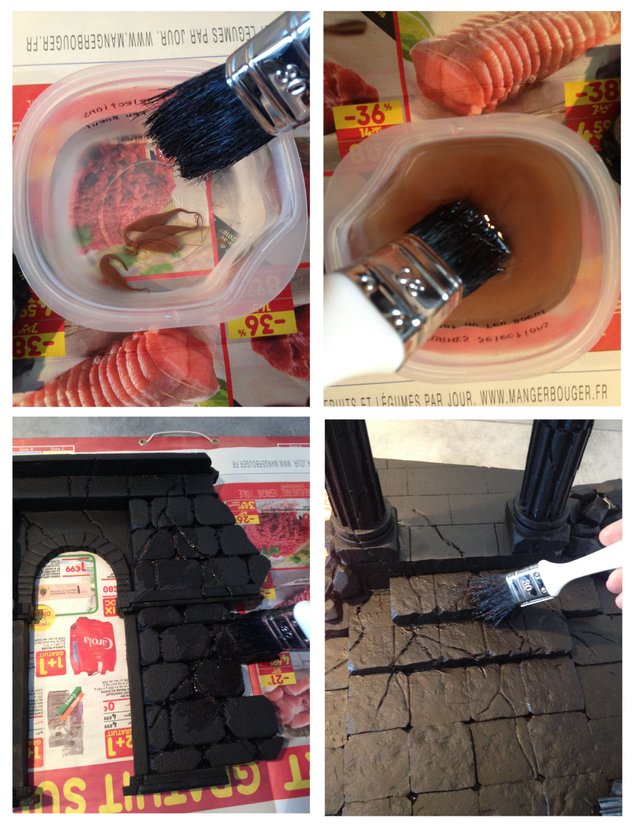
2.) Dark brown lavis.
We will apply what is called a "wash". That is to say that we will put a small amount of paint in a lot of water and that we will mix well before applying on ALL the scenery.(Including the base under the slabs). There too, we will let dry well before moving on to the next stage.
WARNING !!!!!
From here, you do not touch the base anymore. Only the part of the slabs and what is above.
3.) Brush 50% black - 50% gray
To accentuate the color of our decorations, we will make a first brush. But what's in a brush? It's simple, at first, we will mix our colors (50% black and 50% gray) with our brush but before using it on the set, we will wipe it on a paper towel to remove the overflow paint. Then, we will "brush" the scenery without too much support the brush. As usual, it is allowed to dry well.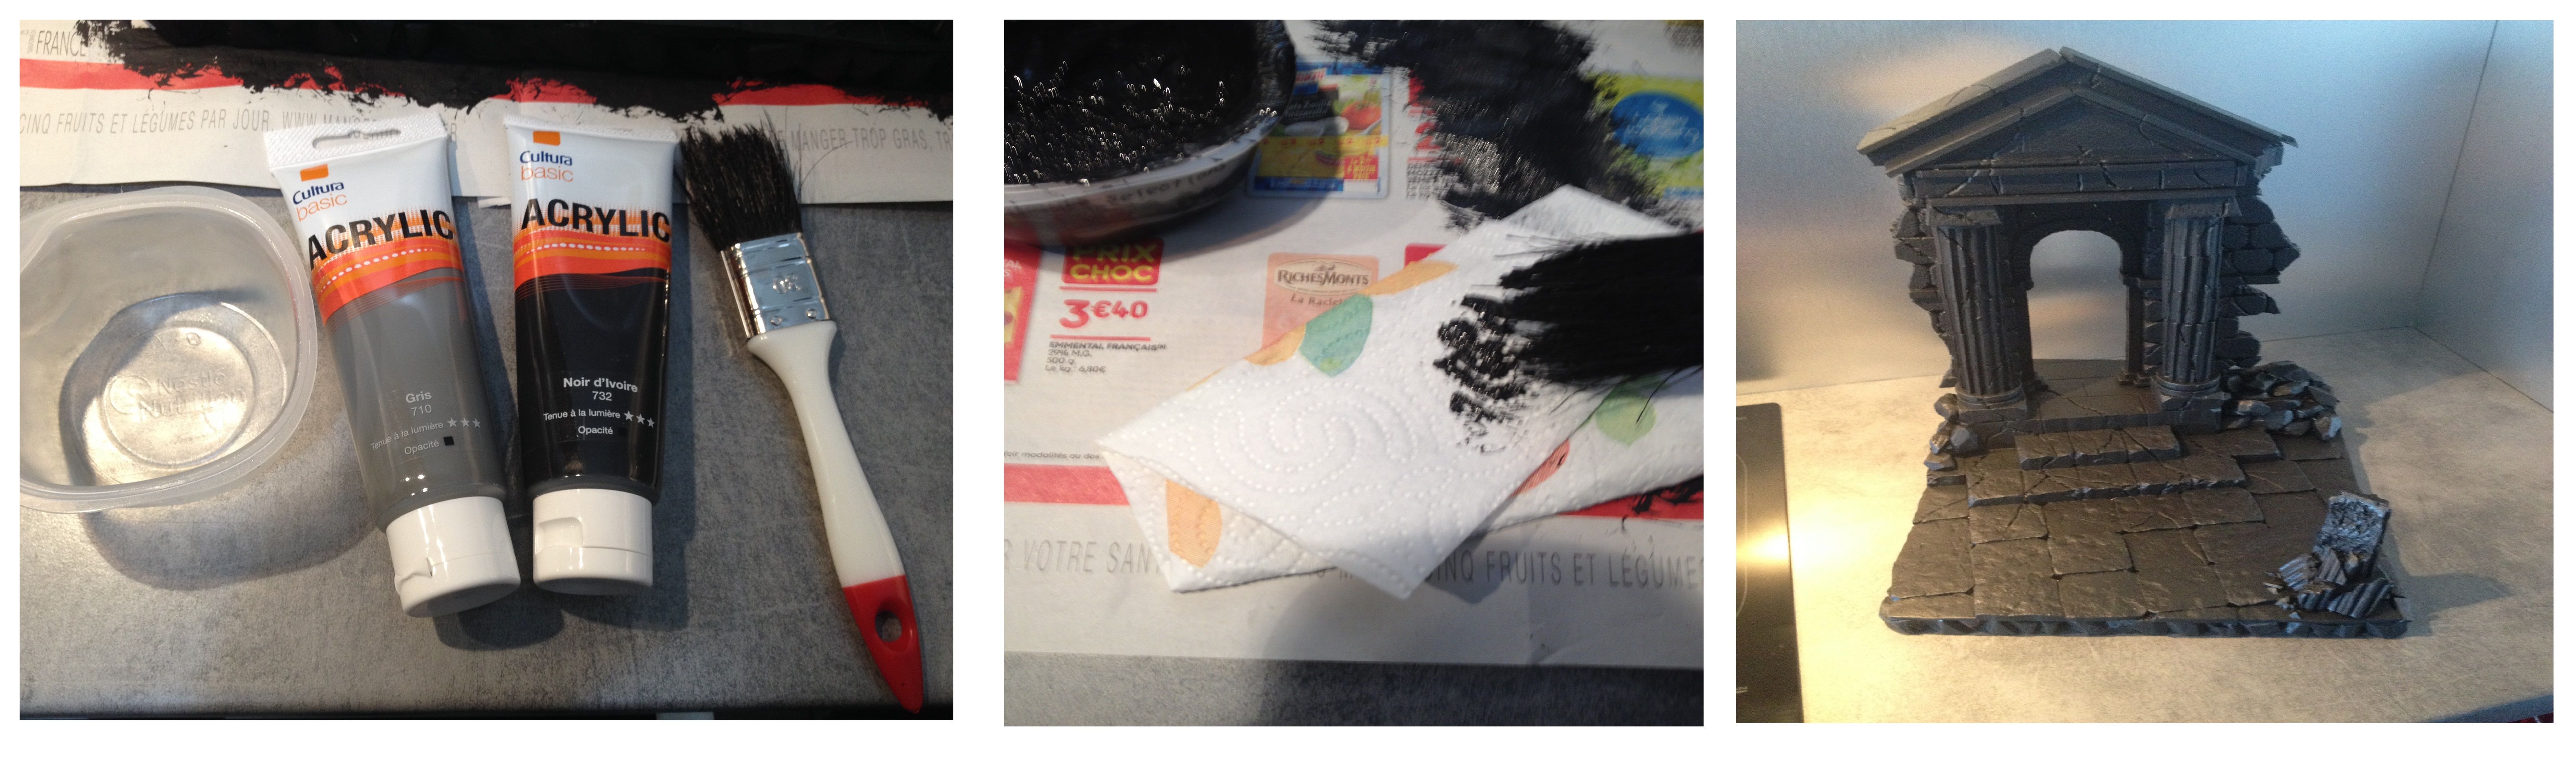
4.) Brush 25% black - 75% gray
We can go to the second brush. This time it will be 25% black and 75% gray. And we repeat the operation # 3, then let it dry again.
5.) Gray brush
We now go to the totally gray brush this time. It is allowed to dry well again.
We begin to see the texture of the decorations take shape!
6.) Brush 50% gray - 50% white
We continue with a brush that will be composed of 50% gray and 50% white.
Don't forget to let it dry.
 .
.
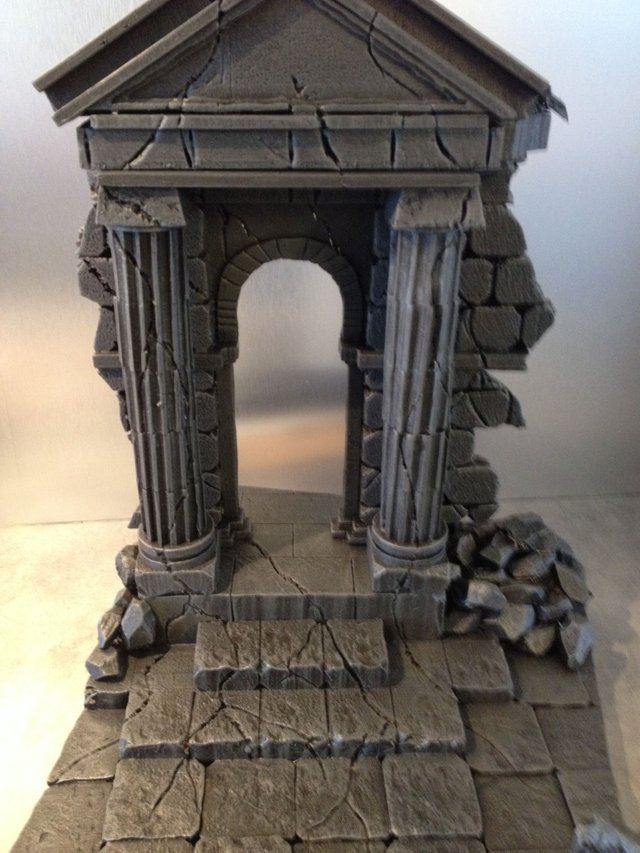
7.) White brush
We finish with a last brush completely white and let it dry again.
WARNING !!!!!
From here, you touch ONLY THE BASE. Only the part under the slabs.
To finish with our brush, we will now take care of the base of the diorama. And to give a color earth to this one, we will use brown. A first brush only brown, let it dry. Then a second brush only white.
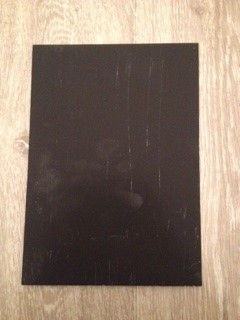
That's it, the big piece of work is done. We'll just take a small piece of Depron that we will paint in black to do the interior of the temple.
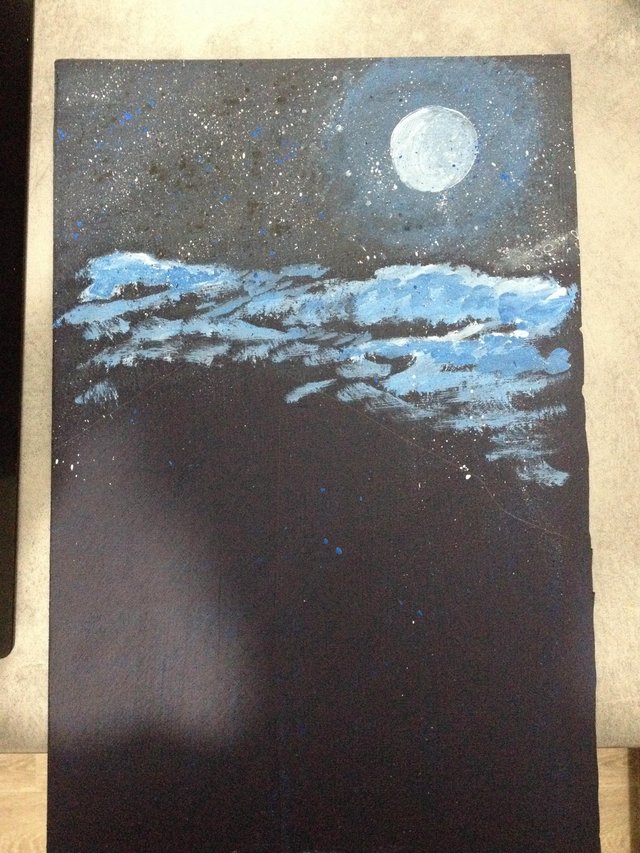
Then paint the background of the scenery, a night sky with a moon slightly hidden by the clouds.
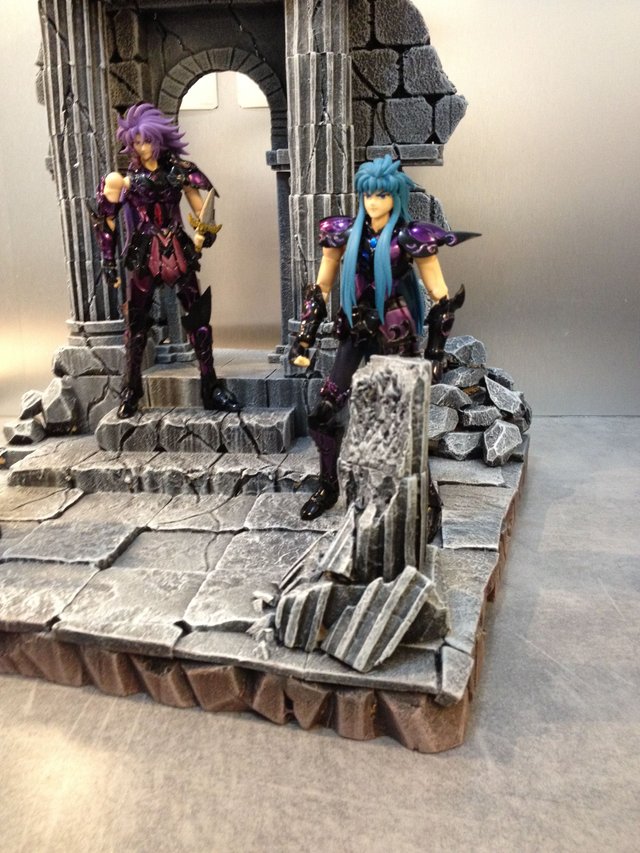
There's more place for the figurines and presto, the long project is done!
Thank you all for following me in the realization of this diorama.
Thank you for dropping by! Catch you next time!!!!

that looks realistic!! wow!! i am in awe sis!! i know it took a lot of effort and cutting and its all worth it! congrats!
Thank you sis@junebride nabawi Ang effort ug Ang mga days nga walay post walay earning hehehe
Wow, looks like it came out of Mt. Olympus! Good job @tonie!
Thank you @mermaid...
Why it looks so easy nay @tonie hahaha galing po!
Thanks sir @tpkidkai... actually it's not so hard to do it sir and affordable too, then you can sell it maybe 90% , but the materials you will spend maybe 10% only except for the thermo cutter... It's a big big win hehehehe
Nako nay @tonie wala na pong sirhahaha. Tignan ko po ang magagawa ko dyan :) Mukhang maganda sya.
maganda sya pang sideline business ehehehehe ok lng kahit walang thermo cutter machine hehehehhe
WOW. This is a remarkable post @tonie.
It reminds me of my youth when I used to mess around with Warhammer and I used to make the scenery. One thing for certain, it never turned out like this!!
Honestly, amazing job. I'm so happy to see a post of this caliber and laid out so well for others to learn about.
Thank you @caluman... You can try making a diorama for your little warhammer figurine... :)
Oh, they are long gone now!
Yehey mare! Congrats sa curie votes..proud of you super!
Thank you mare! After how many days of no post, finally a blessing came! I'm so happy hehehe!
Wooooow!maam @tonie really great..
By the way thank you so much you are there for me the time i was confused about it
Godbless you
Hello ate deevi! Thanks te.. welcome po, I'm glad you are back in steemit te...
Congrats to your curied post!!!
very well done!!!
I'm just wondering what's the actual size??? because for me, it looks real... I can imagine it like it was as big as human size....
the details are amazing!!!
seeing the thumbnail, I thought at first, you only created the background because I thought the thing there were really made from blocks!!
wow... this post really deserved to be curied...
Thank you @maylyn09 actual size 32x34x48cm heheheh
Wow very nice and congrats!
Thank you sir @long888...
OMG ang ganda!!
Ang galing nito!
Really awesome work @tonie!
This can be an awesome exhibit piece.
Thanks @guri-gure.... :)
Nice and creative.
Thank you...