How to install and customise ZSH terminal on Mac OSX
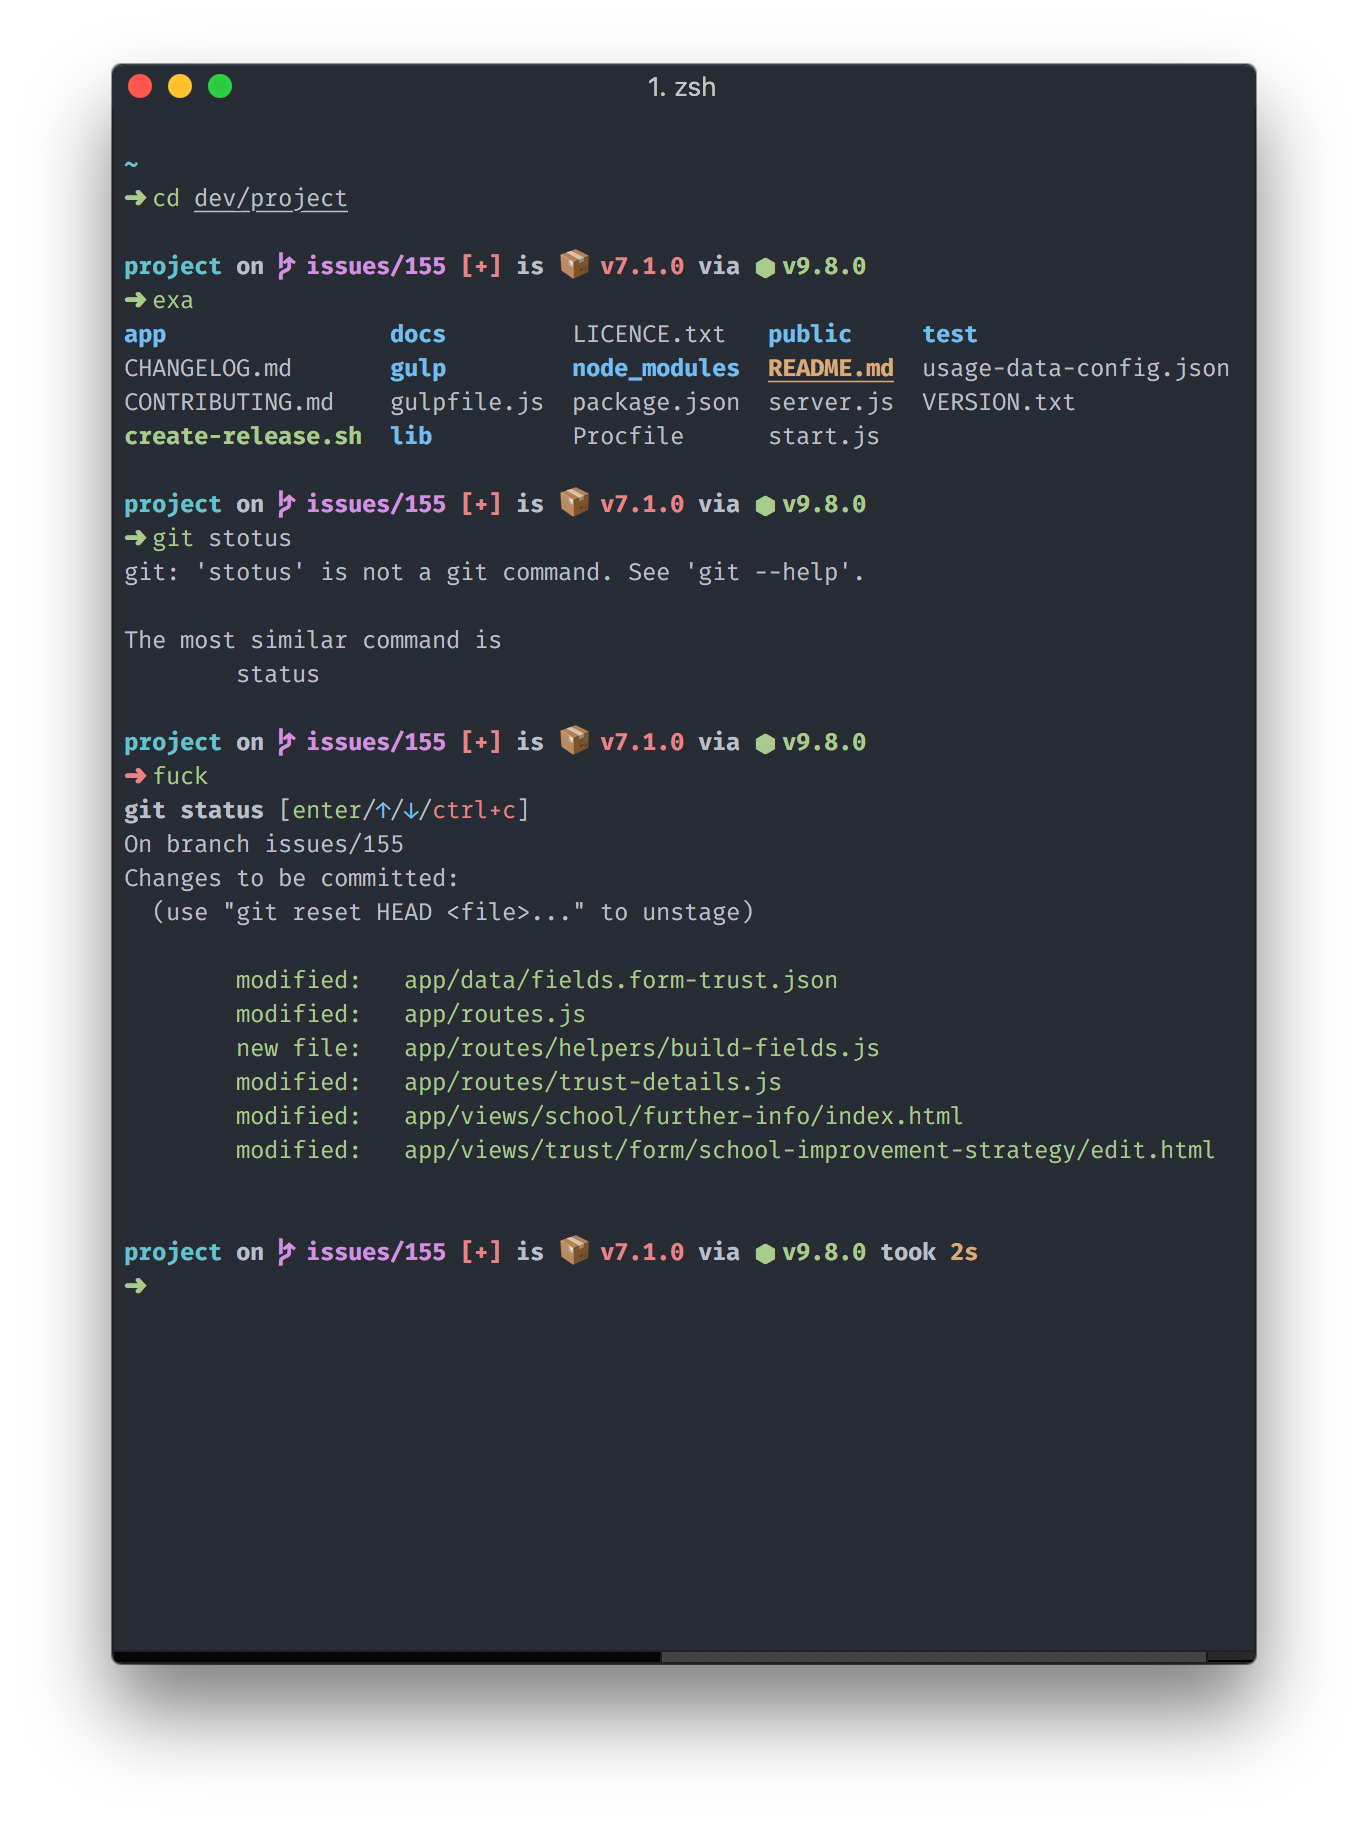
By the end of this tutorial, our terminal will look like this:
tldr; version
Assuming you already have Homebrew installed and are familiar with ZSH, here is the tldr; version:
$ brew install wget zsh zplug exa thefuck asdf
$ brew tap caskroom/fonts
$ brew cask install font-hack-nerd-font font-fira-code therm
Copy and amend the contents from this gist and then launch therm
For everyone else these are step by step instructions from the very start to install everything we need. I'm assuming some of you have never done this before so I've been explicit where possible.
Homebrew
The missing package manager for macOS
We will use homebrew throughout this process, it's a community maintained package manager for OSX, akin to apt on debian/ubuntu.
In your current terminal we're going to follow the instructions from Homebrew:
$ /usr/bin/ruby -e "$(curl -fsSL https://raw.githubusercontent.com/Homebrew/install/master/install)"
This will install homebrew and allow us to use brew from here on.
Lets also install wget whilst we're doing this, to download files with
$ brew install wget
ZSH
We're going to use ZSH so that we can install a bunch of plugins not available via Bash natively. ZSH is a different type of shell environment and allows us to make the customisations we want.
By default OSX has ZSH installed, but we're going to use homebrew to install ZSH to we can upgrade or uninstall it at any given time with ease.
I followed these instructions by Rick Cogley to install it, I've copied his instructions here for you and ommitted some of the detail just to speed things up:
Confirm the current active zsh version:
$ zsh --version
Confirm the location of zsh:
$ which zsh
/bin/zsh
Confirm the shell that’s set for your user:
$ dscl . -read /Users/$USER UserShell
UserShell: /bin/zsh
Install ZSH:
$ brew install zsh
Use brew ZSH:
$ sudo dscl . -create /Users/$USER UserShell /usr/local/bin/zsh
Password: *********
After that, restart your Terminal to have it take effect. You can also use System Preferences. Open Users & Groups, ctrl-click your username, then select “Advanced Options”. You can select your shell in there.
Now if you run which again, you’ll see the system is recognizing the one you installed:
$ which zsh
/usr/local/bin/zsh
Confirm you're running brew ZSH:
$ dscl . -read /Users/$USER UserShell
UserShell: /usr/local/bin/zsh
**Set the shell in Terminal App: **
Open Preferences > General > “Shells Open With” and set the path to your preferred shell.
Ok cool, so now we have ZSH installed and we've switched from Bash to ZSH.
Therm
Therm is an iTerm2 fork that aims to have good defaults and minimum features
$ brew cask install therm
Most people prefer to use iTerm2 over the default Terminal app due to it's customisable nature and user friendly GUI features.
I use Therm, which is a fork of iTerm2 with some various changes and performance improvements.
Therm will be installed in your app directory, feel free to fire it up and continue from here.
It's the app featured in this tutorial and all the screenshots.
Fonts
We will install some fonts and make them available to to Therm so that you can get nice fancy icons that we will need for one of the ZSH plugins we are installing later on.
Nerd fonts
Iconic font aggregator, collection, and patcher. 40+ patched fonts, over 3,600 glyph/icons, includes popular collections such as Font Awesome & fonts such as Hack
First we install Nerd Fonts for the icons
$ brew tap caskroom/fonts
$ brew cask install font-hack-nerd-font

Fira Code
Monospaced font with programming ligatures
$ brew tap caskroom/fonts
$ brew cask install font-fira-code

One Dark theme
A dark syntax theme
$ wget https://raw.githubusercontent.com/nathanbuchar/atom-one-dark-terminal/master/scheme/iterm/One%20Dark.itermcolors
You can choose any colour scheme you like, my preferred is One Dark which was originally a theme for Atom.
I chose to use the port made by Nathan Buchar because it's the most actively maintained for iterm/therm.

This will download to your current directory.
Colours
Open preferences in Therm and navigate to Profiles > Colors then in bottom right, from the dropdown color presets choose import... and import the file we downloaded.

Fonts
Change your fonts in the text tab.
Change Font to Fira Mono and Non ASCII Font to Fira Code Regular, I chose 12pt size for each.
Finally under the Other actions dropdown on the left corner, choose Set as default
Zplug
A next-generation plugin manager for zsh
Finally we pull it all together and use Zplug.
$ brew install zplug
There are other alternatives out there, such as Oh My ZSH, Antigen and Antibody but I've found for performance, management and customisation Zplug beats them all.

Zplug lets you use Oh My ZSH (OMZ) plugins, which is pretty much the standard for anyone customising ZSH. Most people stick with OMZ but I've found it to be slow and bloated, moreover, I dont need all the plugins included anyway. Feel free to use any of the above if you feel otherwise, but I'll be sharing my presets for my setup with Zplug.
Zplug is a well thought out and structured system:

Next we add our settings to the ~/.zshrc file.
Here is a copy of my own .zshrc file:
After you've copied the below rules to your own ~/.zshrc file you need to run
$ zplug load
which will source the plugins and add commands to your $PATH
# stop these errors https://github.com/asdf-vm/asdf/issues/266
# & make it fast https://carlosbecker.com/posts/speeding-up-zsh/
autoload -Uz compinit
if [ $(date +'%j') != $(stat -f '%Sm' -t '%j' ~/.zcompdump) ]; then
    compinit;
else
    compinit -C;
fi;

##########################################################
export ZPLUG_HOME=/usr/local/opt/zplug
source $ZPLUG_HOME/init.zsh

# Make sure to use double quotes #########################
zplug "zsh-users/zsh-history-substring-search"
zplug "zsh-users/zsh-completions"
zplug "zsh-users/zsh-autosuggestions"
#zsh-completions
fpath=(/usr/local/share/zsh-completions $fpath)

# oh-my-zsh ##############################################
zplug "plugins/git", from:oh-my-zsh
zplug "plugins/github", from:oh-my-zsh
zplug "plugins/heroku", from:oh-my-zsh
zplug "plugins/lein", from:oh-my-zsh
zplug "plugins/command-not-found", from:oh-my-zsh
zplug "plugins/autojump", from:oh-my-zsh
zplug "plugins/compleat", from:oh-my-zsh
zplug "plugins/ssh-agent", from:oh-my-zsh
# Node Plugins
zplug "plugins/node", from:oh-my-zsh
# Python Plugins
zplug "plugins/python", from:oh-my-zsh

# Load if "if" tag returns true
zplug "lib/clipboard", from:oh-my-zsh
zplug "oz/safe-paste"

# Note: To specify the order in which packages should be loaded, use the defer
#       tag described in the next section

# Set the priority when loading
# e.g., zsh-syntax-highlighting must be loaded
# after executing compinit command and sourcing other plugins
# (If the defer tag is given 2 or above, run after compinit command)
zplug "zsh-users/zsh-syntax-highlighting", defer:2

# Load theme file ########################################
zplug denysdovhan/spaceship-prompt, use:spaceship.zsh, from:github, as:theme

# Install plugins if there are plugins that have not been installed
if ! zplug check --verbose; then
    printf "Install? [y/N]: "
    if read -q; then
        echo; zplug install
    fi
fi

zplug load
As you install Zplug, you'll see some nice output in your terminal.
Spaceship prompt
A Zsh prompt for Astronauts
Zplug allows you to reference a github repo just by username and repo and loading as a theme.
We have gone for Spaceship Prompt, which is on line 49 of my .zshrc file
Spaceship Prompt gives you information about the directory you are working in, particularly information about:
- git/mercurial branch,
- package (npm for example)
- language version information (node, python,ruby and lots more)
- low battery indicator
- plus much more...

Restart your terminal and you should be all set to go!
Bonus
Exa
$ brew install exa
A modern replacement for ls.
As you could see in the original screenshot at the top of this page, the folders and files were nicely highlighted by Exa.
It can do all kinds of nifty things for example show you a tree view of a directory.

The Fuck (yes...really)
Magnificent app which corrects your previous console command.
$ brew install thefuck
If you ever make mistakes, as I often do, like in the original screenshot at the top, It can be a pain in the neck to type out the correct command again, or respond to the command line output, this is where the fuck comes in.
In your ~/.zshrc file you will need to add the following line, after the zplug rules:
eval "$(thefuck --alias)"

You simply type fuck (or something else if you change it in the settings) and it will attempt to work out how to resolve your problem and you can confirm or cancel.
You can see the full features in the documentation
Also see what Osho has to say about the word fuck.
ASDF
Extendable version manager with support for Ruby, Node.js, Elixir, Erlang & more
$ brew install asdf
Finally, I can't recommend ASDF enough.
My friend Steve Graham recommended it to me and it's made managing my local dev environments so much easier.
In your ~/.zshrc file you will need to add the following lines, after the zplug rules:
. $HOME/.asdf/asdf.sh
. $HOME/.asdf/completions/asdf.bash
Rather than install multiple versons of Ruby, Node, Python and have them all clash, ASDF isolates each install.
This means you can have multiple versions of Node or Ruby installed in multiple directories, or set a global version and have one interface to manage all.
There is no need for seperate managers per language like NVM, RVM and so on.
