Ram it down! or - Failures and tribulations on the cnc mill.
I guess it comes as no surprise to those who follow my posts here, that I am new to the whole cnc milling thing.
I am still experimenting with different software tools and pipelines to get my cnc mill to do what I want as hassle free as possible.

My most recent experiment was to try and mill a 3D relief in mdf. I did this mostly as a test and so I was not so interested in the resulting piece. It was meant as a means of testing such things as feedrates, clamping and endmill size. All things that I knew nothing about a few weeks ago.
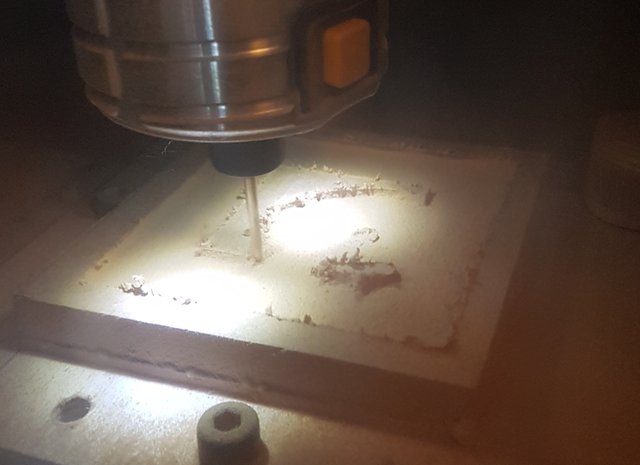
First I cut a piece og MDF 11 cm by 11 cm and 12 mm thick and glued it onto a slightly larger piece of 12 mm mdf. this gave me some thickness to play with and something to clamp on.
I let it dry and then clamped it in my cnc. I had made a simple file using half of a rams head I have made earlier. I ran this through the webbased cam solution camlab it is fairly easy to use and with the mills i have it is more than sufficient. also it spares me from learning fusion 360 which would be the alternative
One thing that annoys me , is that you dont get any time-estimations . When I do 3d prints I can leave the printer alone and even then I like to have some idea how long the print will take. CURA gives me some fairly exact estimates of print times, but with camlab I get nothing. Maybe fusion360 gives estimates?
Anyways, I started the job after having set up a fairly simple collection of toolpaths in camlab. I used only one mill for both roughin and finishing, to save me the bother of changing the bit and rezeroing the z-axis.
this means that the finish will be less than optimal but this was only a test after all.
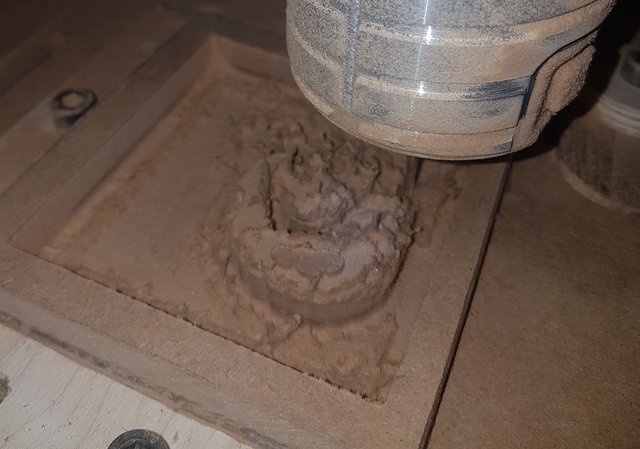
When I started the job it all looked good initially, but then things started to get away from me. first I had forgotten to make tabs in camlab. these are little areas of material that holds the object attached to the surrounding material and that the mill avoids to let the piece be fixed during the entire milling. that meant that suddenly 1/3 through the milling the part was cut loose and was basically just lying there being pushed around by the Mill. I quickly paused the job and managed to get the piece realigned and by pushing down small pieces of wood and gluing the piece to the waste-board i convinced myself that it would last for the rest of the milling.
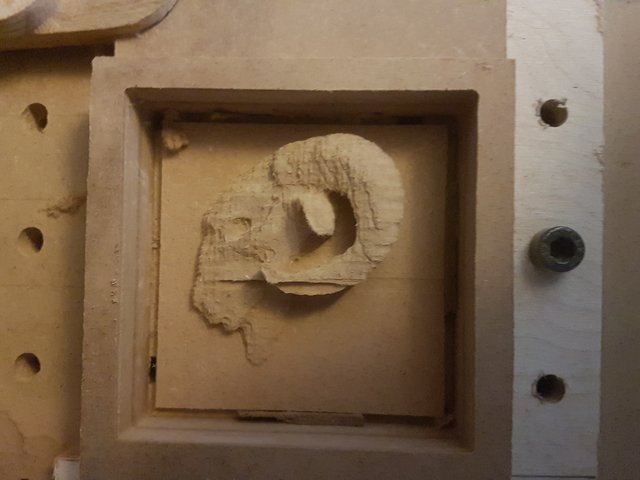
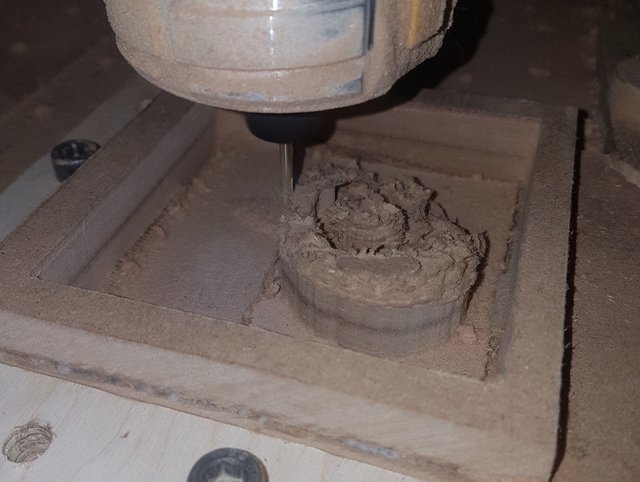
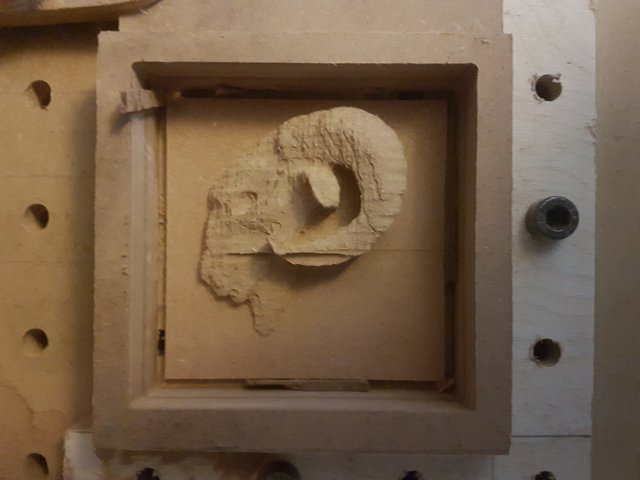
Well, not entirely but close enough. it came loose 2 more times , but each time i managed to pause and fix before any harm was done. I managed to finish the milling and got the piece done , but with a few errors. The most obvious one is the horisontal line across the horn and face.
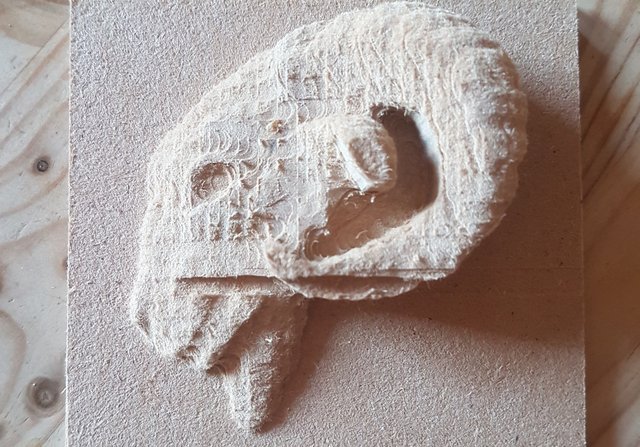
another is that since i only used a 1/8 inch endmill, the surface is not as nice as i would have wanted. i am however now, ready to give it another go using real wood. I have a piece of Zebrano that I might try it with. i just need to make some new toolpaths - with tabs - so I do not repeat my mistakes.
until then

Im EvilHippie, a compulsive creative and jack o' trades. If you want to know more about me, check out my introduction post here
If you like what you see, feel free to upvote, follow and resteem
or you can check out my accounts on these sites:
It looks cool, though, despite your dissatisfactions ... hahaha I kinda like the imperfections :) but I definitely will look forward to seeing your future attempts, as I am sure you'd have learned from your mistakes :D
thanks, I plan to do better next time,some of the imperfections are actually nice enough the topology like lines are fairly nice but the big gash is not so nice. at least i think so.