Vundle使用教程
简介
Vundle 是 Vim Bundle 的简称,是为了使 Vim 的插件更便于管理,如果你使用过 Vim ,那么你也一定对于 Vim 的插件管理很头疼。现在可以体验下 Vundle 给我们带来的使用便利。
快速全新安装(Mac or Linux)
1. 清除掉原有配置,如果需要备份,请先备份
~ » rm -rf .vim .viminfo .vimrc
2. 安装 Vundle
~ » git clone https://github.com/VundleVim/Vundle.vim.git ~/.vim/bundle/Vundle.vim
3. 创建 .vimrc 并添加以下 Vundle 的配置信息
set nocompatible              " be iMproved, required
filetype off                  " required

" set the runtime path to include Vundle and initialize
set rtp+=~/.vim/bundle/Vundle.vim
call vundle#begin()
" alternatively, pass a path where Vundle should install plugins
"call vundle#begin('~/some/path/here')

" let Vundle manage Vundle, required
Plugin 'VundleVim/Vundle.vim'

" Add your plugins to this place 在这里添加你的插件

" 在这行前添加你的插件
call vundle#end()            " required
filetype plugin indent on    " required
" To ignore plugin indent changes, instead use:
"filetype plugin on
"
" 以下是常用命令
" :PluginList       - lists configured plugins
" :PluginInstall    - installs plugins; append `!` to update or just :PluginUpdate
" :PluginSearch foo - searches for foo; append `!` to refresh local cache
" :PluginClean      - confirms removal of unused plugins; append `!` to auto-approve removal
"
" see :h vundle for more details or wiki for FAQ
" 在该行后添加自己的配置信息
4. 安装插件
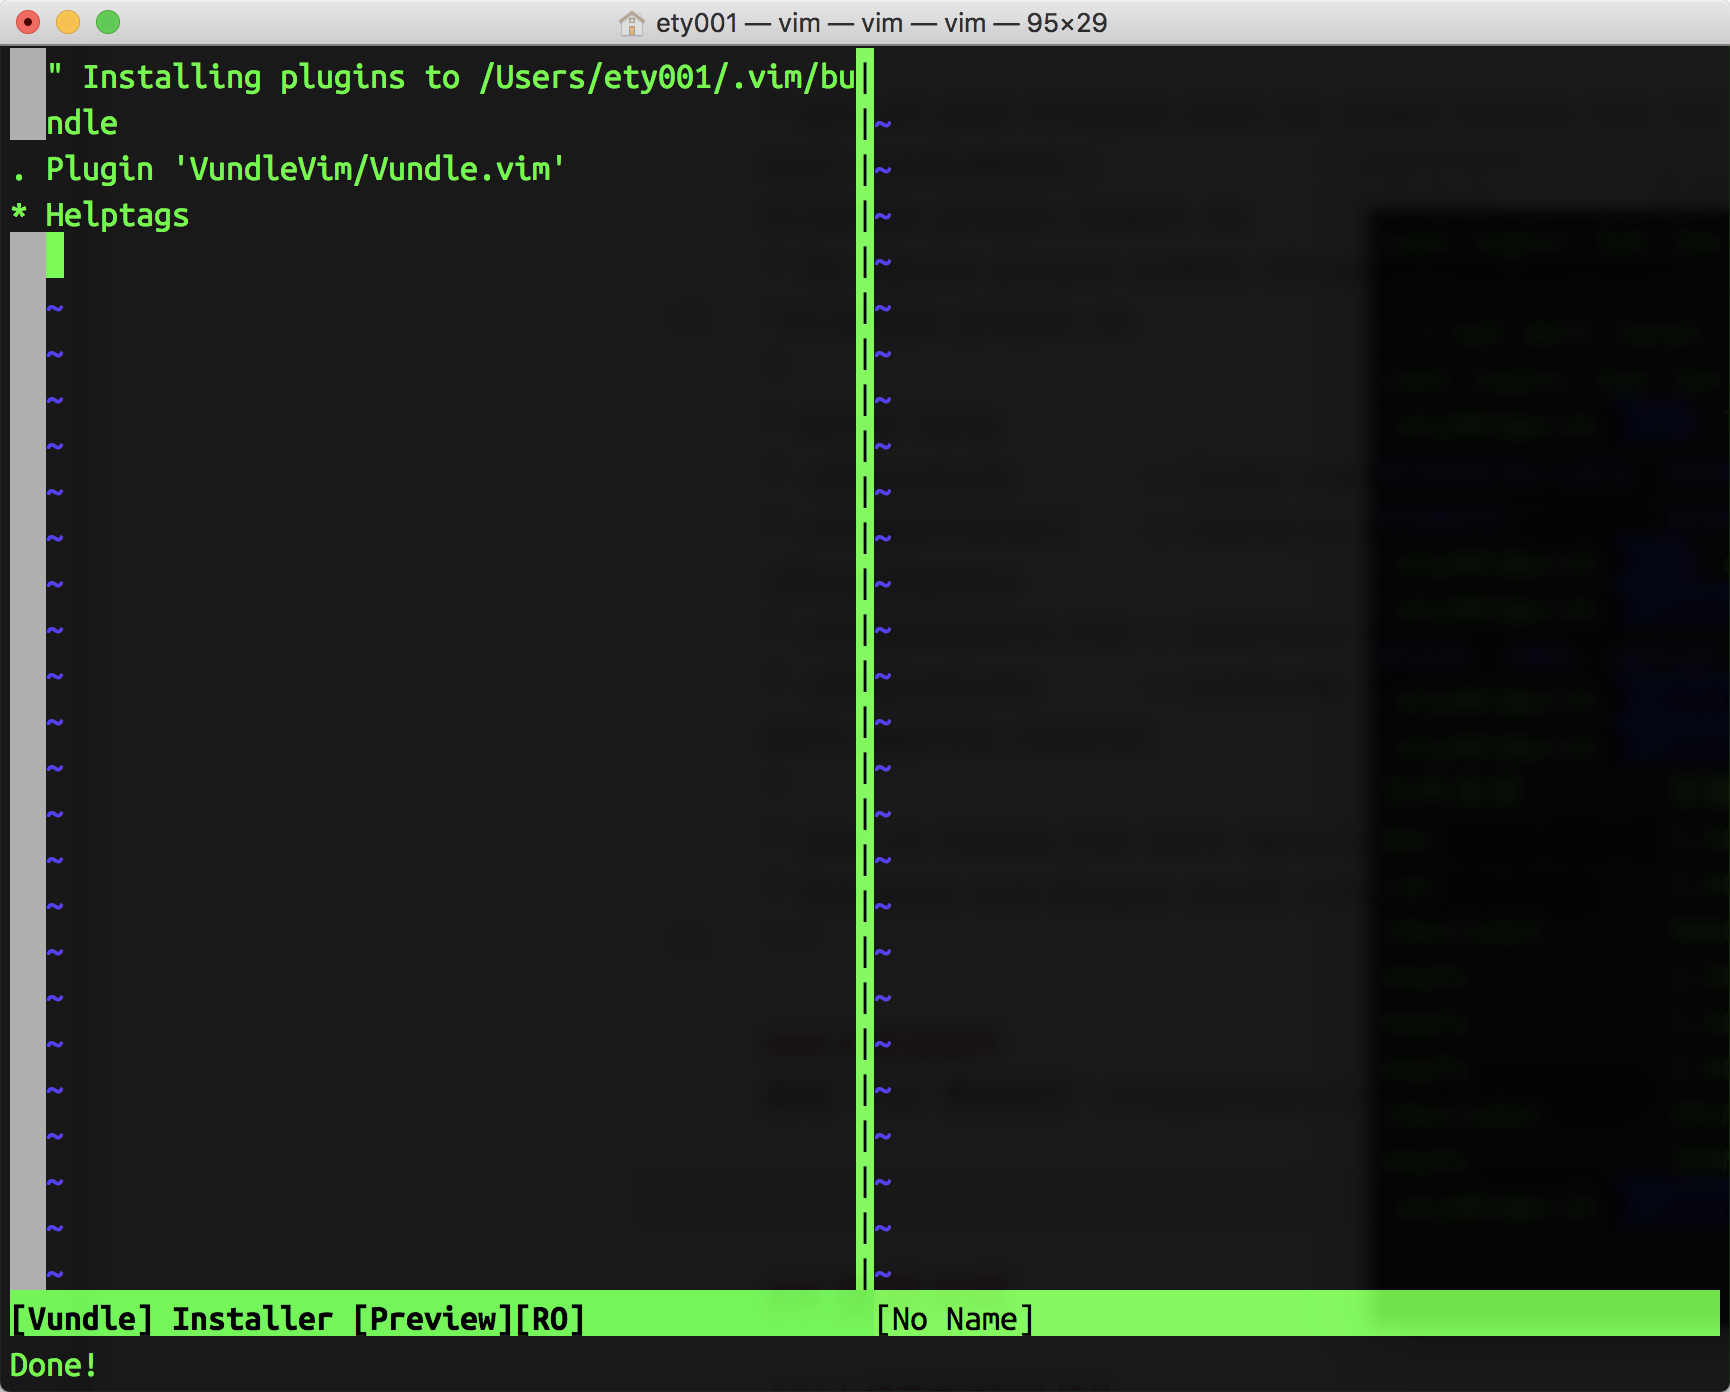
启动 Vim 然后运行 :PluginInstall,底部状态栏显示 Done 即为安装完毕,如图
使用说明
1. 想要安装新的插件
在 .vimrc 中的 Plugin 'VundleVim/Vundle.vim' 和 call vundle#end() 之间插入你想要增加的插件信息,常见的几种语法如下:
" 插件托管在 Github 上的
Plugin 'tpope/vim-fugitive'
" 插件托管在 http://vim-scripts.org/vim/scripts.html 上的
" Plugin 'L9'
" 插件托管在非 github 上的
Plugin 'git://git.wincent.com/command-t.git'
" 插件是在自己本地的
Plugin 'file:///home/gmarik/path/to/plugin'
比如我要安装 NERDTree 插件,它的 Github 地址是 https://github.com/scrooloose/nerdtree,那么添加的配置信息如下:
Plugin 'scrooloose/nerdtree'
然后启动 Vim ,执行 PluginInstall 即可完成安装。
2. 增加自己的配置信息
如果想要增加自己的配置信息的话,只要在 Vundle 的配置信息之后增加即可,以下是我的自定义配置信息:
colorscheme peachpuff
set guifont=Monaco:h10       " 字体 && 字号
set expandtab                " 设置tab键换空格
set tabstop=4                " 设置tab键的宽度
set shiftwidth=4             " 换行时行间交错使用4个空格
set autoindent               " 自动对齐
set backspace=2              " 设置退格键可用
set cindent shiftwidth=4     " 自动缩进4空格
set smartindent              " 智能自动缩进
set ai!                      " 设置自动缩进
set nu!                      " 显示行号
set showmatch               " 显示括号配对情况
"set mouse=a                  " 启用鼠标
set ruler                    " 右下角显示光标位置的状态行
set incsearch                " 查找book时,当输入/b时会自动找到
set hlsearch                 " 开启高亮显示结果
set incsearch                " 开启实时搜索功能
set nowrapscan               " 搜索到文件两端时不重新搜索
set nocompatible             " 关闭兼容模式
set vb t_vb=                 " 关闭提示音
"set cursorline              " 突出显示当前行
hi CursorLine  cterm=NONE   ctermbg=darkred ctermfg=white
hi CursorColumn cterm=NONE ctermbg=darkred ctermfg=white
set hidden                   " 允许在有未保存的修改时切换缓冲区


syntax enable                " 打开语法高亮
syntax on                    " 开启文件类型侦测
filetype indent on           " 针对不同的文件类型采用不同的缩进格式
filetype plugin on           " 针对不同的文件类型加载对应的插件
filetype plugin indent on    " 启用自动补全

set writebackup              " 设置无备份文件
set nobackup
set autochdir                " 设定文件浏览器目录为当前目录
set nowrap                  " 设置不自动换行
set foldmethod=syntax        " 选择代码折叠类型
set foldlevel=100            " 禁止自动折叠

set laststatus=2             " 开启状态栏信息
set cmdheight=2              " 命令行的高度,默认为1,这里设为2


" 设置编码
set fenc=utf-8
set encoding=utf-8
set fileencodings=utf-8,gbk,cp936,latin-1
" 解决consle输出乱码
language messages zh_CN.utf-8
3. 对自己的 .vimrc 进行版本管理
大致配置好以后,可以把自己的 .vimrc 加入到自己的某个 Github 库中进行版本管理。然后做 ln 到自己的家目录。
我们又见面喽!cn区点赞机器人 @cnbuddy 感谢你对cn区作出成长的贡献。 @cnbuddy 很开心能够和您一起为cn区快速发展,贡献自己的力量。我的主页会定期总结cn区活动动态,欢迎围观。欢迎关注我们的大股东 @skenan,并注册使用由其开发的 CNsteem.com。如果不想再收到我的留言,请回复“取消”。