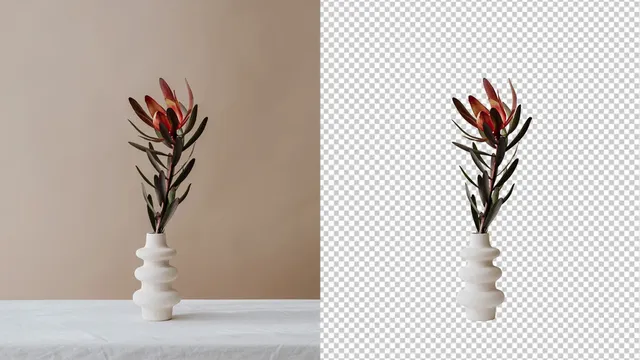
Step-by-Step Guide to Manually Hand-Drawn Background Removal Services
Introduction:
Background removal is a crucial technique in graphic design and e-commerce. In this tutorial, we'll take you through the process of manually hand-drawing background removal to achieve a polished and professional result. Learn how to isolate objects from their backgrounds with precision and finesse.
Step 1: Choose Your Software:
Open software that supports image editing and drawing tools, such as Adobe Photoshop or GIMP. These tools provide the necessary features for accurately hand-drawing background removal paths.
Step 2: Import and Duplicate the Image:
Import the image you want to work on and create a duplicate layer. This preserves the original image and allows you to work non-destructively.
Step 3: Select the Pen Tool:
Choose the Pen Tool from the toolbar. Ensure that the tool is set to create a "Path" rather than a "Shape" or "Fill."
Step 4: Start Drawing the Path:
Zoom in on the image and start creating anchor points along the object's outline. Click to place points on the edge of the object, and use as many points as needed for accuracy.
Step 5: Curves and Handles:
For curved sections of the object, click and drag to create "handles" that adjust the curve of the path. This helps you achieve smooth and accurate outlines.
Step 6: Complete the Path:
Continue placing anchor points until you've outlined the entire object. Close the path by connecting the last point to the first.
Step 7: Refine the Path:
Zoom in further and carefully adjust the position of anchor points and handles. Focus on achieving a seamless transition between the object and the background.
Step 8: Save the Path:
Save the path as a "Work Path" within your software. This way, you can revisit and modify the path if necessary.
Step 9: Convert Path to Selection:
Right-click (or control-click) on the path and choose "Make Selection." Set the Feather Radius to 0 pixels. This converts the path to a selection.
Step 10: Invert and Create Layer Mask:
Invert the selection to select the background instead of the object. Add a layer mask to the duplicated layer, hiding the background and revealing the object.
Step 11: Fine-Tune the Mask:
Use the Brush Tool with a soft edge to refine the mask. Paint over any areas that need adjustments, ensuring smooth edges and clean isolation.
Step 12: Preview and Adjust:
Toggle the visibility of the original background layer to see how well you've isolated the object. Make further adjustments as needed.
Step 13: Save and Export:
Once satisfied, save the image in a format that supports transparency, such as PNG. This preserves the isolated object's quality and allows for easy integration into various projects.
Conclusion:
Mastering the art of manually hand-drawn background removal opens up new possibilities in design and e-commerce. By following this comprehensive guide, you'll gain the skills needed to create stunning images with clean and accurate object isolation. Practice, patience, and attention to detail will contribute to your success in mastering this technique.
