1975 Porsche 914 Targa - The Engine - Part II
Do you ever wonder if people who get into their cars, start the engine, and drive off ever think of what is happening underneath the hood? Do they even realize that extremely violent explosions of gas and ambient air mixtures are within 2 - 4 feet from them? Think about it...explosions ignited by a spark causes a piston to move downward forcing a cam shaft the piston is attached to turn. The cam shaft makes the flywheel turn. The energy of the spinning flywheel transfers power to a transmission. And finally that transferred energy turns wheels to make a 4000 lb car move. Humans who invented the stone wheel would be forever pleased to know we've come so far.
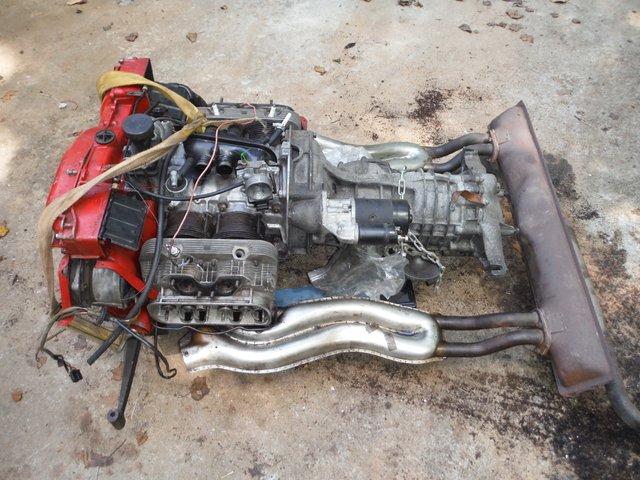
What I'm writing about today is a 1.7 L 4 cylinder air-cooled Volkswagen engine. It was made for the Porsche 914 Targa. I know, I know the desirable Porsche was the 911 but hey sometimes you take what you can get.
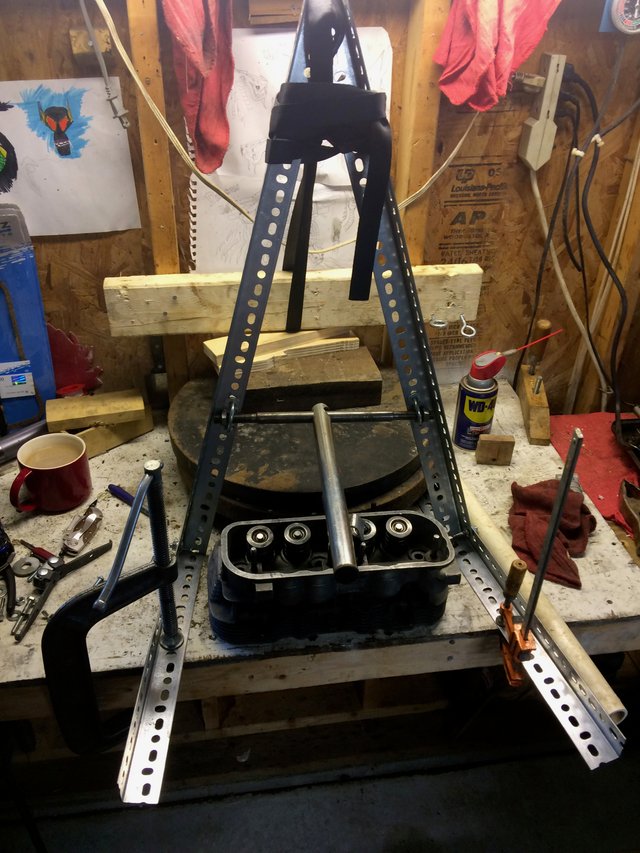
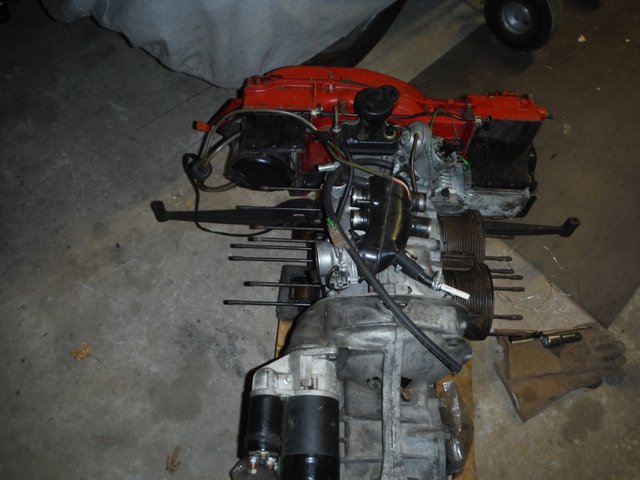
So When I first moved the engine into my garage I placed it on jack stands but soon concluded that I didn't like this configuration. I was afraid the engine would fall, it was stationary and anyway I wanted to remove and paint the engine carrier bar but couldn't paint it while I was using it to support the engine on car stands.
.jpg)
I went to the hardware store and bought some 2"x4"'s and made a engine "pad" suitable for my needs. I actually made two to get the engine up higher. It's nothing fancy but it helps get the job done and I feel a lot more comfortable with it; I can also move it around easily because I put my homemade pad on a furniture roller.
.jpg)
In my previous article I provided a link that I used for the engine removal process. As I said in that article it was literally a one man job and it really doesn't take that long. At this point I do not know how long it will take to put the engine back into the car because I haven't done that yet; I'll explain why later. Thinking it through in my mind it shouldn't take as long to re-install the engine. One day I'll find out.
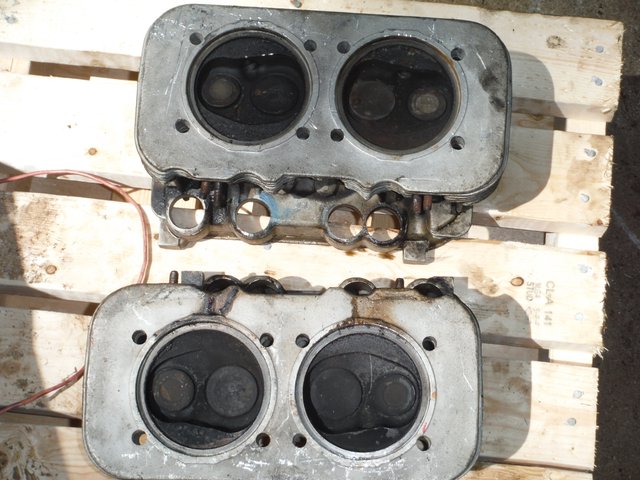
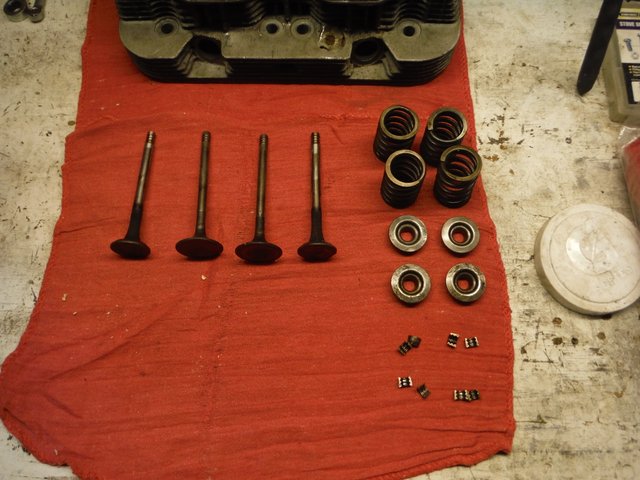
This article is just a photo log of removing the heads,
valves
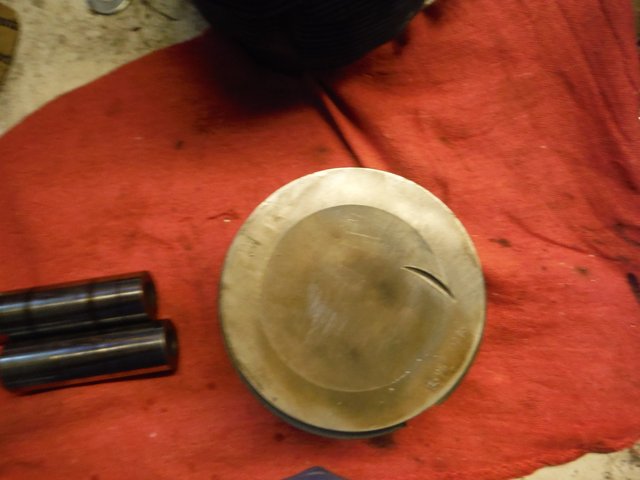
and pistons from the engine. Lots of carbon was built up on the piston heads:
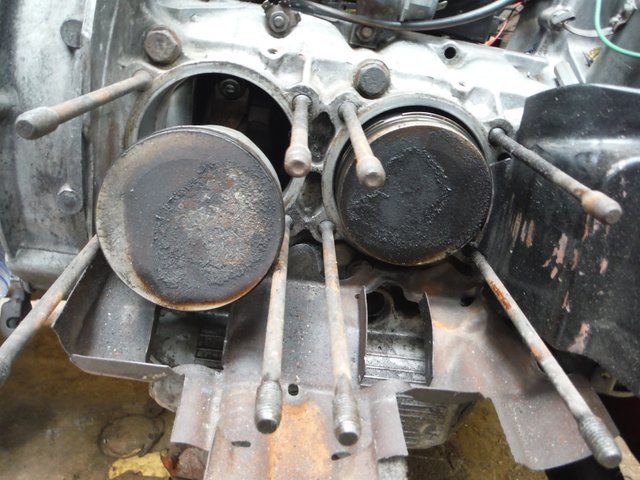
I found that, after cleaning, one piston that looks like it may have banged into a valve while hot due to the timing being off (maybe?) IDK.
By now I hope you've realized I'm not a professional. I often have to make things work with what I have; that's what makes things fun in my opinion; it's too easy to run down to the store or go online to buy something someone else has made to do what needs to be done. Sometimes you have to but wherever I can save a few bucks I do just that!
The hardest part for me was removing the valves from the head. I had to make a valve spring compression tool
because the one I bought from Sears was kind of wonky. Meaning I couldn't hold it steady enough to compress the springs to remove the retainer clips so the springs would come off and the valves come out.
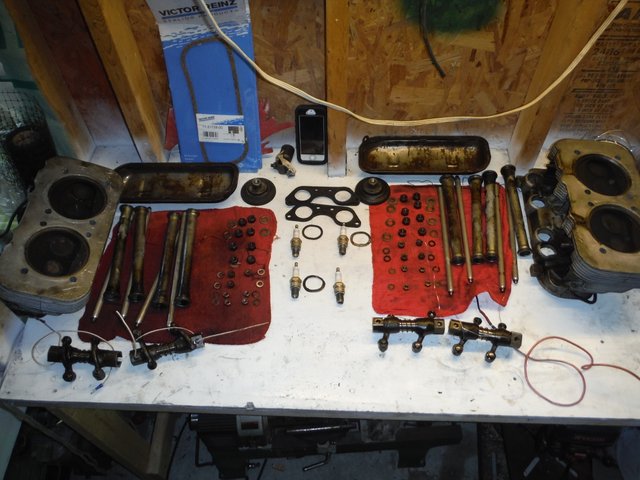
Here is a complete photo of all the parts dismantled from both both sides of the engine excluding the pistons.
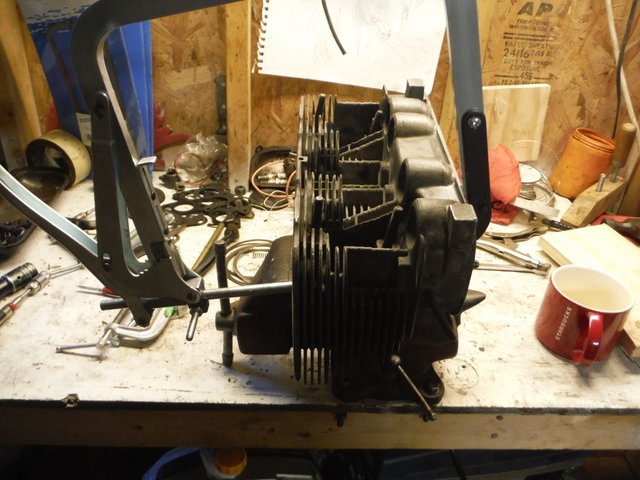
Here is a shot of the engine with two of the cylinder heads removed.
After tearing the engine all the way down to the crank case, cleaning up parts and inspecting them I did have to replace the valves and that damaged piston. I also replaced the piston rings. Unfortunately while I was putting the engine back together I managed to damage one of the piston rings (I don't know how, probably impatience) and while putting the sheet metal back on one side of the engine one of the screws fell in to the push rod hole. I can't get it out. I've played with the idea of filling the crank case up with oil and use a engine cleaning tool connected to a compressor to spray the oil into that hole and maybe flush the screw to the oil pan but I think thats going to be too messy. My other alternative and the one I'm probably going to go with is taking the engine all the way apart again and cracking open the crank case. Just to get a loose screw out and to avoid damage to the internal components of the engine. It shouldn't really take that long but it's frustrating.
The engine's now been sitting in my garage all winter long waiting for me to take it apart again. Procrastination is slowing me down. Let me know if you want to hear the rest of the story in the comments below. I don't know when I'll get back to work on the engine but it'll get done eventually and I'll be taking lots of pictures.
Thanks for reading.