Propagating Cannabis: A Few Hoops To Grow Your Own Medicine
Never in a million years would I have ever thought that I’d be in a position to add cannabis grower to my professional curriculum vitae.
Yet, here we are.
I’ve been officially out of the cannabis closet for 2.5 years on the medical side and I have almost a year under my belt as a person who also has a licence to grow her own medicine, for herself.
In the country where I live (which is Canada), it is rare for people to pursue applying for their personal growing licences because the process involves a lot of bureaucratic hoop jumping.
Even more hoop jumping than what one has to go through to achieve a recognized medical cannabis license. (That’s the licence that lets you buy from a government sanctioned corporate grower.)
Once I had the 30+ page application “to grow” filled out and paid $350 to get that paperwork signed by a medical doctor, it took 4 months before I received approval.
I’m now in the throws of renewing that licensing (2 months early) so that there’s no lag in dates from one licence to the next. A complete money-grab these days because I will now also have to pay another $350 for another doctor’s signature to complete the renewal documents. We’ll shall see how much time I will lose on the “processing part” this time around.
Yeah, that’s part of the bureaucracy. It’s the grower’s responsibility to renew their grow licence before the expiry date. However, the government takes an average of 4 months to issue updated paperwork.
Many growers submit their renewal paperwork (for processing) 4 months in advance of their licence’s actual expiry date, for this reason.
Growers submit their renewal paperwork early so that they won’t be in violation of the law. They don’t want to risk losing their licences, nor being criminally charged.
The government issues the licence and dates the paperwork to correspond with the date that the doctor signed the renewal paperwork. To be fair, the licence should be dated a few days before the government mails the documents back to the grower.
This means that if the government “processes” the paperwork for 4 months, the grower loses all that time. (Basically all the time between when the original application or renewal paperwork was received and when it was finally issued, dated and mailed back to the recipient.)
Trust Me When I Say, We All Have Missing Time And It’s Not Because We’ve Taken Too Many Bong Rips
These kind of delays are tough when you are using the plant as your medicine. Most medical growers agree that this is an additional stress that no one needs when every week of potential growing counts.

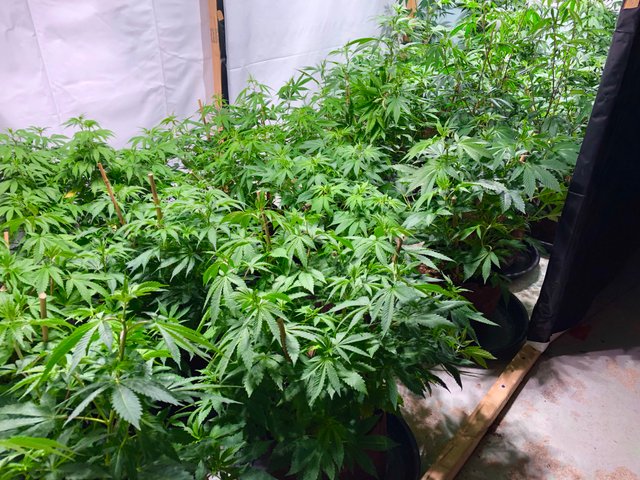
From seed, each crop takes about 3 months to finish. I’m now on my 3rd crop and I’ve had two successful harvests.
That Still Makes Me A Novice Grower But I’m Happy To Share What I Am Learning Along The Way.
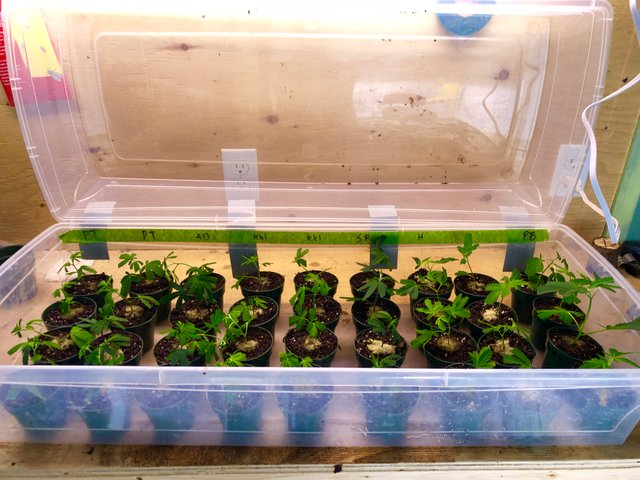
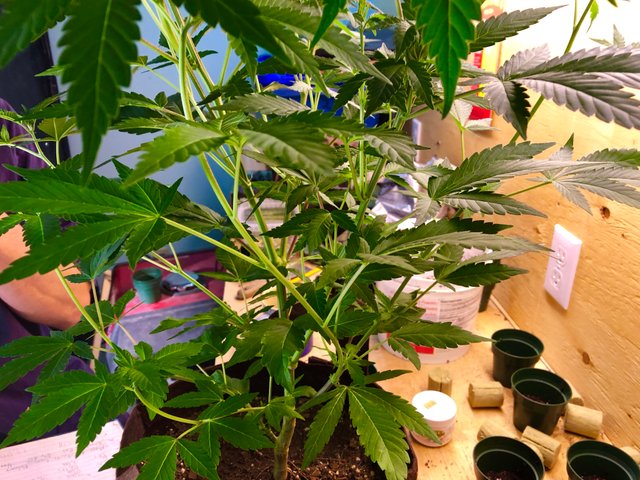
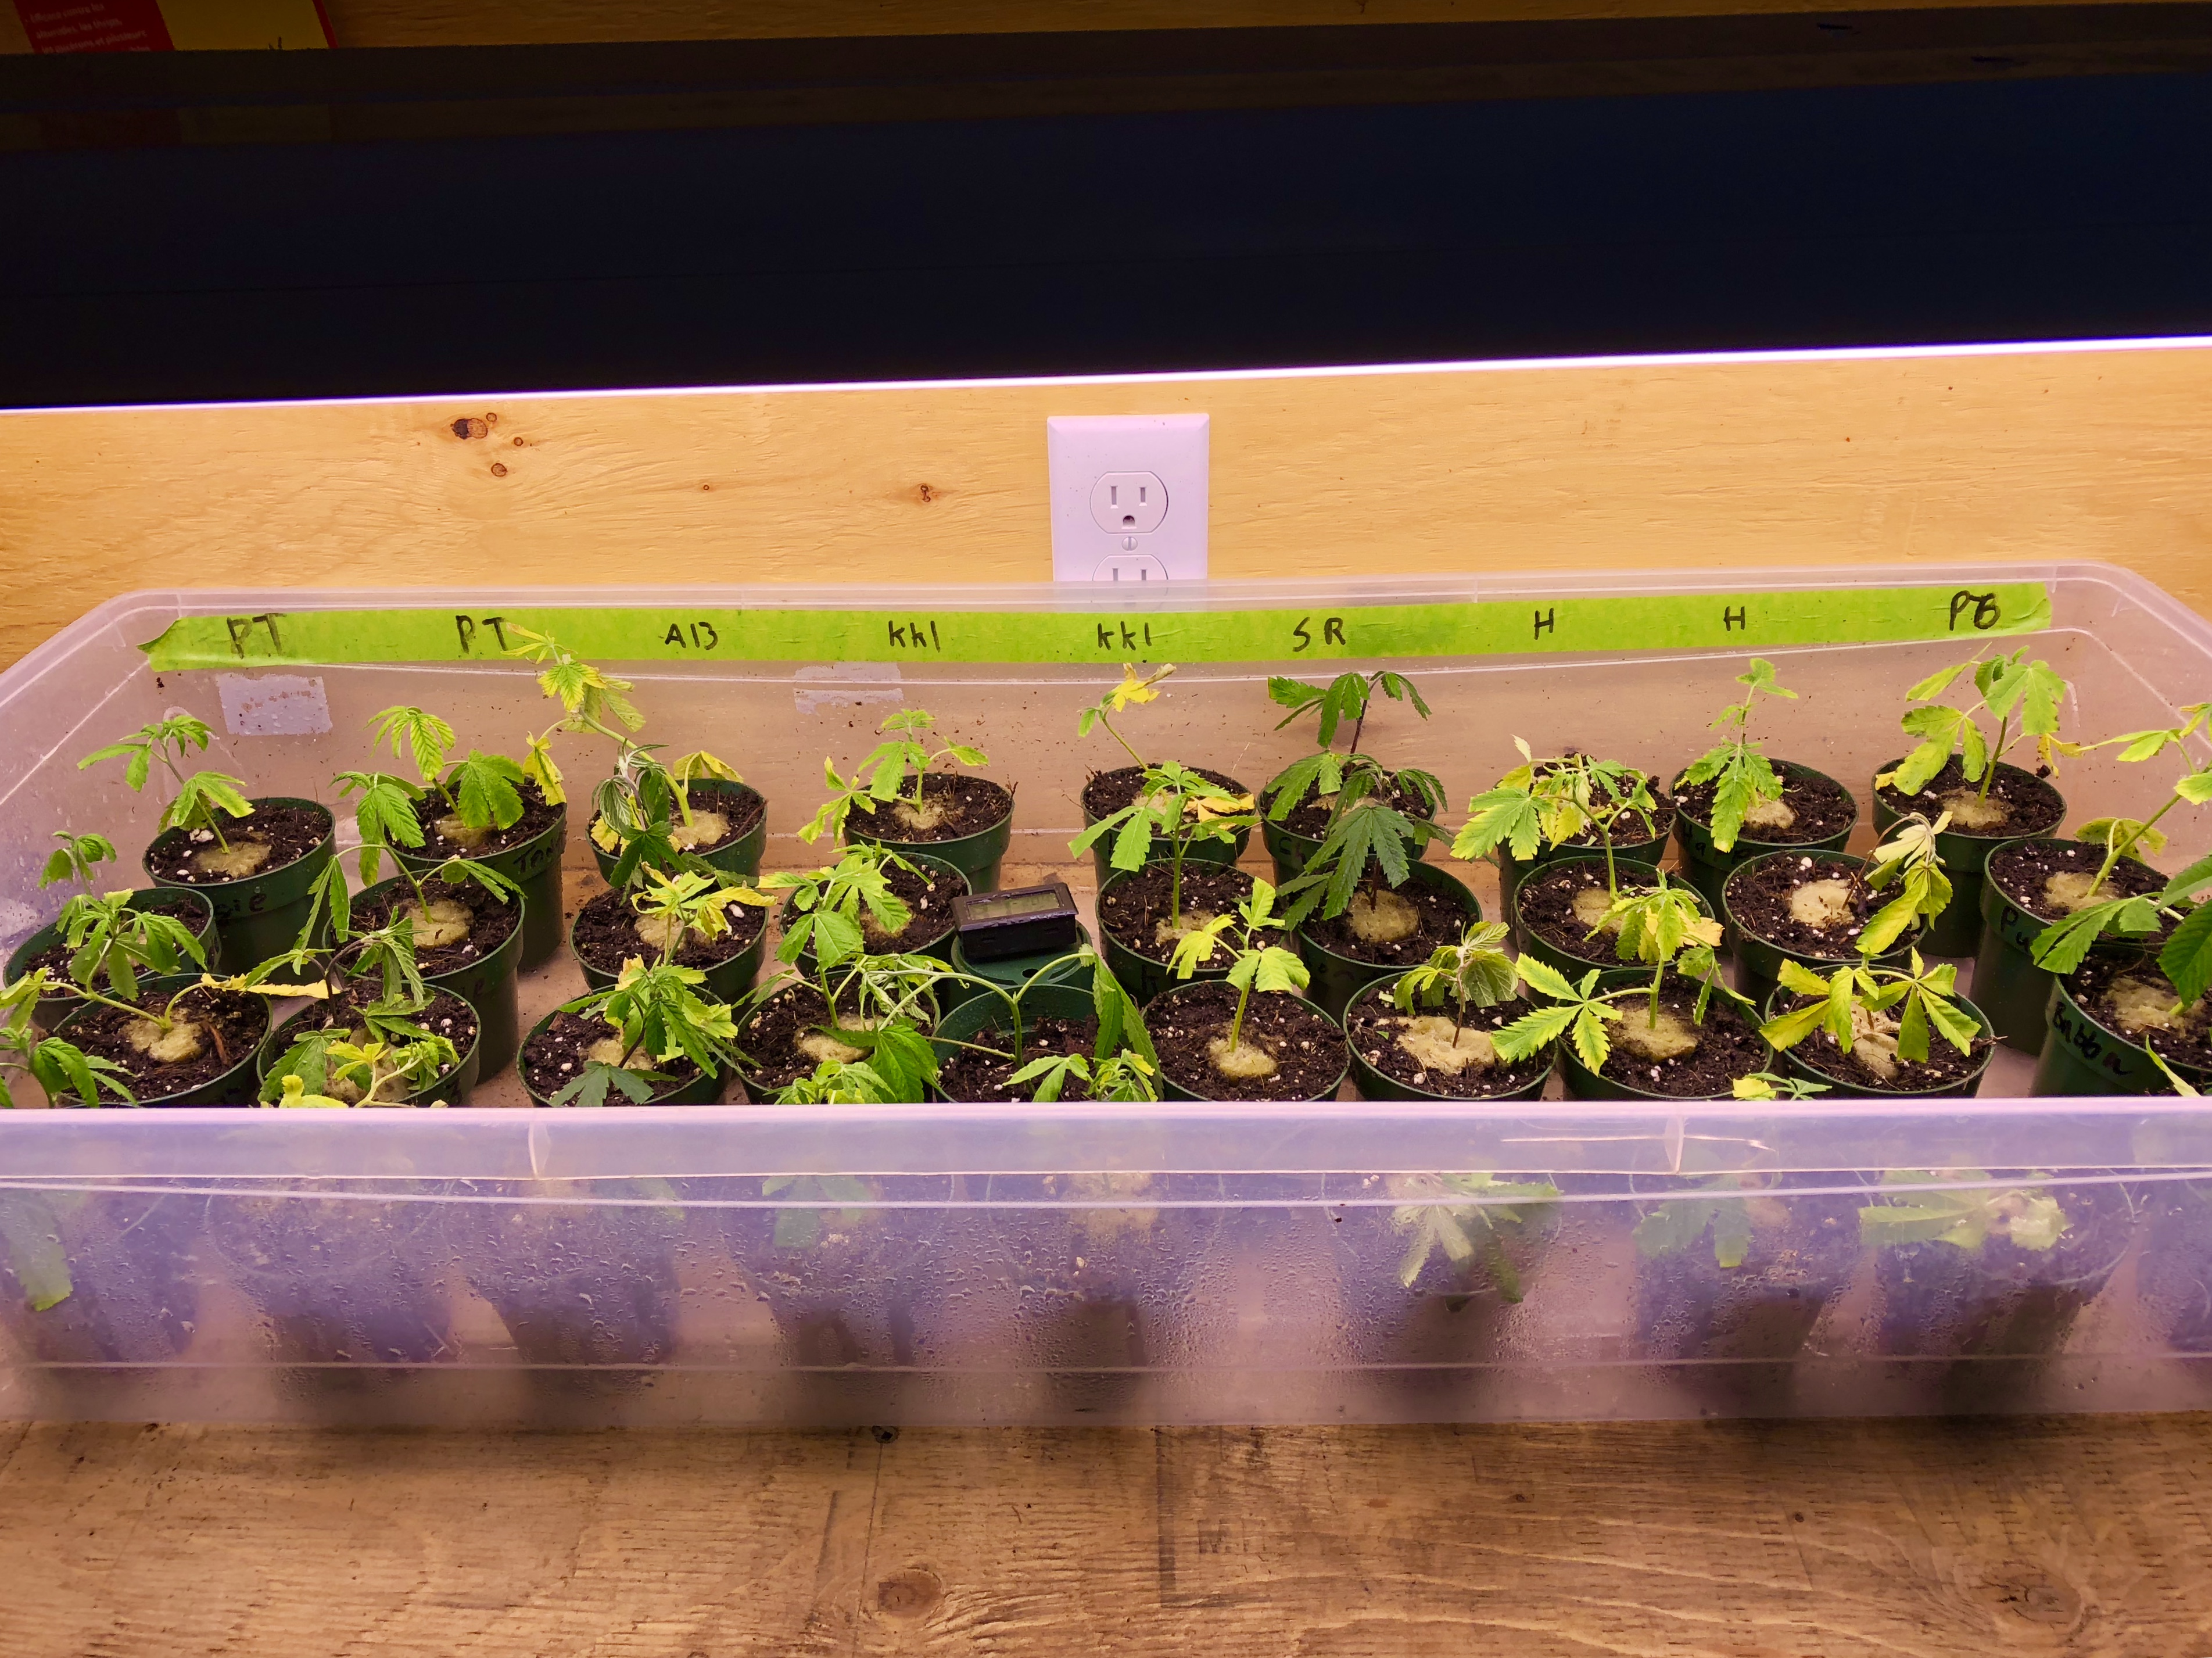
This is my current crop:
I’m just getting ready to take these Queens into the Flower Stage. This is done by adjusting their lights to 12 hours on and 12 hours off and I’ll be doing this within the next 2 weeks.
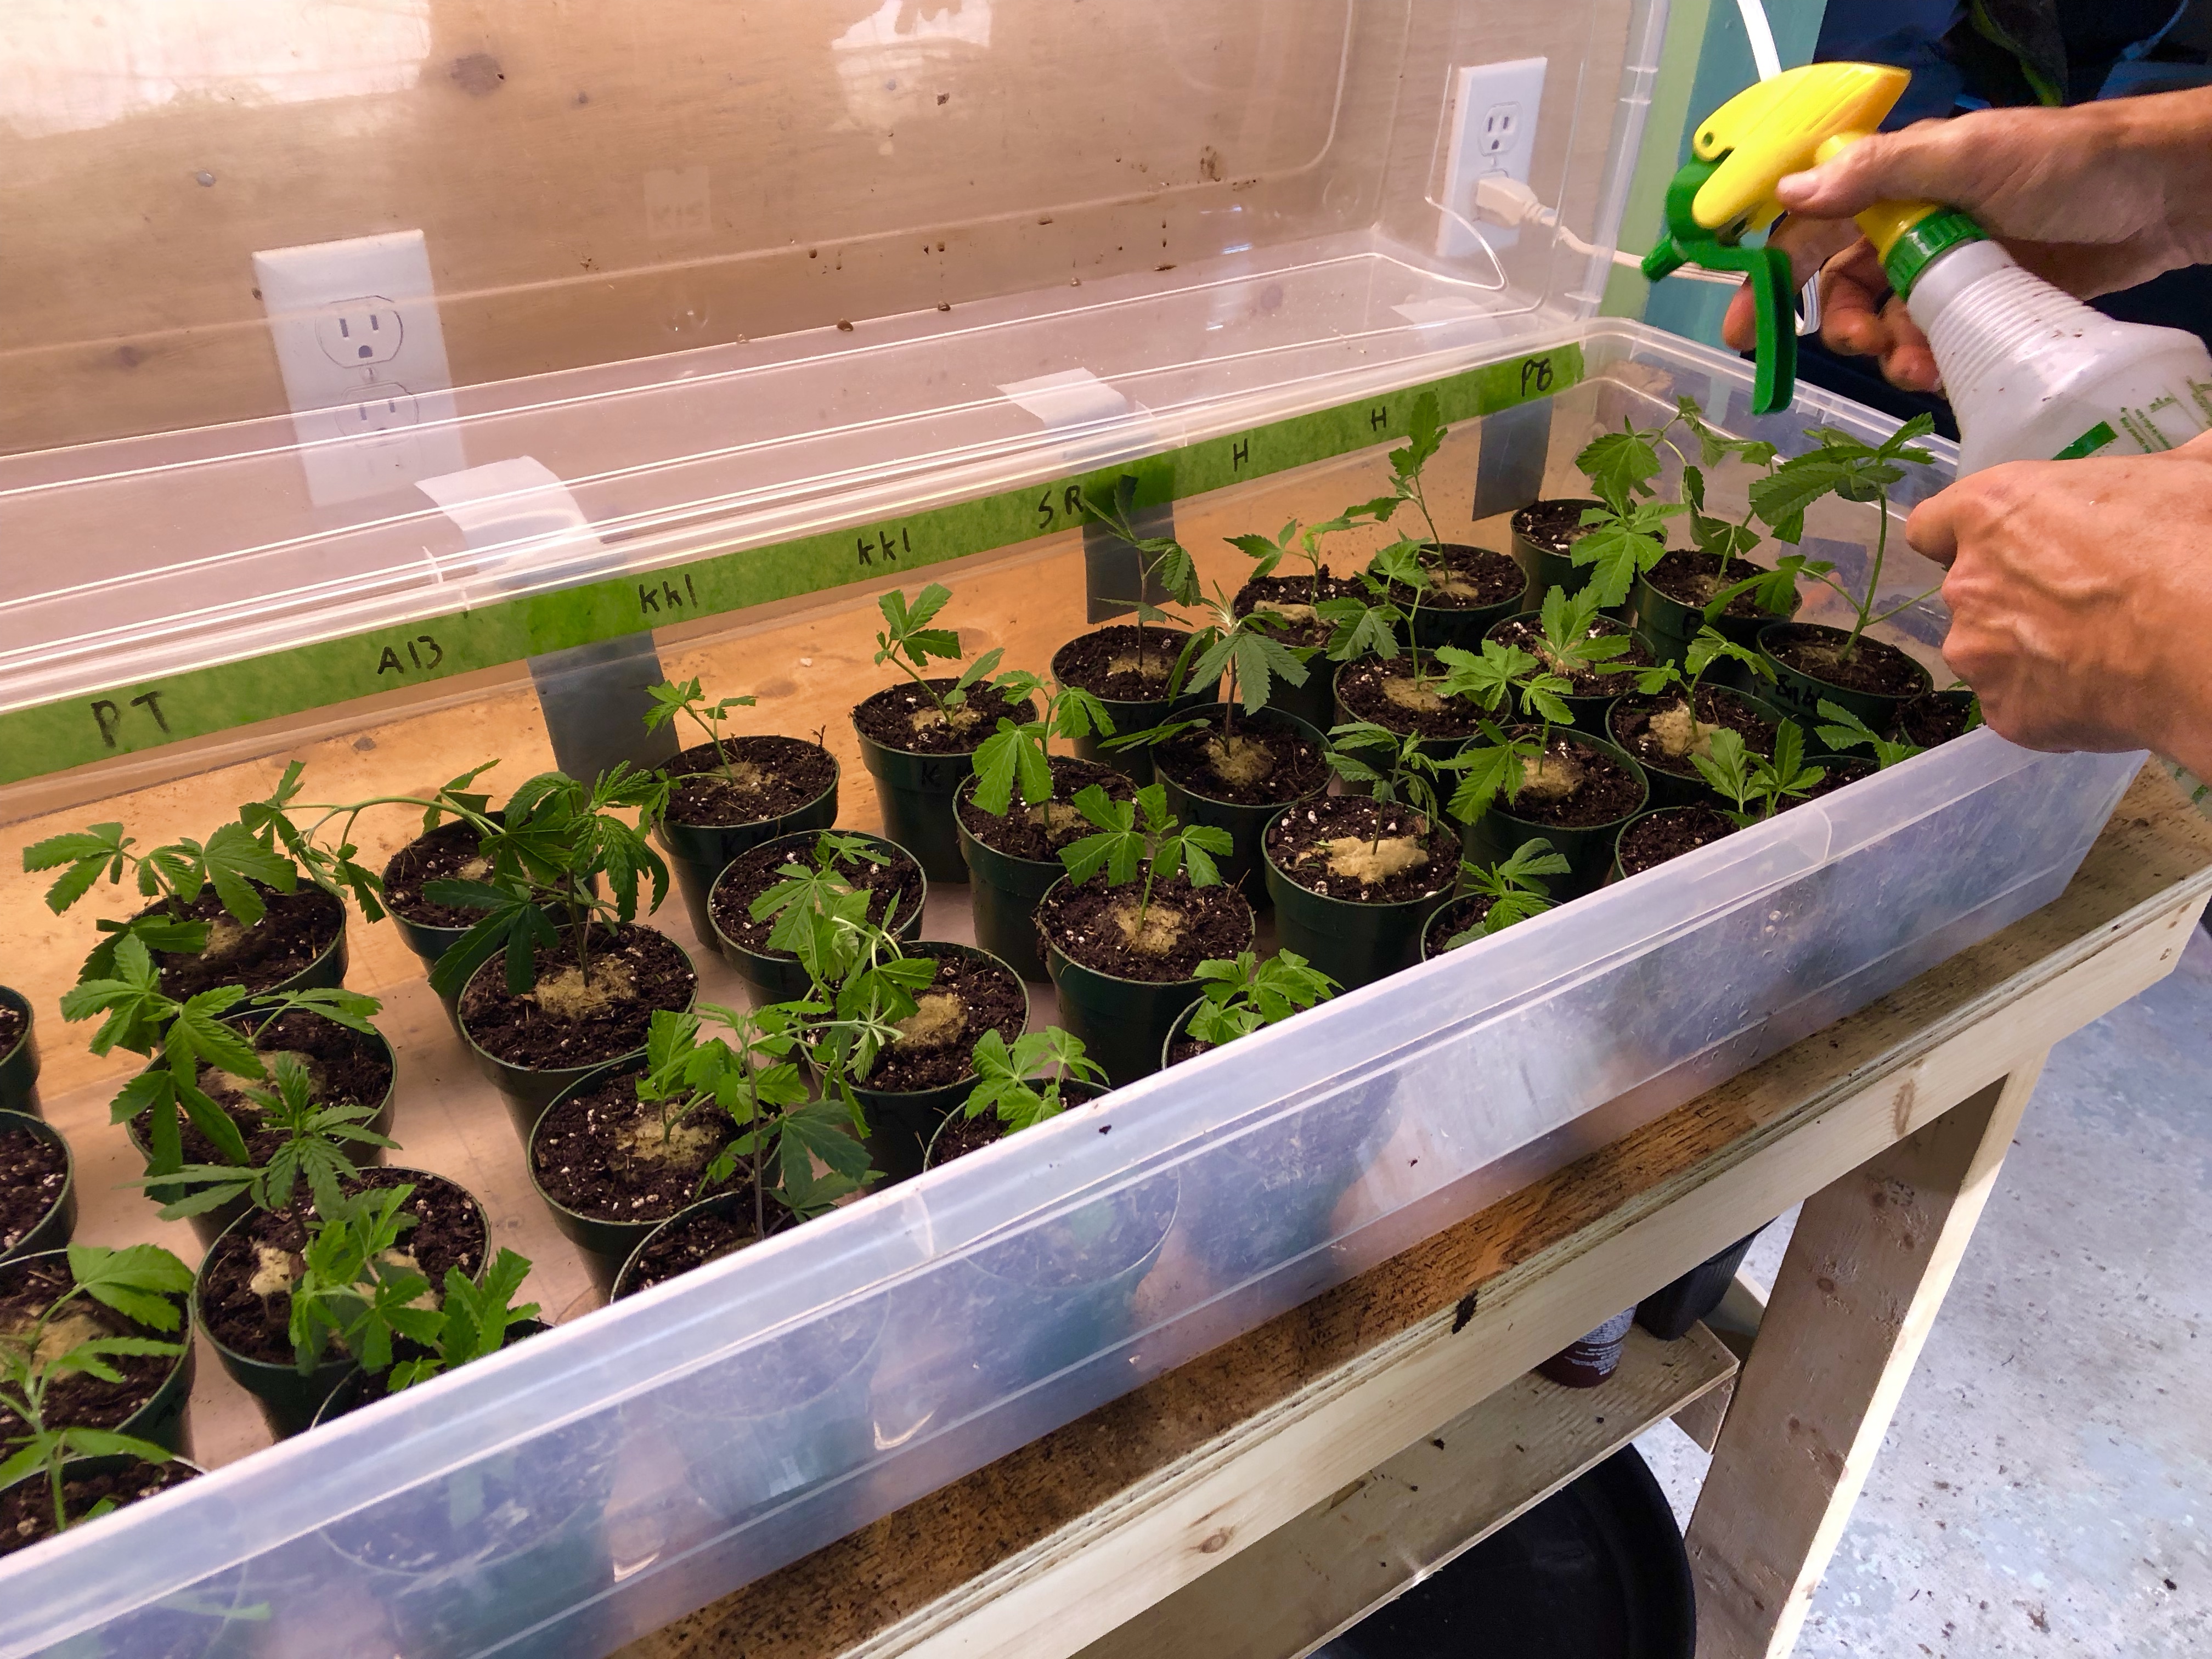
In the meantime, I’m taking 6 cuttings from each of the 6 strains (that I am currently growing) so that I can propagating 36 new plants that will be “clones” or exact duplicates of the plants the cuttings were taken from.
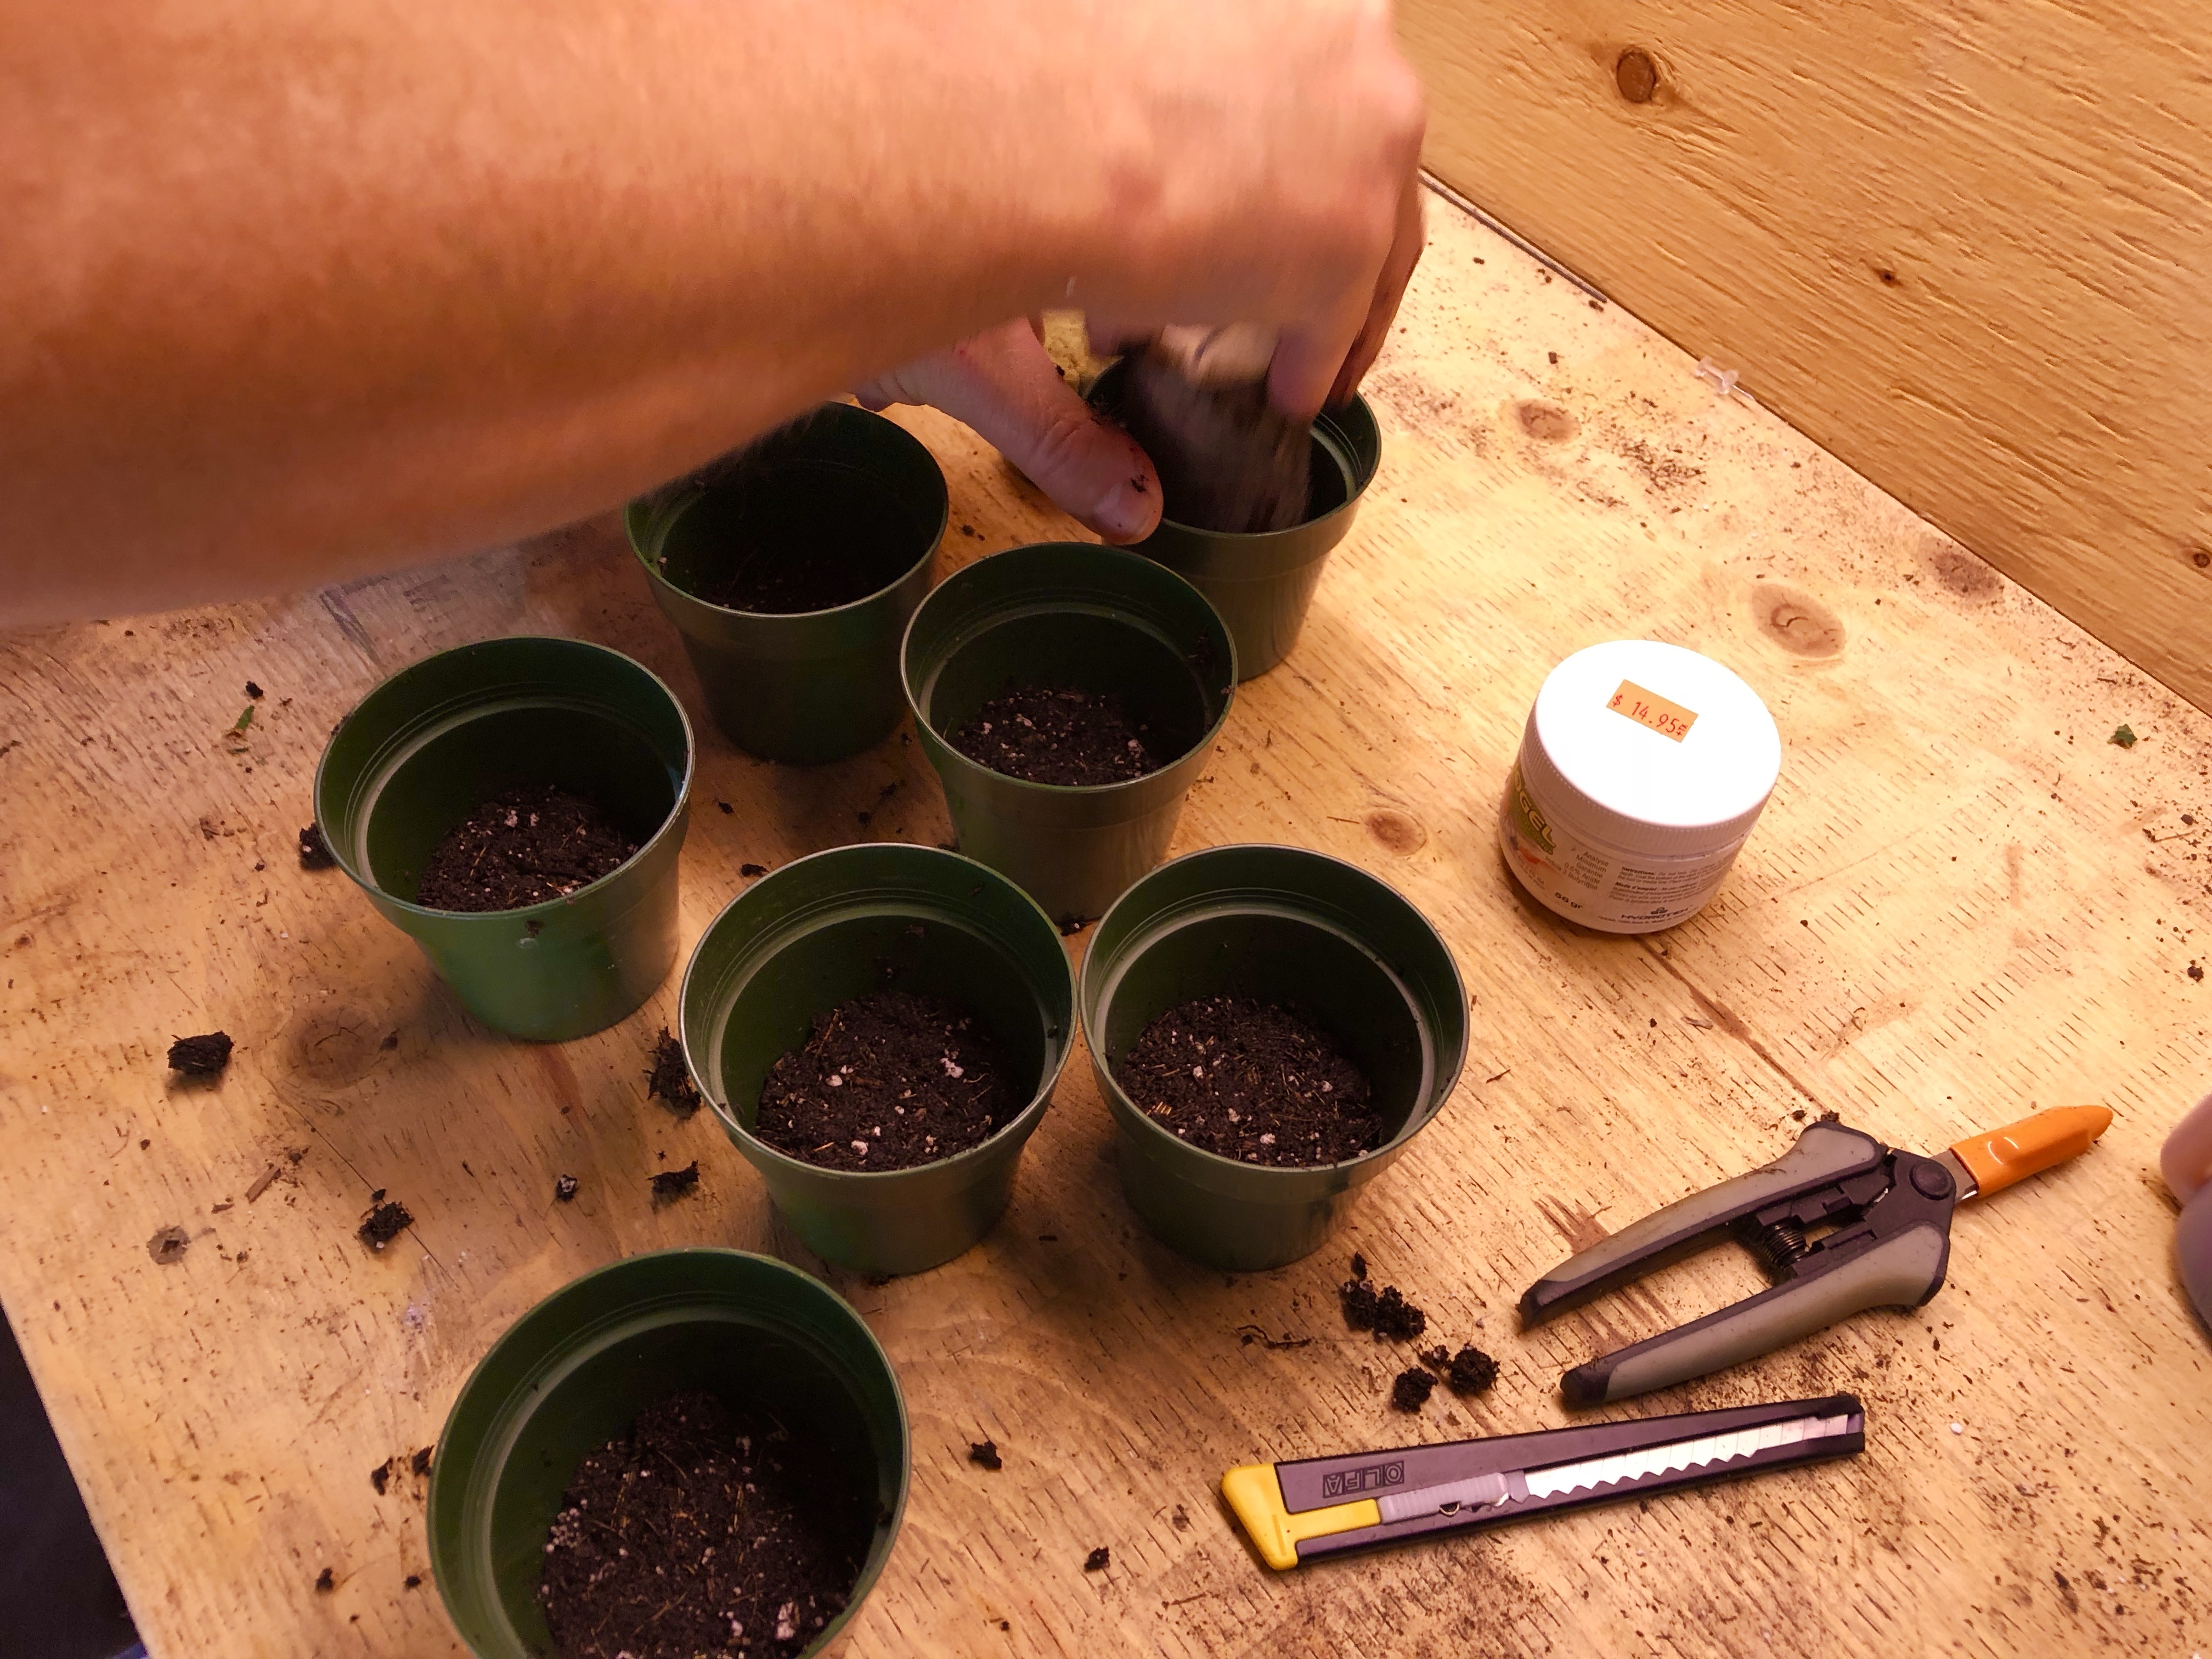
- Step 1: Gather The Tools And Supplies
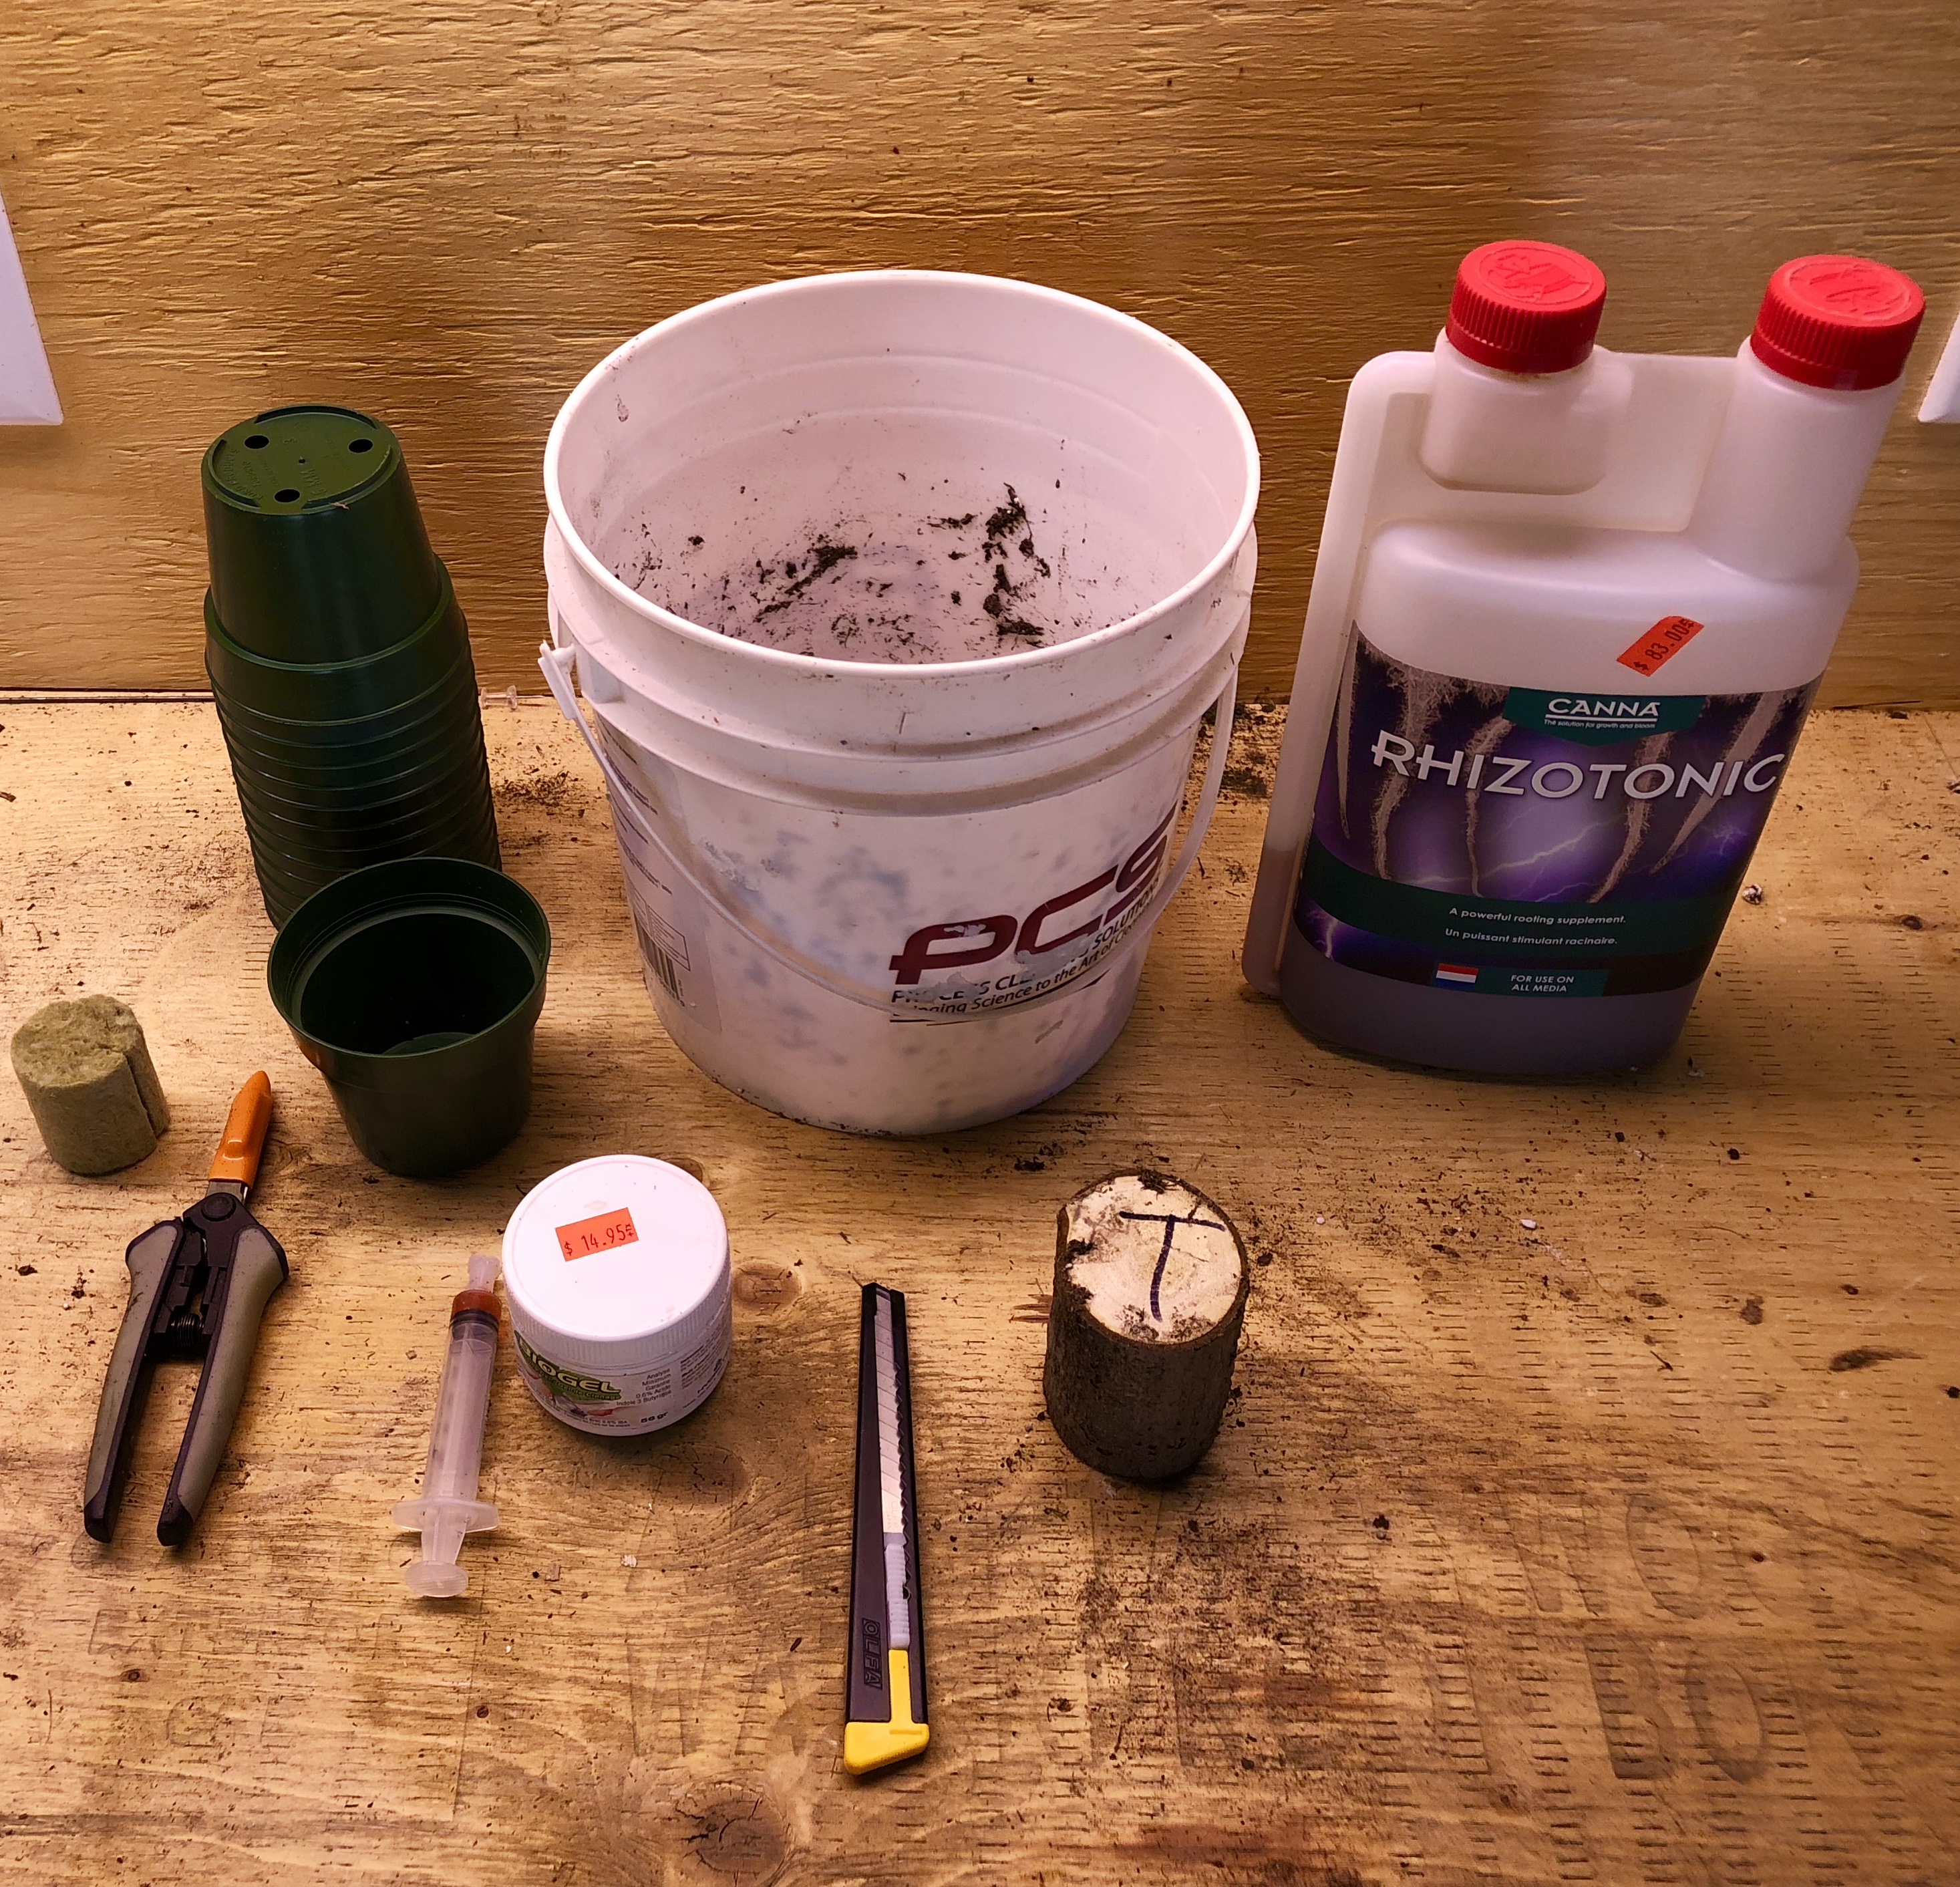
This includes: a smaller pail to hold your growing medium; Enough small pots to match the number of clones you plant; a razor blade; a tamping device; a syringe; a glass dropper; cutting plugs; trimming sheers; rooting supplements; a ph meter; and phosphoric acid.
- Step 2: Prepare The Growing Medium
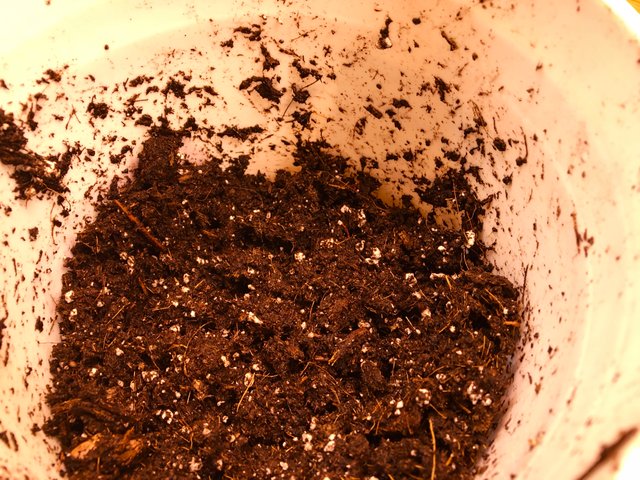
I use a soil product called Promix HPCC. It’s designed to support roots. It balances air porosity, drainage and water retention to ensure the growth of healthy roots.
I mixed this soil with a little bit of water to make the soil mixture moist to the touch.
- Step 3: Fill Each Small Pot 1/3 Full And Tamp Down The Soil Mixture
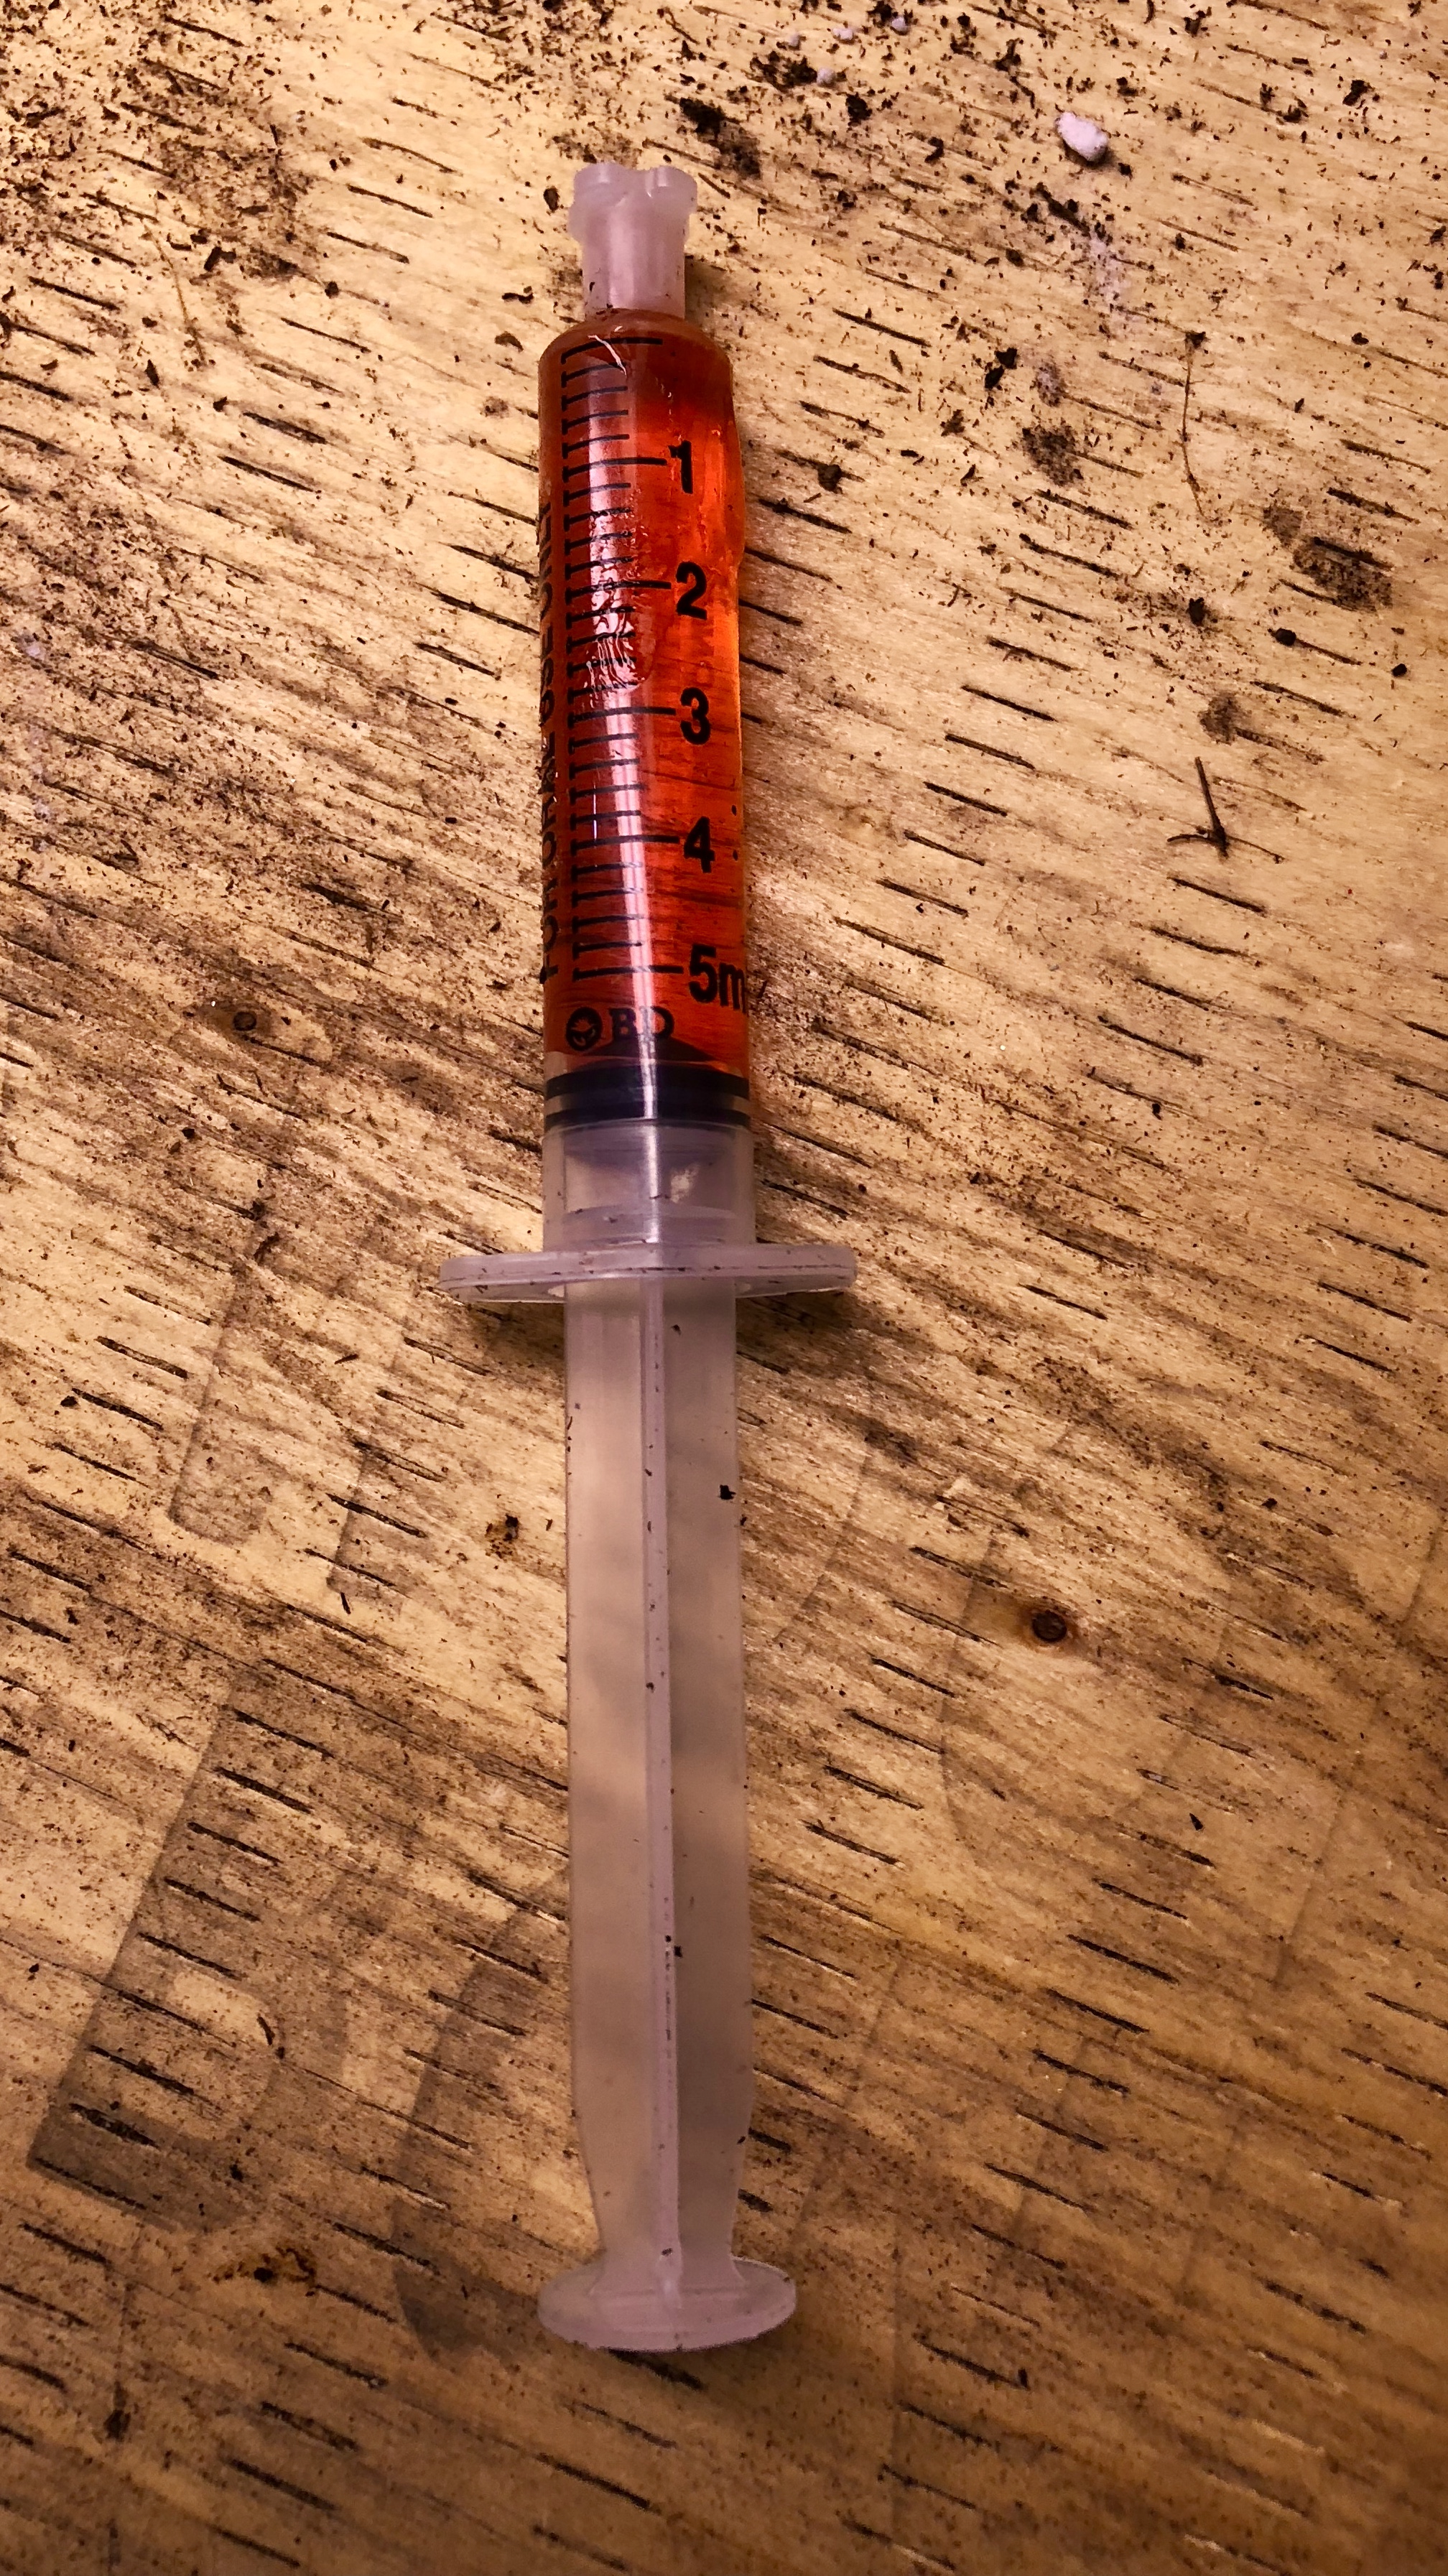
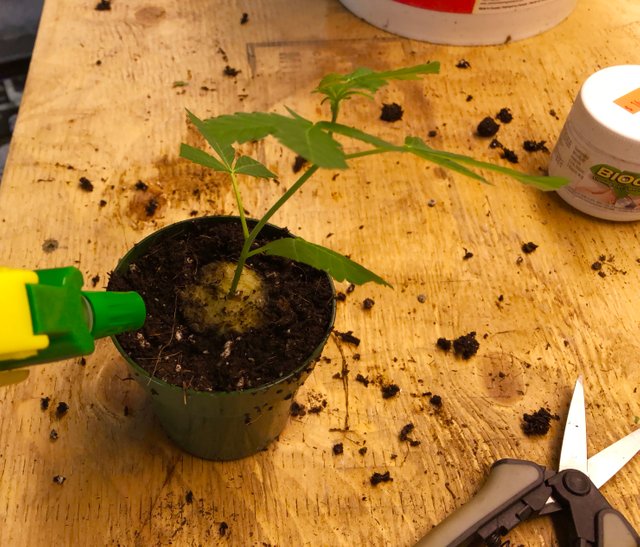
- Step 4: Fill A Suringe With Biogel Cloning Gel
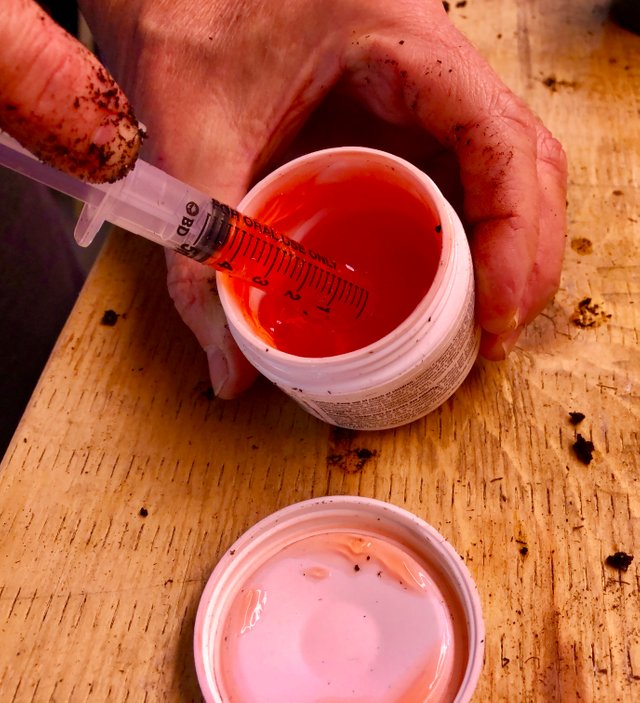
This is a rooting hormone which encourages roots to grow out of the stems of your cuttings.
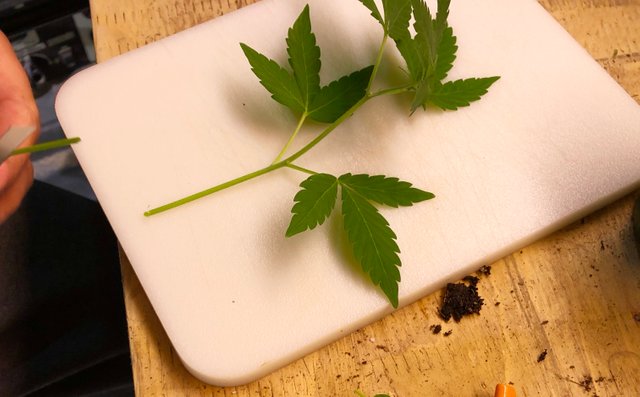
- Step 5: Identify Your Potential Clones
These are stems that are buried at the base or sides of your existing plants. They’ll have too far to grow (in the growing time period left) to reach sufficient light to produce a flower. If you don’t take these stems, they will take nutrients and energy away from the stems that have a better chance of producing more potent, bigger buds because those stems have already grown to reach the light they ‘ll require.
- Step 6: Cut The Stem At Its Node
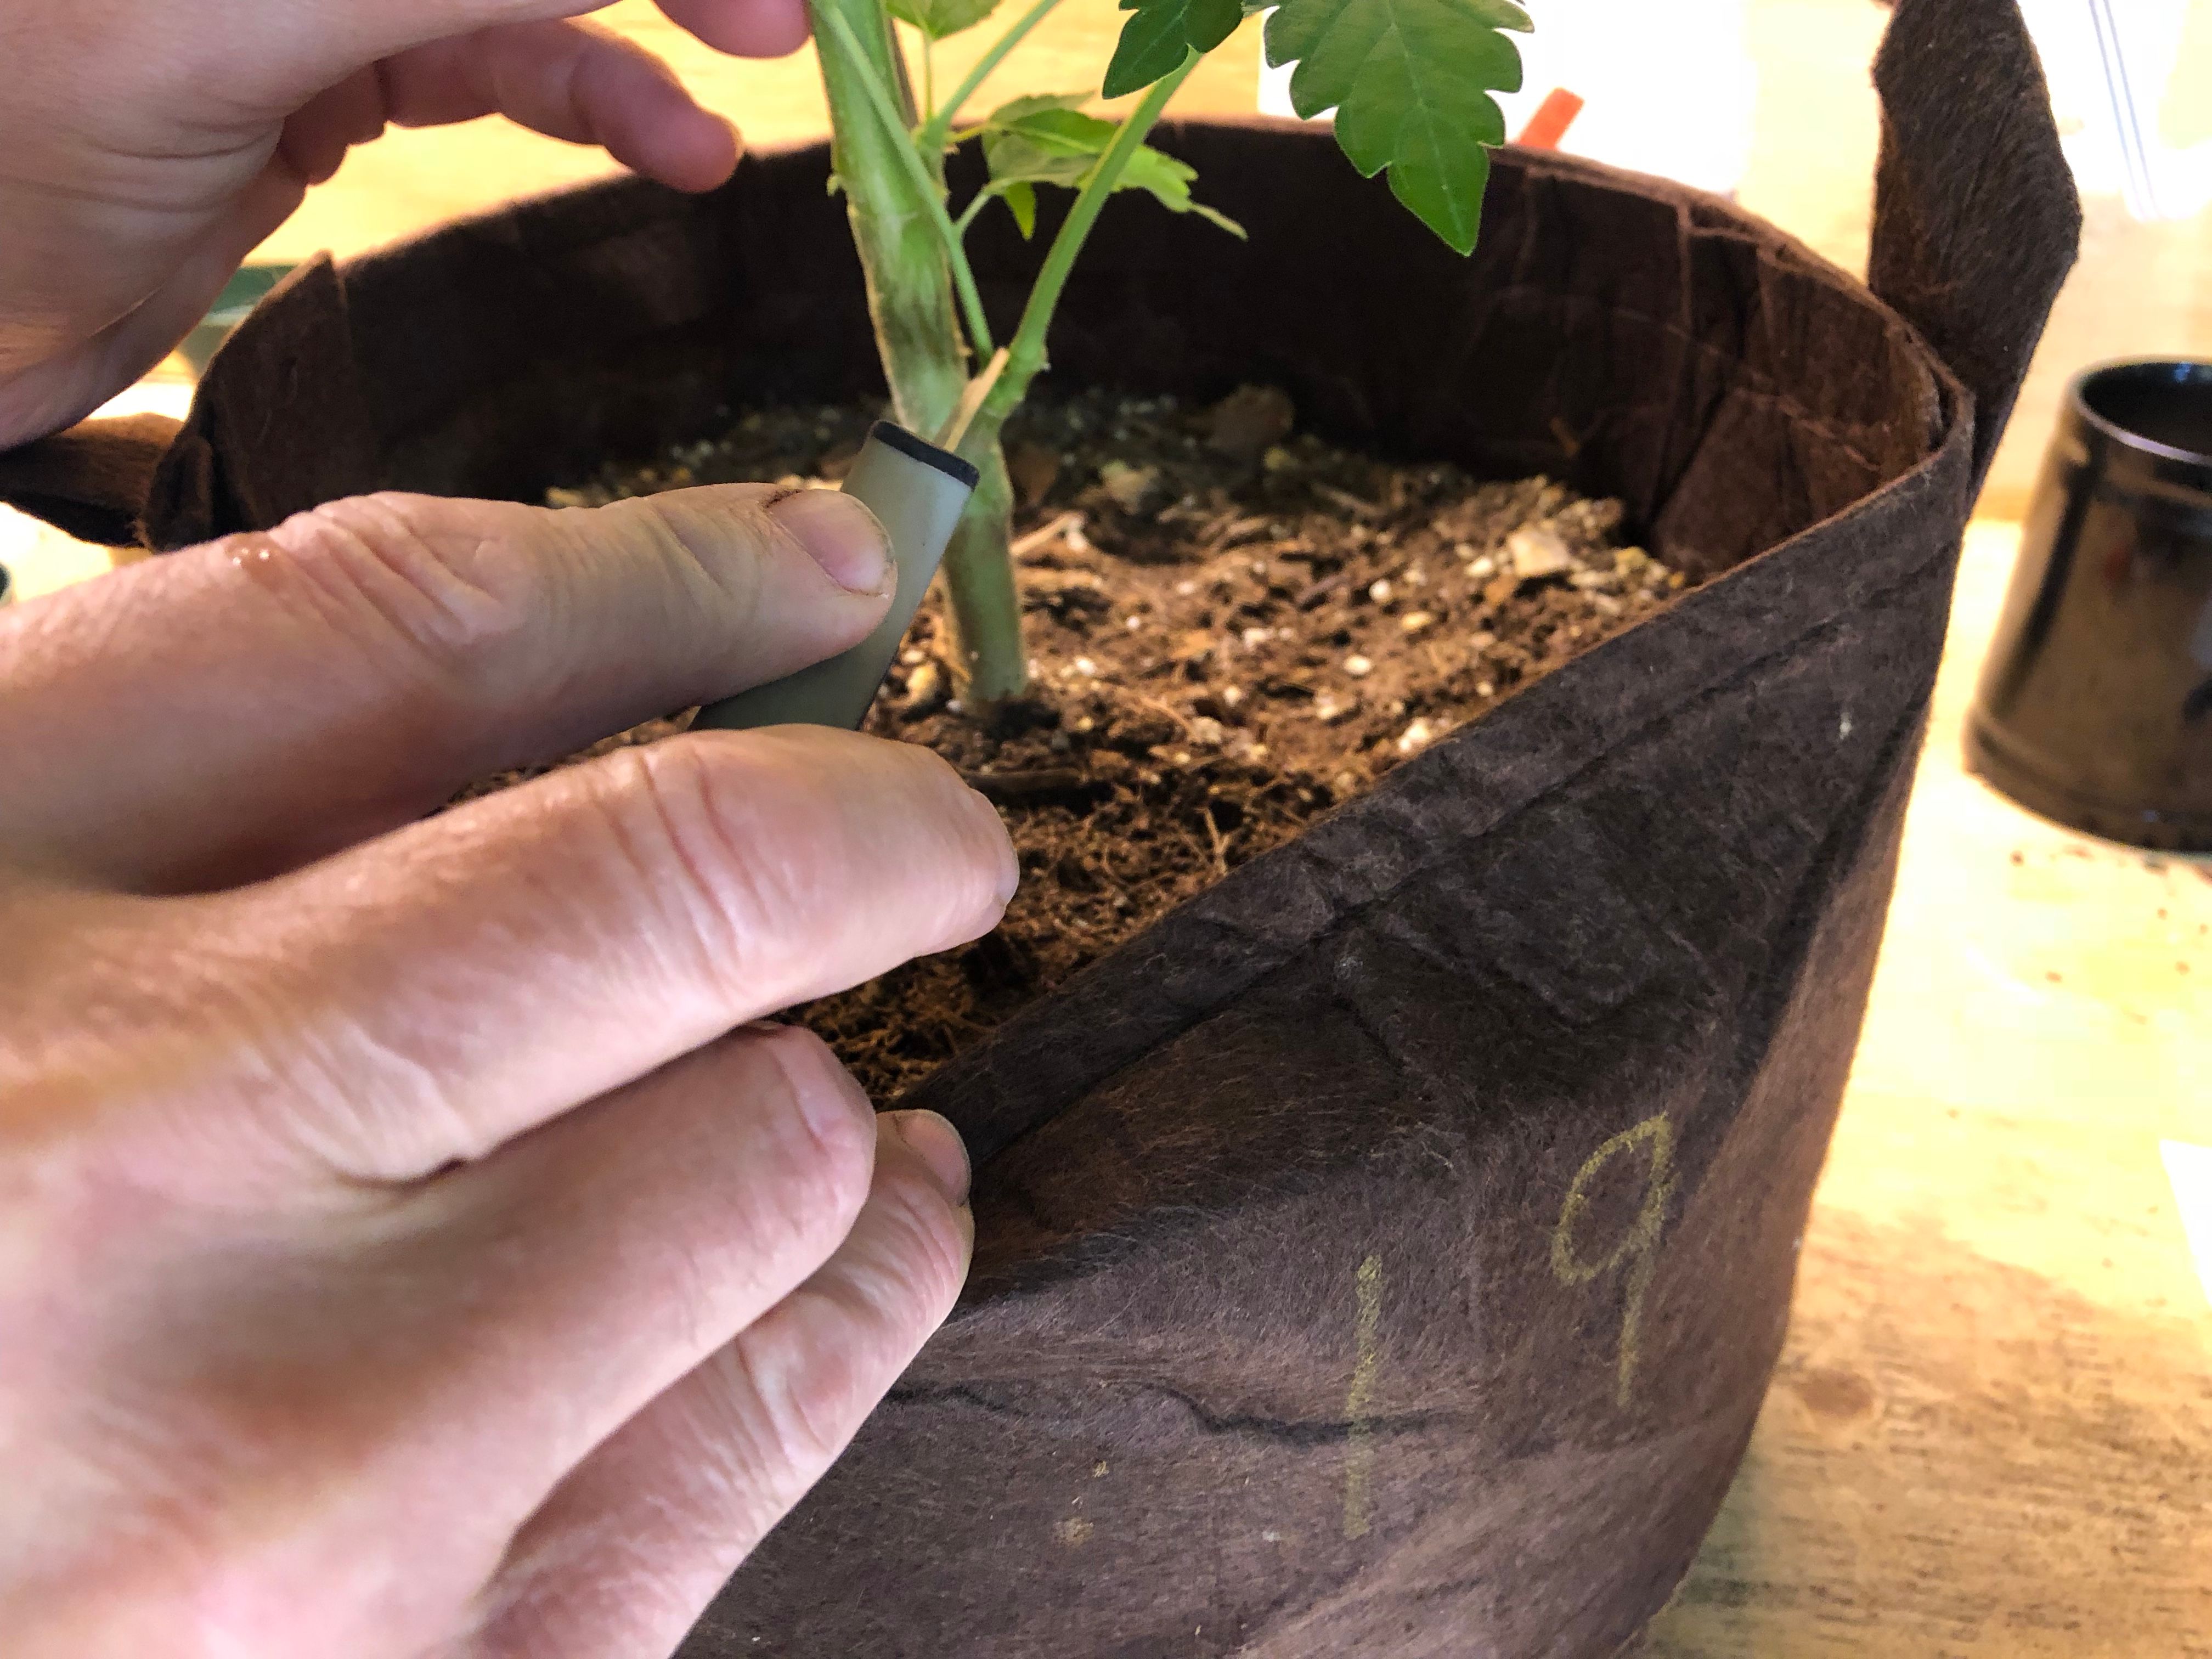
I cut the stem on an angle, at its node to improve the ability of the stem to grow a root.
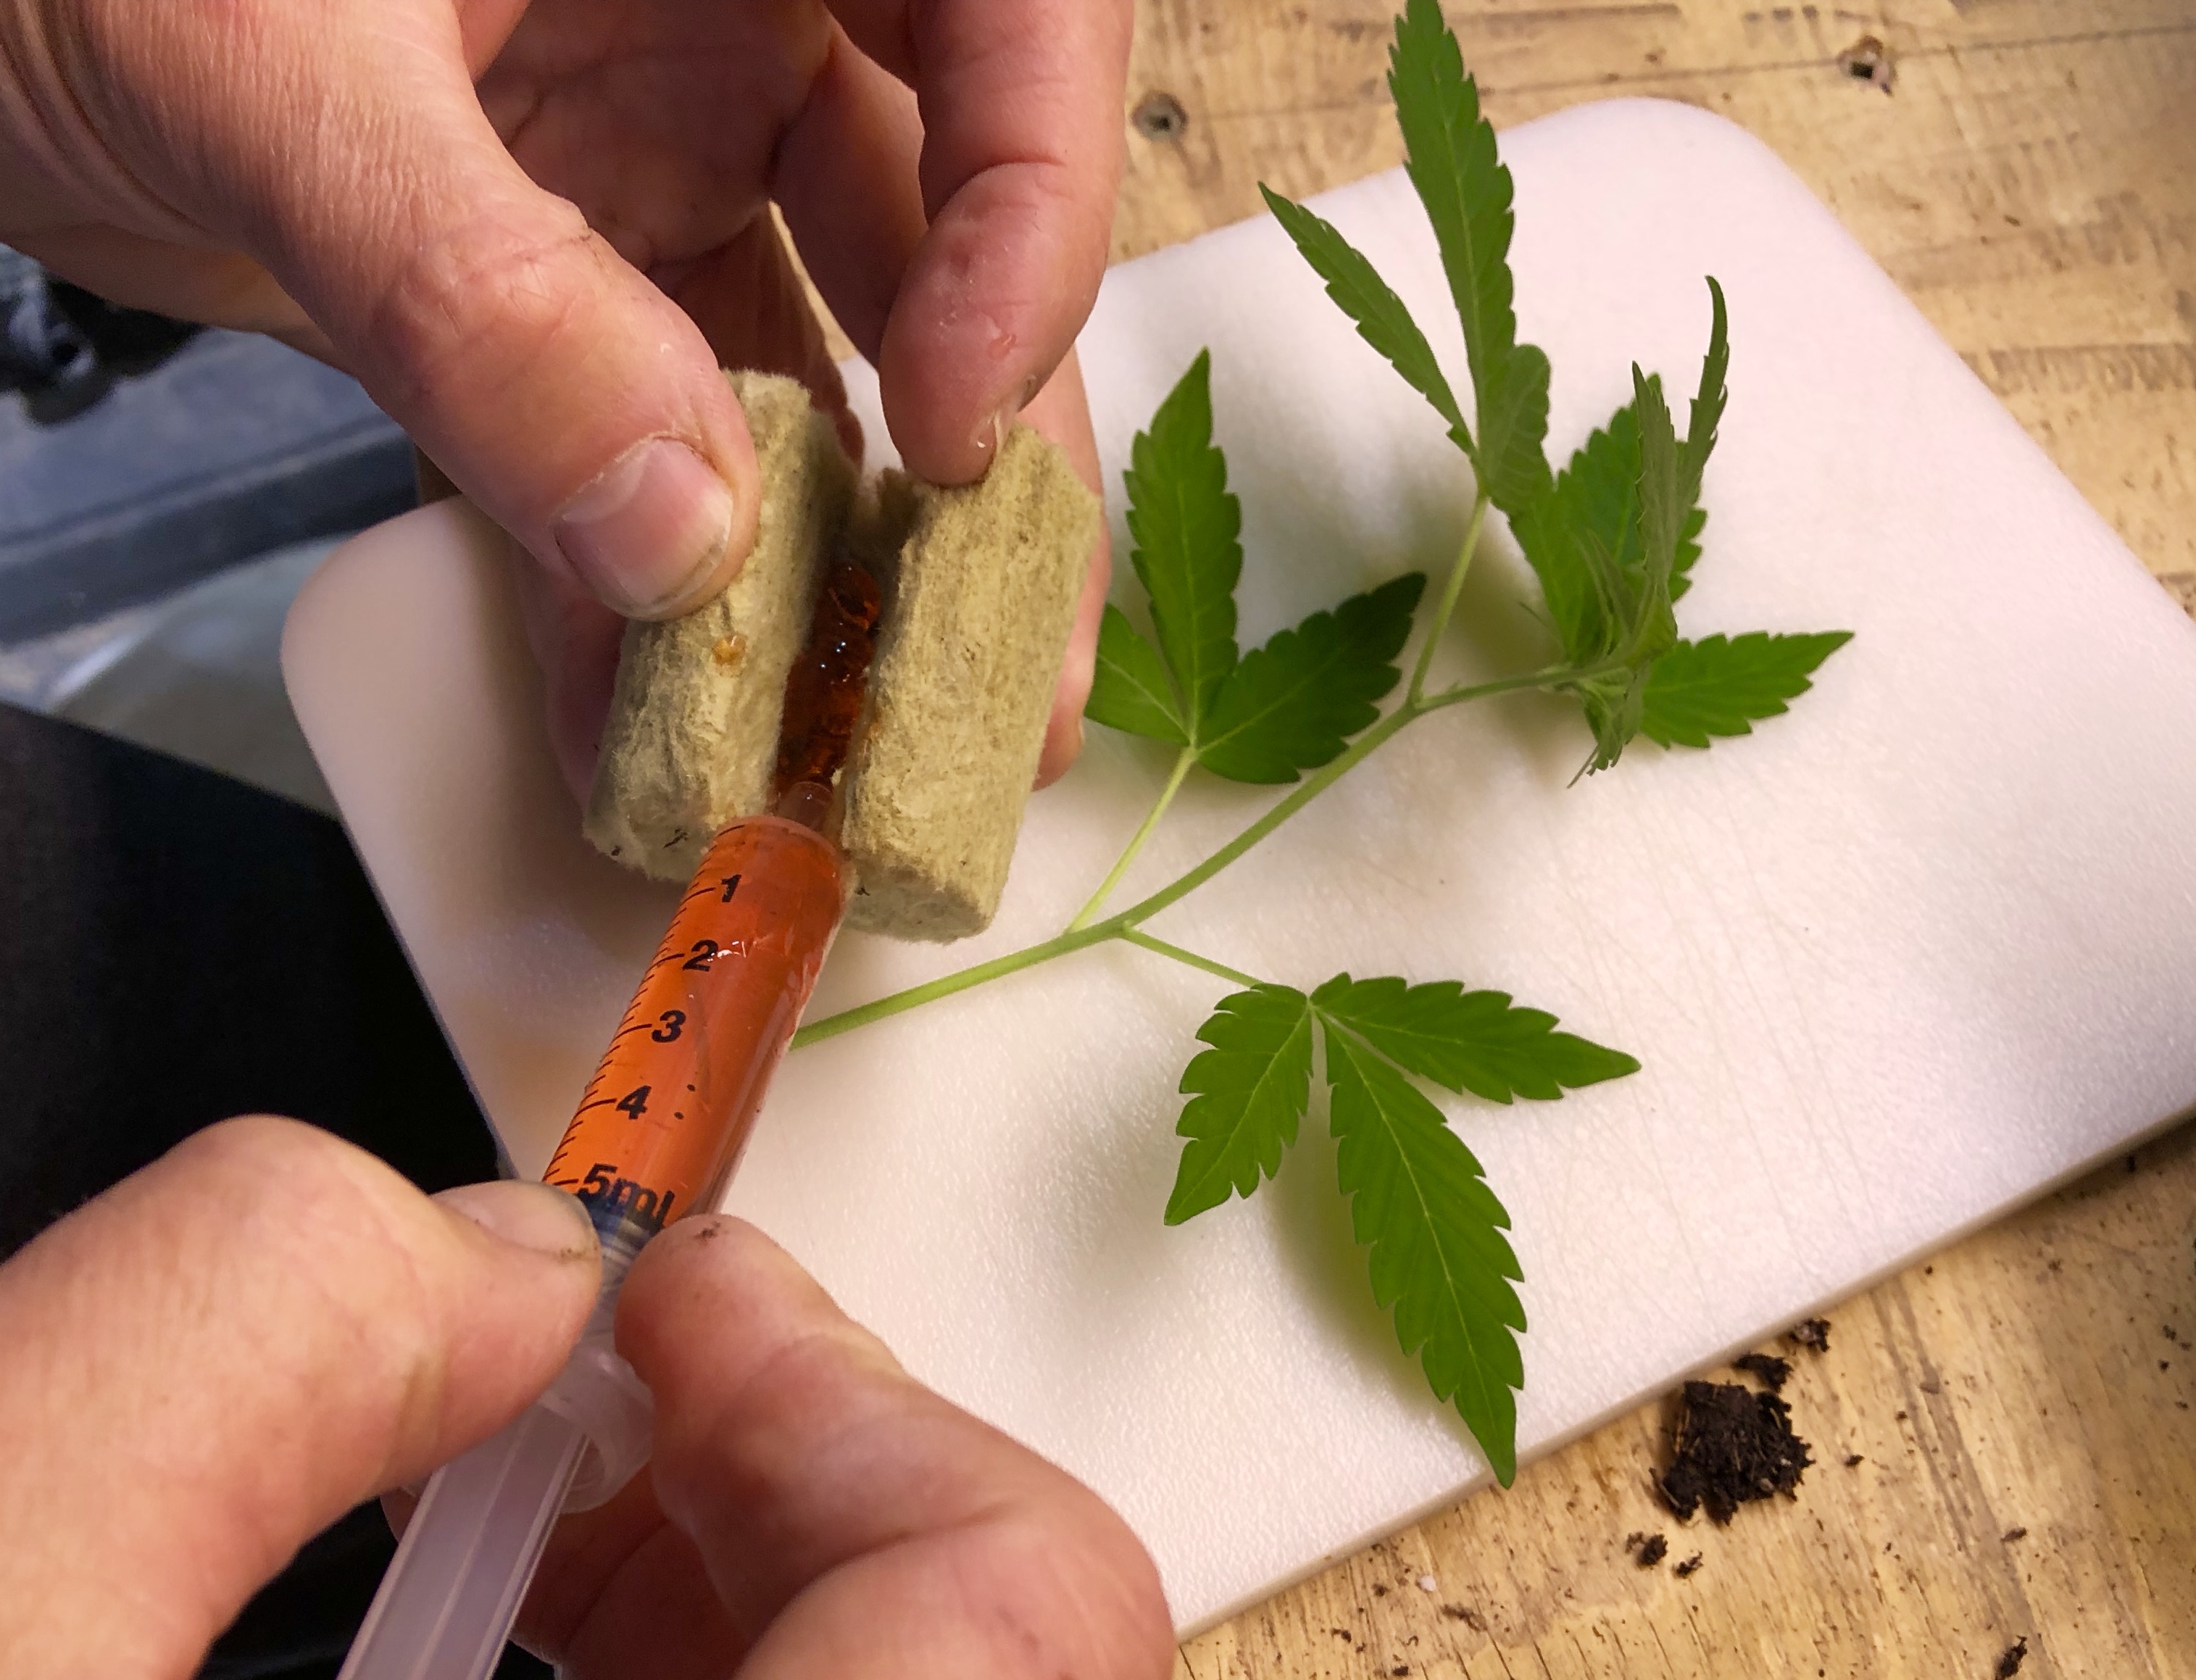
- Step 7: Dispense A Line Of Biogel Rooting Hormone In The Centre Of The Inside Of A Cutting Plug
In the photo (below) you’ll see what a cutting plug looks like. You can buy these or you can make your own. They are made out of rock wool (an insulation, just like what you could use to insulate a house with.)
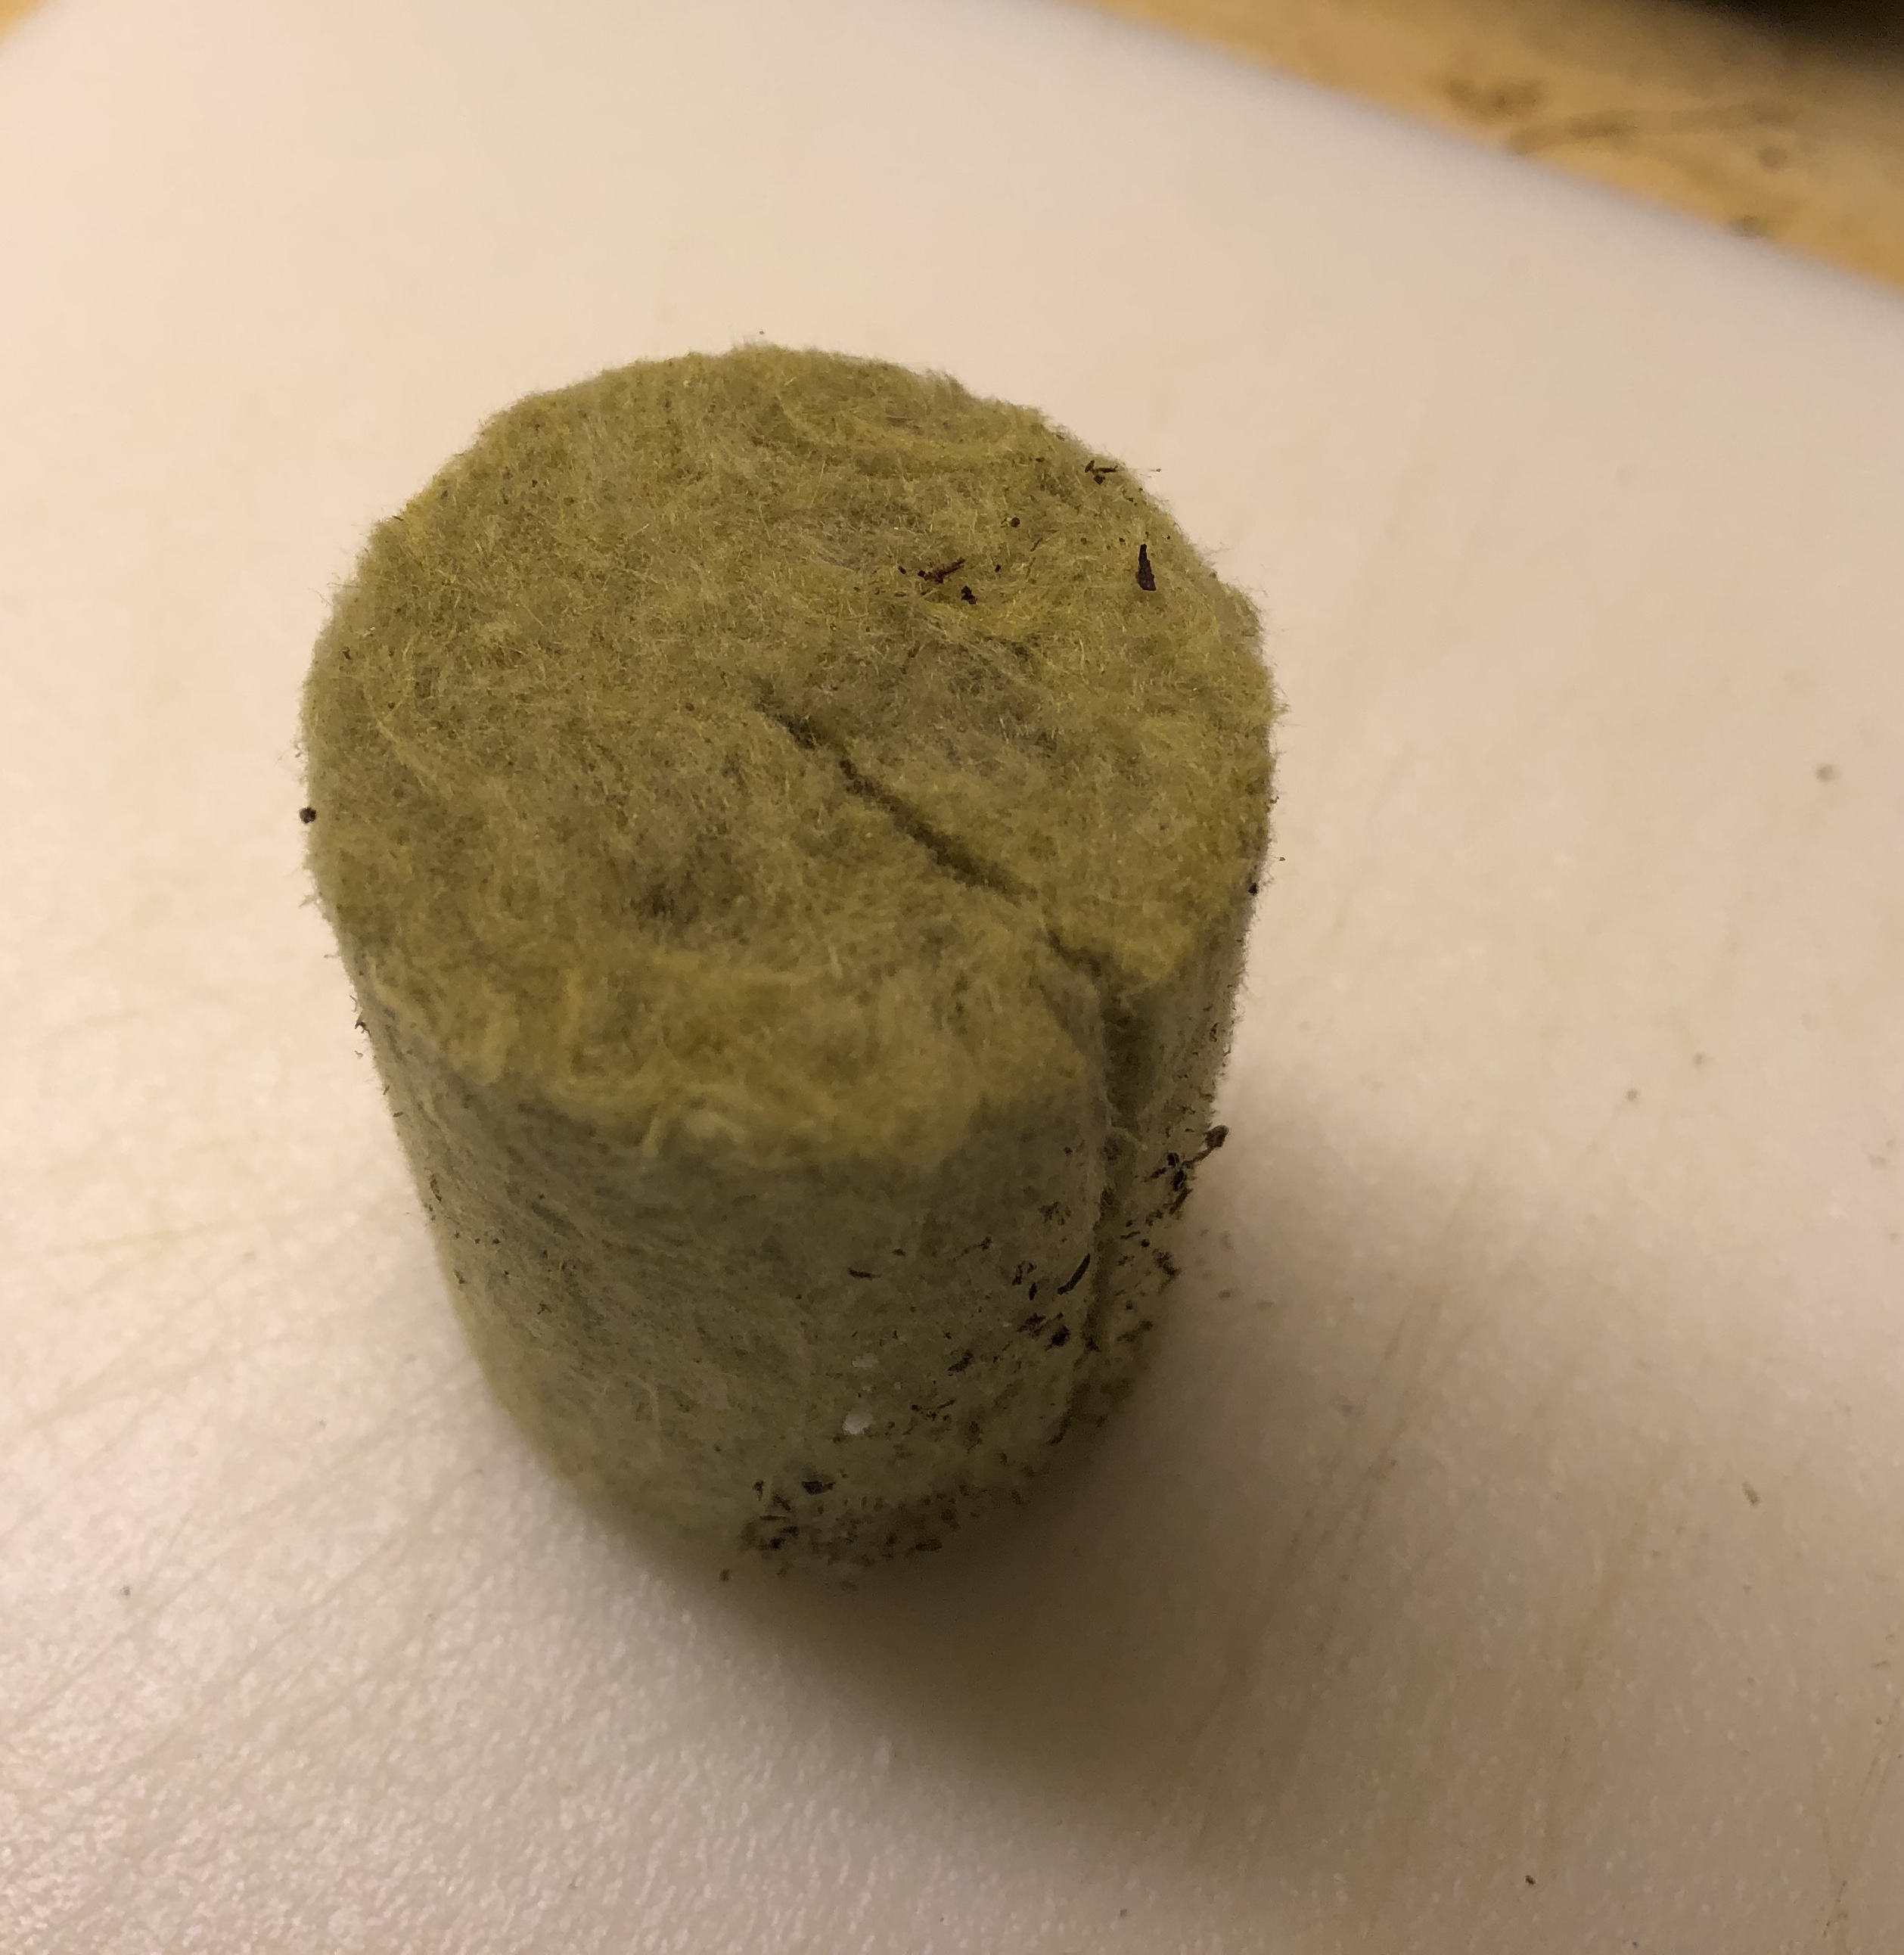
These are commercially made and they come pre-cut.
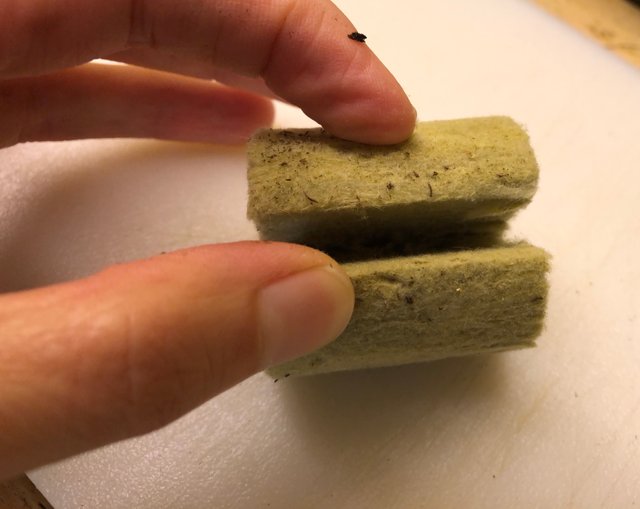
Run a bead of rooting hormone in the centre of the plug and extend that bead or line a little bit further towards each end of the plug. You don’t need to go all the way to the ends of both ends. The hormone stimulates roots to grow where it comes in contact with the sides and cut-end of the stem.
- Step 8: Put Rooting Plug In Centre of A Small Pot And Add Soil Mixture
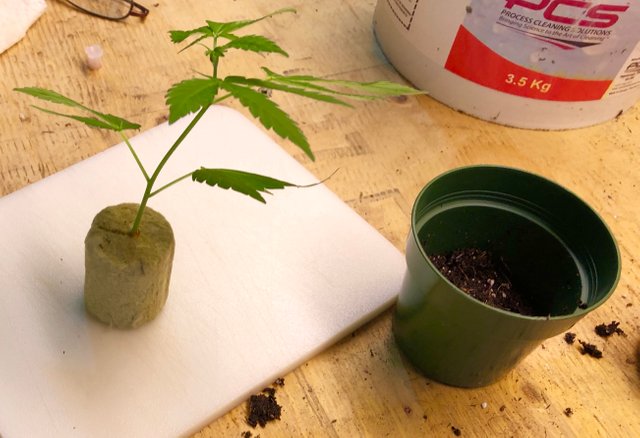
Add more of the soil mixture to hold the plug and stem you are rooting in the centre of a small pot.
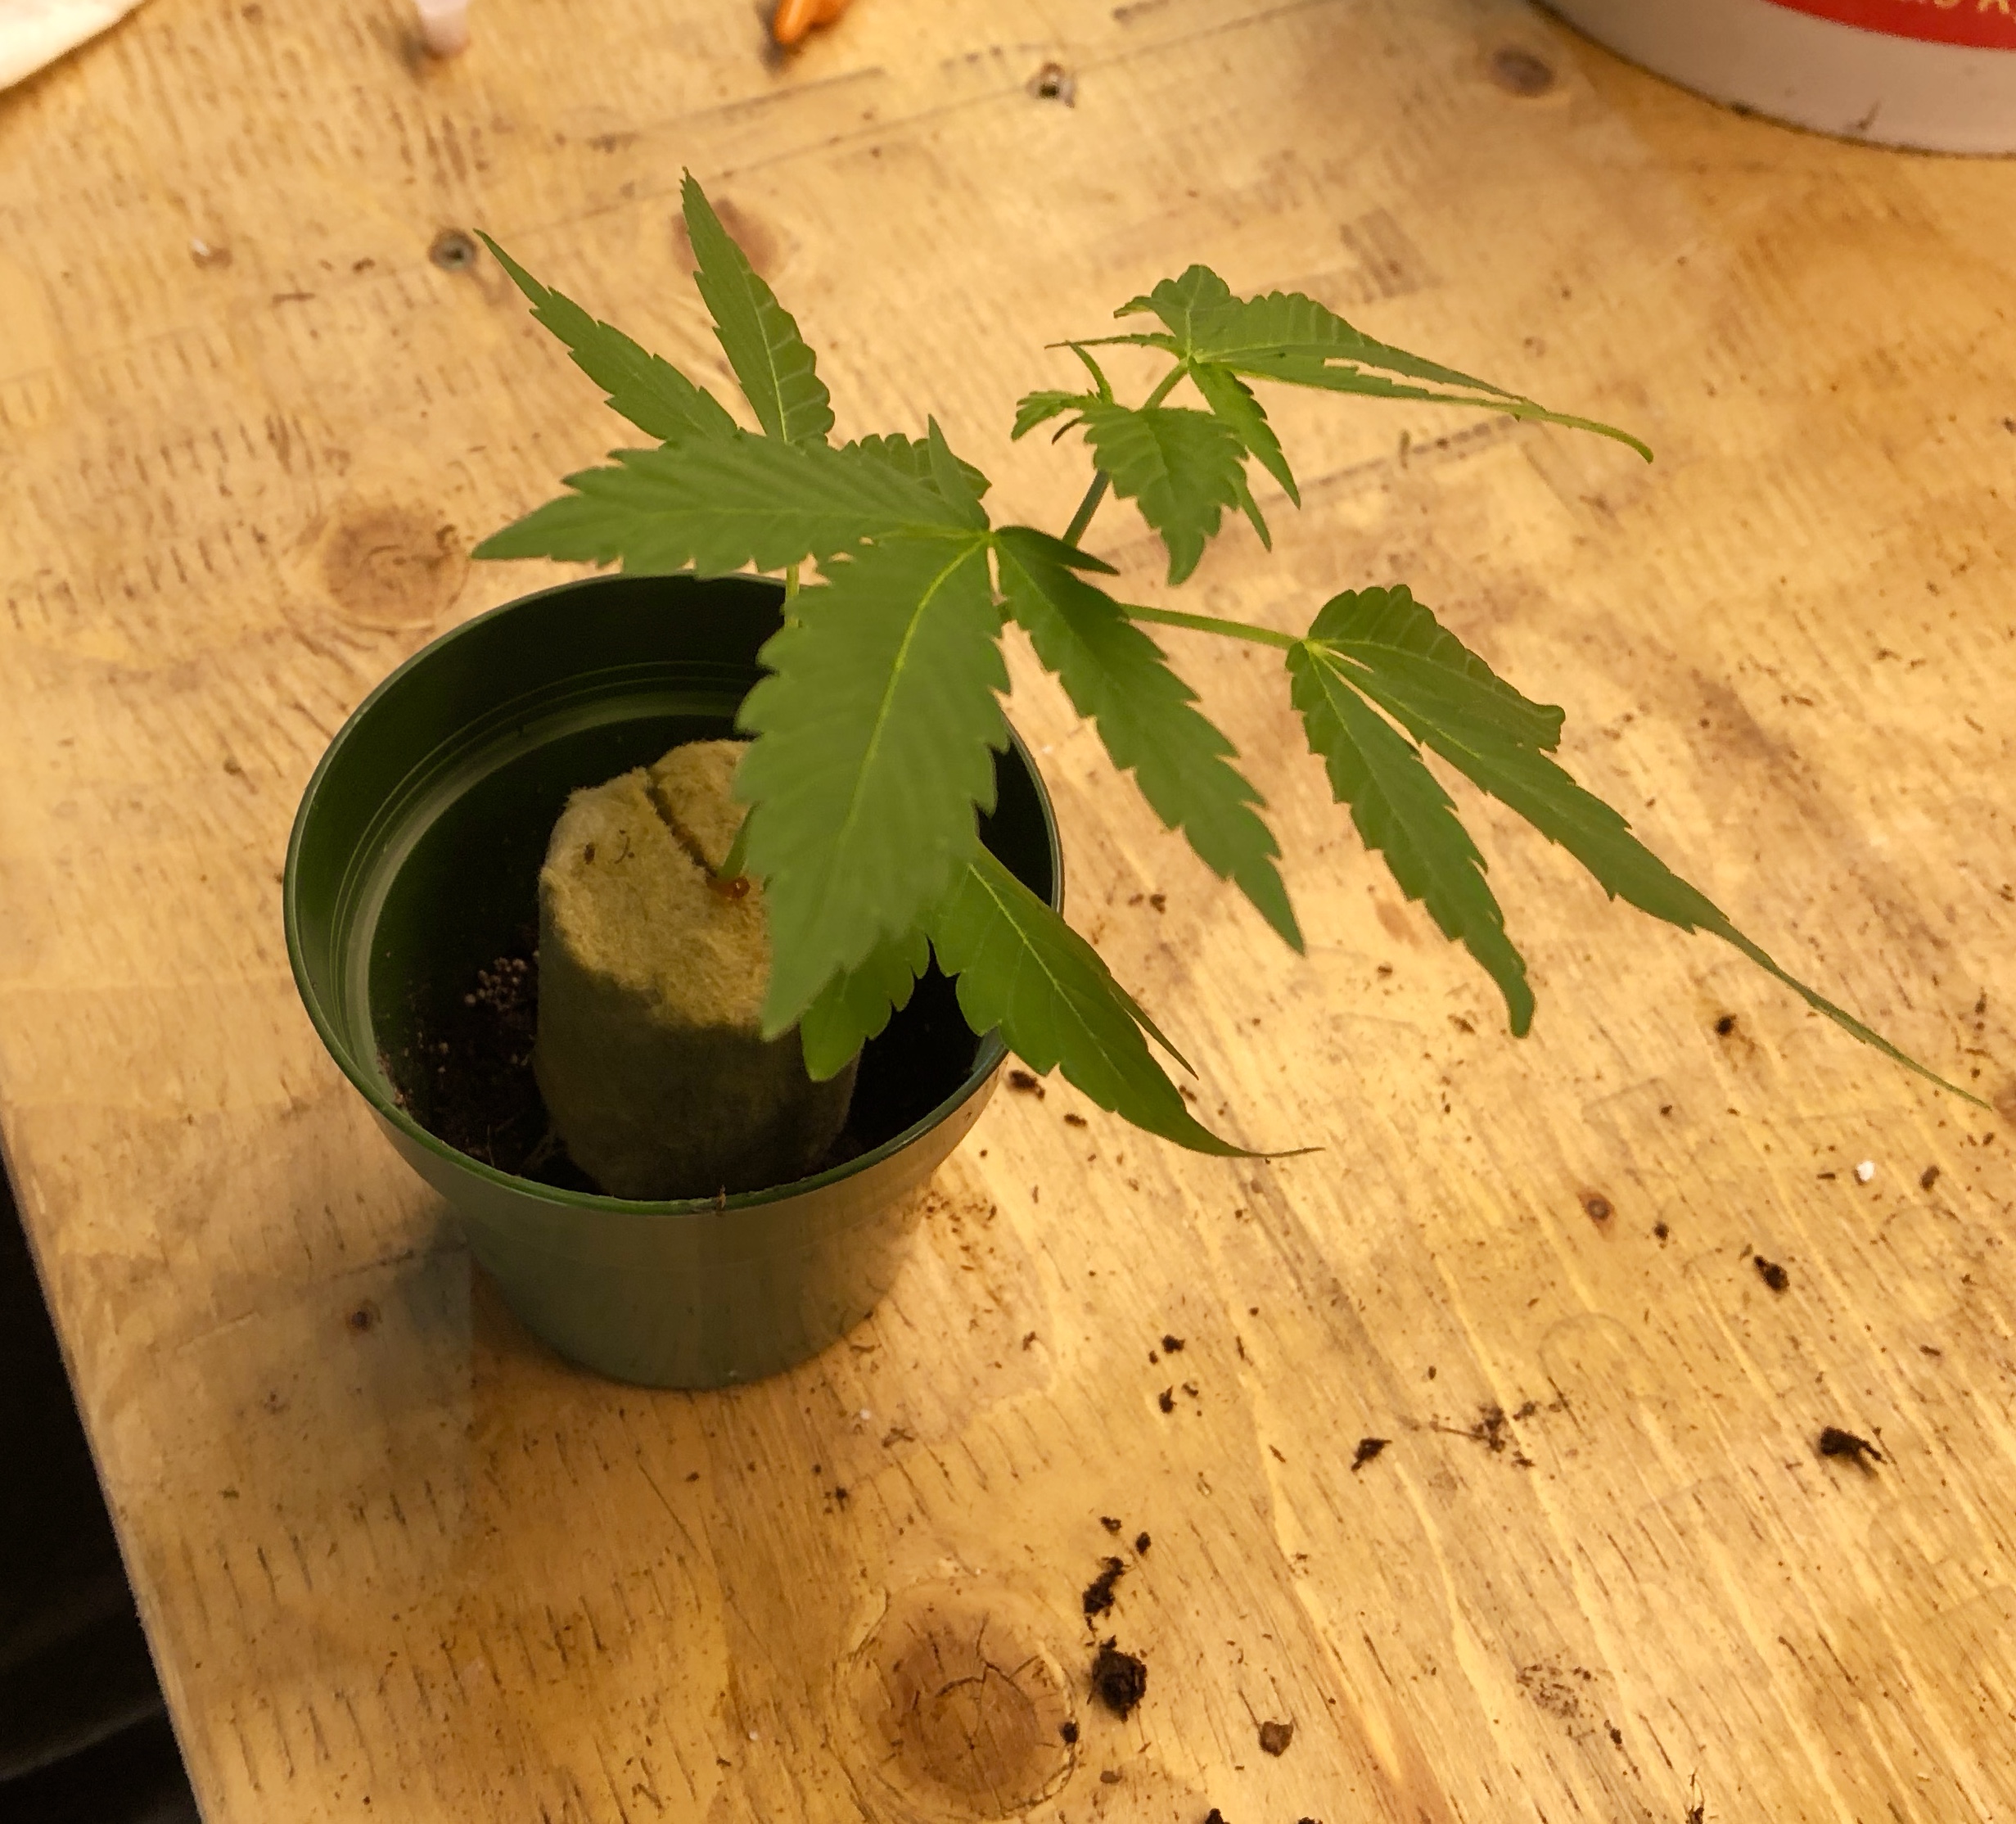
The top of the rooting plug should still be visible and should not be completely covered over with soil. You need to be able to saturate it with rooting supplement.
- Step 9: Cut The Tips Of The Remaing Leaves On The Stem
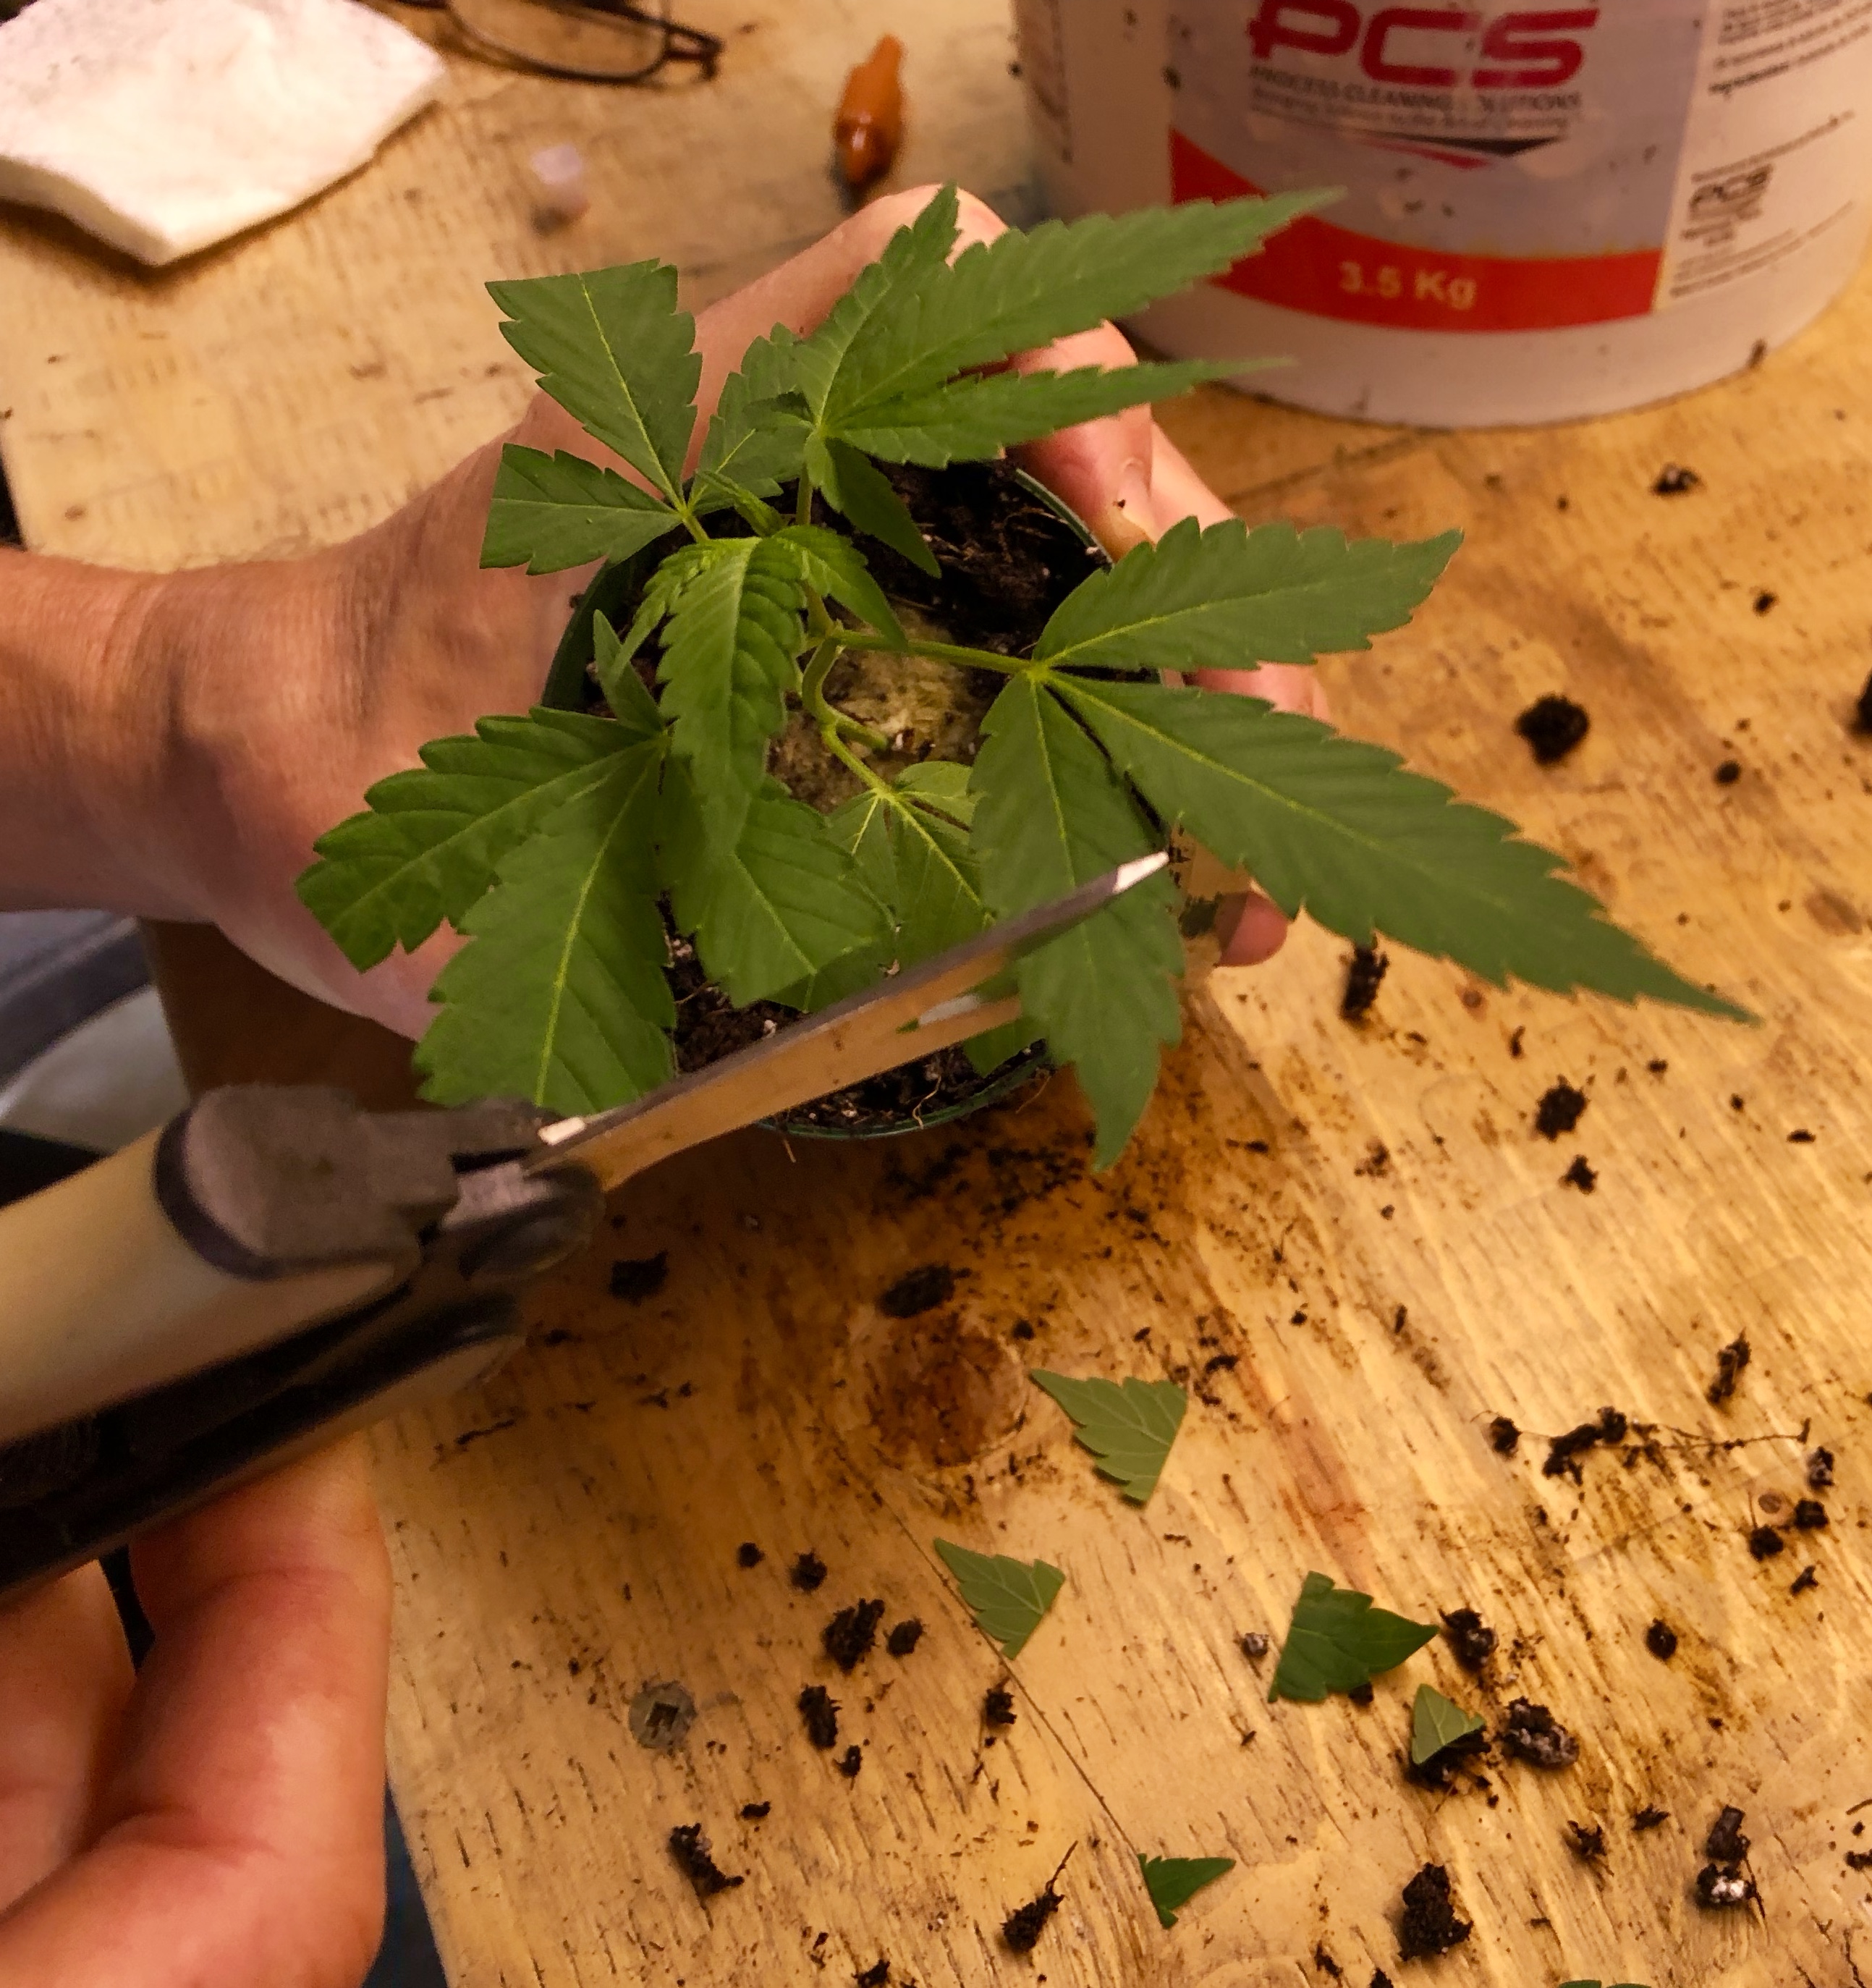
By cutting the tips of of the existing leaves on your original cutting, it encourages the stem to grow roots instead of using its energy to grow bigger leaves, Yes, it’s a hell of a lot of trauma to the stem at one time, but the strongest will survive and that’s the main goal, to be working with the strongest stems that you can.
- Step 10: Mix The Rooting Supplement In A Watering Container
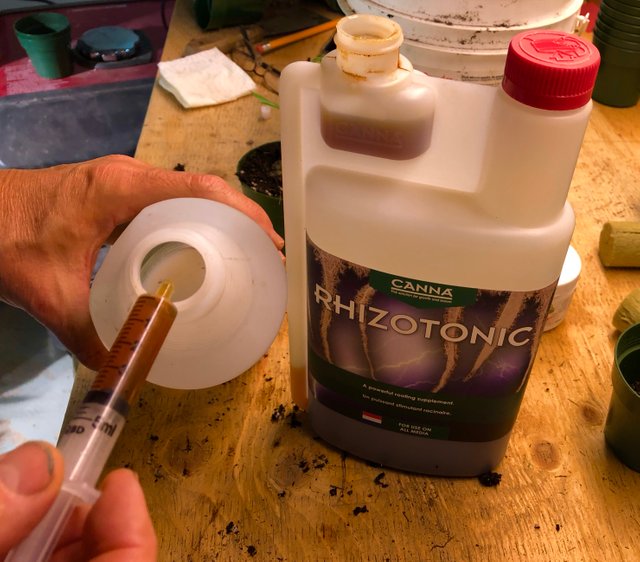
Simply mix the rooting supplement into the water according to the ratios given by the product manufacturer.
- Step 11: Check The PH Of The Water And Supplement Mixture
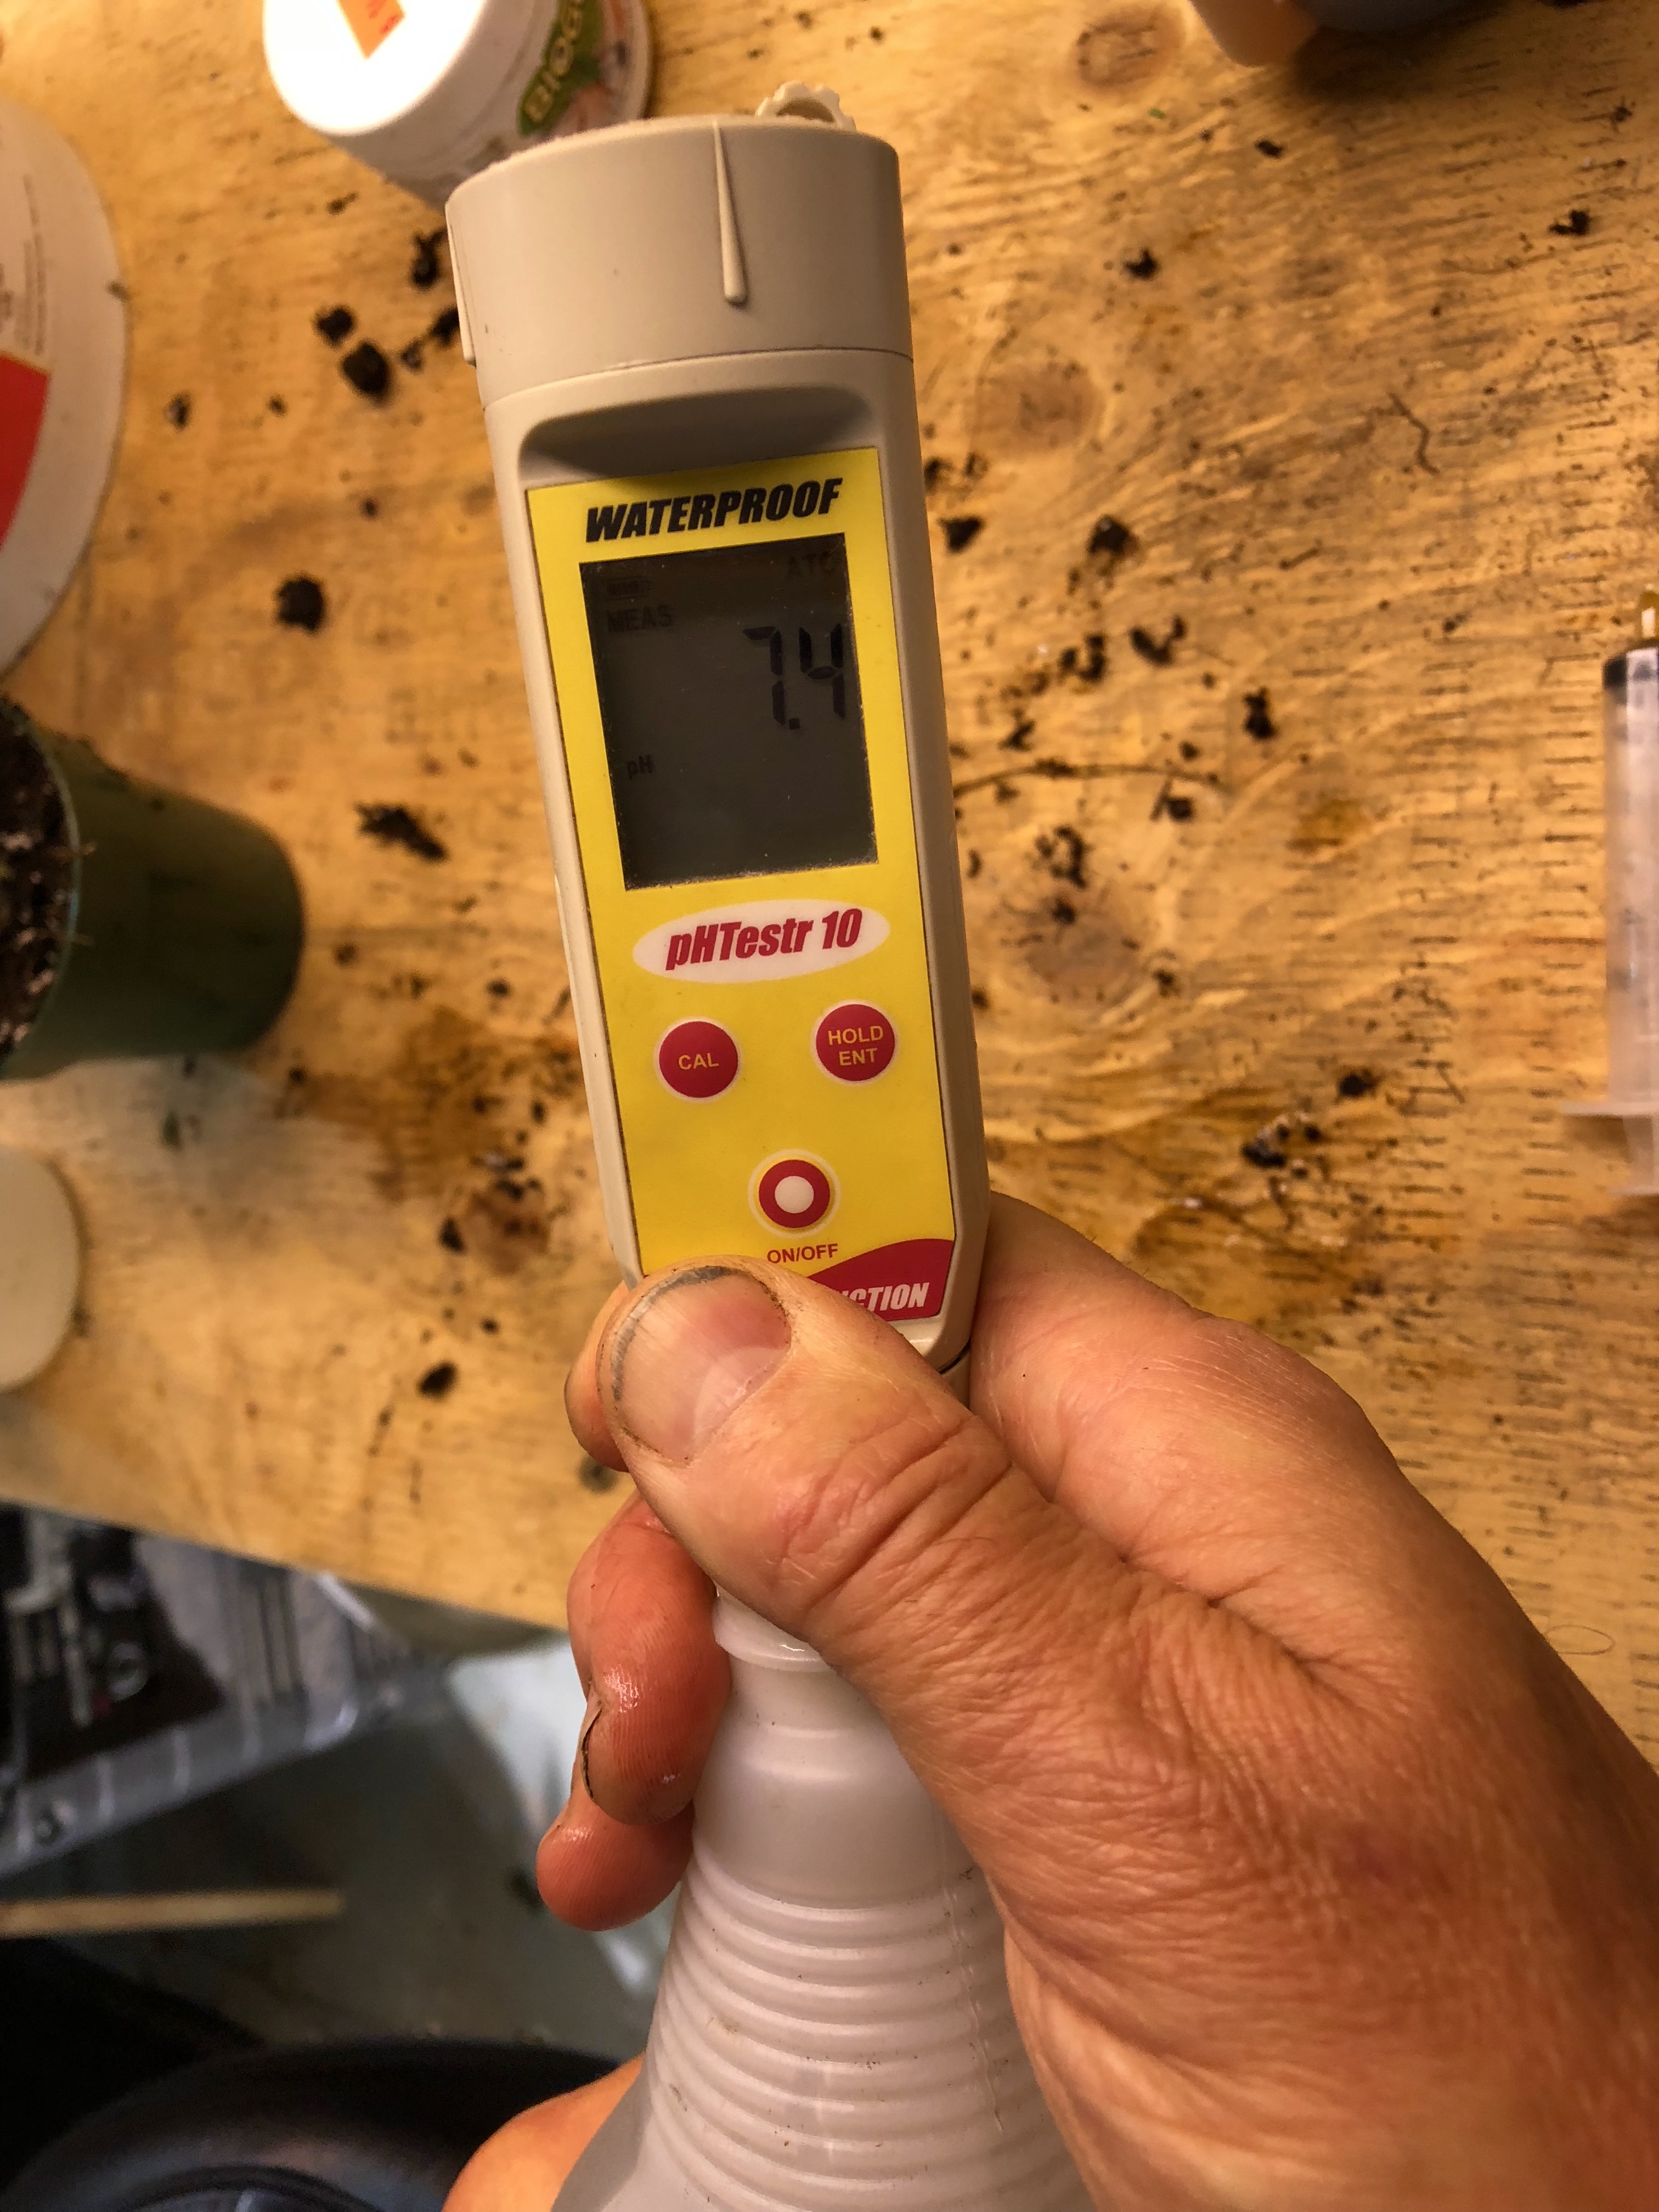
You’ll likely measure a very alkaline ph at this point. In the photo (above) you’ll see that my water/supplement mixture originally clocked in at a ph of 7.4.
- Step 12: Adjust The PH Of The Water/Supplement Mixture To Between 5.5 And 6
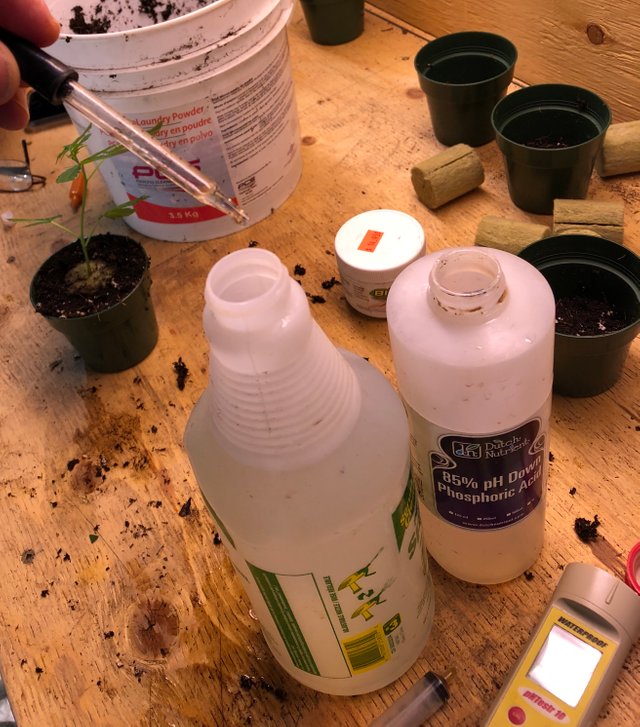
To bring the ph of the water/supplement mixture down into a more acidic range, I added a product called 85% PH Down. This is phosphoric acid.
- Step 13: Check The PH Level Of The Water/Supplement Mixture Again
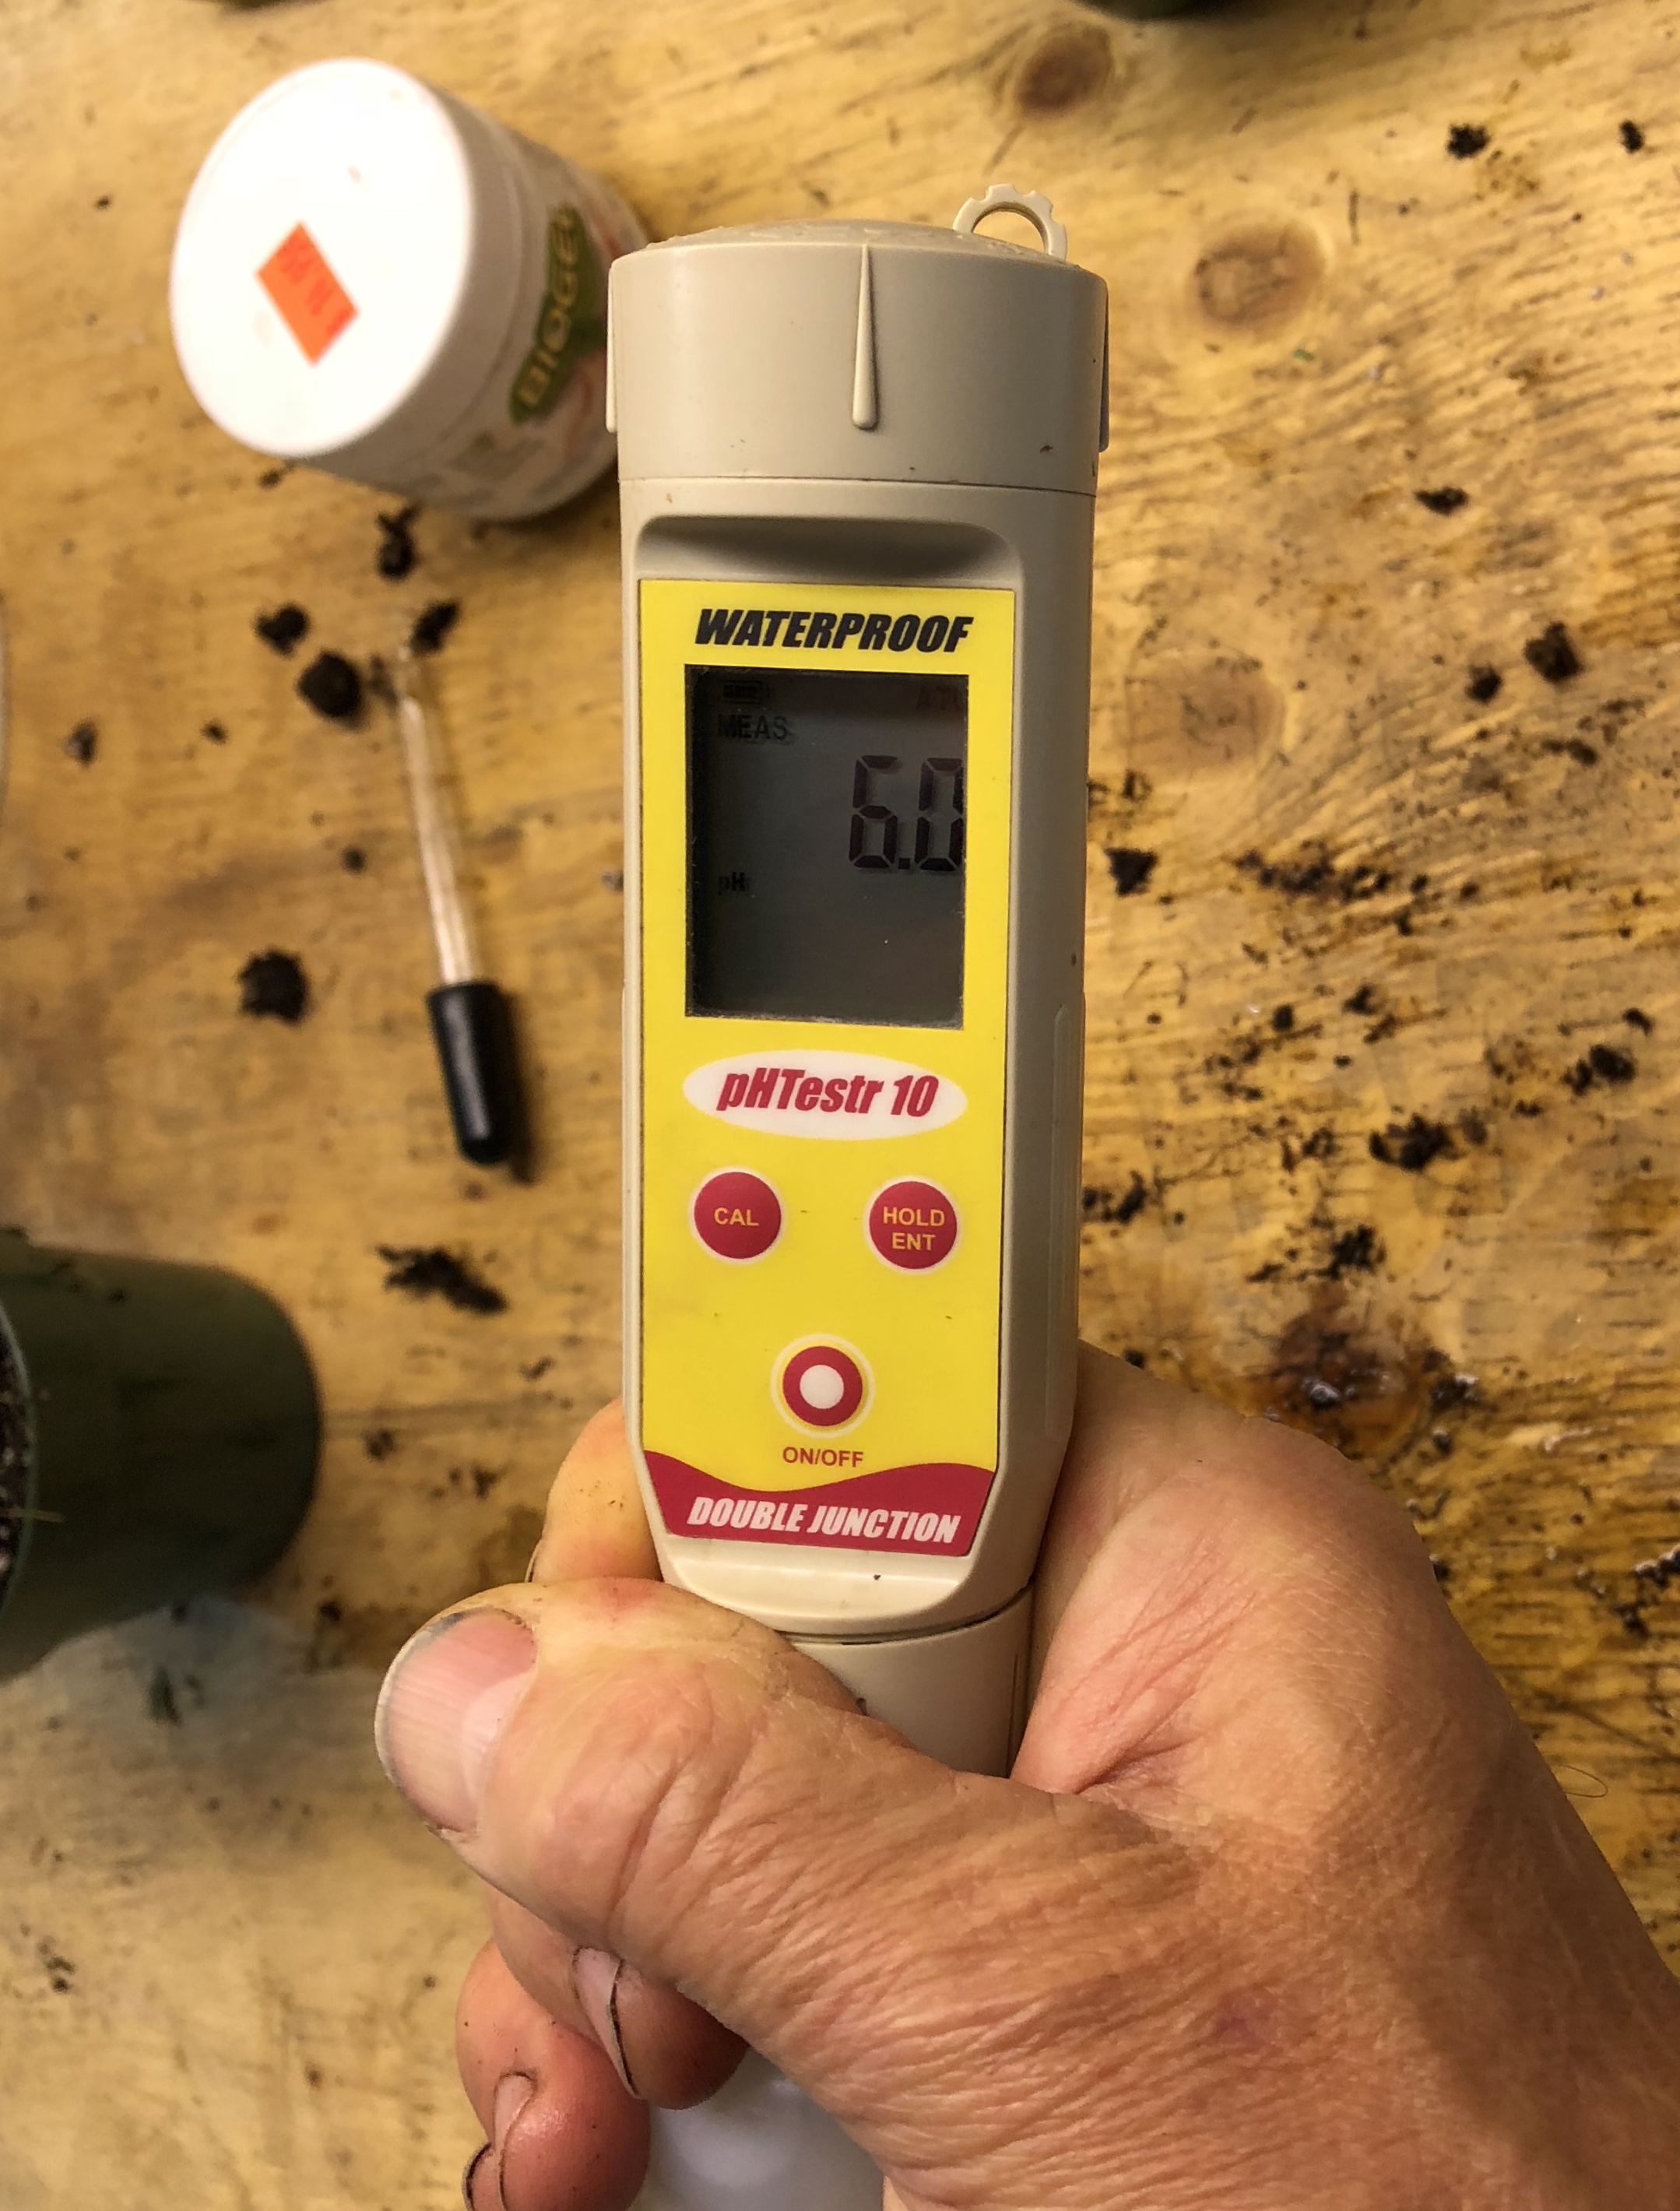
Check the ph level of the water/supplement mixture again to ensure that the correct ph level has been achieved for the correct level of acidity to encourage rooting.
You’ll see that my mixture was successfully adjusted to a ph level of 6.
- **Step 14: Water The Top Of The Rooting Plug With The Water/Supplement Mixture.
- Step 15: Place All The Clones In A Terrarium And Mist The Inside Of The Transparent Top Covering With The Water/Supplement Mixture
- Step 16: Close The Lid Of The Terrarium And Cross Your Fingers While You Hope For The Best
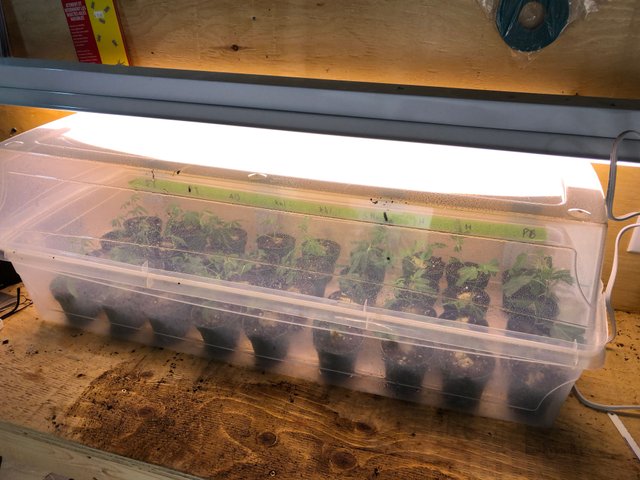
Run the lights above the terrarium, 24 hours a day for the first week. Mist the top of the terrarium (not the leaves directly) every day to keep the humidity level at 90%+ inside the terrarium.
- Step 17: After A week Of Monitoring The Clones, Remove The Lid Of The Terrarium And Adjust The Height Of The Clones’ Light Source
At this point, the clones are still in a high humidity environment (upwards of 80%).
The next week of propagating is crucial and will determine how many of these stems actually develop roots and survive the cloning process. So far, none of the 36 stems have died (but I am expecting some losses.)
The clones that survive and root will become the plants that I am planning to grow in my 4th garden.
As these clones have been sourced from female plants, they will also be female.
If these plants become stressed for any reason, they could still turn into hermaphrodites (and present with both male and female genitalia) so I will still be providing tender loving care to these little girls so that we don’t achieve pollination and seed production.
Such is the life of a cannabis farmer.
I welcome your comments and I invite you to follow me on my journey...we will always be growing a little something, something.
Just wanted to add a shout-out to a new cryptocurrency company, the Smoke Network.
You can find out more from these links:
https://smoke.network
https://smoke.io

~ Rebecca
Be careful of rockwool. It has the same hazards as fiberglass. Never breath or handle it dry. We recommend peat moss foam plugs. And roots grow from the stem not the cut. So a 45 degree angle isn't critical. It can be a clean break or 90 degrees.
Definitely supporting you and your work! Keep growing and very nice job! And great setup.
Growers like you make the patients rights battle even more needed. The endless paperwork and fear to grow the medicine? That's a horrible thing. We need more rights to grow flowers. And to be free from that fear and financial burden. But that's what the state wants. Control and cash.
I couldn't agree more @greenunion!
Thanks for adding some valuable information to this post in the way of an alternative to the rockwool plugs and in offering that the cut angle is not really important.
Yep. Keep it propagation friendly! And experiment with clones. I had a shot glass and plastic wrap with a little water end up working the best. Not large scale but fun microfogponic adventure... Love t
Your work!
Thanks @greenunion!
Thank you! Every vote grows us so we can help grow the Cannabis community!
Well then, here you go! :)
You sure can take the sting out of working on the van! Let alone the hard work of helping patients!
@greenunion you are absolutely right! Rockwool is not a great growing medium, it is both hazardous and not biodegradable.
Not to mention it has PH fluctuations issues more then other growing mediums.
I have been using "Flexiplugs" (this is a coir or peat product that is bound together with a polymer) for a while and although they are not as biodegradable as regular peat or coir products, they give you the benefits of both being solid and breaking down by plant roots, but in the same time not polluting the environment and causing more balanced PH.
Awesome job on the setup, thanks for sharing :)
Thanks! Just spreading truth! Nice to have someone agree!
You have certainly become an expert . It’s such a long progress and takes a lot of perception . The wait is the part that kills the most after until the beauty is ready
Yes, we walk a tight rope for 3 months at a time...so worth it in the end, once the goal is achieved. :)
You are an amazing grower. Any greenhouse would be lucky to have you as a grower. Unbelievable what you have to go through every year to renew your license. Your plants are beautiful. I have learned a lot from you, that translates to propagating many plants. Hope all goes well with the beaucreacy and your 4th batch of girls. 🐓🐓
Thank you @mother2chicks! That was very kind of you to say. :)
"Out of the cannabis closet" We need more people like you.
Incredible post, was a pleasure to read and learn! Keep it up and have my upvote!
Thank you so much @medicalmarijuana! I will work until this herb is free for all the people and the animals on this planet to use.
Pretty sure it is already free for animals... If is only us humans that have it all wrong.
it seems you have been struggle to sign out of your license for cannabis growing and cultivation, but despite this and your dedication you have shown how to clone a cannabis with some advance technology. you are such a true medicationist for this type.
I admire your tenacity in the face of that mountain of bureaucracy. Congratulations you are now a farmer. Your plants look awesome.
Thank you @cesicastor! Yes, there is no denying that I am farming...even if it is on a "micro-scale". LOL!
I knew you had a lot of bureaucracy in Canada as far as getting legit is concerned, but that pile of paperwork seems like a real pain in the ass and an overkill at that. Still better that most of EU countries!
At least it's an option...even though it's tough to exercise.
I'd say the trickiest part these days is to secure a doctor's signature from a doctor who understands the value of the plant medicine and is willing to sign the paperwork.
Hi dear! I think It’s so difficult in the first time to plant it , and needs so much patience to grow your own cannabis , thank you very much for showing us the step by step!
Have a nice day.
It can be used as a guide for propagating all kinds of plants. As the cuttings are so delicate they do require a lot of TLC to achieve successful propagation. :)
I hope you have a fantastic day, too @creativewoman!
congratulation.............for your great achievement.........really you overcome so tough segment ..........i appreciate you,,,,,,,i just pray for you ,,,,must be you will win your dream.......keep it up.....all the best......
Thank you for your kind intentions @abontikazaman! All your positive encouragement helps me to keep sharing what I'm learning as I go. ;)
Wow I Love Your Cutting Techniques!
Thank you a1-shroom-spores! I am interested in the smoke.network...
How long have you been involved?
Around A Month.
All The Info Is Here:
https://wn.nr/KJxTRH
Thank you very much.
I have made an account and I wonder if there is a way to get you credit for the referral you have made...I noticed after I signed up that a referral link was issued to me and if I can find a way to use yours I will...do you happen to have it somewhere so that I could copy and paste it into their platform? Oddly it never prompted me for a referral link when I made my account, so there must be another page that I can drop this info into...)
Its Actually Automatic!
You Already Earned Me A Point Already!
Here's My discord: https://discord.gg/cgMv5z
If You Have Any More Questions! :)