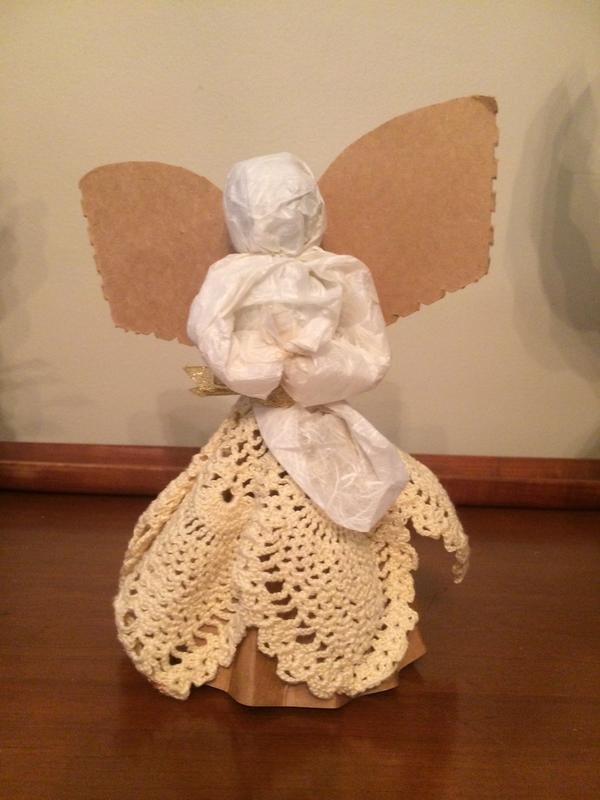
Conscious Creation- Sustainable Upcycled Crafts #1: Plastic Bag & Cardboard Angels
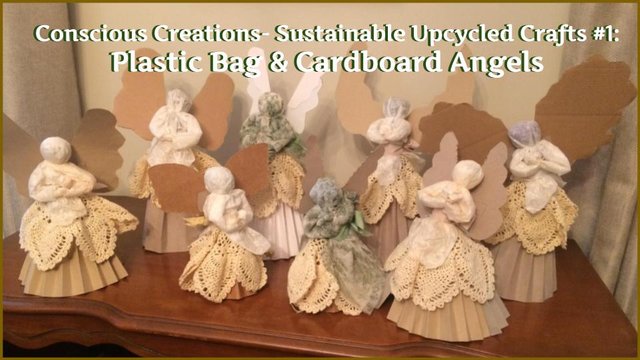
These cute angels are all made out of recycled household items. Most people might consider these things trash but here at the @gardenofeden, I've learned a lot about the value of reusable bits and pieces. My gal pal @everlove is a master of found object art and turning trash into treasures. Her art and perspective are so inspiring to me.
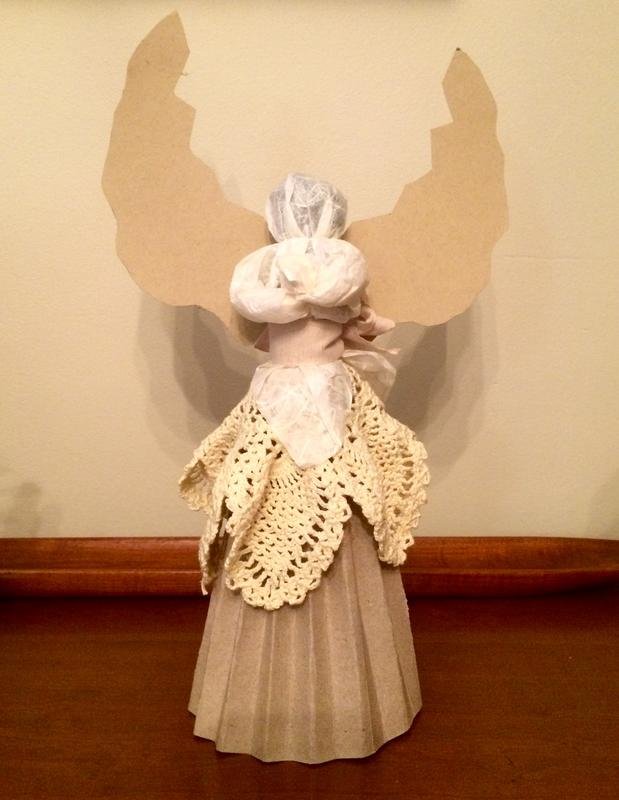
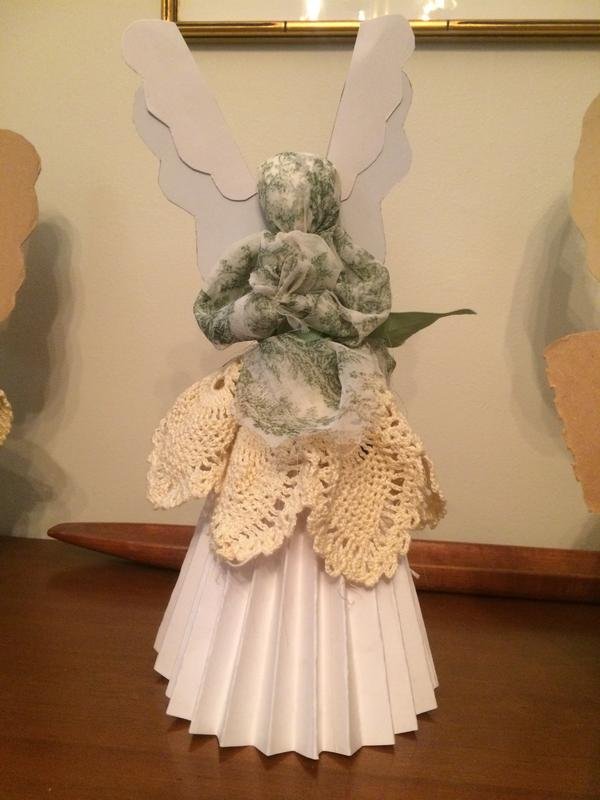
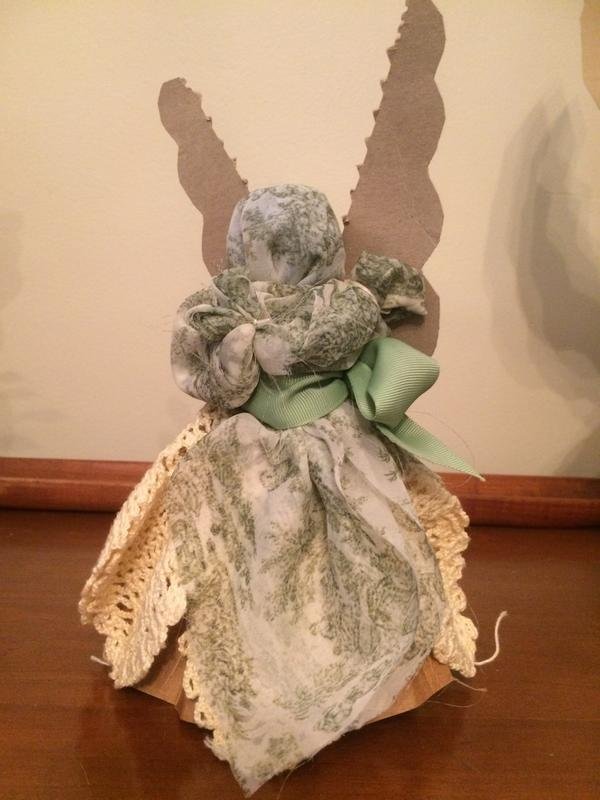
I made this series of angels together with my two daughters @qiqi-power and @noki-power as gifts for my relatives at the closing of a recent trip to visit my parents in western Nw York. Angels have been a recurring theme in the artistic gifts I have created them over the years and have special meaning for my mothers family especially.
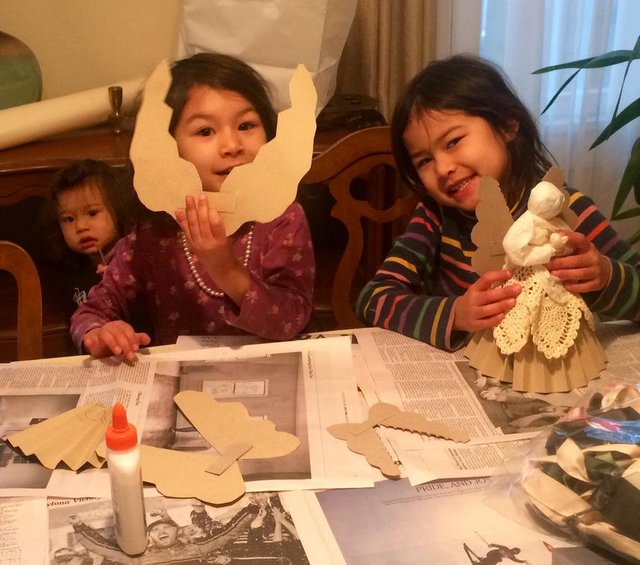
After a bit of trial and error, I got it down to a process that was easy and fast. Once you have all the materials, and once your wings have set, usually best to glue the night before, it takes only about 20 minutes to put together each angel, depending on how nimble your little fingers are.
Here is a simple set of instructions for creating your own upcycled angels:
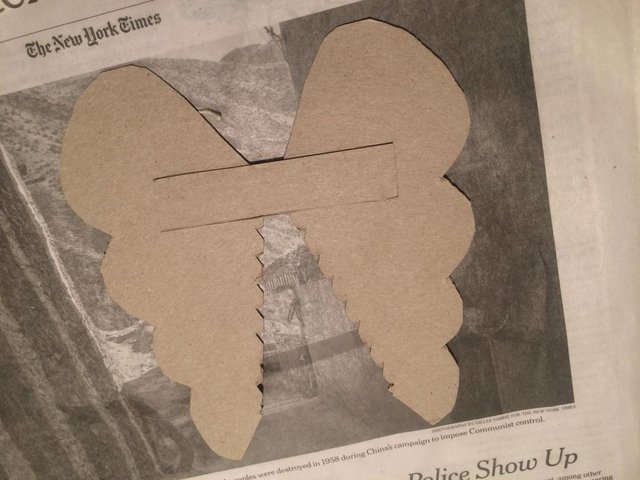
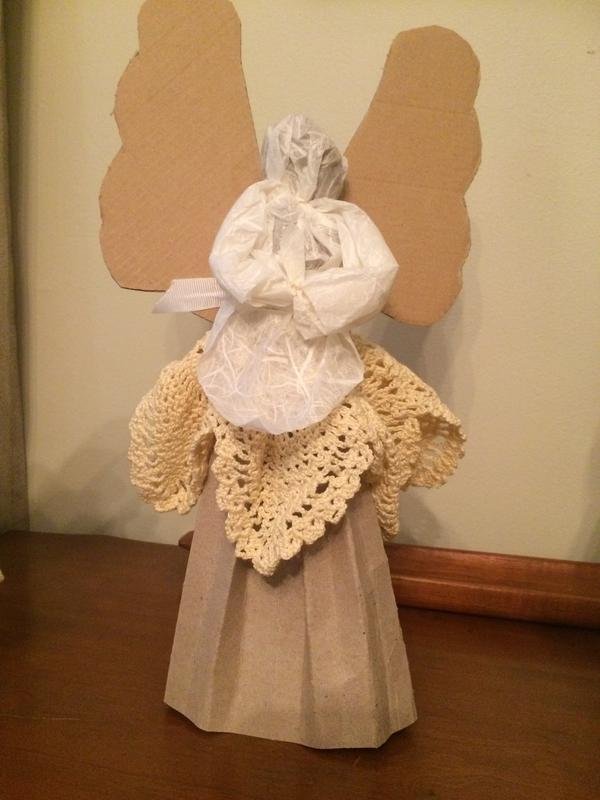
Step 1: Make your wings.
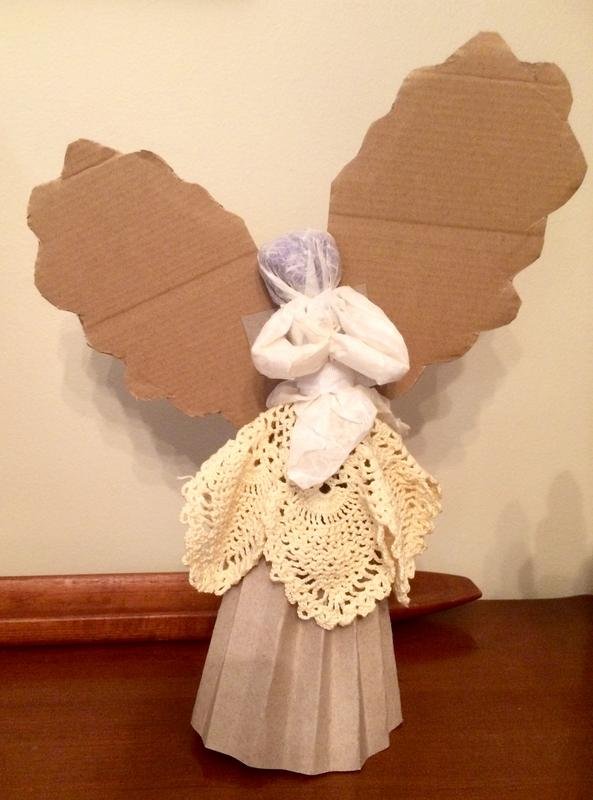
Cut out any wing shape that inspires you from paperboard, cardboard, card stock paper, or anything g flat and semi-stiff. Do one, then flip it over, trace it and cut out the mirror image. Then make 2 little strips to join them. Glue one strip to each side of the wings. Let them set over night, if you can or at least for a few hours. You'll want to make sure they are fully set before you try to see them onto the angel.
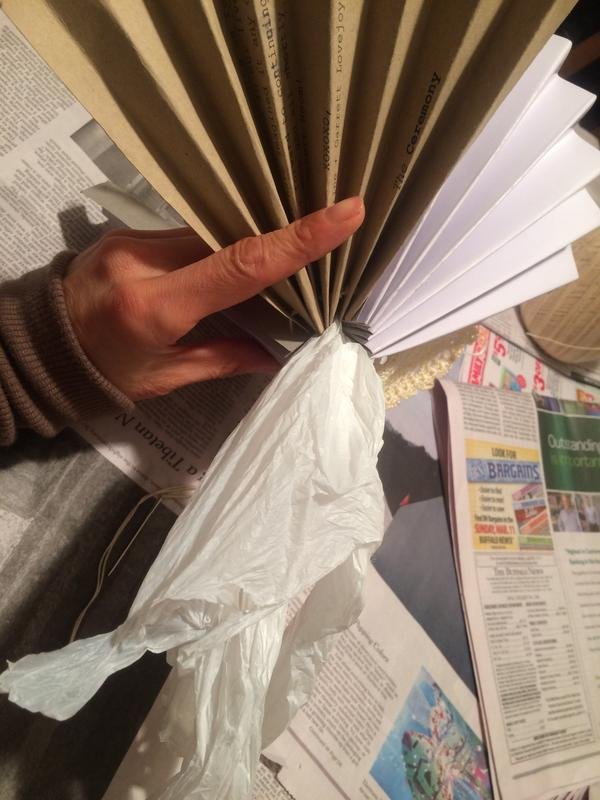
Step 2: Make the head and upper body.
A: Cut a square of fabric about 12-16 inches on each side.
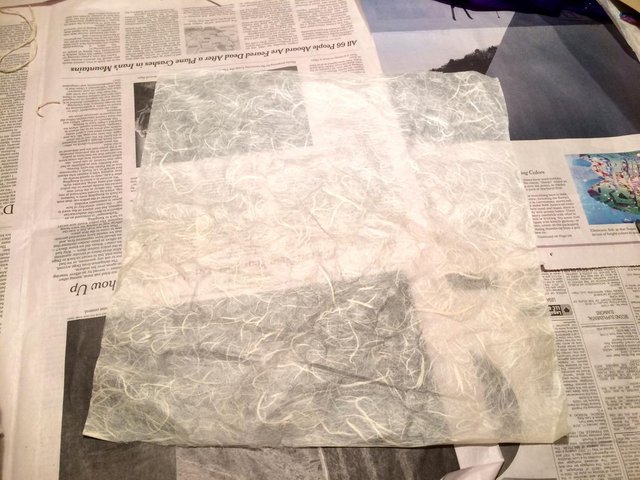
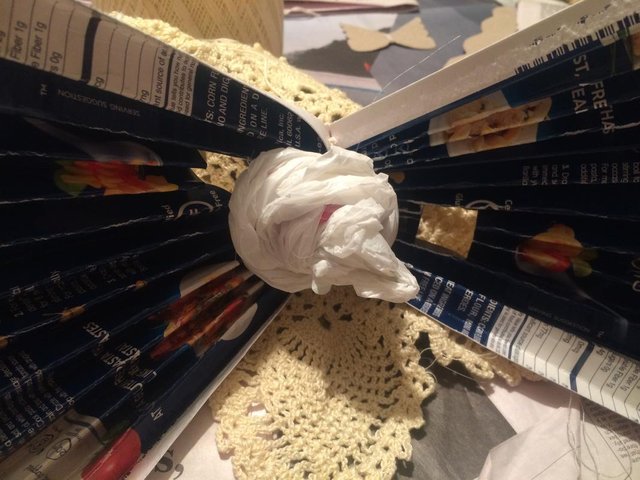
B: Take an ordinary plastic grocery bag and ball up the bottom into a smooth ball, about 1 1/2 inch diameter.
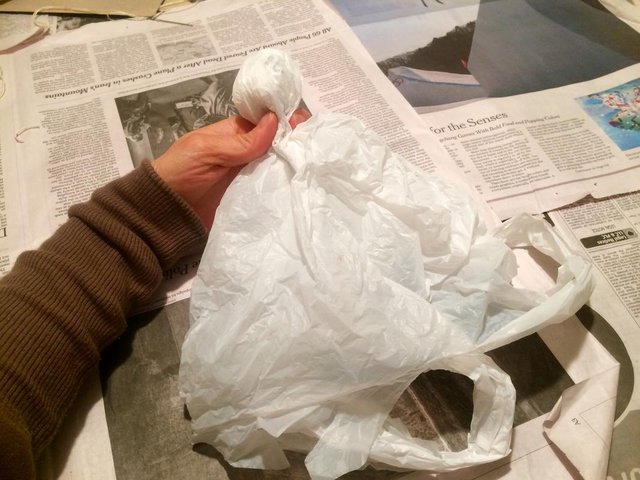
C: Place the bag ball into the center of the fabric square. Wrap the bottom/neck with some string, skinny ribbon, crochet thread, yarn, or something of the like.
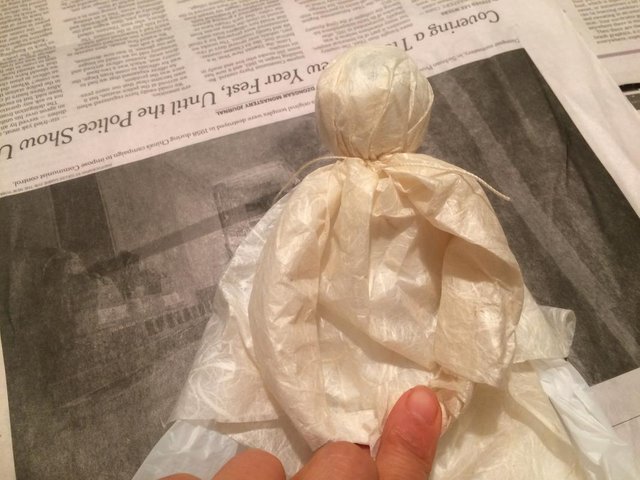
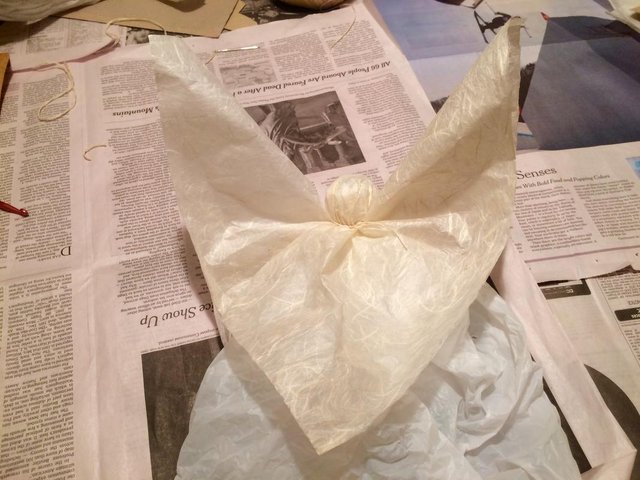
D: Pull 2 opposite corners of the fabric out so the whole thing makes a triangle shape.
Take the two side corners and roll them down backwards towards the center/bottom to form the arms. 
E: Once they are at about 45 degrees, curve them up and onwards towards each other, with the rolled edge facing toward the back.
F: Fold the very ends of corners over and tie the two hands together.
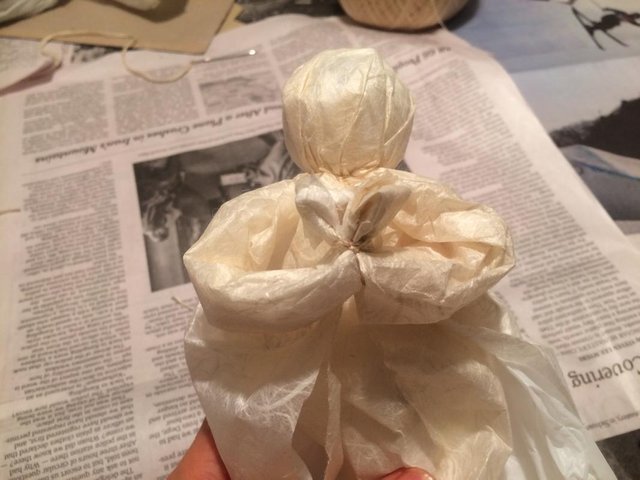
They should look like a little heart in front of the body.
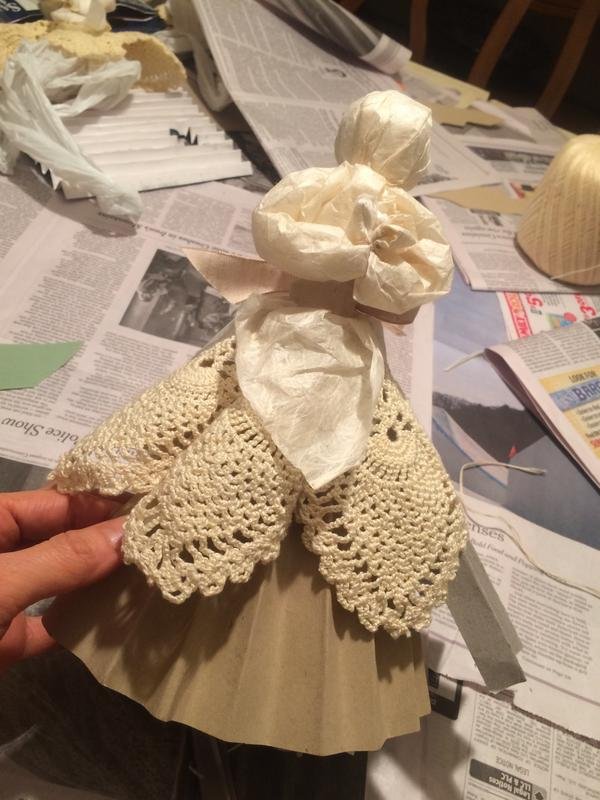
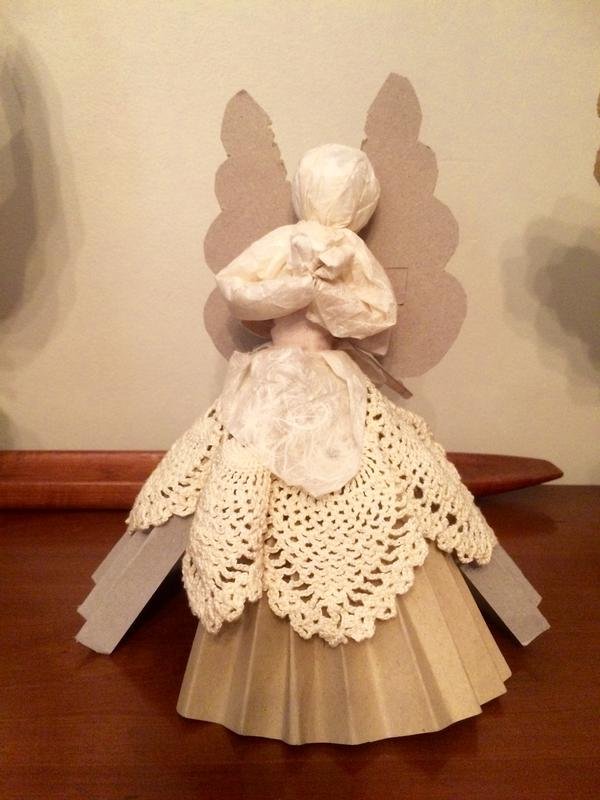
G: If you are using a doily, take the bottom end of the plastic bag and thread it through the center eye of the doily.
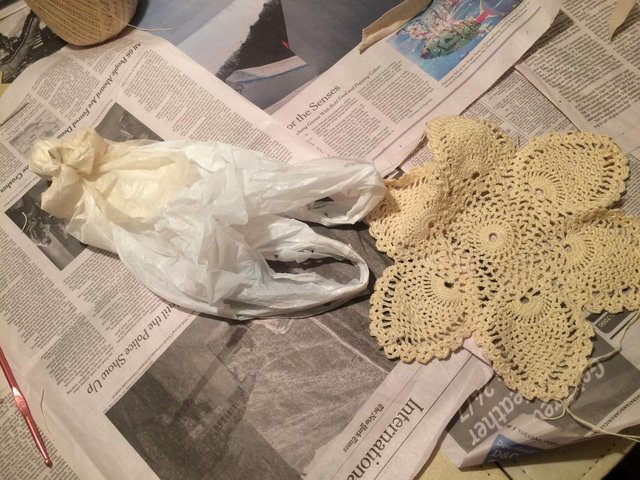
Pull it through until you have the doily up where her waist should be.

If you don't have a doily, no worries. You can simply substitute another piece of fabric, which can be cut square or round. If you have something with a hem it will be better because it will not fray at the ends.
H: Tie a ribbon around her waist. Ribbons that are at least 1/2 an inch wide will work best. Make a pretty bow in the back.

Step 3: Make the skirt.
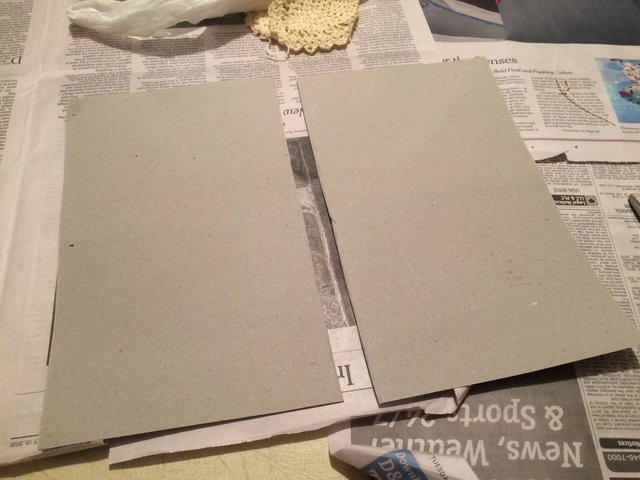
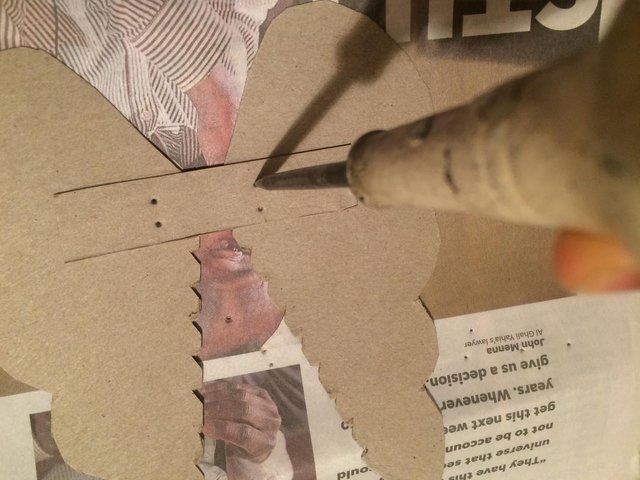
A: From a piece of card stock or paperboard, cut a long rectangle. The inside of a cereal or cracker box works great. Anything single layer and stiff can work but corrugated cardboard is too thick.
The shorter dimension will be the height of the skirt. Anywhere from 4-12 inches can work, depending on how tall and slender or short and cute you want your angel to be. It should be at least twice as wide as it is high but the exact proportions are not critical.
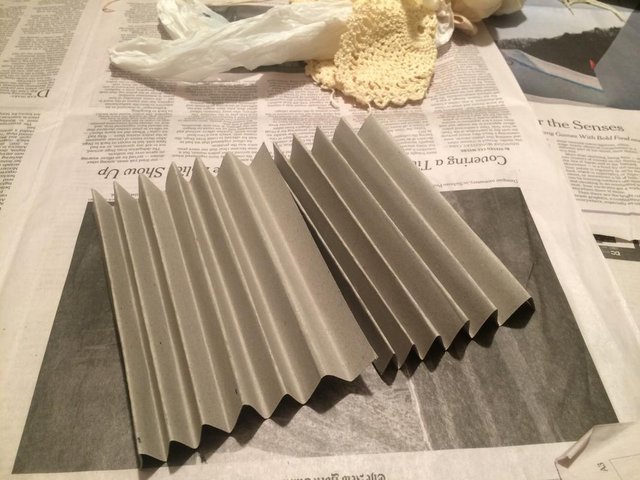
B: Fold the length of the skirt back and forth to make vertical pleats. Use two or three of these pieces to make it all the way around.
C: Punch holes in the top center of each pleat section. I used an antique leatherwork tool. A skewer or tiny screwdriver could work too. The holes won't be visible so it isn't important for them to be nice looking.
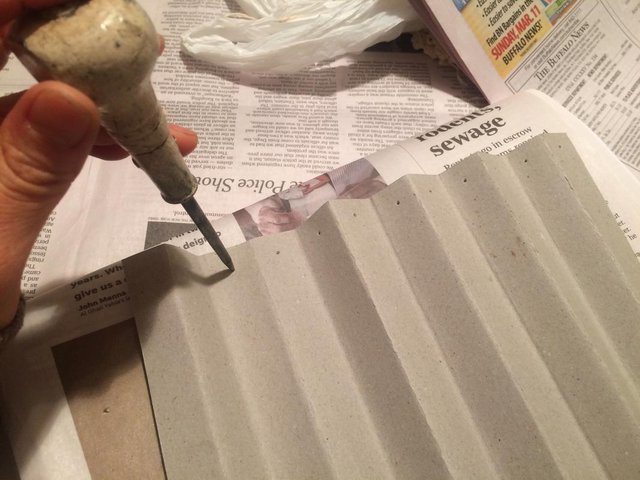
D: Use some string, yarn, crochet thread or the like to see through your punches holes at the top of the skirt.

Once you have all the pieces strung together, place them around the waist if your angel and wrap the end piece to join the last two pieces and close the skirt around the body.
Wrap the thread around both edged of the two end pieces to join them securely.
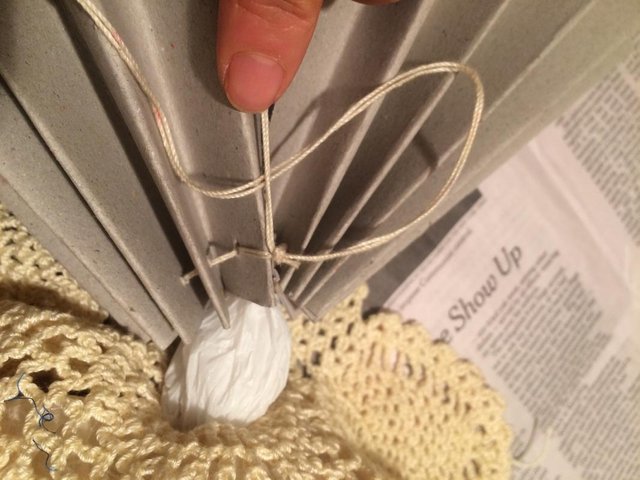
The skirt should sit there nicely, tight around the plastic bag and not require being attached directly.
If the bag hangs low, you can tie it in a knot to keep it secure under the skirt.
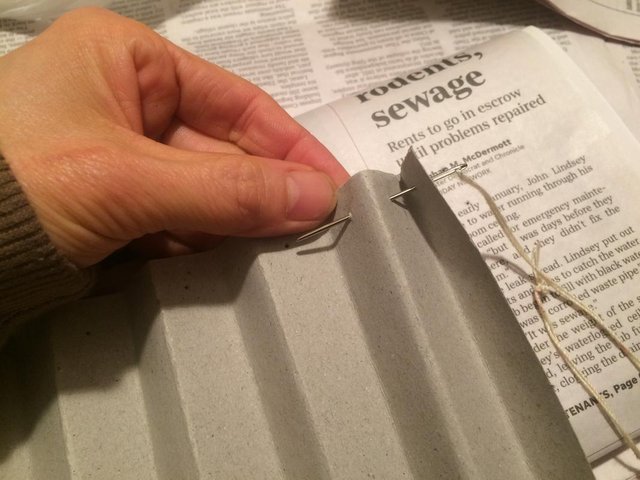
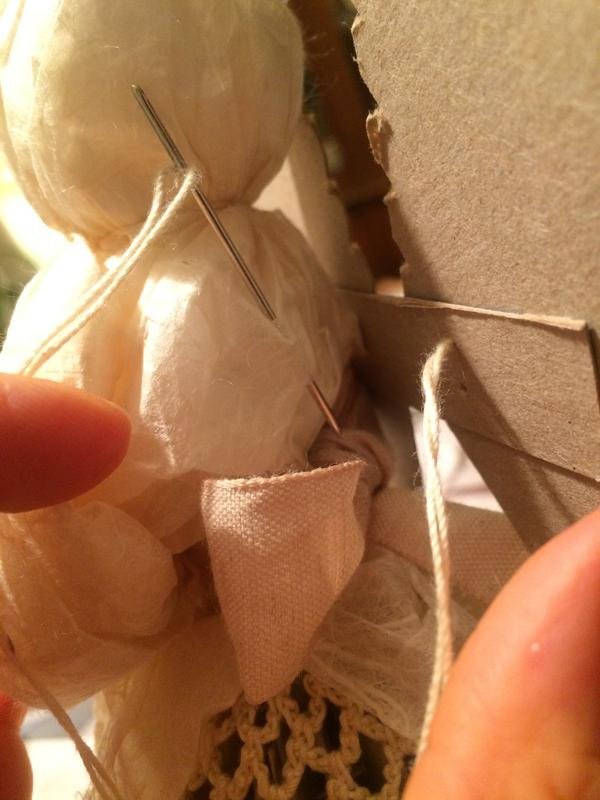
4: Attach the wings.
A. Punch 4 holes, 2 in each side of the wing attachment section.
B. Sew through the wings and into the fabric on the back of the angel, like sewing on a button.
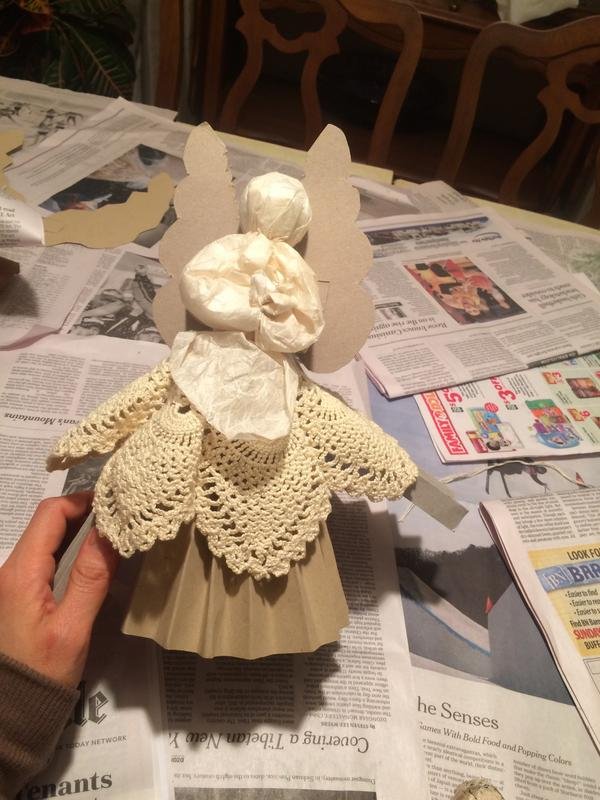
VOILA!!! Your Angel is complete!
You could also add some decorations to the wings or skirt, (recommended to de before you attach them), and/or adding some hair would be a nice touch (yarn, string, crochet thread, etc.).
The shape of the wings, the materials you use, and the height of the skirt can all be varied to create different angels.
I hope you enjoyed this craft and I would LOVE to see photos if any of you choose to make your own.
Stay tuned for more Conscious Creations and STEEM ON!
OH my these are soooo cute! You made a lot of them...all unique with character of their own. I love it that the girls got involved. We know how they LOVE to create! Awesome job @truelovelives. A very fine sustainable gift!
I am definitely going to make some of these. They are adorably beautiful, and your step-by-step instructions are very clear. Kudos!