[Servers in the Cloud - Chapter 3] Creating an environment in MirHosting (Recommended) [UNEEVERSO BASE] [BASE FOR YOUR PROJECT]
The provider of cloud computing that we recommend and why, will be discussed below. The intention of this content is to expand the opportunities that users have when choosing a platform where they can start or stabilize their project. Many may not know this Methodology or have not yet practiced it, I hope that this content serves to help take the initiative to use it.

Administrator for the management of cloud computing
Main characteristics
- Investment is consumed, only when resources are consumed
- You can configure resource limits
Main technical characteristics
- Technology for platforms: PHP, NodeJs, Java, Ruby, Python, docker
- Load balancers: Nginx, HAproxy, varnish, Apache
- Support database: SQL and noSQL
- VPS functionalities
Characteristics of the mirhosting service
- Cloudlets / Processors: 2 Free
- Storage: 10 GB Free
- Traffic: 10 GB / h Free
These latter features can be configured for the environment / server that is desired, everything that is specified in the place and what can be obtained for free
Steps to create atmosphere
(Environment or VPS)
Step 1:
You proceed to login with your access data.
If you are not yet registered, you can access the following publication to use it as follows:
<a href = "https://steemit.com/busy/@blickyer/servidores-en-la-nube-capitulo-2-register-en-mirhosting-recomendado-base-de-uneeverso-base-para-tu- project "target =" _ blank "> TUTORIAL
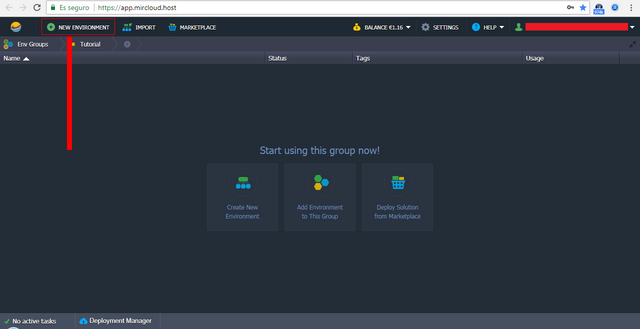
Step 2:
Press the NEW ENVIRONMENT button to display the panel where the environment will be created
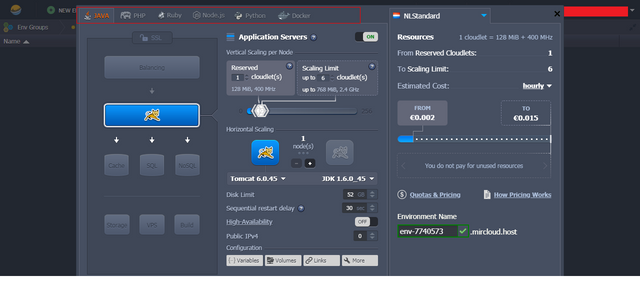
Step 3:
The technology is selected with which we will create our environment. In this case, select the environment for a platform based on NodeJs technology
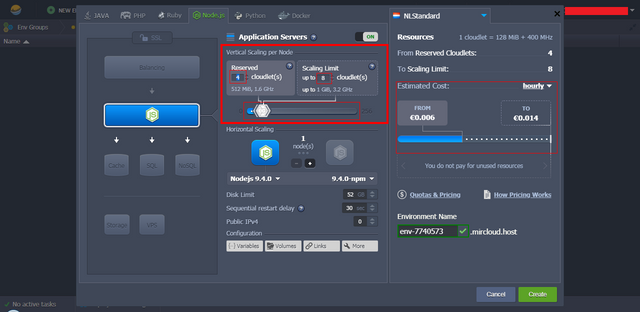
Step 4:
The Vertical Scaling per node is configured so that cloudlets (Cloud Computing Processors) are designed for minimal use.
Step 5:
The storage capacity limit is set.
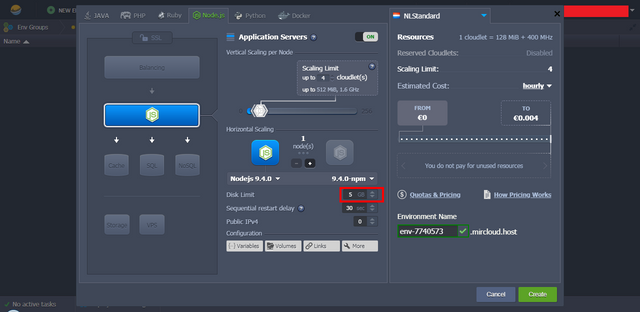
Step 6:
The name is introduced for the subdomain for our environment
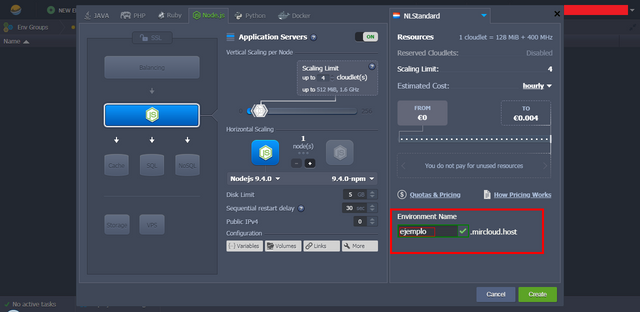
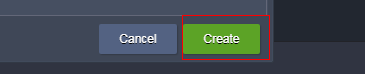
Step 7:
You press the Create button, and then you can see a floating message, where you can choose whether to send the information that the sea has just created its environment.
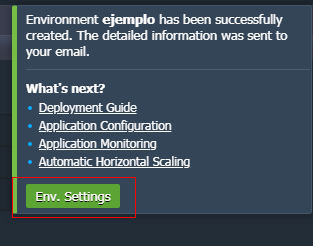
Step 8:
Here you can see the result of a newly created environment. Based on NodeJs technology.
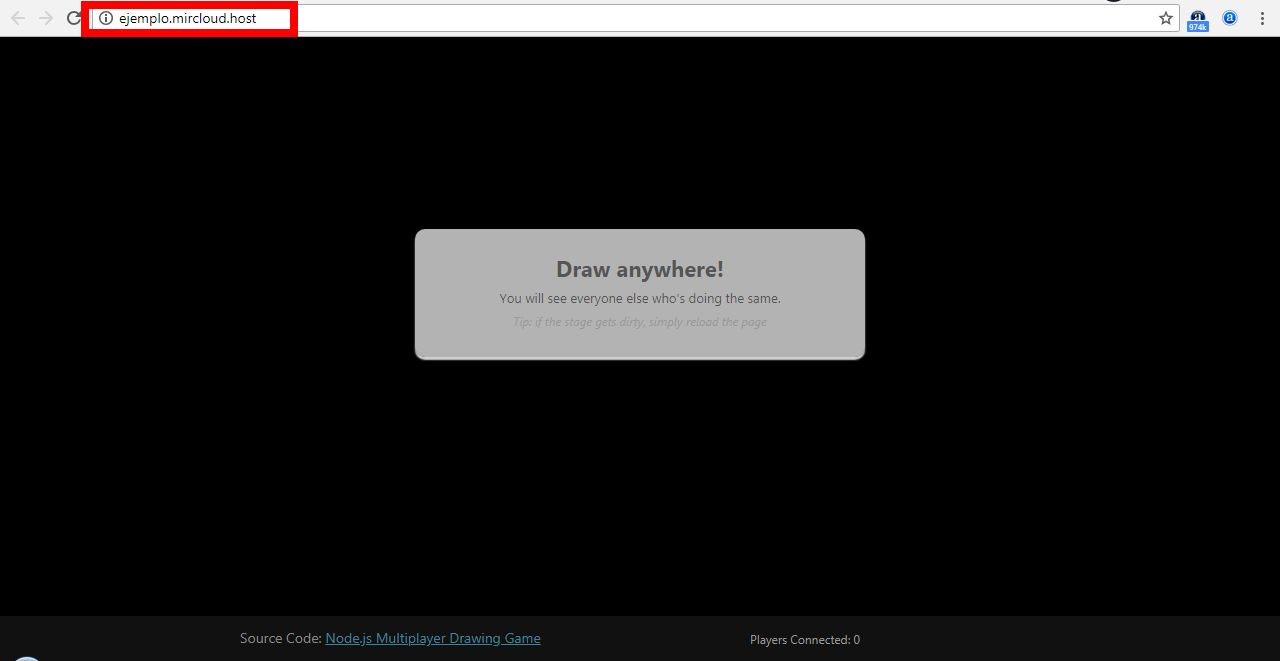
http://example.mircloud.host
Cloud computing is very useful, it has been for UNEEVERSO, I hope the sea of help to many STEEM projects and others.

More about UNEEVERSO

This user is on the @buildawhale blacklist for one or more of the following reasons:
Congratulations! This post has been upvoted from the communal account, @minnowsupport, by reykcilb from the Minnow Support Project. It's a witness project run by aggroed, ausbitbank, teamsteem, theprophet0, someguy123, neoxian, followbtcnews, and netuoso. The goal is to help Steemit grow by supporting Minnows. Please find us at the Peace, Abundance, and Liberty Network (PALnet) Discord Channel. It's a completely public and open space to all members of the Steemit community who voluntarily choose to be there.
If you would like to delegate to the Minnow Support Project you can do so by clicking on the following links: 50SP, 100SP, 250SP, 500SP, 1000SP, 5000SP.
Be sure to leave at least 50SP undelegated on your account.
Congratulations @reykcilb! You have completed some achievement on Steemit and have been rewarded with new badge(s) :
Click on any badge to view your own Board of Honor on SteemitBoard.
For more information about SteemitBoard, click here
If you no longer want to receive notifications, reply to this comment with the word
STOP