Making a tattoo (Step by step of the first tattoo on my own skin) #Art
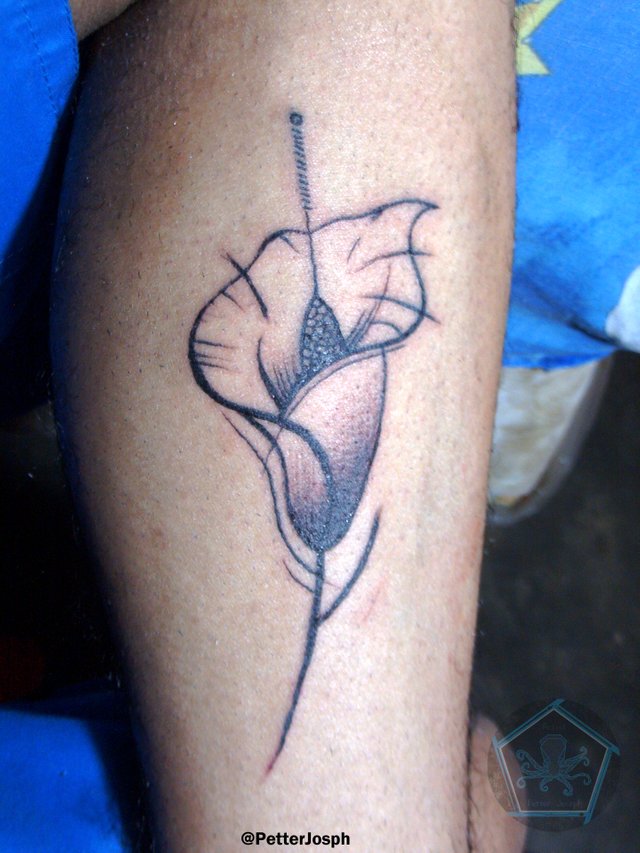
A Cala flower, simple and beautiful beauty.
Good Sunday afternoon this day I bring you a special post because today I decided to make my first tattoo on my skin, and then for those who did not know if, if I tattoo but never had a needle stained my skin to this day, I decided for this design of a flower, specifically a cove which has a great meaning for me who know me when detailing the design will realize its meaning because I will keep it a secret so if you understood it, keep your discretion.
Let's do it!
To make a tattoo, the first thing you should have is a design in mind, that is, the drawing that you want to make on the skin I had it in mind, so I put my hands to it and started to draw it, when drawing designs for tattoos it is advisable to make them with colors with a light color as the basis for the main sketch and then use a stronger color to mark well where the lines really will go, in this case use a sky blue color to define the sketch of the flower, then with the help of a color orange highlight all the drawing defining where my lines will go and using blue as a guide for it, with this step in addition to get our designs we are familiarized with the strokes in the drawing, following these tips we would be something like this. | 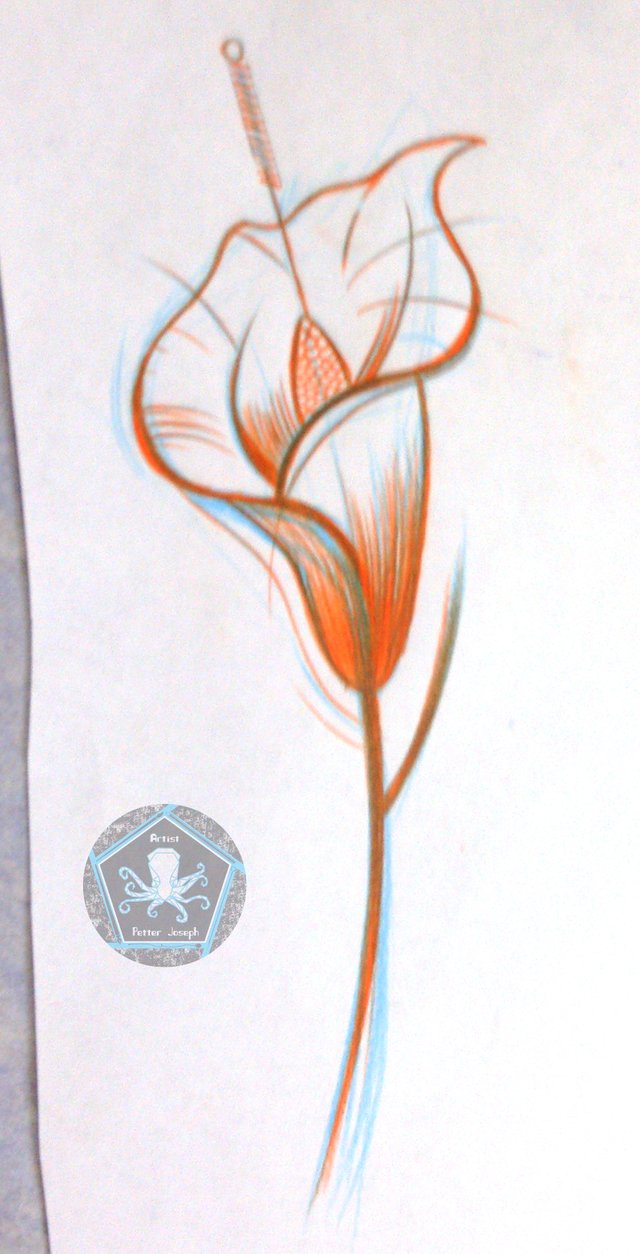 |
The next step is to turn our design into a tranfer, the tranfer is a sheet with our design that we can pass to the skin, if you do not want to lose your drawing it is advisable to make a copy and use it for the tranfer, this will be done with help of an ectographic paper which is like a carbon paper but with much more ink, with a pencil we will highlight the design on the ectographic paper so that on the back there is an inverted design of our ink design which will be the one that will remain attached to Our skin. | 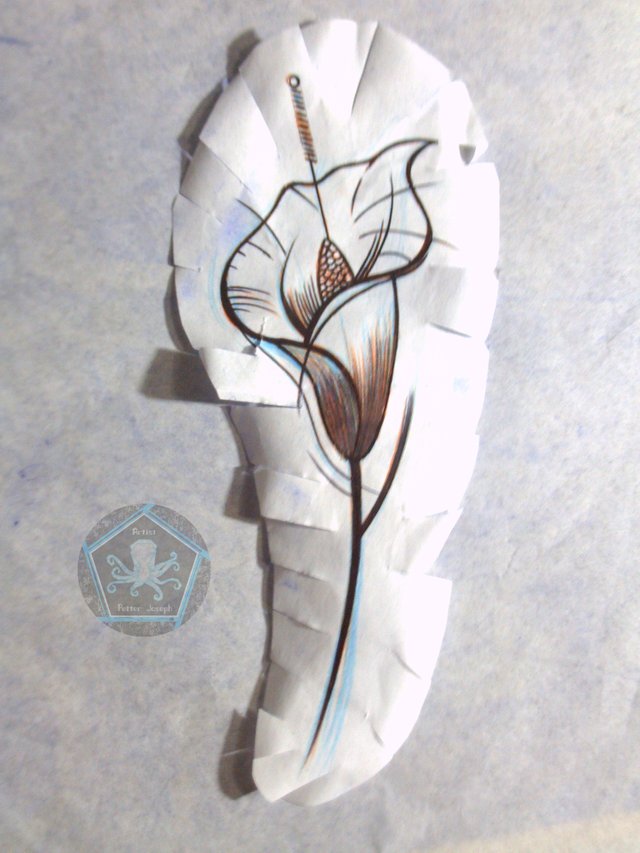 |
Here as I mentioned you can see the inverted design already impregnated with the ink of the ectographic paper ready to be placed on our skin, if you noticed it make some cuts in the design along the edges this so that when placing the tranfer on the skin this adapts much better to the curvature in this case of my leg. | 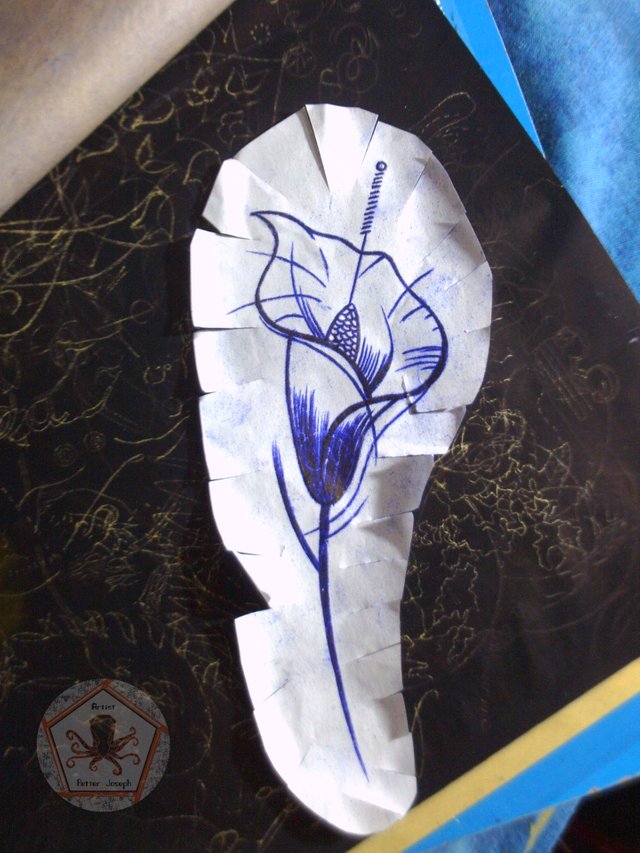 |
I will not explain how to put together your field of work because I will leave it for a next post but following these steps now we have to place that design on the skin with the ink of the ectographic paper, first we must shave our work area to avoid infections, as it was in my leg I have to shave because I am very hairy legs, then we must disinfect the area is clean it with soap and then with alcohol, and with our clean area we proceed to put our tranfer, there are two ways to pass the ink from the paper to our skin, the first is with the help of a deodorant to moisten the entire area where the design goes and the second is to use some neutral lubricant to do the same when it comes in contact with the ink of the tranfer adheres the ink to the skin . | 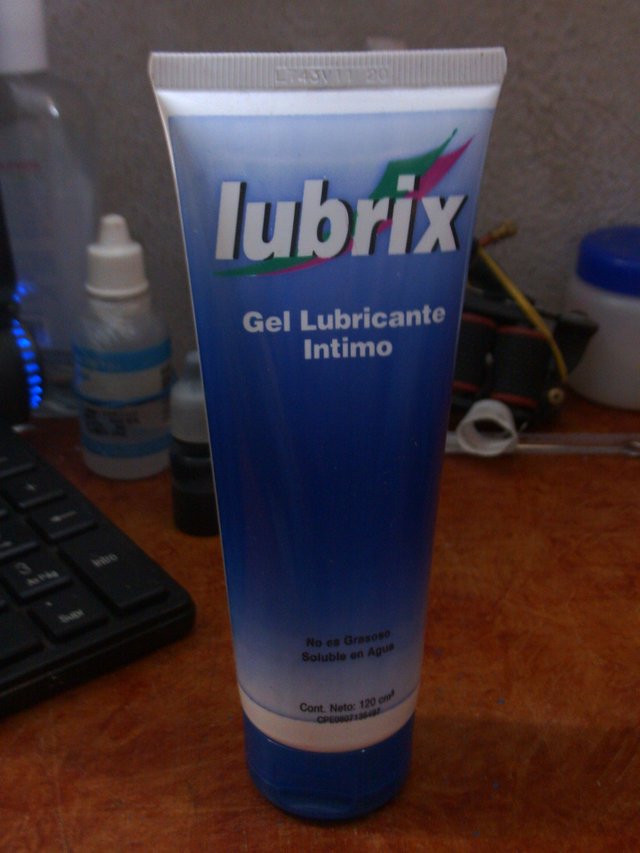 |
After placing the tranfer we leave it for about 10 minutes pressing carefully on it so that each part of it is on our skin, then we remove with great care not to break our tranfer and not to damage the design already impregnated in the skin, we wait again about 10 minutes for the ink and lubricant to dry completely. | 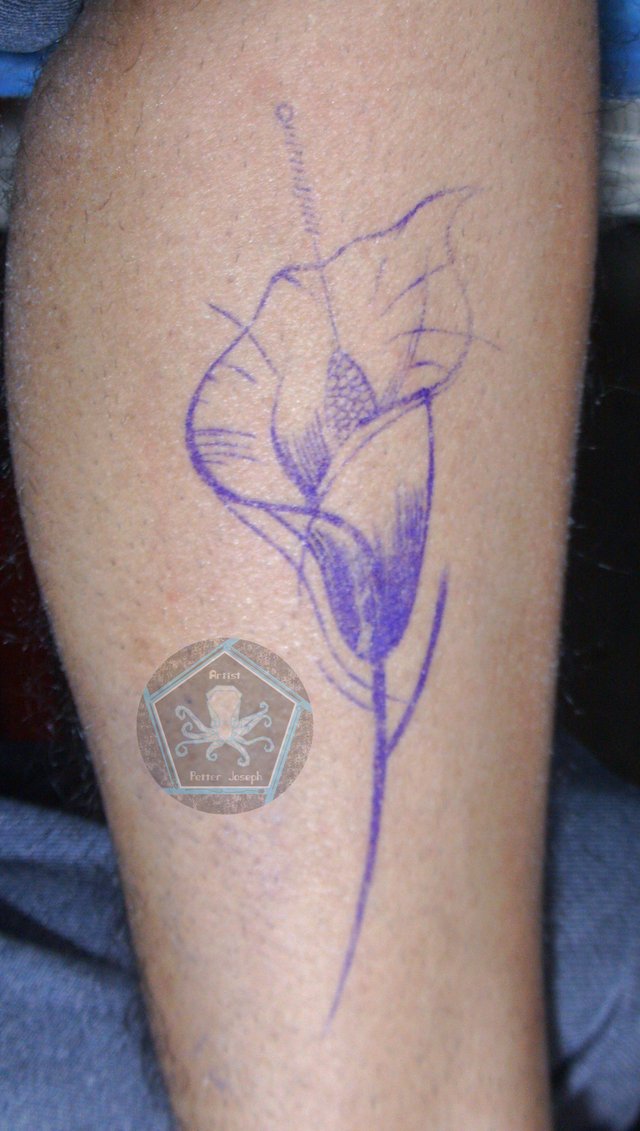 |
Here you can see in more detail our tranfer already in the skin. A well-placed tranfer should be kept during the whole tattoo process. It does not usually fall with water and if it is left dry enough we can be sure that we will not lose our design halfway through the tattoo, but that if neither the tranfer nor the tattoo will be you must place alcohol because if you started the tattoo you will burn the tattooed person a lot and our tranfer will easily fall with this substance. | 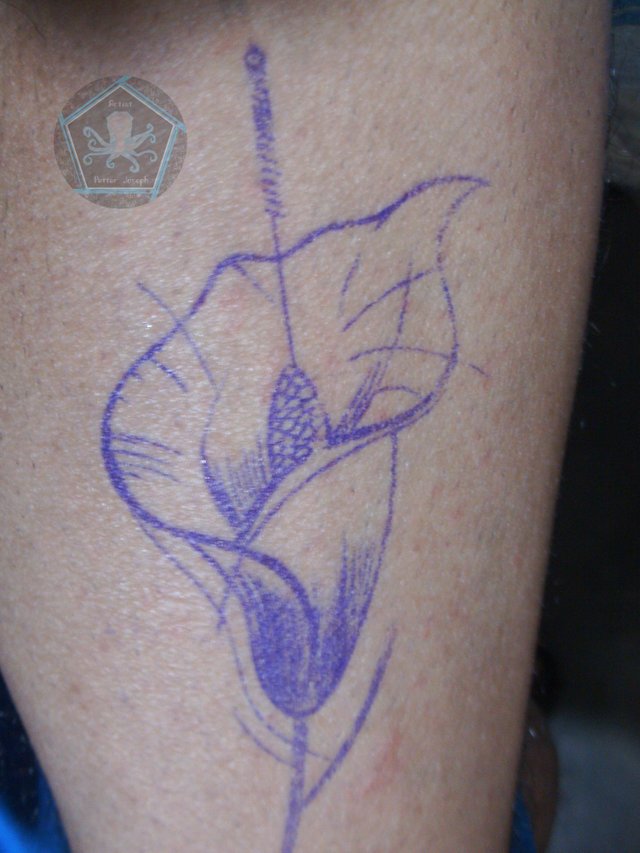 |
Already with our dry design we can choose our needle, for this design I chose a needle RL number 5 a needle of fine lines, number 5 since in its tip it has 5 needles joined in a circular way therefore the term RL "Round Liner" in a Next post I will bring you the types of needles. | 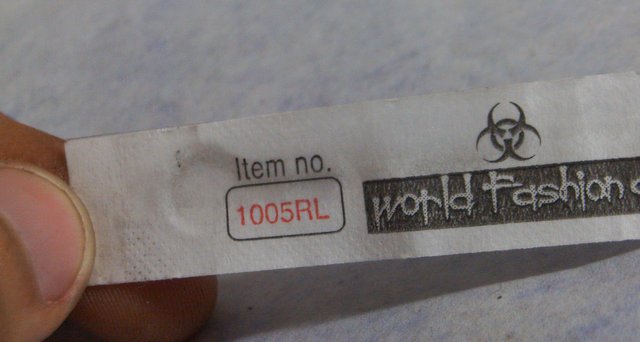 |
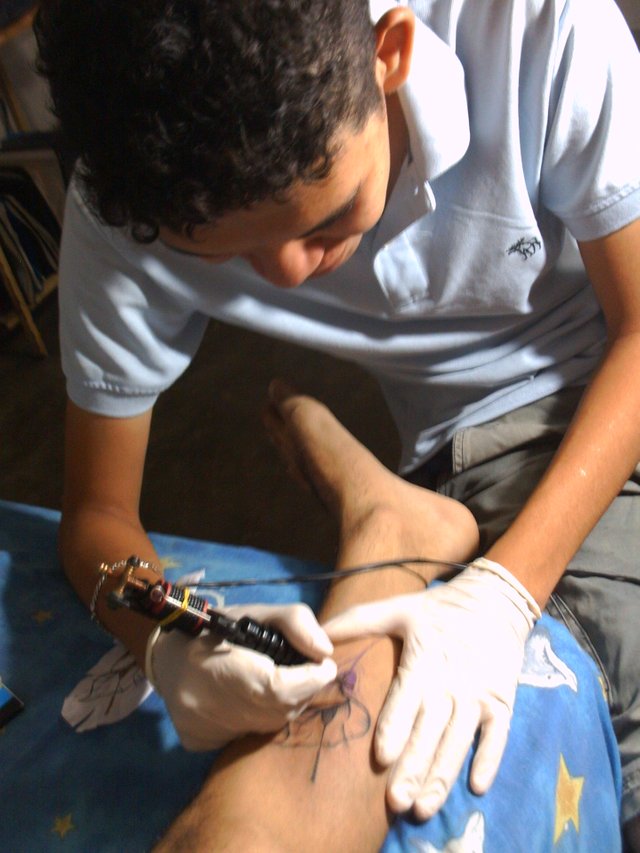
Now we just have to begin to ink with our machine, previously calibrated for lines we proceed from bottom to top in this case it is reversed because as I did it myself the inferred part is the superior of the design, always placing Vaseline previously on the area To tattoo so that the needle runs better, I must admit that I was very nervous at the beginning because it was my own skin and I knew how much it would hurt, so it was a very interesting experience. | 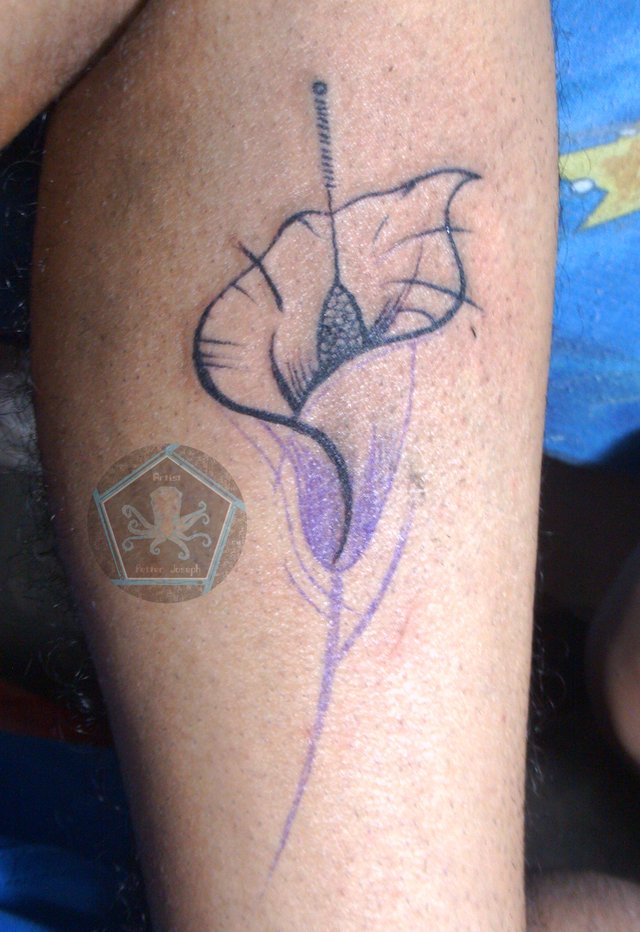 |
I will not explain the whole process of the tattoo since it is a simple drawing they are only lines and everything depends on the firmness that your hand possesses and how nervous you are, always be sure of what you do and so they will improve little by little day after day. | 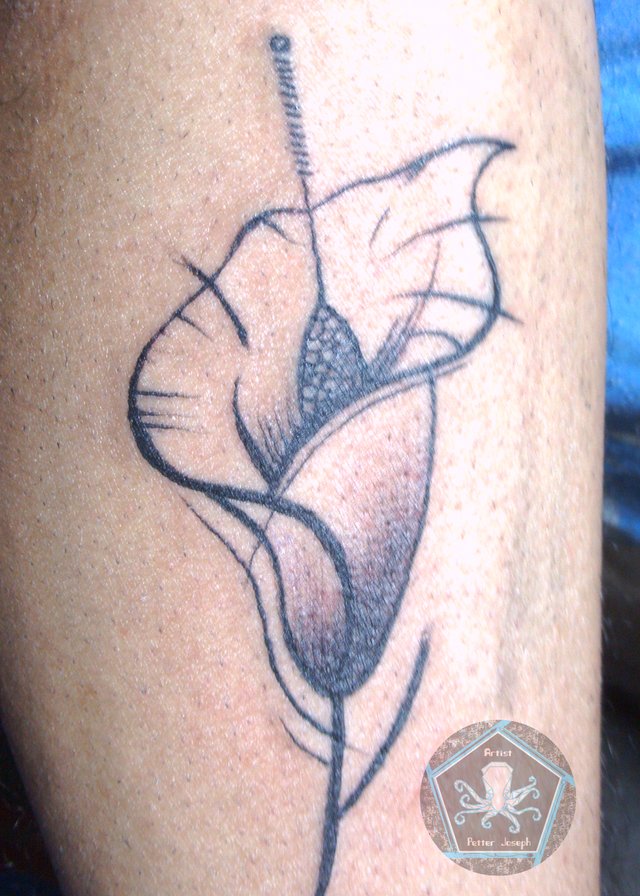 |
With the ready design, we clean the area with a needle and soap and place some drops of glycerin to help the scarring of the tattoo, we cover with emboplast paper to avoid infections, our tattoo must be completely covered by the plastic paper. | 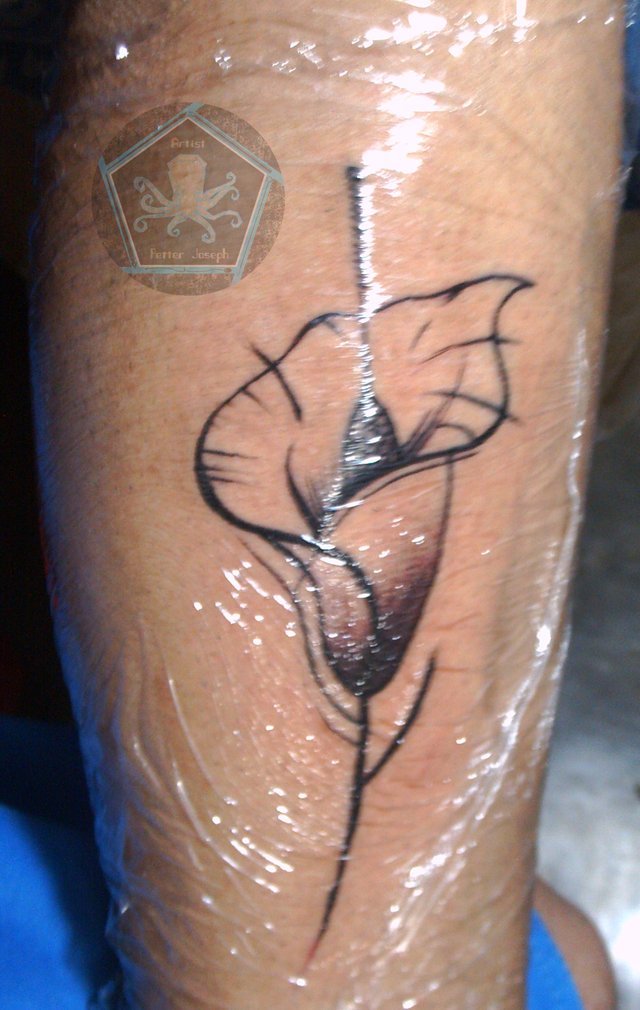 |
Sincerely I can not say that I made this tattoo myself in its entirety, since I had a little help from a boy who wants to learn to tattoo, and this time I took the opportunity to make his first lines and feel what it is to make a tattoo, that boy is none other than my younger brother @SrSus, that despite the nerves and doubt made some pretty good lines to be his first time, specifically the center of the flower and the stem were made by his hand and one other detail that escapes me at this time.
I hope you enjoyed this process until the next and happy start of the month.
My social networks here always:
And never forget that the most important thing is ...
Next you need to add some color
why? it is a black and white tattoo not a fullcolor
Wow, I would like to make a tatto.