Pruning Chinese Elm Start to Finish [Bonsai]
.jpg)
As promised, today I'm going to share some recent work I had done on my young #ChineseElm.
In this post, I will be sharing step by step some of the pruning choices I made, and explain why I made these decisions.
As a gentle reminder I always like to state that I am not an expert #bonsai master with years of training as an apprentice to the Dragonball Z masters in Japan. I am a simple hobbyist growing a variety of trees for my own personal enjoyment, and sometimes I follow techniques from others to sharpen my abilities, and sometimes I go my own way. Mistakes will be made along the way, and that's how I prefer to learn.
To learn more about this particular Chinese Elm tree featured below, you can read my past post about here on steemit.
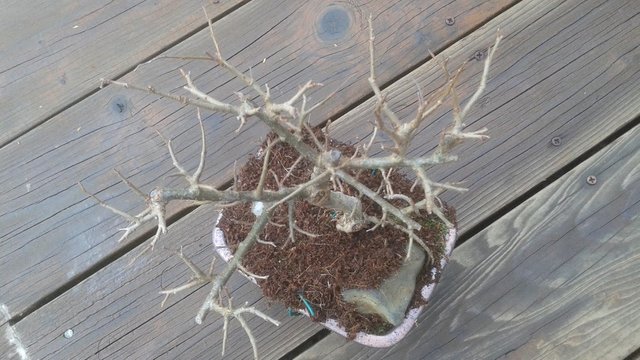
First things first.
The general concept today I will be focusing on is looking at the branch nodes. Any place a branch splits into multiple branches, I am going to count how many branches it split into. In a good bonsai, the branch always divides into smaller branches at the node, like the letter Y.
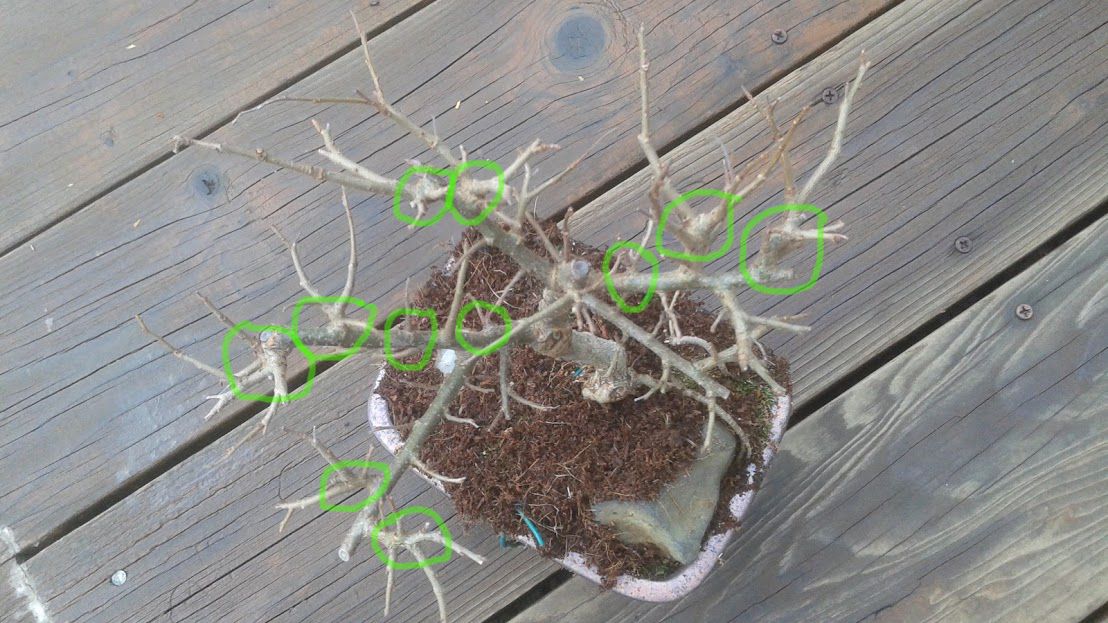
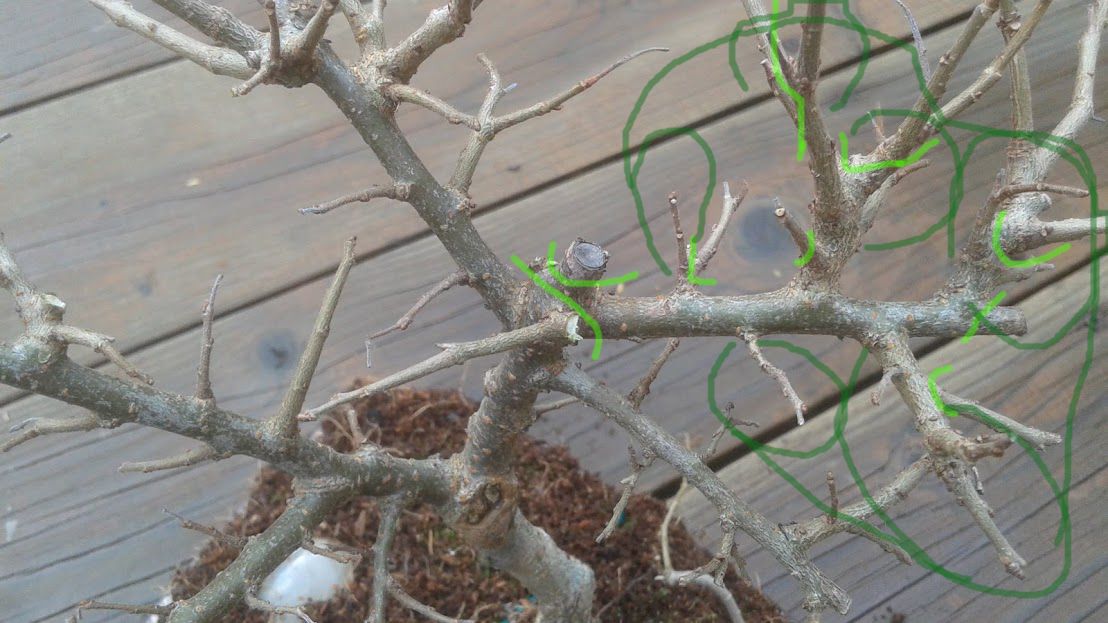
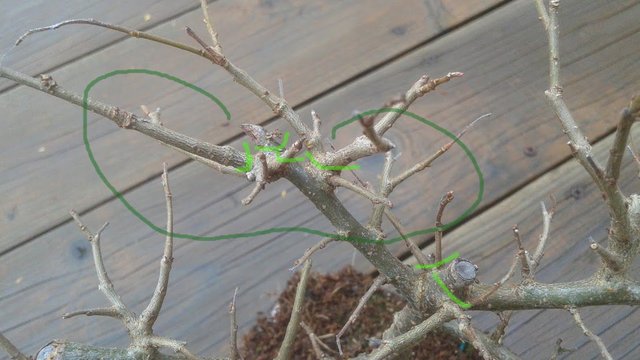
Lightly circled in green are all the areas that show more than two branches connecting to a single node.
Looking at the top view it is easy to find multiple junctions where the branches are splitting into three or fours. Notice how thick those junctions are? Having nodes that are thicker than the branch or trunk is generally frowned upon in a bonsai. By eliminating branches from these swollen nodes, it is possible to regain natural growth flow of the tree, so it doesn't look like it sprouted a ton of thick multi-branch growth suddenly from a single branch area. Instead we want branches that continue to feather out into smaller and smaller branches, always into two branch junctions angling outward.
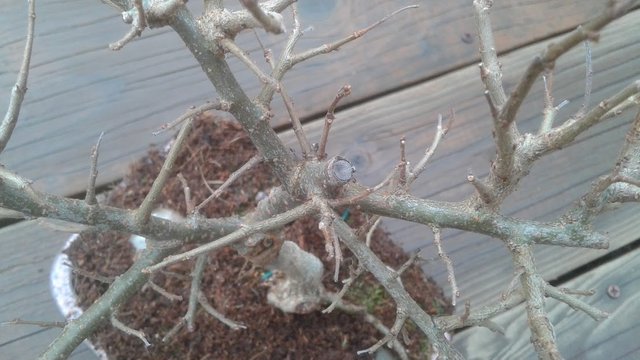
Some benefits to removing some of these branches while the tree is dormant:
- increased airflow, reduced disease risk
- increased access to light on the leaves and wood, better photosynthesis
- lower branches will receive increased sugars for growth
- keep the tree small and proportional. Bonsai!
First I will look closely at all of the main branches to decide how to proceed.
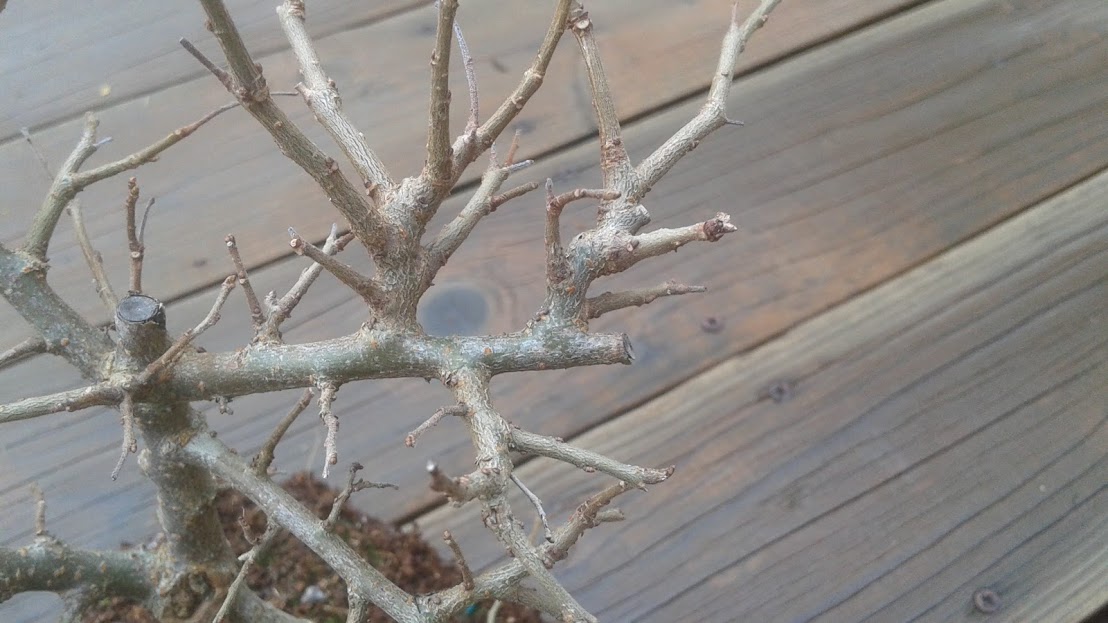
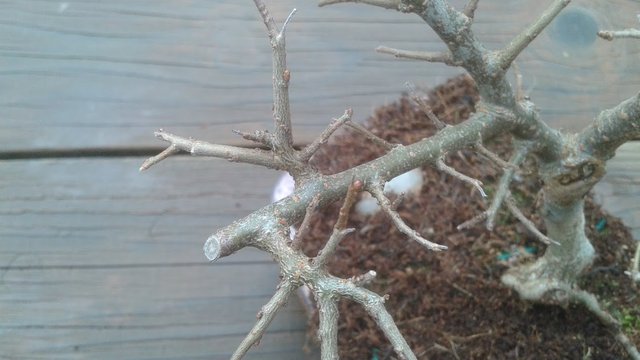
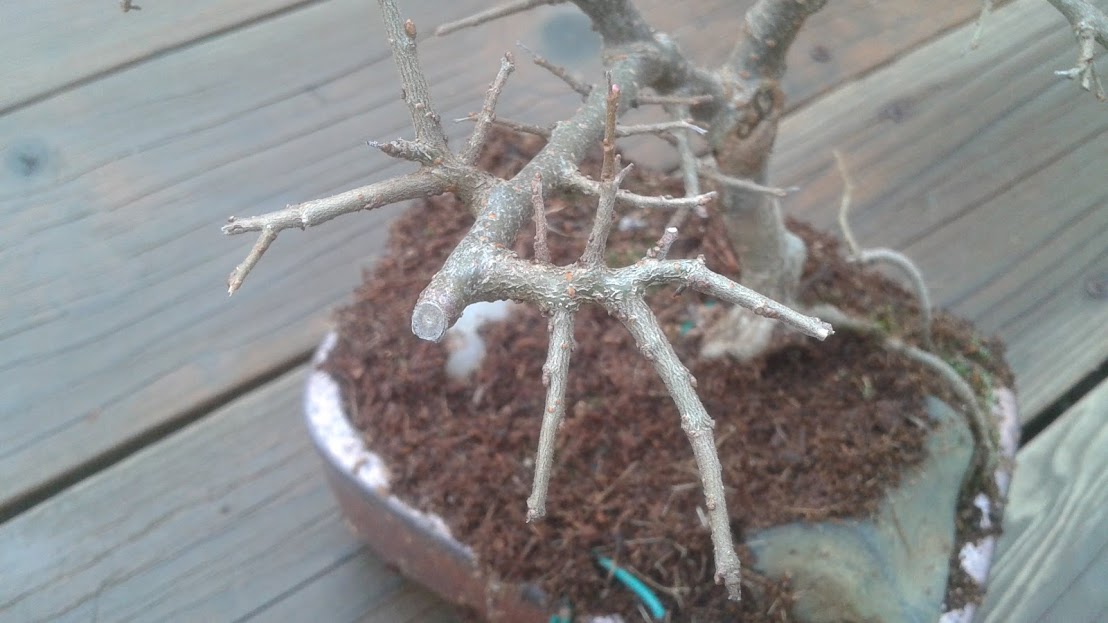
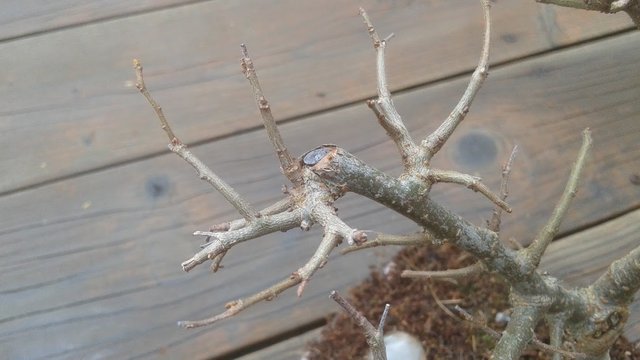
This branch introduced another pruning strategy with some decisions I need to make.
To create a fan shaped pad similar to the beautiful cloud pruned bonsai trees we see in Japan, I need to create some movement and change of lengths and direction in the branches so they don't all point in straight directions in predictable angles. One method for doing this is to look for branches that grow evenly in alternating directions along a branch.
By pruning off a branch from each side, alternating between keeping and removing a branch, the remaining branches will take on the new form. First there will be a long side branch, followed by a medium branch further down and heading in the opposite direction, and toward the end of the main branch will be the smaller branch heading in an alternate direction again.
Any time I had to pick between branches, I usually prefer to remove the thickest one. I want all the protruding branches to be smaller than the one it is connected to. If there is a small bud forming, I can remove a branch adjacent to it, because I know a new small branch will be forming there soon.
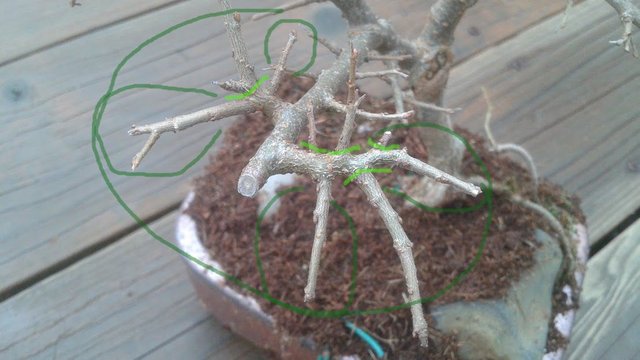
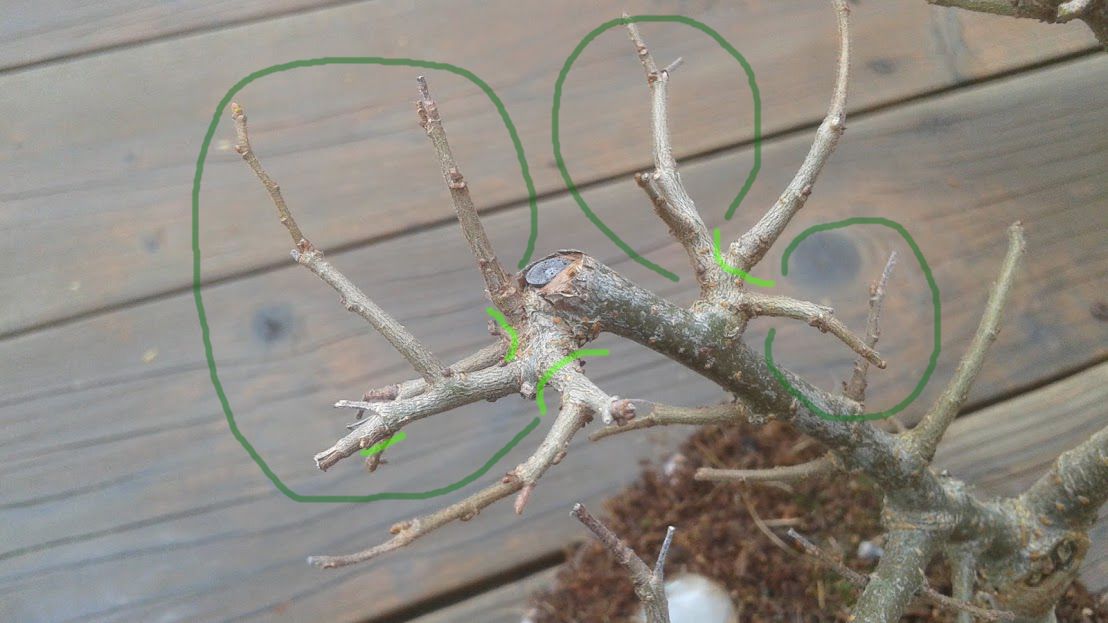
Light green lines shows the places I will choose to remove branches. Dark green curves are the pad shape of branches and leaves that will form in Spring, and the larger fan shape from the remaining branches.
It was difficult for me to choose which branches to keep. I didn't want to keep a whole bunch of branches bunched up close together, because that would cause the connected branch to fatten up and swell at the top of the tree. Not good for overall proportions. Two of the branches were already heading backwards into the center of the tree.
In the end I decide to keep the nearest branch and the furthest branch, to keep the inter-node distance from the main branch as short as possible (another key principle in bonsai design). I do not worry about the other branches so much because I know this tree backbuds very easily. I'll probably get a few new branches in between here in the future, especially with the added sunlight shining on this open space.
Sorry tree. This is going to hurt me more than it hurts you.
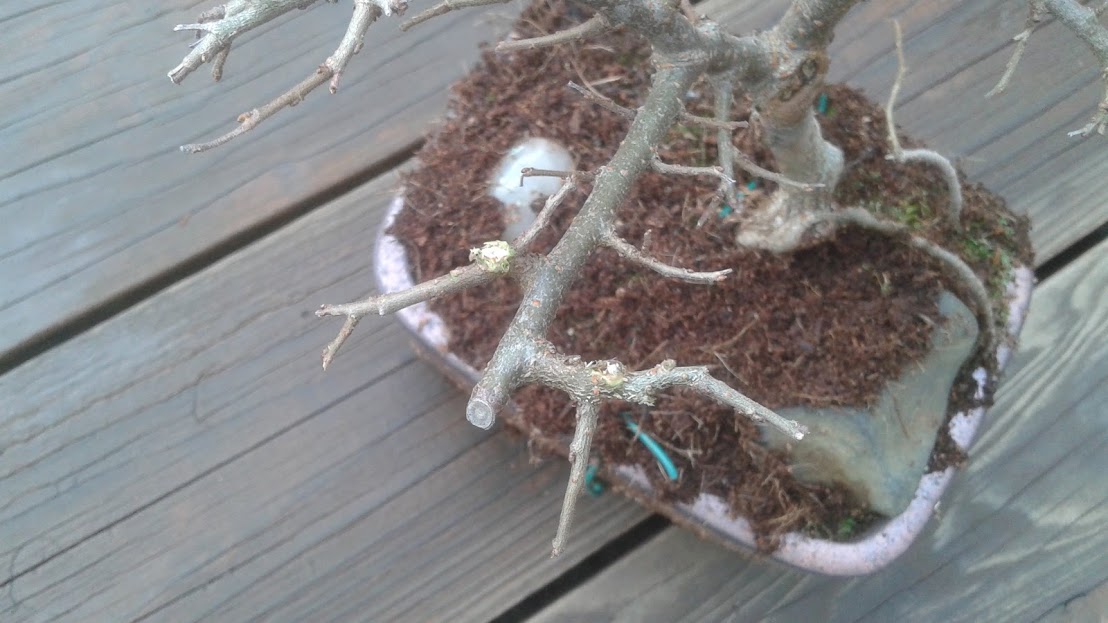
The concave branch pruners I am using didn't get the cleanest cuts, but they get the job done of biting through the hard wood. I can clean up the thin frayed ends with a sharp blade. I tried my best to cut as close to the collar of the branches as possible, without cutting into the main branches. A little bit of nub is okay to help the cut heal, as long as it isn't leaving a stump end. Stumpy ends don't look like good pruning generally, and is not natural.
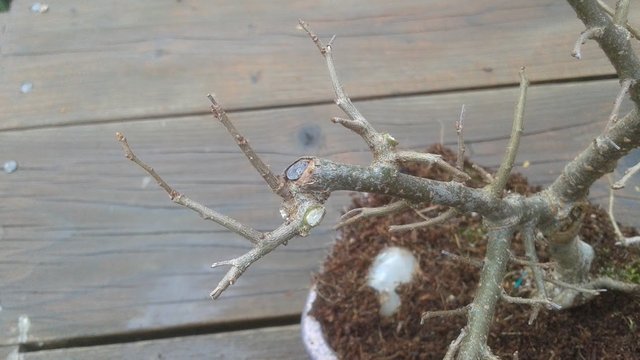
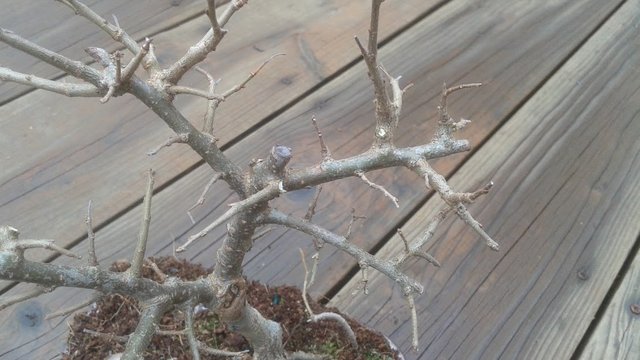
Here's a spot in the photo below I had to spend a bit more time thinking about.
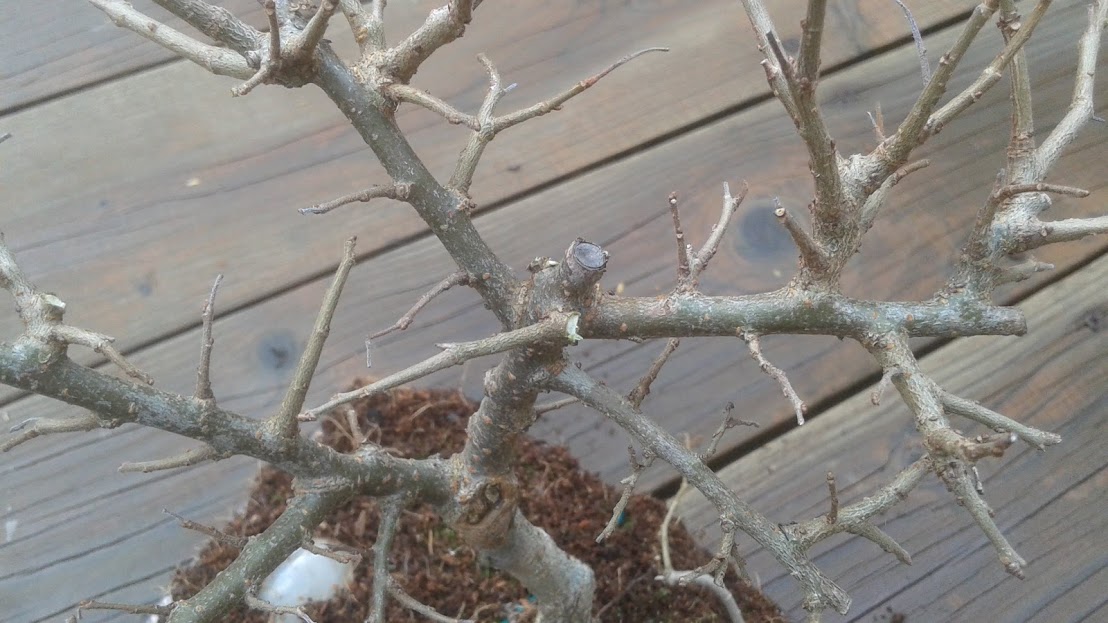
After pruning off some of the weak little multi-branches sprouting from the center, I ended up with this odd intersection.
Obviously that big stump on top needs to be removed.
The lower branch is very close to the top two branches, so I am starting to think one of these upper branches should be removed, or I could remove the lower branch. I kind of like the lower branch because it fills the lower void on the right side. There is no real purpose to having two dominant branches on top. One of these should be selected as the true top branch to form the apex of the tree. By making a deep prune here, I can also reduce the node so it doesn't look so thick. I'm thinking of removing the top right branch.
Before I do that, I thought I might continue practicing my pruning skills on the areas I find to be pruned on it.

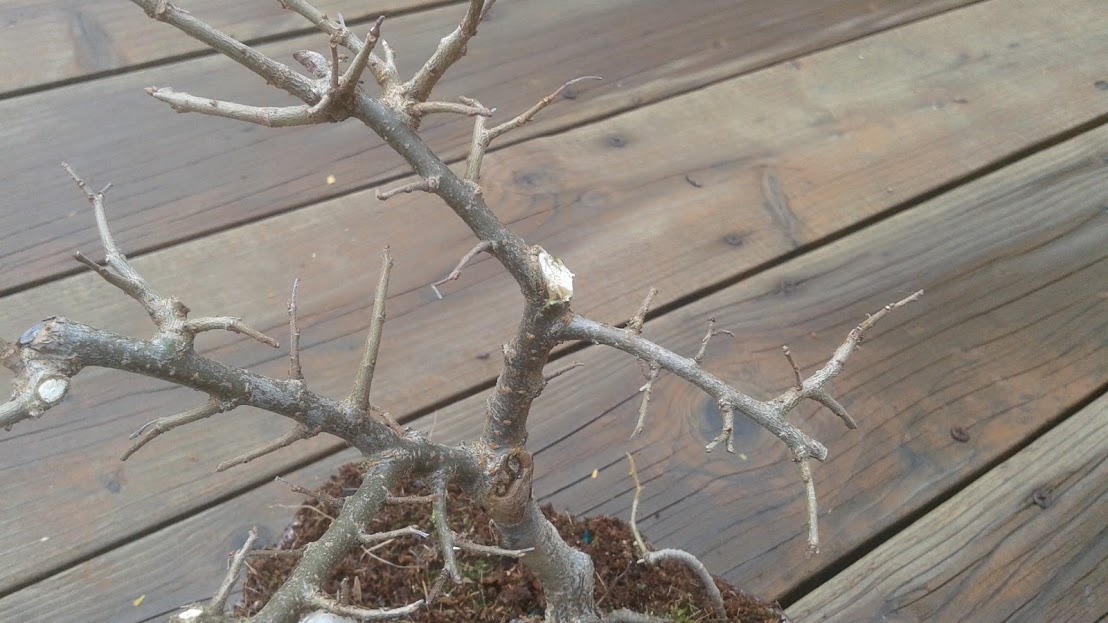
I know, I know. It was a major branch removal. This will change the design of the tree forever. If you really like that branch, do no fret. All is not lost...
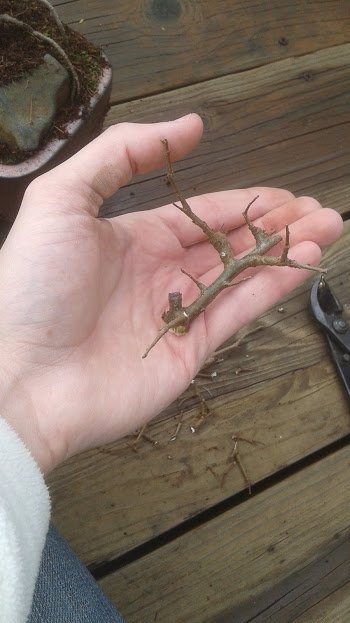
Chinese Elm is one of the easiest trees to root from cuttings. I decided to save this branch and plant it into a nice wet soil. In the Spring, if it forms leaves, then I know it is still alive, and it will form roots and become a new tree. Maybe I could probably give it away to someone who might want it.
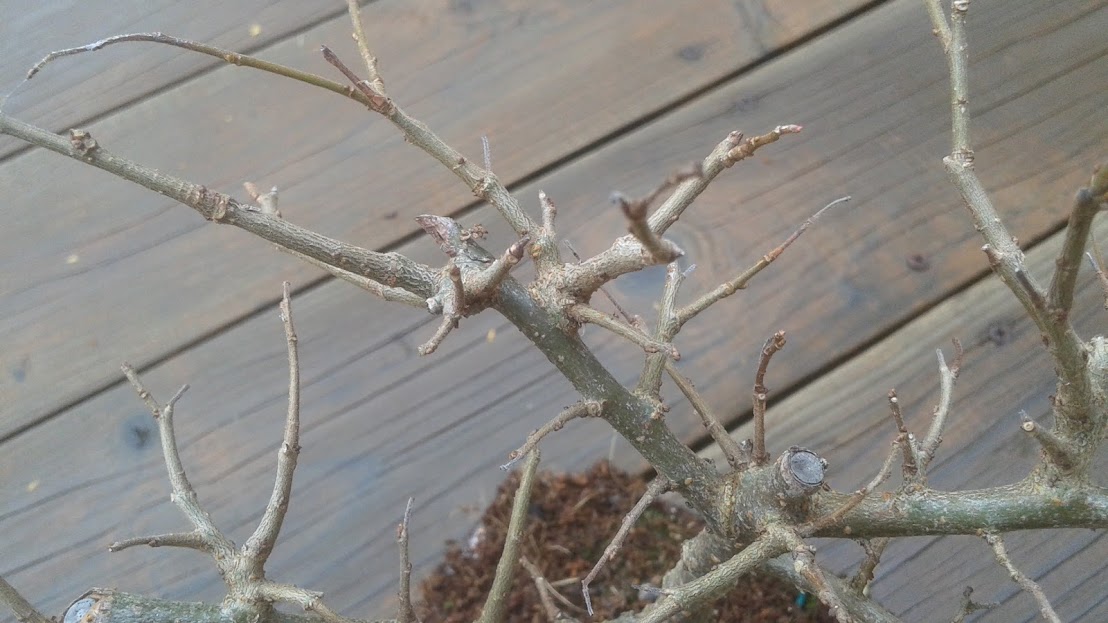
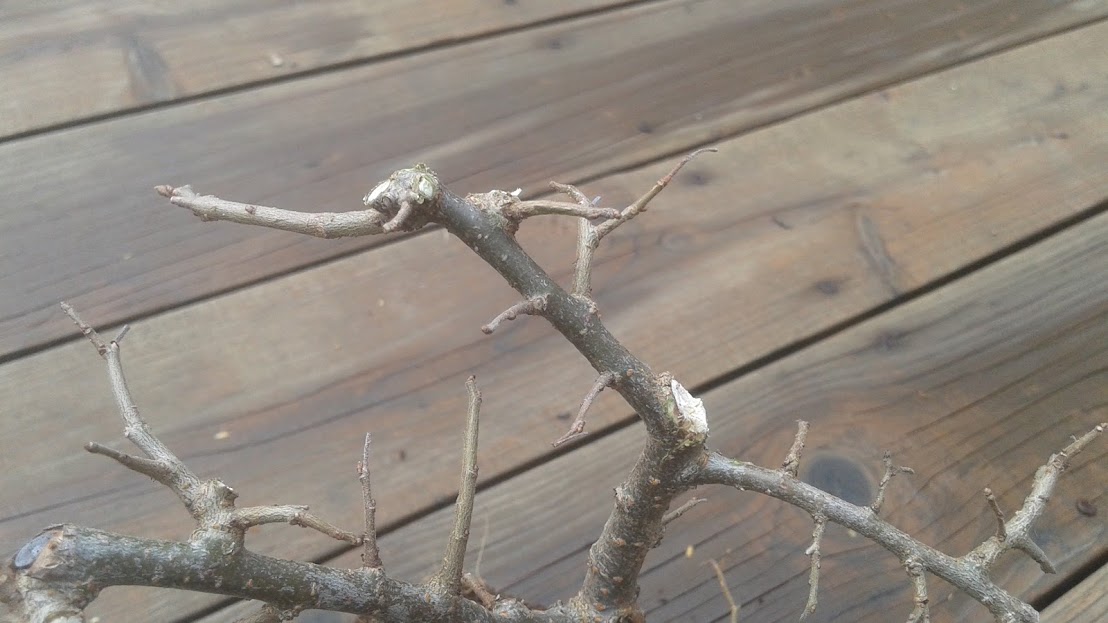
See how the branches coming from the main branch are much more proportional now? Removing the branches I felt were over-sized helps bring attention to some of the smaller detail branches, and the shape they are adding to the sillouette of the tree.
Here's what the full tree looks like so far in total...
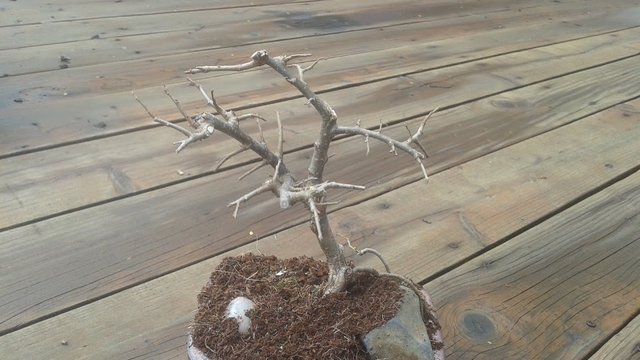
Just needs a little bit of clean up. Missed some of the obvious stubs in the first pass, so I will remove them now.
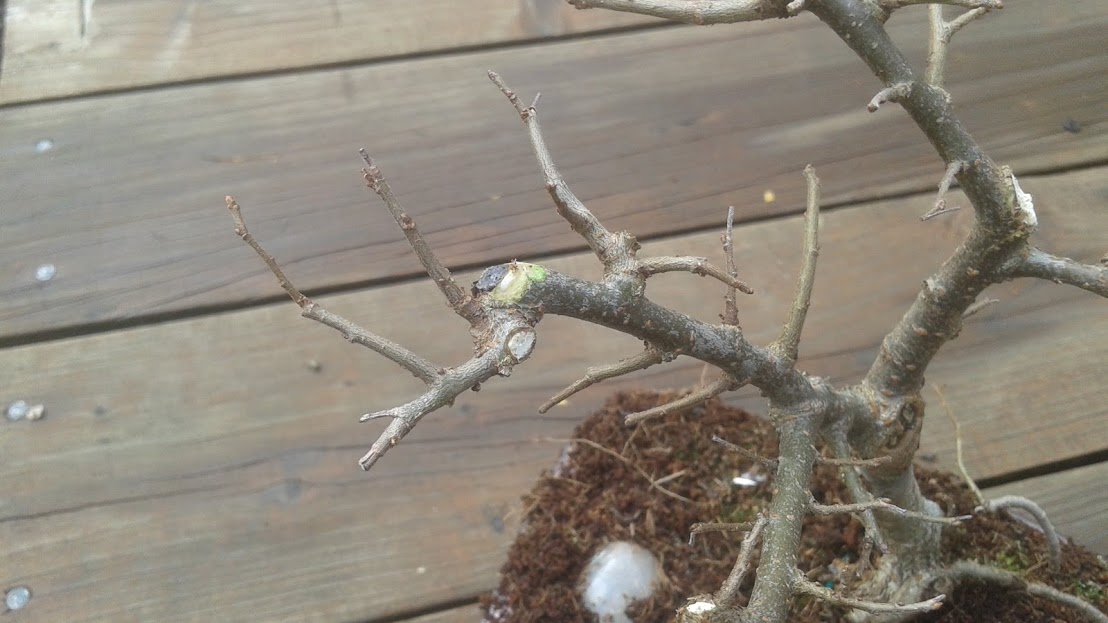
See all of the green wood? That means the tree is definitely alive in this area. There is a probably a lot of sugars trapped under the surface of this branch. Sugars, not fertilizer, produced through photosynthesis is what will feed the tree energy to grow leaves and branches in Spring.
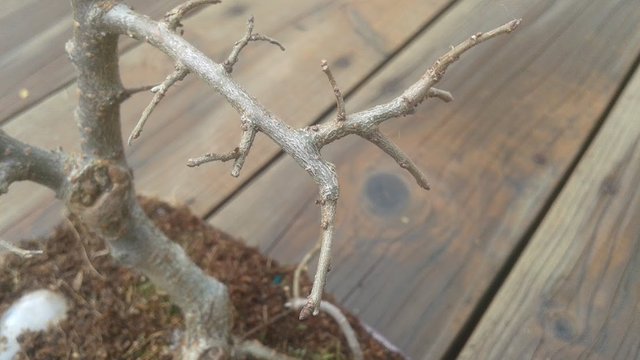
Removing the end of the main branch here helps the branch continue to flow towards the curve of the small branch. It now looks like the main branch grew that way naturally, but it had some help. Now the branch tapers from wide to narrow from base to tip in this area because of the prune I made.
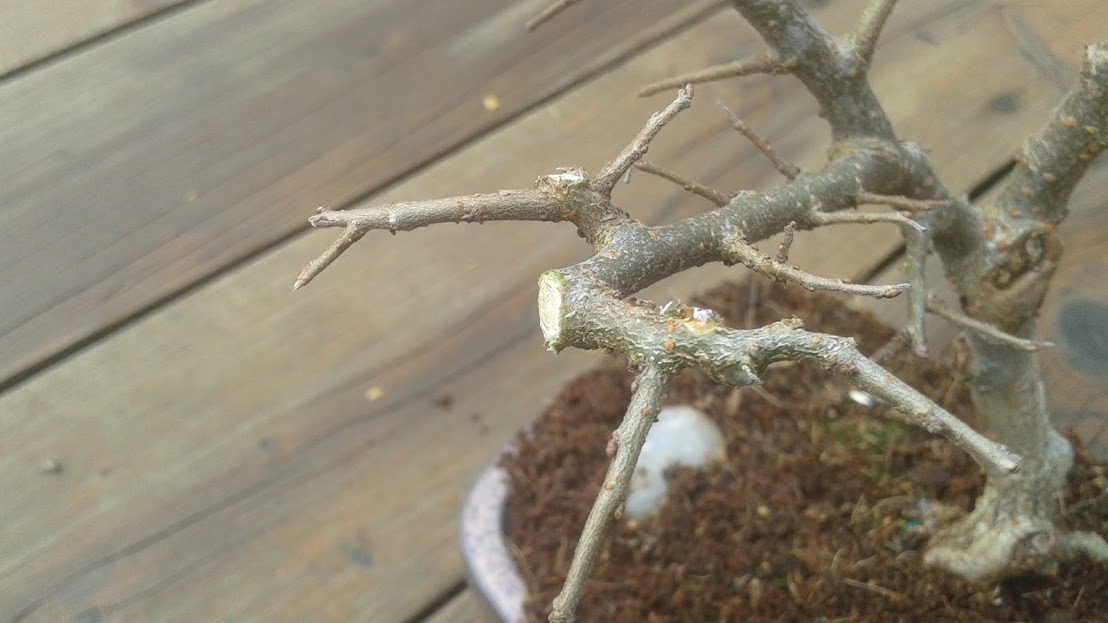
There was an old stump here that was also removed. If I want, I could try to use a sharp blade to bevel the corners, but I think I would rather let the tree try to heal from a flat clean cut. You can see on the trunk of the tree the way the bark will heal, it will sort of fold over with a rounded edge. As a personal decision, I also kind of like that I can see the rings of the tree on this cut, so I'll leave it alone for now.
Conclusion
So what do you guys think? #Pruning tends to be a very controversial subject among tree growers. Everyone has a different opinion. I think it really depends on what you value in the design, and also knowing how the species of tree will react to the cut angles of the removed branches. Did you like the choices I made? Would you have chosen a totally different end design? Do you think this tree was improved or not? Let me know in the comments below, because I love getting constructive feedback.
And before you say something like, "I would have let the tree grow naturally without any pruning." To that I say...
Bonus Photos
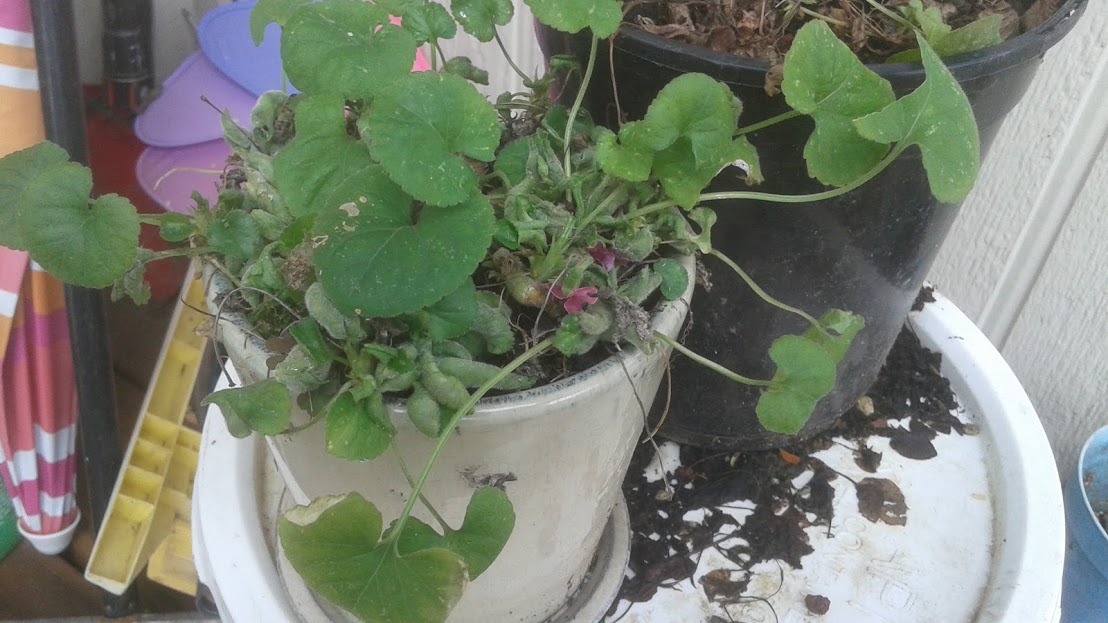
The Sweet Violet is blooming.
People think I'm crazy to put this plant out in the cold with no protection every year, but I swear that is what it wants. Without the cold, it never produces flowers.
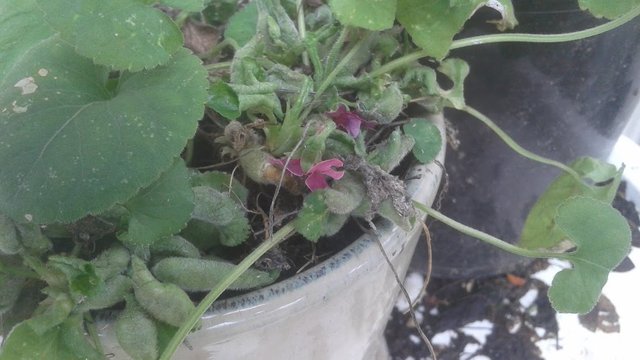
The flowers are very small. They are edible, and can be used as a garnish on desserts. They are slightly sweet like a delicate sugar candy.
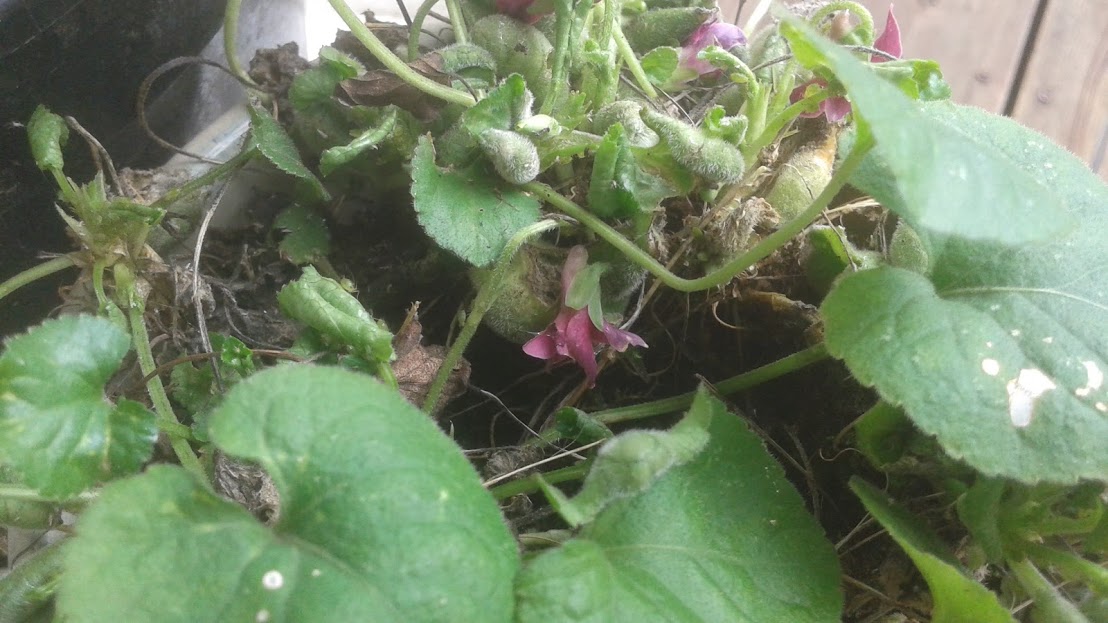
Sweet violets love a wet swampy soil, and they prefer partial shade and full shade, because the sun will dry out the leaves.
Keep an eye on these plants after they flower, because they'll release seed pods that will roll around and root into anything wet it touches. Your neighbors might not appreciate this invasive plant when it takes over their lawns. I keep mine growing in pot, and use a bucket lid as a saucer to catch the seeds if they fall off. I wouldn't want the seeds to fall between the boards of the deck either.


I would love to have a Bonsai plant at my place, or rather I can say many other plants also, but the issue right now is the climate does not support and I do not have enough space. Once i shift to a bigger place with a balcony I am sure gonna have a mini garden out there.
Thank you for the tips @creativetruth :-)
That's how I got started. One tiny little apartment balcony garden. Native trees are a great way to get started, because they can better handle the deep cold in your area.
Thank you for sharing, and I appreciate the input. You are lucky to have access to great resources and teachers at your school. Keep it up @daniellozada.
Wow.....i like this photo...this valuable tree... i like this post.....
Thanks for viewing.
Hey creativetruth! Thanks for another very interesting post. I've never read about bonsai before.
Great pics... made the wall of text much easier to get through!
And this part was especially close to something I might say: "sometimes I follow techniques from others to sharpen my abilities, and sometimes I go my own way. Mistakes will be made along the way, and that's how I prefer to learn." I love learning by doing and doing by learning. I rarely want to know how the "experts" do something, if I can dig into it myself the way I need to.
Thank you. When I teach others things I am good at, people ask me how I got so good at it. I tell them, "You will never really learn how to to do it right until after you have learned how to make all of the mistakes first." I don't believe in natural born talent in most cases. Everything must be learned from somewhere. ;)
Some famous gardener long ago said something like "all a person really needs is an awesome garden and a fully stocked library". Nowadays I would say the library is essentially the internet, and things like Steemit. Too few people have gardens.
Nice @creativetruth
Great tutorial! Excellent idea trapping any stray seeds to prevent unwanted plants taking over. Most usually don't think of that!!
sweet little thing :D.. nice!!
i always wanted a bonsai, but i dont have luck with plants .. don't know why, i know nothing :)
I really appreciate how thorough you are in explaining why you have decided to prune precisely as you have. Although I have no experience with bonsai trees, I do love gardening and value your evident passion for it. Thanks for sharing you knowledge and experience.
Nice