How I plant a tree into a bonsai pot
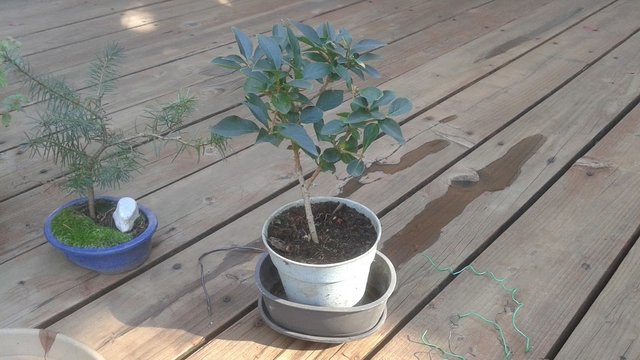
Welcome back friends. In this post I'm going to walk you through my recent project with this tree pictured above. The roots were starting to crawl out the bottom, so I decided I would take it out of the training pot and put it into a bonsai style pot.
This tree is a Forsythia. Recently I wrote a post titled Little bonsai tree waiting for Spring, so be sure to read it if you haven't already. I like to make posts throughout the year of the progress of my various bonsai trees I am growing. It is a nice way for me to share my hobby with those who may be interested, but don't know how to get started, or they can't grow trees of their own for whatever reasons. Let me bring my trees to your own viewing space with these photos.
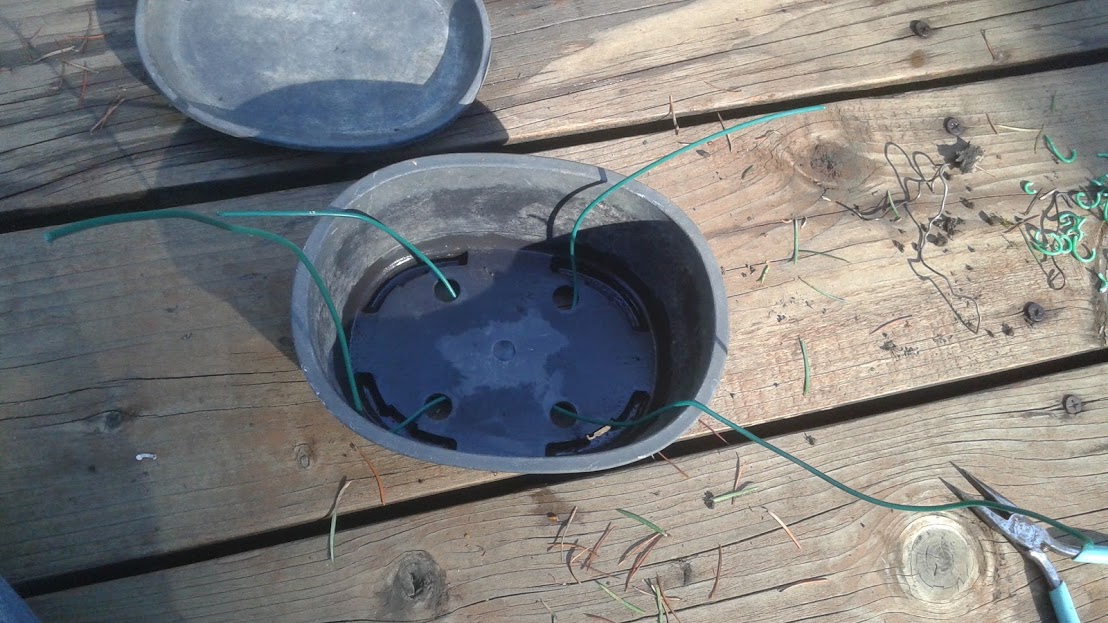
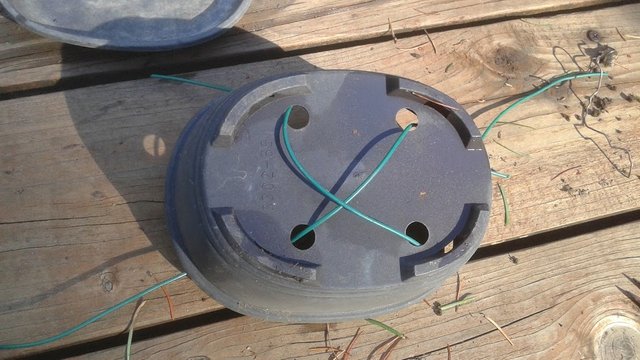
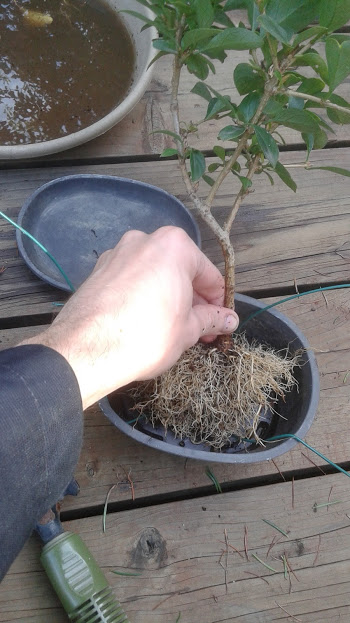
First things first. This pot is very unusual. Normally a bonsai pot has one or two holes. This one has four small holes. In order to keep the tree firmly inside the pot when I plant it, I use wires to hold it in. My decision was to place the wires in so they will tie together diagonally across the tree roots since the holes are going to be surrounding the trunk from only the corners of the pot.
Trees like to be held down tight. In nature roots grow deep underground where there is less oxygen and sunlight. Tipping trees become loose, and roots that become disturbed by sunlight and air will die and kill the tree.
Last time I grew a tree in one of these plastic pots, the tree did not survive. Dark plastic sometimes has a tendency to radiate heat from the sun directly into soil. You can literally cook a plant or tree if you keep it in a black pot, even with moistened soil. Winter is coming up, and I'm going to winterize this tree soon, so I'm not too concerned about the limitations of this pot for the season coming up. Maybe I'll consider painting this pot a lighter color before next summer arrives.
If you see your plants or trees growing roots out the bottom like this, it means you should move it onto an impervious surface (pavement or wood) so it doesn't continue to root downward. Yanking your tree from the trunk because it rooted into your lawn is an example of bad planning and poor strategy. A better pot will solve the escaping root problem shown in this photo above.
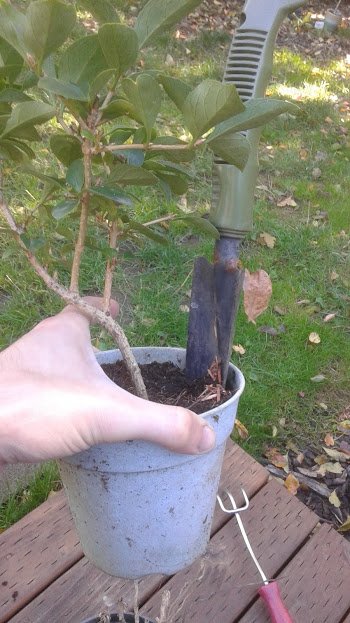
This handy shovel looks like an effective tool to remove my tree. It matches the curved shape of the pot it is in, so it should help to keep the root ball in tact. Next I'l use that hand rake on the deck to help brush out my root ball.
Excellent!
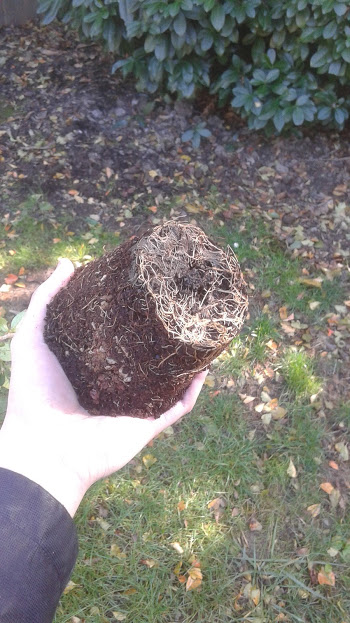
Everything came out easily in one piece. It is okay to slightly squeeze, tap, and slap the pot from the sides and bottom to help it to pop out. I use my hand to cup the tree trunk between my thumb and palm while I gently slide it out upside down.
Sometimes the soil does not come out nicely in one piece like this. That is usually a sign that the tree was not ready to be replanted yet, or it might be a sign that the roots are dying. Either way, make sure you have a something underneath just in case the soil falls out and makes a big mess.
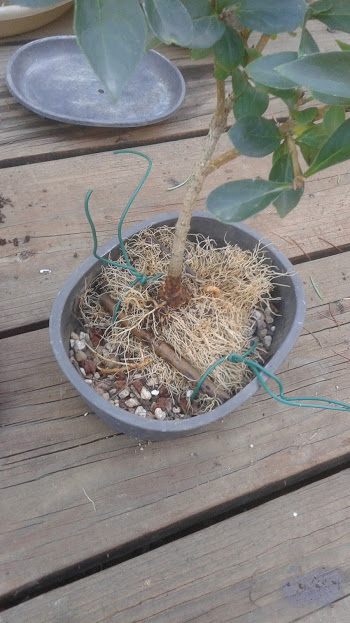
Next I'm going to brush off the excess soil to get a better look at the roots. In order to fit the tree into the new pot, some of the roots will need to be removed.
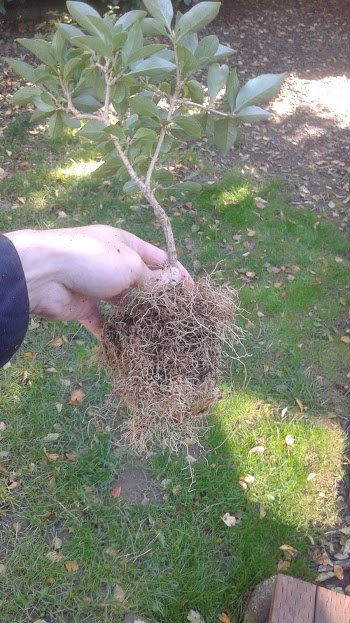
This is what it looks like after I used the hand rake to brush out the roots. I try not to use the rake to tear the roots. Doing so could accidentally pull out a large snarl of roots all at once from the base. All I do is use the rake like a comb to smooth and spread out the roots into more even directions from the center. A radial root system, like the spokes of a wheel, heading out in symmetrical directions around the trunk is the ideal design for a tree.
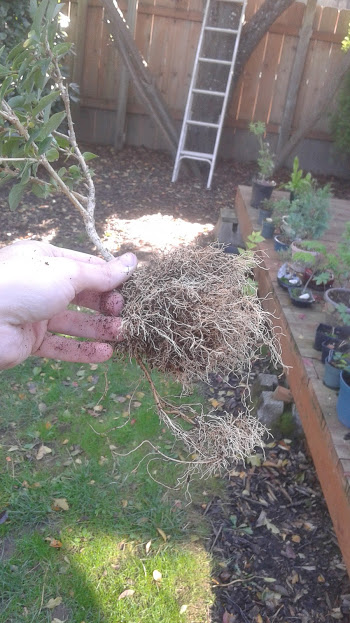
Sometimes you might find a large taproot like this one sticking out.
It isn't in proportion with the rest of the roots, and it doesn't even look like it will fit back in the pot because it snakes out in such a long, awkward direction. I'm probably going to trim this taproot down so it only barely reaches the edge of the pot.

None of the roots should be smooshed like spaghetti noodles under the tree in the pot. I want them all just barely touching the pot. My plan is to cut around the roots lightly so the root ends give it some structure, and to tease the ends to fork out into new smaller roots. It will also help the tree to sit upright. Propping the tree up against something to hold it up would be really lame, right?
I also inspect the top roots closely. Everyone does it differently. I like to trim off any top roots that are pointing up towards the trunk. Also I like to trim any top roots that are growing too close to another top root. I keep only the ones I like best, and I try to keep the top roots heading away from the trunk in a somewhat symmetrical pattern. If I have to choose between a big root and a small root, I prefer to keep the big roots. Large top roots visible at the soil line are called nebari, which means root-flare.
After pruning the roots, it looks like it should fit nicely in the new pot.
Some people go into a hysterical panic attack when they look at me pruning a tree's roots like this. They might even scream,"You're killing it!" Let me assure you, it won't kill a tree with a vigorous growth style like this, and if you act effectively. And besides, if I am doing it wrong, I want to make that mistake and learn from it. It won't be the end of the world.
Usually Spring is the best time to prune trees, but sometimes you have to deal with things sooner. Fall is probably the next best time to root prune, because the roots are going to start storing a lot of energy in the Winter. Summer also not ideal because the tree is in a growing phase, and branches could die off if you prune off the root that was feeding it.
Keep the roots wet constantly when root pruning like this. I had a bird feeder nearby, and I kept dabbing the roots into the water whenever it felt dry to the touch.
Try not to prune more than 30% of the roots. I think I only cut off about 15% to 20%.
Almost ready to put the tree in the pot, except I just realized I have a problem...
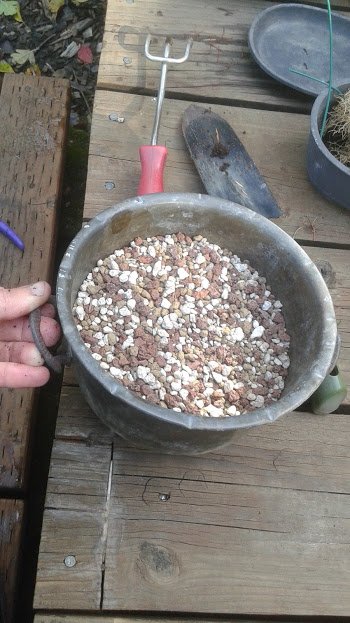
This is a special bonsai soil mix that I use for my trees. It is very porous, to allow water to drain extremely fast. As I recall, this mix includes lava rock, akadama clay, and a volcanic cinder rock similar to pumice stone but doesn't break as easily. My stash is getting low, and I'll need to stock up on some more bonsai soil mix soon. Hopefully I can find a good retailer online if I can't find one locally.
The problem I discovered is that I forgot to put screen material into my pot to cover the big holes up.
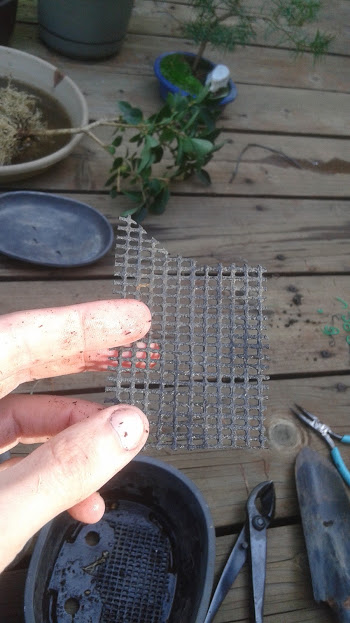
Screen material needs to have small enough holes to prevent the soil from falling out the bottom, but also have holes large enough to easily let water escape. This material I am using is very durable and it can be cut with shears to fit inside the pot.
Many beginner growers use an ordinary pot to grow their tree in, and forget to expand the size of the holes in the pot. A waterlogged pot will kill the tree in days. If water is dripping out the top or bottom of a pot when you pick it up an hour after you watered it, then it is probably holding too much water in the soil.
A good pot and soil mix can hold water within the soil to last a day and then dry out almost completely. The many small air pockets allow for water to evaporate upwards and feed the many small root hairs.
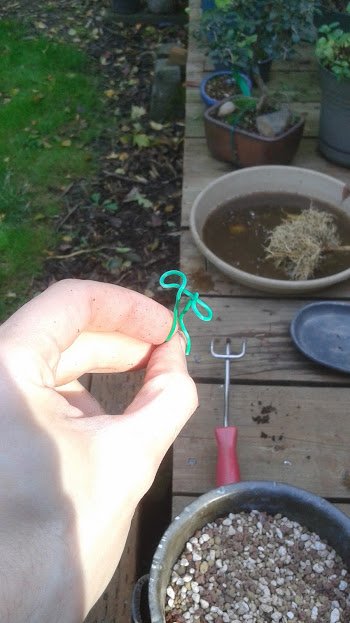
Look Mom, a little green wire man!
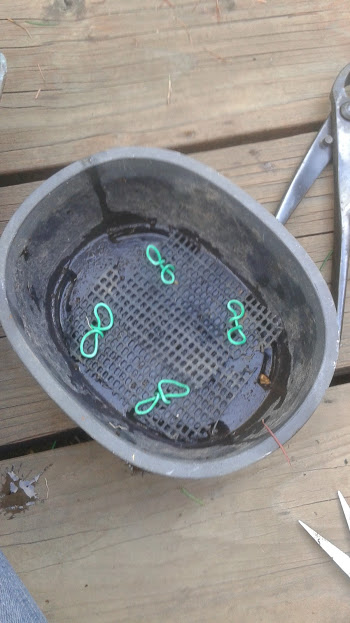
Push the little green legs through the screen material, and the little round arms will hold it down over the pot holes.
That should prevent the soil from spilling out the bottom.
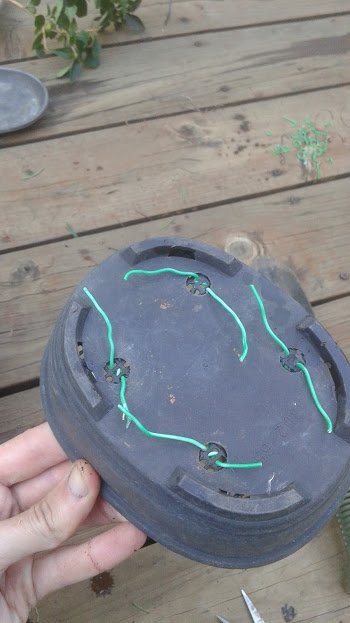
Spread the legs out underneath. They need to lay flat so the pot can sit on a flat surface evenly. With the four holes, it looks more neat and tidy to angle the legs along the perimeter. Any wires too long can be cut with a wire trimmer.
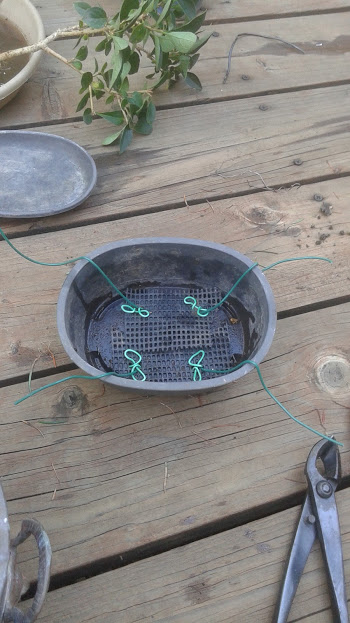
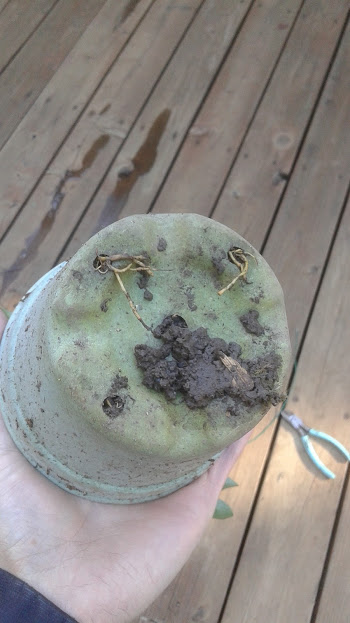
Next I threaded my anchor wires back in. Ready to add some soil now.
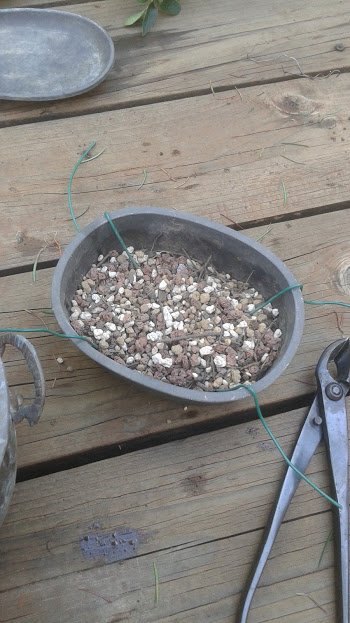
First I added a base layer of soil. Then I also added some compost. That's what the little sticks and leaves and dirt is you see. I used my own yard and garden clippings that I composted and sifted into small particles earlier this year. This tree is used to growing in a soil that was mostly organic matter, so I wanted to give it some of that back as it adapts to the new rocky soil mix. Organic matter that can decompose will help the soil hold onto nutrients and provide food for beneficial bacteria the roots rely on.
Here, the tree is positioned over the soil. Make sure the base of the tree is high enough so you do not bury the trunk under the soil. The wires are twisted over the top of the roots to hold it snug tight. I use two fat twigs between the wire and the roots to help cushion the roots. (Remember how wire can damage trees? Check out my post bonsai wiring paranoia)
Looking back at how I potted this tree, I wish I threaded my anchor wires with the ends underneath the pot, instead of out the top. Since I forgot, I had to use the soil to hide the anchor wires, and cut them as short as possible.
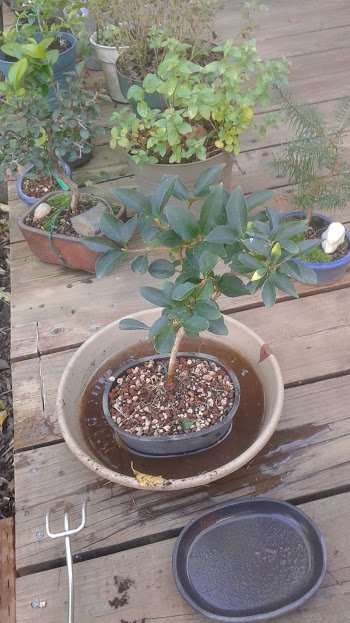
After filling the pot with more soil, I gave the tree a bath in this tray of water. All of the fine grains of soil will wash out, and the air spaces will fill in with moisture.
This is the tray I also use as a water feeder for the birds. Sometimes the birds like to take a bath too. Don't worry, I'll wash it out and put fresh water back in for the birds to enjoy.
I use my fingers to tamp down the soil to make sure there are no big air pockets. A master would use chopsticks. The roots need to be completely buried in the soil. Some of the top roots are sticking out. Mother Nature will probably help me to air prune those off over time.
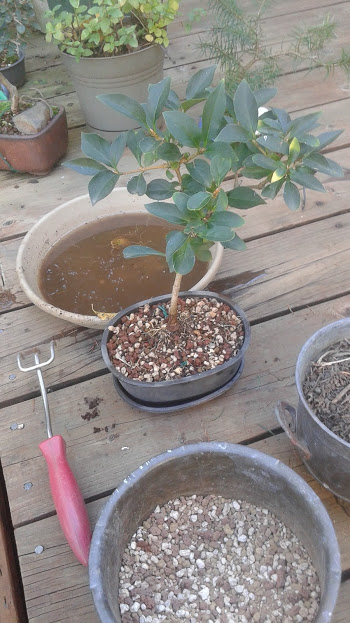
Here is the finished result.
This pot has a matching water dish, which makes it look nice. Notice the water is not pooling in the dish, so that means that soil has excellent drainage qualities. That will be very helpful for the super wet winters we get in my climate zone.
Now you know how to plant a tree into a bonsai pot.
Hope you enjoyed this post. There will be more like this one in the future.
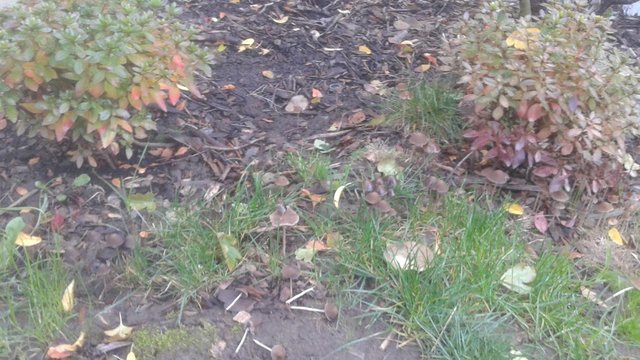
For my bonus photo, I found a forest of mushrooms growing again. Can you count how many there are?
Congratulations @creativetruth! You have completed some achievement on Steemit and have been rewarded with new badge(s) :
Click on any badge to view your own Board of Honor on SteemitBoard.
For more information about SteemitBoard, click here
If you no longer want to receive notifications, reply to this comment with the word
STOPLe sigh... We had a bonsai... it died. If only we had read this.
Looks like Chinese Elm. I make cuttings of these often. Very easy to grow if you keep the outside.
nice photo work... dear
https://steemit.com/steemit/@kaleem345/steemit-101-ebook-free-download-for-friends
Great explaination there @creativetruth.. Keep it up!