Steam boiler sight glass repair
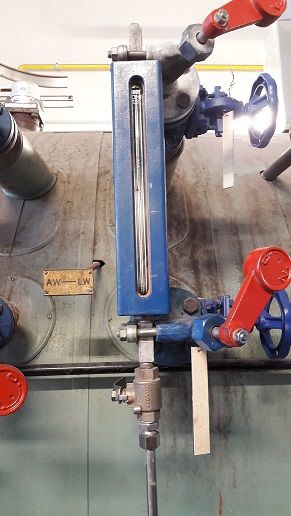
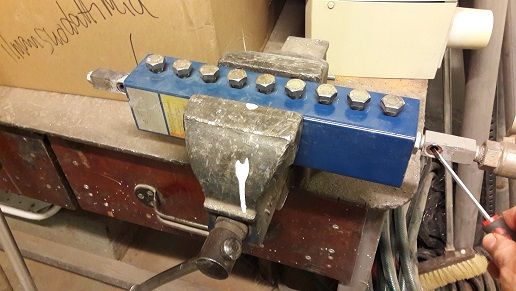
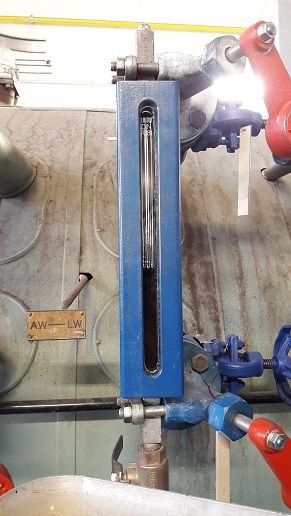
Life throws you about like a piece of bark on ceaseless waves. For some of you, it might be that one day you are working at a steam boiler plant, and are tasked to repair a leaking water level gauge on a steam boiler. It might even be that it is made by Vaihinger and is blue, like the one above, and it could be possible that you have no idea what to do with it. You want to do a good job, I assume, because no-one likes having a 160 °C steam spray at their face. Some might despair at their predicament, but You are in such luck, my friend, for you are reading a guide for repairing a genuine Vaihinger steam boiler water level gauge! Congratulate yourself silently, ponder on the uniqueness of this special spot in the web of cosmos, and then get to work.
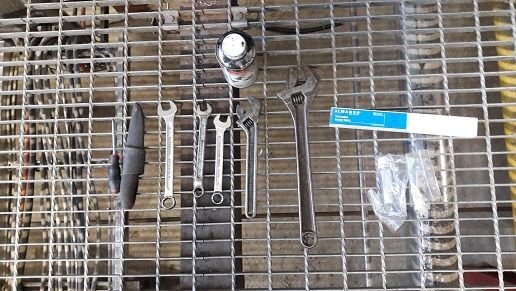
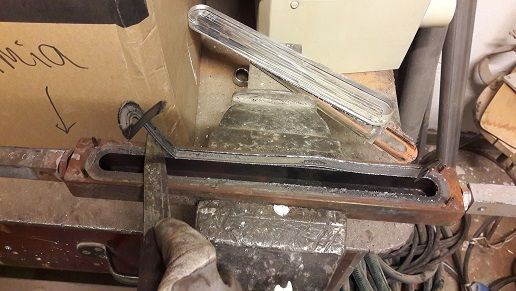
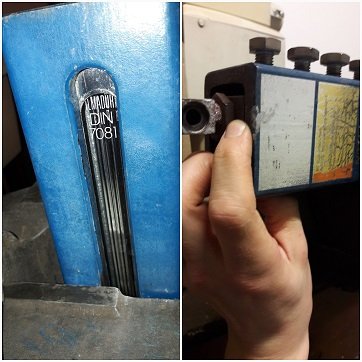
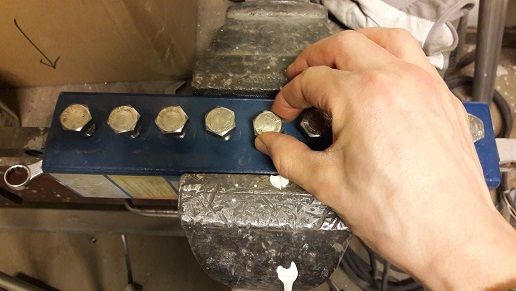
Tools needed, from left to right: a small flat-head screwdriver, a knife, a 19 mm wrench, either a 17 or 16 mm wrench (here I have both), a couple monkey wrenches, the top and bottom fittings, the borosilicate sight glass (this one is made by Ilmadur, make sure you have to correct size), some thermal anti-seize paste. A 24 mm wrench is also needed.
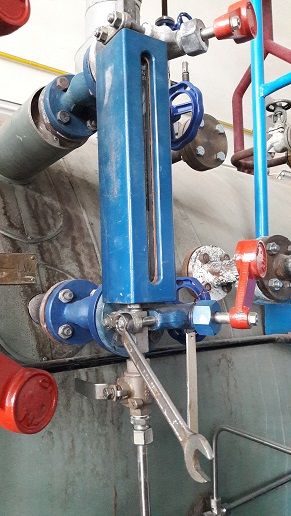
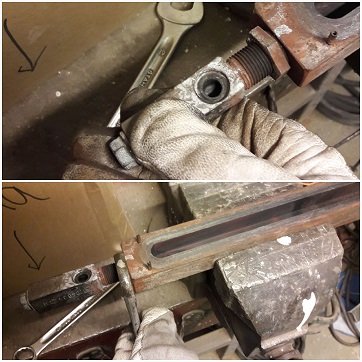
Unless you are certain the boiler has NO pressure or water in it, double-check to make sure the shut-off valves are tightly closed, both blue and red ones in this picture. You want to have a minimum of two closed valves between your skin and steam at 7 bars of pressure. Open the fittings with either a 16 or 17 mm wrench (16 mm nuts are a rarity, most often this thread size matches a 17 mm nut). All the threads are righty-tighty lefty-loosy unless otherwise noted.
There is a line down from the glass, and you'll want to loosen its coupling as well. In the picture, I would open the coupler under the valve with a couple monkey wrenches to avoid turning the valve itself. Make sure, however, that there is and will be no pressure in the line during the job.
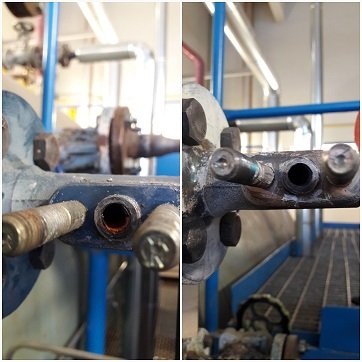
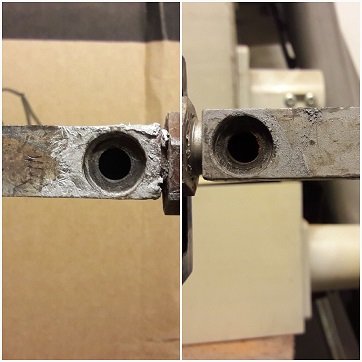
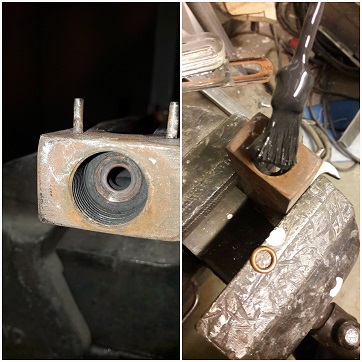
Once you have removed the structure without steam spraying all over the place, check the inlet holes and inspect them for wear. Steam and hot water eat metal away, and once the edge on these holes gets too thin, these safety valves need to be replaced. No amount of gaskets will seal the shoulder in that case. These are still round and good to go.
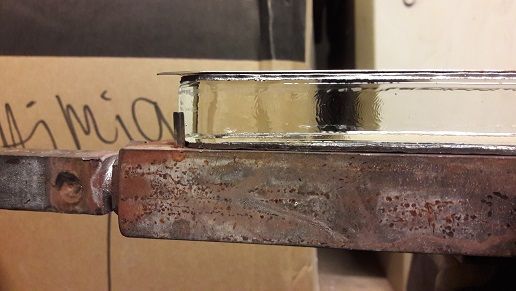
Set the glass in a vise, clamp it down, and pry the copper gaskets from the end fittings with a screwdriver or a knife. They need to be replaced. These ones have a hollow, not a solid profile.
Again, inspect the end fittings' inlet holes. These look nice, too.
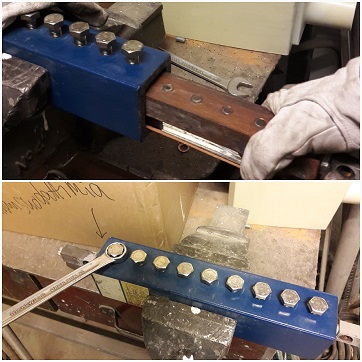
Now it is time to remove the glass itself. Starting from the edges and working your way inward, open the 19 mm bolts and then simply grab the whole package and pull it out. You'll need to open the bolts almost all the way for reassembly anyway, so might as well do it now even if the old glass came out with less work.
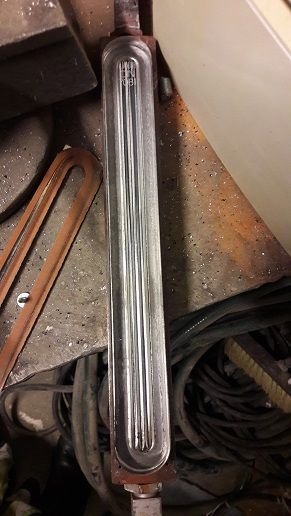
A fine sight glass there. No problems.
Remove the glass and any leftovers of the old graphite gasket from the body. The glass is not reusable even if it didn't leak. I would strongly advise against using OR re-tightening an old glass! True, borosilicate glass is very durable, can withstand hammering and whatever you throw at it, but it cannot withstand torque! I've had one of these burst open from steam after stupidly re-tightening the back bolts in order to "fix" a leak. I'm glad my gut feeling told me it probably won't work, and I wore my safety glasses. It popped open when I walked in front of it and a small shard of glass flew a lightning-speed at me, luckily missing my face. Don't cut corners here.
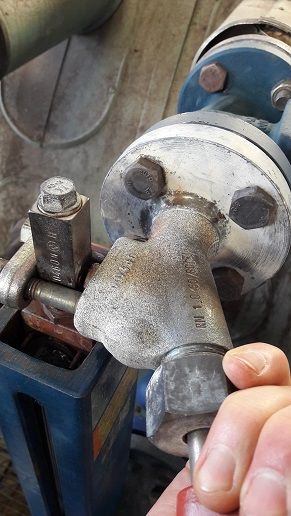
Next, we'll remove the top fitting since there was a leak here in my case. The larger, 24 mm, threaded sleeve opens counter-clockwise while the end fitting itself opens clockwise with a 19 mm wrench. This, here, is the exception to the rule of righty-tighty in the project. It is built so that you can tighten the end fitting - the one with the gasket plane, check that it's not malformed - with it facing any direction. Make a note of how far the sleeve and the fitting are screwed in, and what direction the fitting is facing. Having it face the right way really does help re-installation.
Hello, gasket-in-the-hole! Remove it by poking its edge from the inside of the canal. Then dab a bit of anti-seize paste into the hole and set the new gasket in. The same copper gaskets work here. Sometimes you might use two at a time, which has not caused any problems for me.
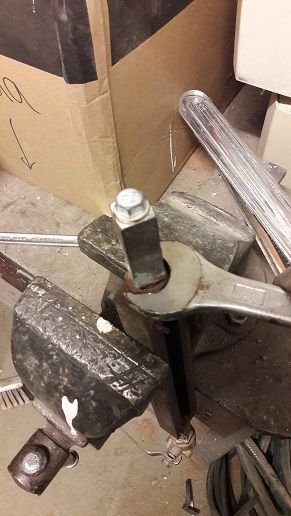
Once the fitting is threaded in enough - as per the previous, supposedly working setup - hold it put with a wrench and tighten the sleeve down. You can go TIGHT, it won't break.
Assemble the inner body, from top to bottom: the piece of sheet metal you hopefully didn't break or throw away, a graphite gasket (not necessary here, you can use a special paper gasket as well), the glass, another graphite gasket (very necessary here, since were trying to keep hot steam in).
Plug the assembled setup into the shell and align the outer gaskets with the opening in the shell. Inner body edge should line up with the shell edge. I used my thumb to push the sheet metal piece and outer gasket into alignment while using the other hand to set the edges right.
Time to tighten the glass down! It is critical that you tighten it starting from the middle and work your way towards the ends in SEVERAL passes! First, turn them finger tight: the middle bolt, the first bolts beside the middle bolt, the next tier and so on. After each pass the middle bolt will be loose again, because the gaskets give as you tighten the bolts. Go only snug each time once you use the wrench, don't over-tighten at first. The bolts will be tighter and tighter with each pass, and I would estimate the final tightness to be around 50 Nm. Takes about 6 minutes or so to do them all correctly, so take your time.

Once you are done with the tightening, dab some paste into the end holes and set the gaskets in place. The paste will help keep them in. Now, get ready re-install the glass!
Set it back in on the threads, and re-assemble the tightening system, the piece of metal with the knob-size in and those two 17mm nuts on each end, but leave it loose for now. You will want to carefully align the shoulder of the valve with the hole the gasket sits in, because otherwise it will certainly leak. If the nuts suddenly are very tight, chances are the shoulder is pressing against the side of the hole, and you will have to reposition. You can also do some final adjustments to the end fittings alignment here, just make sure it ends up tight. Also, pulling or pushing the pipes a bit can help with the installation.
Once an end is aligned, tighten it down but evenly, alternating both sides. You can compare the length of thread left visible to gauge the equality of your tightening.
Don't forget to re-attach the bottom pipeline, or you'll be in for a nasty surprise!
You're done, hooray! Open the valves a little bit, let in some pressure, inspect for leaks and if you're clear, open the shut-off valves (blue) all the way and the red valves three quarters of a turn.
Whew, that was quite the adventure, was it not?
I have never seen a guide for this anywhere, so if someone finds this, takes the time to read it and even applies it in real life, I will be glad I was able to help.
That is fairly arcane subject matter but you write good tutorials. Keep it up!
I thought so, too, as I was writing the tutorial: "I wonder if anyone will find this information actually useful?" Then again, it was a pleasure to write and compose, and I wanted to do a good job at it, as giving careless instructions in regards to tampering with hot steam apparatuses is likely to result in an injury.
Thank you.
All writing is good practice, no matter the subject matter. Even if you don't get steemit views, you never know who Google will send. Many people look online for odd subjects like this
Congratulations @kuura! You received a personal award!
Click here to view your Board
Congratulations @kuura! You received a personal award!
You can view your badges on your Steem Board and compare to others on the Steem Ranking
Vote for @Steemitboard as a witness to get one more award and increased upvotes!