ColdPi - How to make an Offline Bitcoin Cold Storage Wallet
Making an offline cold storage wallet with a Raspberry Pi Zero and Electrum
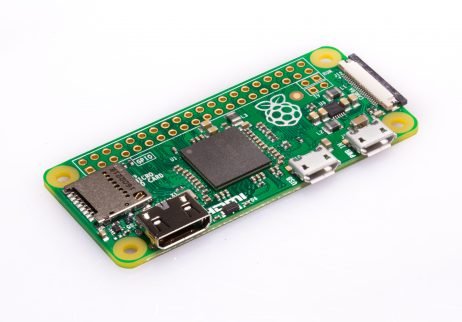
Say Hello to my Little Friend!
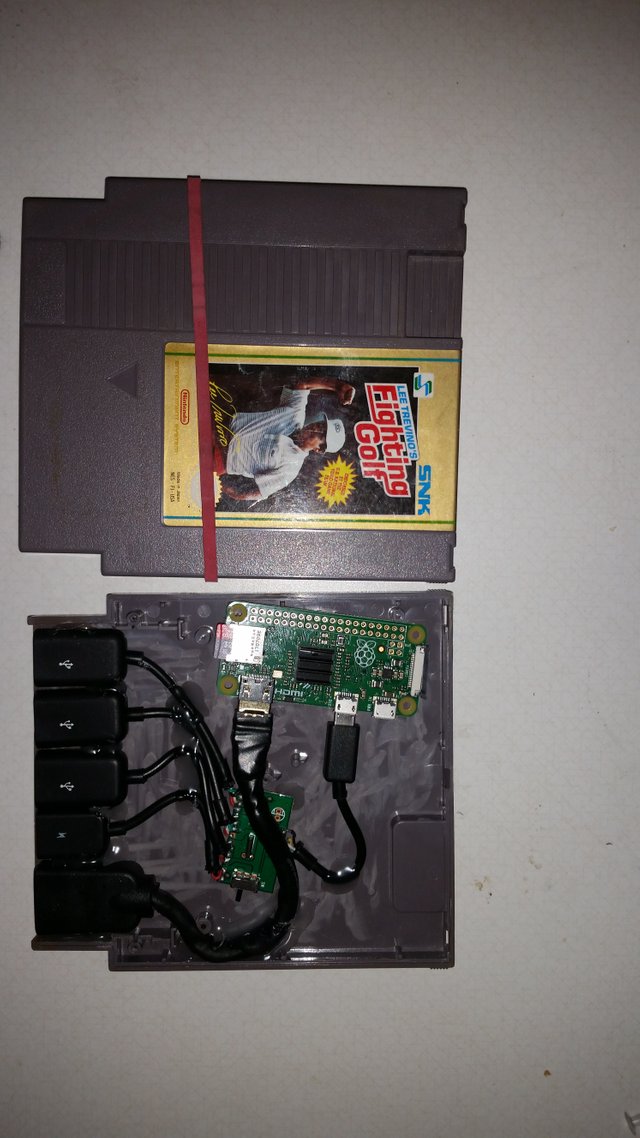
Actually, I should say "Friends," because I couldn't help but make two. Let me explain.
I've been wanting to play around with a Raspberry Pi for a while now, but I haven't really had the time to do much. Well, recently I got the time, and I decided to get a Pi and make myself a retro Gaming station. I stumbled across a bunch of videos on YouTube of RaspBerry Pi Zero boards stuffed inside an old NES cartridge, and I was sold.
I went to Raspberry Pi's website, followed a link to the distributor to order one, and they wanted 7 bucks for shipping a $5 board! Well, I showed them: I bought 3!
I bought the new hotness, the Pi 3B+, the Zero, and a Zero W, which is the same board as the Zero, but with onboard WiFi and Bluetooth.
Now, having the two Zero boards got me thinking: what is the best use for Zero? You see, the Zero doesn't have any networking built in, so you have to add something to it to go online. Well, naturally I thought a Bitcoin Cold Storage wallet was a good application.
Enter Electrum
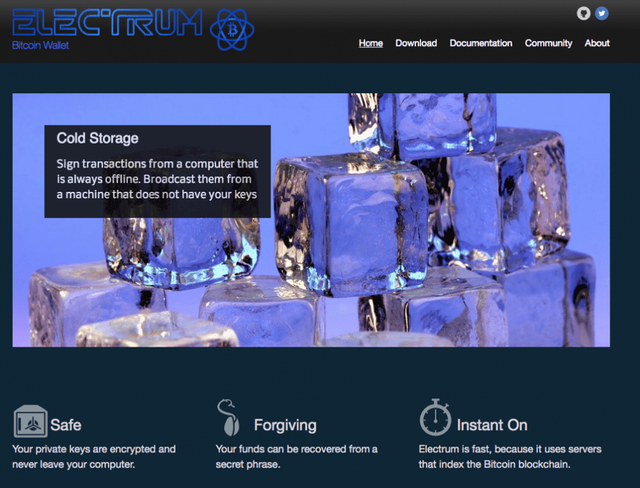
The idea is to install Raspbian, the default Linux Operating System for the Raspberry Pi family, on the Zero W with WiFi, download and verify the needed packages for Electrum, and transfer them to the Pi Zero via USB. The Pi Zero would have a fresh install of Raspbian with a brand new SD card, never having been connected to the Internet and not capable of it.
The Pi Zero can now be used as a normal, albeit slow, Linux OS that you can use exclusively to create a Bitcoin wallet for cold storage. You can use Electrum on any other device to receive funds to the cold wallet, but you would have to log on to the device, transfer the transaction to a USB, move it to the Pi Zero to be signed offline, moved back to the USB, back to the Online Electrum wallet, and broadcast.
I know that sounds like a big pain in the butt, but this wouldn't be used on a daily basis. This would be more like a trip to the bank: you get some folding money, stuff it into your cell phone, and head out. The Pi Zero is an off-line computer that has never been On-line, and won't ever be On-line.
Buyer Beware!
I'm not really a security expert, so I'm posting this for critique as well as to help anyone out who wants to give this a try. It's a pretty secure solution that doesn't require a whole lot of trust, which is an advantage over consumer hardware wallets. However, it is a bit of a project, so you should probably enjoy tinkering with computers if you are thinking about trying this.
Also, just so we're clear here: I'm not offering any promises, guarantees, advise, or new Commandments for God. This is just me sharing a project I did for anyone interested.
Window? Not today, sir. (Or ma'am)
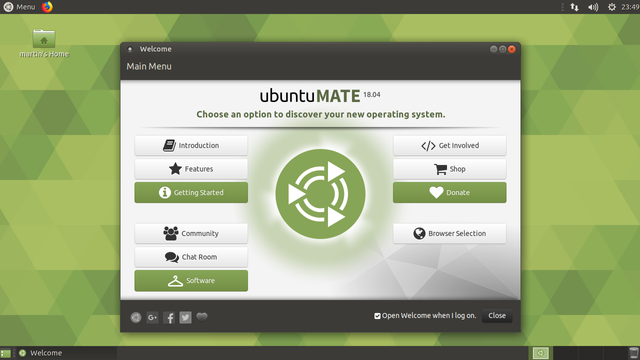
I'm going to stick to using all Linux instructions, not because it's easier, but because it's free. I am installing Raspbian on both Pi Zero boards, which is free from Raspberry Pi, and I am using Ubuntu MATE to download and check the Raspbian OS and flash the SD cards. Ubuntu MATE is free, and anyone can run it from a USB card on almost any machine.
You don't actually need both Pi Zero boards. You could do this by buying just the Pi, and using a virtualized Linux pc, a fresh install Linux running from a live USB, TAILS, etc... Each choice comes with its own vulnerabilities and advantages, do your homework. Nevertheless, a Pi Zero is five dollars, and the Zero W is ten, so we're not talking Ledger Nano S territory here.
What you'll need
Here's the supplies list that you'll need to make the wallet as I did:
| Item | Cost | Qty |
|---|---|---|
| Zero | $5 | 1 |
| Zero W | $10 | 1 |
| SD Card 16GB | $10 | 2 |
Other items you may need, and I did buy
| Item | Value | Qty |
|---|---|---|
| USB OTG Hub | $8 | 1 |
| HDMI adapter | $9 | 1 |
| Power adapter | $9 | 1 |
I bought a power adapter, hub, and HDMI adapter for both boards so I could mount them in the NES cartridges. This will save on wear and tear of the tiny ports on the boards, and they're cool. The power switch comes in handy, but isn't needed. Just make sure you use a quality power supply if you aren't buying a new one. Get 5V - 2.5amp, and you shoudn't have any problems. You're going to need some sort of hub to plug in a keyboard and a mouse, so use what you got or buy one. Also, if you don't have an SD card reader on your PC, you'll need a reader, about ten bucks on Amazon.
About the Case
There are loads of tutorials online showing how to stuff the Pi Zero into an NES cartridge, so I'm not going over that. For now I'm going to assume you have all the hardware listed above to finish this project. I'm also going to assume a basic familiarity with Linux. If you don't have that, ask questions and research. Don't put any money in the wallet until you're sure you understand what we're doing here.
Regarding the SD Cards
One last note, make sure to use two brand new SD cards of the same size, and preferably the exact same brand/model. Get a class 10 card unless you want to draw out the experience. Mark the cards before you begin! This is important because the goal is to build a computer that has never been exposed to the Internet. I will refer to the card that will get connected to the Internet as #1, and the Cold Storage card as #2.
Here we go!
First, start out on the Ubuntu MATE Machine. This is optional, but I like to start out by updating the system:
sudo apt-get update
sudo apt-get upgrade
Download and Verify Raspbian

First get Raspbian
Go to https://www.raspberrypi.org/downloads/raspbian/ and download the latest version of Raspbian. At the time of this writing, it's Stretch. Don't download NOOBS, get the actual Raspbian image. Make sure to verify the site's security certificate.
Now, go to the Home folder and create a folder called Raspbian. Copy the downloaded image to the folder and open a terminal in that directory. (In Ubuntu MATE you can right click inside the folder and select "Open in Terminal.")
Verify the Authenticity of the Download
To do this, we're going to calculate the checksum, which will tell us if the download is genuine and free from tampering.
$ sha256sum 2018-04-18-raspbian-stretch.zip
make sure you check the version!!! The output should look like this:
0e2922e551a895b136f2ea83d1bc0ca71e016e6d50244ba3da52bd764df5d1b6 2018-04-18-raspbian-stretch.zip
Now compare the output to the SHA-256 signature on the Raspbian Download page. If they match, you are cleared to proceed.
Flash the SD Cards
Grab Etcher
Now, you need to flash Raspbian to both SD cards, and to do this we're going to use another free tool. (isn't Linux great!) To format the SD cards and flash the Raspbian Image to them, we'll use Etcher. Etcher is a tool built specifically for flashing images to SD cards and makes the process very easy. It also helps avoid to uncommon, but potentially catastrophic possibility that you will accidentally format the wrong drive.
Go to the GitHub download page: https://github.com/resin-io/etcher/releases. Download the appropriate AppImage, I'm using etcher-electron-1.4.4-x86_64.AppImage, choose the correct one for your system. Also grab the SHASUMS256.txt file.
Verify Etcher Download
Open a terminal in the Downloads folder and verify the checksum the same way we did before:
$ sha256sum etcher-electron-1.4.4-x86_64.AppImage
use the correct AppImage name
Check the output against the text file, and make sure you're looking at the correct one. The text file has the checksum for all the downloads on the same file. If your download checks out, unzip the Etcher AppImage.
Flash image to the SD Cards
You'll need to authorize the AppImage to execute, so right click the file and select "Properties." Go to the "Permissions" tab and check the "allow executing file as program," then click OK. Insert SD card 1 into the SD card reader, and then double click the Etcher AppImage. This part is pretty straightforward thanks to Etcher. Select the Raspbian image and the correct drive for your SD card and click flash.
Wait patiently.
Once Etcher is done, remove SD card #1 and insert #2. Follow the prompts to flash the second SD card with Raspbian.
Insert card 1 into the Raspberry Pi Zero W and boot it up.
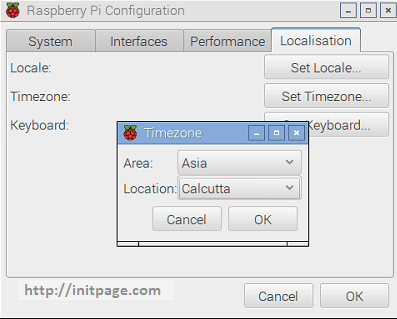
On the Pi Zero W
Once Raspbian boots you'll probably need to change a few settings first to make things easier. Mouse up to the top lefthand corner and click the Raspberry icon. When the options scroll down, click on "Preferences," then "Raspberry Pi configuration." Click the localization tab and set the Local, Timezone, Keyboard settings, and WiFi country to the appropriate settings for you and reboot the Pi.
Now that we got that out of the way, you should be able to connect the Pi Zero W to the Internet via WiFi. Do so now. We're going to download some pachages and pre-load them onto a USB drive so we can move them to the Pi Zero to be installed.
If you aren't doing this on a fresh Raspbian install, you may need to temprarily move some files out of the way first:
$ mkdir /var/cache/apt/archives/tmp
$mv /var/cache/apt/archives/*.deb /var/cache/apt/archives/tmp
Install the python dependencies:
$ sudo apt-get install python3-pyqt5 python3-pip qrencode -y
Now we're going to tie them all up into one file. First navigate to the directory:
$ cd /var/cache/apt/archives/
Now create an archive:
$ tar cfvz ~/debs.tar.gz *.deb
If you moved the deb files, now move them back:
$ mv /var/cache/apt/archives/tmp/* /var/cache/apt/archives
$ rm -rf /var/cache/apt/archives/tmp
Get the Python libs:
$ cd~
$ mkdir python_libs
$ cd python_libs
$ sudo pip3 download https://download.electrum.org/3.1.3/Electrum-3.1.3.tar.gz
Verify Electrum Download
***First, let's grab Thomas V's public key, the developer of Electrum. ***
You should still be inside the python_libs directory.
$ ls
this lists the contents of the folder. Look for the Electrum Tarball, At time of writing it's Electrum-3.1.3.tar.gz.
$ gpg --keyserver keyserver.ubuntu.com --recv-keys 7F9470E6
Now you need the signature from the downloads page. Scroll down to the section that says "install from Python sources," and right click on the signature link next to the Electrum-3.1.3.tar.gz link and select "save link as." Name it Electrum-3.1.3.tar.gz.asc.
Now go back to the terminal and check the file against the signature and verify it matches Thomas V's key:
$ gpg --verify Electrum-3.1.3.tar.gz.asc
Read the output, which may take a while, and check for the words: "Good Signature." Ignore the stuff about the key being trusted, that just means you didn't tell the computer to trust them. If it says the signature is good, then you can proceed.
Now Zip the entire folder up like we did earlier:
$ cd ~
$ tar cfvz ~/python_libs.tar.gz python_libs
Now move the archives we just created to a brand new USB drive
$ cp debs.tar.gz python_libs.tar.gz /media/username/usblabel
replace username with your username, by default it's "pi," and usblabel with whatever the Pi named your USB drive.
Now power down the Pi Zero W, remove the USB drive, connect the P Zero to the power supply, monitor, and keyboard/mouse. Insert the previously prepared SD card #2 into the Pi Zero and boot it up.
Prep the P Zero
We're going to take care of a few security issues before we start the installation. First, let's take care of the username and password situation. By default, every installation of Raspbian sets the super user name to "pi" and doesn't require a password to do anything. That's not going to work for this project. First, though, you need to set the localization settings like we did on the Pi Zero W. It's the exact same procedure, so scroll up if you need to. Once that's done, reboot the Pi and continue.
Create a new user
You really should create a unique user account and use that to log into the Pi. Then we'll secure the "pi" account. First, your new account. Open a terminal, and enter the following:
$ sudo adduser whateveryouwanttheusernametobe
Now set the password.
$ passw insertyourusername
follow he prompts, and pick a strong password. It can be one you have used before, but make sure it is a strong password.
Now change the password for user "pi"
$ passwd pi
Follow the prompts and change the password. Again, choose a strong password. You can use the same password if you want, but doing so is a little less secure in some ways, so it's a preference thing. There are some reports that deleting the user "pi" may cause problems, so it's best to secure it with a strong password you will remember and just don't use it unless you need to.
Promote yourself
You need to make your new user a root user, which is basically the same as an Administrator account in Windows.
$ sudo visudo
Here, a file will open up inside the terminal. You need to edit the file and save the changes. Look for the line that says: # User privilege specification, and add the new username to the entry below root "ALL=(ALL:ALL) ALL"
It should look like this:
User privilege specification
root ALL=(ALL:ALL) ALL
username ALL=(ALL:ALL) ALL
Push Ctrl+x to exit, choose Y to save, and hit enter.
Enter the Raspbian configuration tool:
$ sudo raspi-config
The GUI configuration tool should open. It can also be opened by clicking the Raspberry, Preferences, and then Raspberry Pi configuration like we did earlier.
Find and uncheck the Auto Login, login as user pi option. Save your changes and reboot. Login as the user you just created and then insert the USB drive you created earlier.
Install Electrum
![]()
Now it's time to turn this Pi into a bank! First, install the python dependencies.
Make a directory for the debs:
$ cd ~
$ mkdir debs
$ cd debs
Move the debs.tar.gz file to the new directory
$ cp /media/username/usblabeldebs.tar.gz .
Unpack and install the dependencies:
$ tar xvfz debs.tar.gz
$ Sudo dpkg -i *.deb
Now install Electrum
First copy the files over to the Pi
$ cd ~
$ cp /media/username/usblabel/python_libs.tar.gz ~/
Now unpack and install:
$ tar xfvz python_libs.tar.gz
$ cd python_libs
$ sudo pip3 install --no-index --find-links=. Electrum-3.1.3.tar.gz
Wait for the install to finish and close the terminal. You should have Electrum installed now, and in order to run it you can click the Raspberry, then click run. When the box pops up, type "electrum -o" Use the -o option to tell Electrum that it should open in offline mode. Now you just need to set up your wallet.
Cold Wallet set up
Generate the wallet
Once Electrum opens up, you can pick a name for your new wallet and start the setup. Don't import a seed code here, that would defeat the purpose of using an offline wallet. Instead, generate a new wallet from a new seed.
I just made a normal wallet, but you can make a multi-sig wallet from here if you want the extra peace of mind. Remember to make sure you use proper security procedures to store your seed phrase!
secure the wallet
Now, as you go through the Electrum setup, make sure you select the option to encrypt the wallet files. After the wallet is set up, require a password for Electrum to run. This time, create an entirely new, strong password that you won't use anywhere else. To do this, go to the menu, click Wallet, then Password. Follow the prompts and set the password. Secure the password properly, and don't lose it.
Get the Master Public Key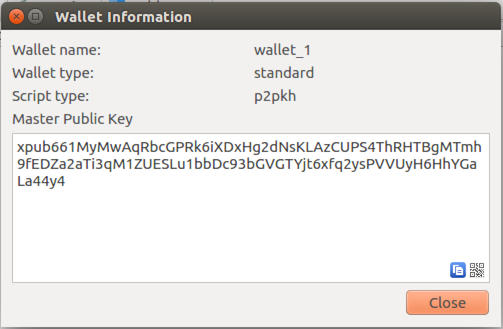
You need the Master Public Key to watch this wallet from another Internet connected device. Go to the wallet tab, then click Information, and copy the text that is displayed and save it to a text file on the USB drive. Now, eject the USB drive and move it to your online computer.
On the Online Wallet Computer
You can use Electrum on any device that the app is available for to monitor the ColdPi. Simply install Electrum on your PC, phone, MAC, or whatever, and do the following:
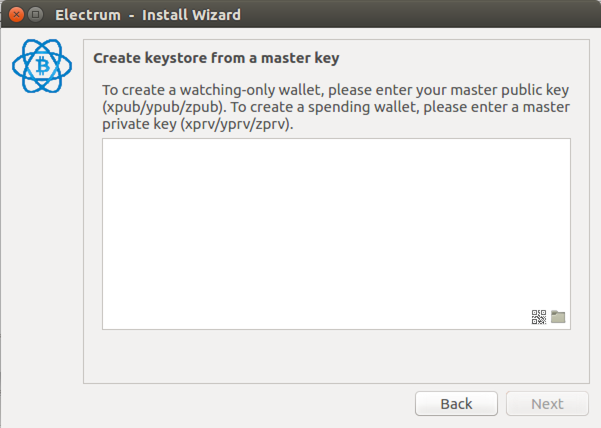
Open Electrum and select "create new wallet."
choose the "Master Public Key" option
copy the text from the file on the USB into Electrum when prompted
Now, you should have a cold wallet, the ColdPi, that will never be connected to the Internet. You can use the Watch Only Electrum wallet to receive payments and to monitor the account, but in order to spend from it you will have to log into the ColdPi. You will have to create the transaction on the Online wallet, transfer the transaction via USB to ColdPi, sign the transaction, transfer the signature to the USB, move the USB to the Online Electrum Wallet, and broadcast it to the blockchain.
Wrapup
Hopefully this tutorial was helpful and easy to follow. This is my first attempt at something like this, so please let me know where there's room for improvement. (Assuming anyone actually sees this, that is)
Also, if you're a security expert, what do you think of my solution? This seems pretty solid to me, provided the seed phrase and passwords are managed correctly. What should I add? Also, I'm planning on storing the SD card in a separate location from the Pi and running RetroPie on it, still only offline. I don't think that would compromise security, but if I shouldn't for some reason, please let me know.
I also would like to add an offline altcoin wallet, but I haven't found one that supports offline signing of transactions. I don't really want to install every Electrum knockoff there is for all the different altcoins, but if Exodus or Jaxx would support cold storage, Ill try to add it to the mix.
If you need help, leave a comment and I'll see what I can do.
If this was helpful, I would appreciate an upvote! I enjoyed building this thing, but typing out the tutorial was tedious. I don't know if I'll do it again unless I feel like people are actually benefiting from it.
Join our Discord Channel to connect with us and nominate your own or somebody else's posts in our review channel.
Help us to reward you for making it ! Join our voting trail or delegate steem power to the community account.
Your post is also presented on the community website www.steemmakers.com where you can find other selected content.
If you like our work, please consider upvoting this comment to support the growth of our community. Thank you.