HomeBrewing - the basic process description

Hello, Steemit friends :)
It took me some time but here it is - my first post about the secret art of homebrewing. This is a very extensive subject, so it will be divided into several parts - this will allow you to read and absorb the knowledge easier, I hope.
In this post, I would like to focus on presenting you the theory of brewing at home. I will do it as simple as possible, and the next articles will expand and complement the knowledge.
Ok, but someone can say: “Whoa, whoa! Why exactly should I bother, waste my precious time and make my own beer at home? I can simply go to the store and buy whatever I want since the choice is almost unlimited these days.” Agree, you can, but there are several aspects which make homebrewing more valuable than the ordinary shopping. First of all, it’s a great hobby, simply put. You can invite your friends for brewing and I guarantee that this will quickly turn into tasting and education kind of a party. Secondly, the pride that you feel after you made your first beer is indescribable :) You can also boast of your work with your family and friends and observe their reactions. It will give you the opportunity to answer the most frequently asked question, which is “how the hell did you cap those bottles?” And last but not least - in my opinion, brewing at home allows us to make much better quality beers than those that can be bought in stores. Of course, it takes a lot of practice to become a brewing master, but this is the reason I’m creating this article - I want to show you that this is quite easy and you can become one :)
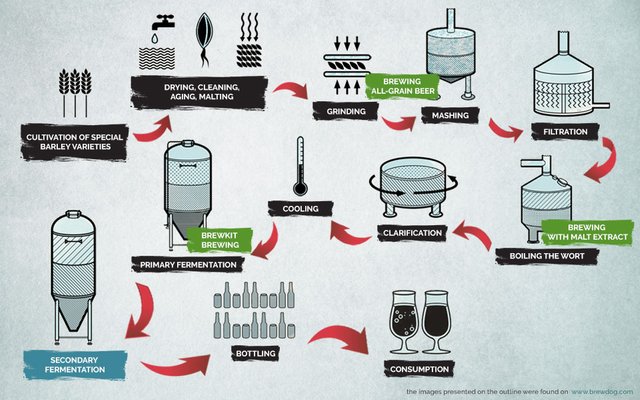
I encourage you to get acquainted with the scheme below. It presents the brewing process typical for the breweries, but it includes steps you start from, using different methods of brewing at home. Yes, there is one process but several methods for homebrewing.

Now I will discuss the above scheme and describe each of the methods.
It is clear where the barley is cultivated. It’s also not hard to imagine where it is stored. Breweries usually start their work from grinding process. Malting the barley is an action taken by factories called malt houses. The similar situation is with the home brewing - we should start our journey the earliest from grinding step. Malting the barley by your own seems not to have too much sense. Personally, I don’t know anyone who is a homebrewer and is doing that, but I do not exclude that some people do. The method which starts from grinding or mashing step is called "brewing all-grain beer".

This method is the most accurate representation of all steps of beer production which takes place in the breweries. It has one basic drawback - it is very time-consuming. But its benefits are invaluable. It gives us an almost unlimited window of opportunities to control the quality and the taste of the beer and thereby to follow our own preferences.

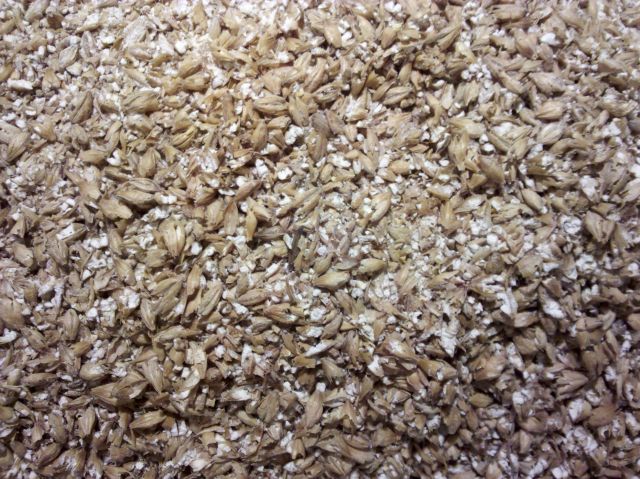
As I mentioned earlier, this method can be started from the grinding step. It is nothing more than fragmentation of the grains and it is needed to provide water with the easier access to the starches contained in there. If you want to do this step by your own, you have to stock up on a grinder.


However, the grinding step can be skipped. You can simply buy the grains that are already ground. It may be a little bit more expensive, but for sure it is much easier. In this case, we start the brewing from the mashing step.
This is the most complex step and there is a lot of information to be pointed here. It is sufficient to mention that there are a few ways to perform the mashing… But, it is supposed to be a basic level of knowledge, that’s why I will describe only one way, the most commonly used one.
During the mashing, the ground malt is added to the hot water (the proportions are 1kg of malt for 3l of water) and for around 90 minutes it is treated with few different temperatures. This step determines how much sugar will be left in the beer. The malt grains contain the starches which are unable to fermentate and is insoluble in water. Each temperature level releases some different enzymes changing the starches into a sugar. This way the sugars with different abilities to fermentation are created. There are a lot of enzymes, but the most important in the brewing process are two groups, namely proteases and amylases. First ones decompose the long protein chains into the shorter ones, and it has a very good influence on fermentation and the beer collar (foam). Second ones decompose the long starches chains into the monosaccharides. There are several temperature rests, but personally, I’m using only two most common ones - in 62°C and 72°C. Varying the times spent on each of those rests allows us to adjust the fermentable sugar profiles. For example: keeping the 62°C rest for about 20 minutes and then 72°C rest for about 40 minutes produces rather sweet, heavy beer, but switching the times at those temperature levels would produce lighter and more alcoholic beer from the same grains.
After the last rest, we need to do something known as iodine test. Simply take a drop of our mash and add some Lugol's iodine to it. If the test is positive (the Lugol's iodine changes the colour), then we need to extend the current rest and do the test again. If the Lugol's iodine doesn’t change its colour, the test result is negative and we can raise the temperature to 78°C where the enzyme's activity stops. This is known as a mash out. You need to be careful there and do not exceed the temperature of 80°C because above that level there are some tannins released - tannins that could destroy your beer taste.

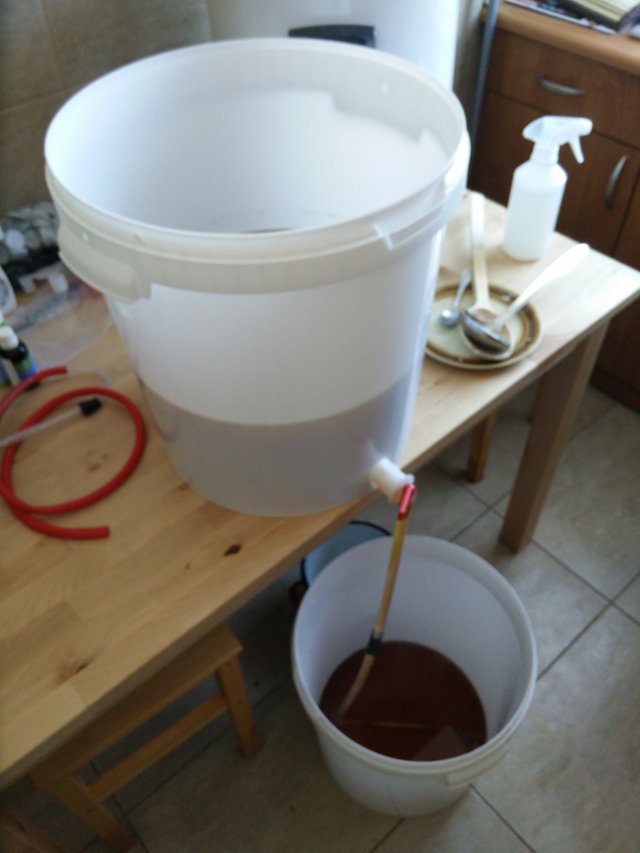
During the mashing process, the starches were converted into the sugars, but unfortunately, only part of them is dissolved in the water. Lots of them are still in the grains. That’s why, the next action to be done is filtration and sparging - the process that allows sugars to be separated from the grains. We do this by slowly adding the hot water (72-80°C) to the top of the grain bed. This extracts sugars from the grains and produces a sweet liquid called wort for boiling. This is a very slow process, it can take from 90 to even 120 minutes.


Wort boiling is a very simple process, but unfortunately very time-consuming. You simply need to boil the wort and keep it boiling for one hour. This is the moment when you add the hops and other spices to the beer. This step is very important because: it sterilizes the wort - killing off any bacteria and preventing infections, it releases critical alpha acids that bitter the beer from the hops, it vaporizes many undesirable compounds that can cause off flavors and aroma and it causes coagulation of undesirable proteins in the wort, allowing them to fall out during cooling.
Now I have to mention something very important - when the boiling stops, the wort becomes prone to the bacterial infections of all kinds. That’s why all the equipment we will use from this point must be sterile, and the wort itself should be cooled down to the temperature below 30°C as quickly as possible, in order to add the yeast.

The primary fermentation starts when we add the yeast to the wort after the boiling and cooling steps. As I mentioned above you shouldn’t add the yeast if the temperature of the wort is over 30°C, because the yeast will die and all previous work will be ruined. The fermentation container should be closed tight and left at the temperature that will allow the yeast to work. The primary fermentation process typically takes 10-14 days during which the bulk of fermentable sugars are converted into alcohol.

The secondary fermentation is an optional step, but personally, I’m doing this almost always to simply separate the beer from inactive yeast, proteins, tannins, hops and other products. This step also allows fermentation to complete and lets additional tannins, proteins and yeast to fall out of the beer. This process takes about 7 days.

For bottling our beer we need to prepare clean, disinfected bottles, caps, the capping machine and the priming sugar which will promote the fermentation after bottling. In other words, the priming sugar will ferment and carbonate the beer. You just need gently mix it with the beer. Next, syphon the beer into the bottles using bottle filler. Put the caps on each bottle and use the bottle capper to cap them.
Now all you need is wait :) Age your bottles for at least 4 weeks to allow them to properly carbonate before drinking. Some stronger beers may require the ageing process to be much longer. I know one Polish homebrewer who is ageing his stouts for more than two years...

Use this method if you want to save a lot of work and time. It is possible by using the malt extract instead of barley malt. For the home brewer, the process starts from boiling the wort, because the mashing and filtering steps were already done by the manufacturer. Later you should proceed in the exact same way as in all-grain method. The difference is you can save from 3 to 4 hours of your time. You even have the impact on the beer taste, because you can still use hops or other spices at this step. The drawback, in this case, is the price which may be higher than in case all-grain method.

This is the simplest, the least time-consuming and equipment demanding method. You just simply buy the can with the malt extract which is already hopped and the bug of yeast. This is rather cheap and very often combined with needed equipment to buy together. The process is trivial, you just need to add the can content to few litres of hot water with sugar and then complete it with around 20 litres of cold water. Adding sugar is very important because it will increase the alcohol to the level suitable for a given beer type. The huge drawback of this method is the lack of control over the taste and quality of the beer. The reason is that the brewing process starts from the primary fermentation step. But still, this method is very often recommended for the home brewing beginners.
Alright, we reached the end of the first part. I hope I interested you with the subject at least a little bit and you liked the article - if you have any questions or points to mention, feel free to leave the comment. I love to discuss homebrewing :)
Also, please stay tunned for the part two, I will post it in a few days. The subject will be all the equipment that is needed in the homebrewing process :)

Wow! I see a lovely hobby and a very good small business all mixed up together in this post. Homebrew or moonshine, it takes talent and patience to get it right. I would love to learn this and try it out once I have enough time.
Unfortunately, I cannot officially sell the home made beer in Poland... I encourage you to follow my posts, I will shortly post more about homebrewing - this will be great opportunity to learn for you :) And the time? You just need from 6 to 8 hours to complete the all-grain process and start primary fermentation. The rest is just waiting basically :)
Haha, I definitely loved this post! upvote
I can't wait to try this out someday! I adore homemade stuff. I would like to brew from fruits. Do you have any posts on that or would care to make one in the future? Lovely post! @imperfect-one Have a nice weekend and thanks for sharing!
Don't wait - try it! :) I will try to prepare some post about making a fruit beers, I never try that before, but sounds like a good idea to learn something new :)
Is brilliant! I want to try it at home!
Go ahead and fill free to ask me questions in case you have some doubts :)
Ok @imperfect-one! I understand. I am following you.
Cool, thanks :)
One day I will try it out, bookmarked.
I strongly recommend that :)
Excellent guide! Thank you for dropping a comment. You and @costopher might have some trade secrets to share! If you are interested in doing a beer exchange, do say in chat ;)
Thank you for the comment :) I will reach you on the chat for sure for more details :)
Thanks for the through guide! I had always wondered about certain steps in the brewing process. Nice post!
Awesome, looks kinda complicated. I'll leave it to the boyfriend and just drink his beer lol.
Hahaha I like the approach :D
I was at my mates last night here in Perth and he has a home garage set up where he brews around 7 beers, IPA pales , kolsch, wheat and a few crazy ones. I loved seeing the set up. So amazing and a great learning experience. Thank you for sharing
Yeah, I wish to have a home with garage and brew more than one beer at once ;) Maybe one day... ;)
@imperfect-one got you a $1.68 @minnowbooster upgoat, nice! (Image: pixabay.com)
Want a boost? Click here to read more!