My first time brewing beer (using a beer kit)
I'm sure I'll make a ton of mistakes my first time brewing beer. Please bear with me and join me on this journey, that will hopefully lead me to being able to produce excellent homemade beer on every attempt.
Note to readers - This post is really about me trying to brew my first beer, meaning I have never done it before and that most of the time I have little idea what I'm doing :)
Receiving a gift
It might come off as strange, but I never really thought about making my own beer. Strange, because I absolutely love beer and have made it my drink of choice for almost every occasion. I did read about it briefly a couple of years ago, but it came off as too much work, too much things that can go wrong and definitely too much cleaning.
Recently however, when I celebrated my birthday one of the gifts was a Home Brewery Kit (this one) and I decided then and there I will give it a try.
Equipment I started with
The equipment that was part of the kit included the following:
• 30 L (8 Gallon) Fermenting Bucket
• Air Lock
• Tap
• Paddle
• Hydrometer
• Stick-on thermometer
• Bottle brush
• Sugar dispenser
• Caps
• Metabisulphite (sanitizer)
• Bottle Filler
Equipment I acquired during my first brew
• 4 L (1 Gallon) of distilled water
• Another identical 30 L (8 Gallon) Fermenting Bucket
• Bottle Rinser
• Bottle Drying Tree
• 48 x 16 oz (0.5 L) glass bottles
• Bottle Capper
• Auto Siphon
Beer kit
I had no idea what kind of a beer kit to get for my first brew, so I chose one randomly and got me Mr. Malt Premium Lager beer kit for 15 € (16$ ). Beer kits seem perfect for first time brewers as they include an already pre-prepared hopped extract, a package of yeast and instructions. The first thing you learn about beer kits online however, is to not follow these instructions :)

Unfortunately that is exactly what I did. I've also learned since than, that brewing Lager beer is actually very demanding and difficult to do at home. And that the Lager beer kits can actually produce fake lagers only, since they use yeast meant for brewing Ale. That means that I'm brewing a kind of close-to-a-lager beer.
Preparation
Water
I would love to get some natural spring water, but I decided to simply use tap water for my first try. My tap water comes with some chlorine, which is not a good thing. Chlorine is added to water to kill bacteria and is poisonous to all living organisms, which means yeast won't like it.
I wanted my first beer to be at least a moderate success, so to be on the safe side I also bought 1 Gallon (4 L) of distilled water to mix it with. Some experienced brewers claim that boiling water for 15-20 minutes and than leave it to cool overnight will lower chlorine levels as it evaporates. I added that on my list.
My biggest pot can only hold about 4 L (1 Gallon) and I needed to prepare five times as much water. That meant half an afternoon of unnecessary and boring work boiling and cooling all that water.
Cleaning
If there is anything all brewers agree on, it's the importance of cleaning. Going into it being well aware how important cleaning is, the whole thing was far, far from optimal. First I thoroughly cleaned all of the equipment under pressure with a garden hose. Than mixed 1 L (1/4 Gallon) of water with 2 table spoons of Metabisulphite (which I got with the brew kit) to get a sanitizing solution.

I poured it into the fermenting bucket and put all other equipment into it. After a minute or two (should have left it longer I think) of soaking, I removed everything and put it outside to dry. About an hour later I transferred all of it into storage to have it clean and sanitized for the next day. Don't do this! All equipment should be cleaned and sanitized just before you need it, I have no idea what I was thinking at the time.
Brew Day
Luckily I noticed beforehand I was missing sugar to add to the wort (contents of the beer kit mixed with water), so I went to get some. On my brew day I did a lot of things wrong when following the simple instructions that came with the extract. I didn't educate myself on a sufficient level before and I'm really wondering what kind of beer I'll manage to produce in the end.
I took two pots, boiled water in them and placed the malt extract can in one of them for 20 minutes to make it easier to mix with the water.

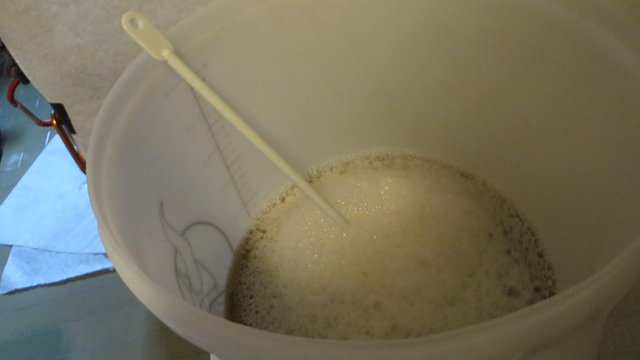
After that I poured about 2 L (1/2 Gallon) of boiled water to the fermenting bucket, added the extract and stirred like a maniac for a couple of minutes. I proceeded to add water until I was at 21 L (5,5 Gallon) mark and stirred some more.

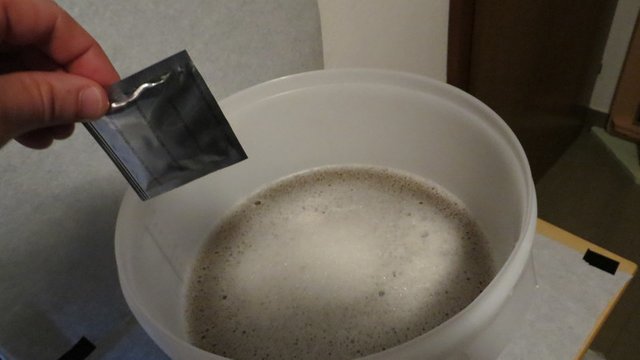
The most funny thing was that I almost forgot to add additional sugar, luckily before adding yeast. Fixing that mistake, I stirred aggressively for another 10 minutes. Than I've opened the dry yeast package and simply pitched it in, on the top and all over. I didn't re-hydrate the yeast before or shake the bucket to mix in more oxygen which helps the yeast to reproduce more rapidly. Two more mistakes.

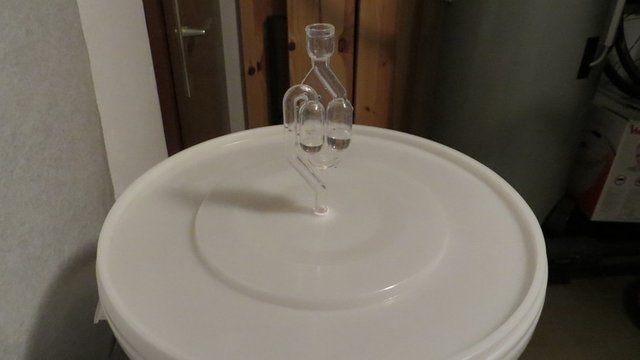
The only thing remaining to do was to put on the lid, attach the airlock filled with a solution of water and Metabisulphite and wait. Hopefully for the bubbling to start.
And it did! Just about 14 hours later. Even though so many things went wrong, it started bubbling very aggressively and I was happy.

The next few following days I was excitedly checking the bubbling all the time and about 1 week later the bubbling settled to about once per minute. My plan from the start was to ferment for 2 weeks and now was the time to check the gravity (density compared to water) for the first time. I was surprised, when pouring some of the fermenting beer to the sampling glass, about how much foam the beer had already. I don't remember the exact value the hydrometer showed but it was clear it's not done yet. I proceeded to check the value every other day until the value told me the fermentation is complete exactly 2 weeks after the start.
Pre-Bottling Day
Another mistake. I thought it a good idea to clean and sanitize everything I'll need on the bottling day one day before again. I got myself a couple of tools to make it all simpler and easier. First I sanitized the Bottle Rinser and the Bottle Drying Tree (picture bellow).
Than it was time to prepare about 40 bottles for the next day. I got myself some standard 0.5 L (16 oz) glass bottles by buying 2 packages of 24 bottles for about 18€ (20$) altogether. Which is expensive. I found a store where I can get the same amount for half the price since than.
I took the garden hose, point it to the bottle and cleaned it with pressure (also managed to clean myself along with the bottles). After I cleaned 5 of them I put them on the Bottle Rinser filled with sanitizer and pushed the bottle down a couple of times, spraying the sanitizer into the bottle. After that I put it on the the Bottle Drying Tree. All nice and fine, the only problem was that I should have done this just before bottling to minimize chances of infection.

Last thing I had to take care of was sanitizing the Bottling Bucket (which is identical to the fermenting bucket), Crown Bottle Caps, Bottle Capper, Auto Siphon and the Plastic Bottle Filler. Sanitized the bottling bucket and added everything else inside to soak during the night.
Bottling Day
There are two ways to do Priming (adding additional sugar before bottling to carbonate the beer). The one mentioned in the instructions I got with my brewing kit and also the beer kit, was to add some sugar to every bottle before capping it using the sugar dispenser. The problem with this solution is that every bottle will be a bit different. Some might not have enough CO2, while some could even burst because of too much. That doesn't sound that fun to be honest.
The other solution that I found online was to get another bucket (bottling bucket), mix the calculated amount of sugar needed with some boiling water and put it in the bucket. Than siphon the beer from the fermenting bucket carefully. This solution not only makes sure that you get the same amount of carbonation in every bottle, it also lowers the amount of trub (sediment) in the final product.
Siphoning
First I added the calculated amount (using this online tool) of sugar mixed with some boiled water into the bucket. I proceeded with putting one end of the siphon into the fermenting bucket, pushed it in and the beer started flowing down the tube and into the bottling bucket. Overall, this part was much simpler than I expected.
Bottling
At this stage I was ready to open a beer to help me fill my beer into the bottles :)
I attached the bottle filler to the tap and started filling up bottles with beer. It was a slow process, but after all that work every filled bottle made me smile.

Conclusion
I've managed to fill 38 bottles and put them all in the basement for conditioning for about 2 weeks. I told myself I'll wait the whole 2 weeks before trying the first one, but I have this feeling that I won't make it :)
looks like a shit ton of work xD, followed u and upvoted some of your posts can u do that to for me pls :)
It is, no debate here. Still I could get used to this hobby, it's a good feeling to have your own beer and offer it to friends and family :)
for sure man i can agree 100% :)
amazing post!
Thank you for sharing this ;)
Thank you katja, more is coming I think :)
Can't wait :)
I still remember my first time brewing. To my surprise, it was a successful stout! Most people from what I've heard aren't that lucky. But like anything in life, the more you do it, the better you get at it.
And there's nothing better than enjoying your own brew!
I'm hoping to get lucky. It should be drinkable at least, there was no sign of the beer being contaminated. And if not, I've learned so much already. Next one will be much better!