Tutorial how to Cartoon yourself
Hi Steemit lovers, readers, digital artists and curators
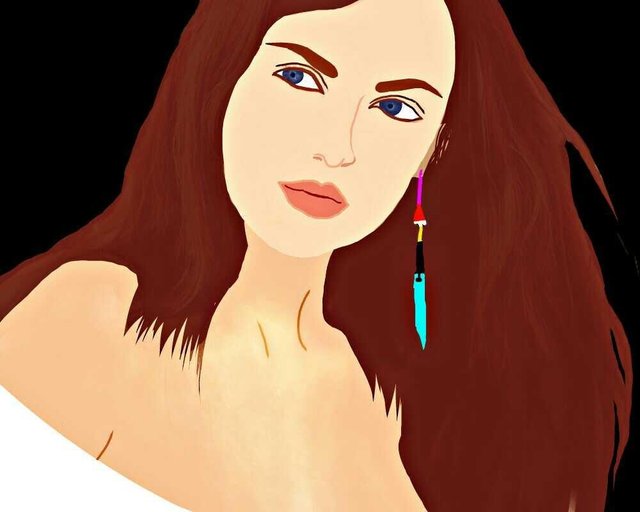
Lately, of course you see a lot of Steemian who use cartoon profile picture or in the form of vector like my profile picture. You do not have to worry if you do not have the skills to draw through the computer media, because I will share a tutorial how to create a picture of 'Cartoon yourself' just by using Smartphone media.
As always, I will use the Picsart App to create the image.
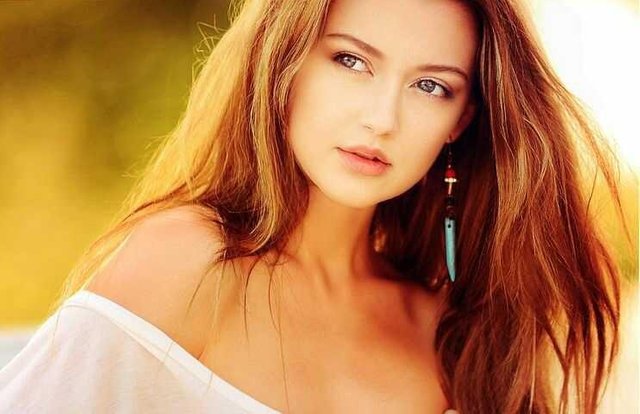
First step, open the app and select edit. Then fill in the image you want to edit.
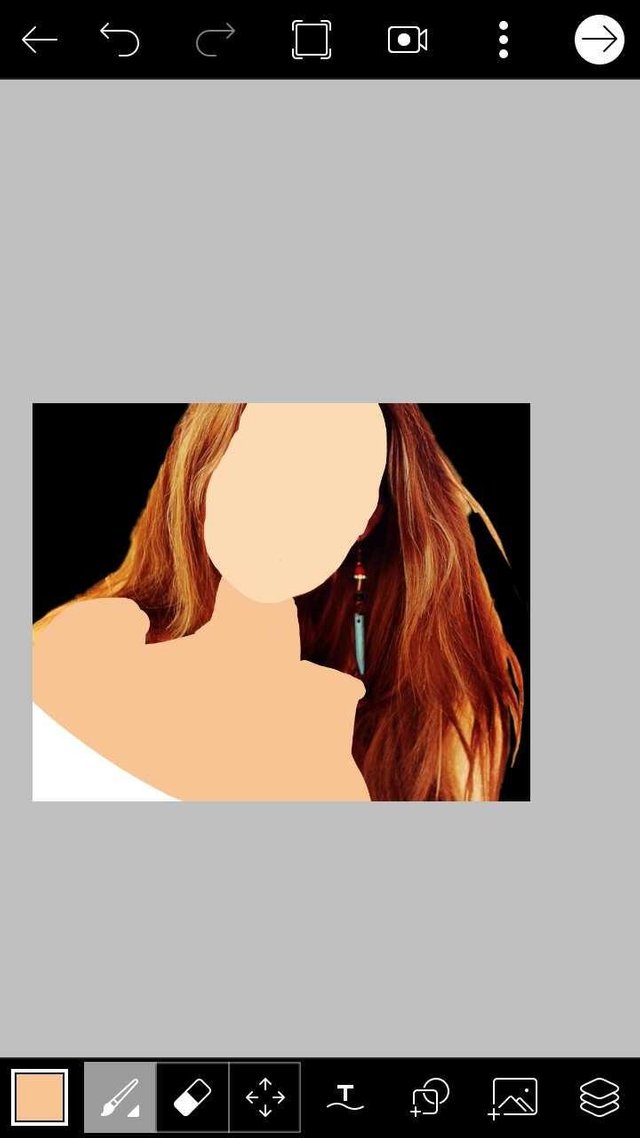
The second step, do the cutting the photo in the eraser menu, then go to the draw menu and add a new screen on the screen that has been filled with images. Start painting the face.
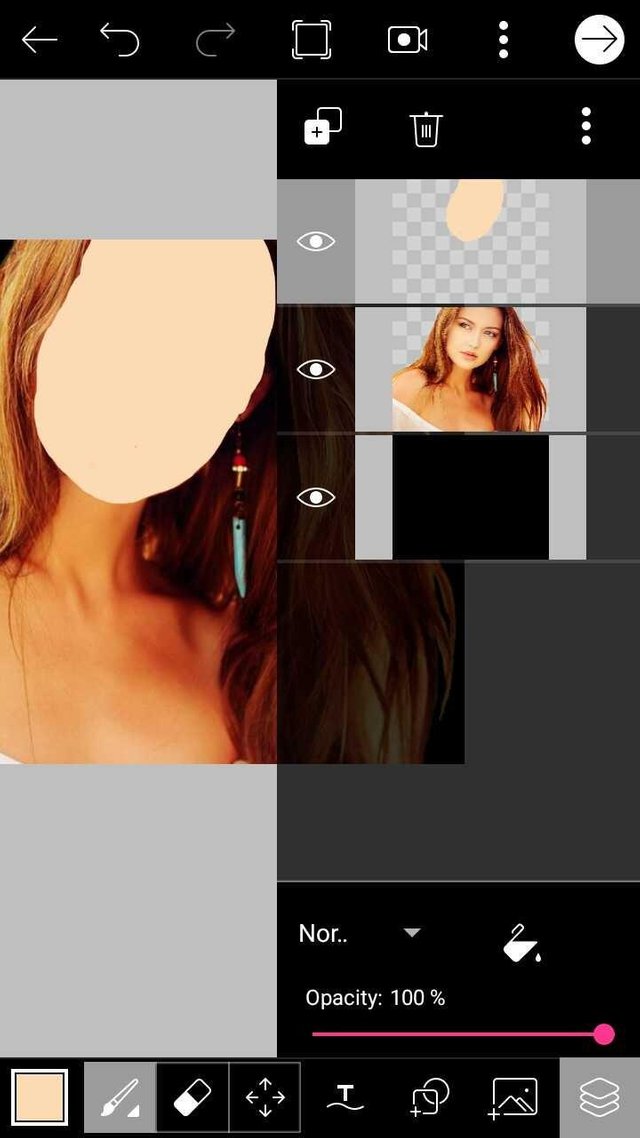
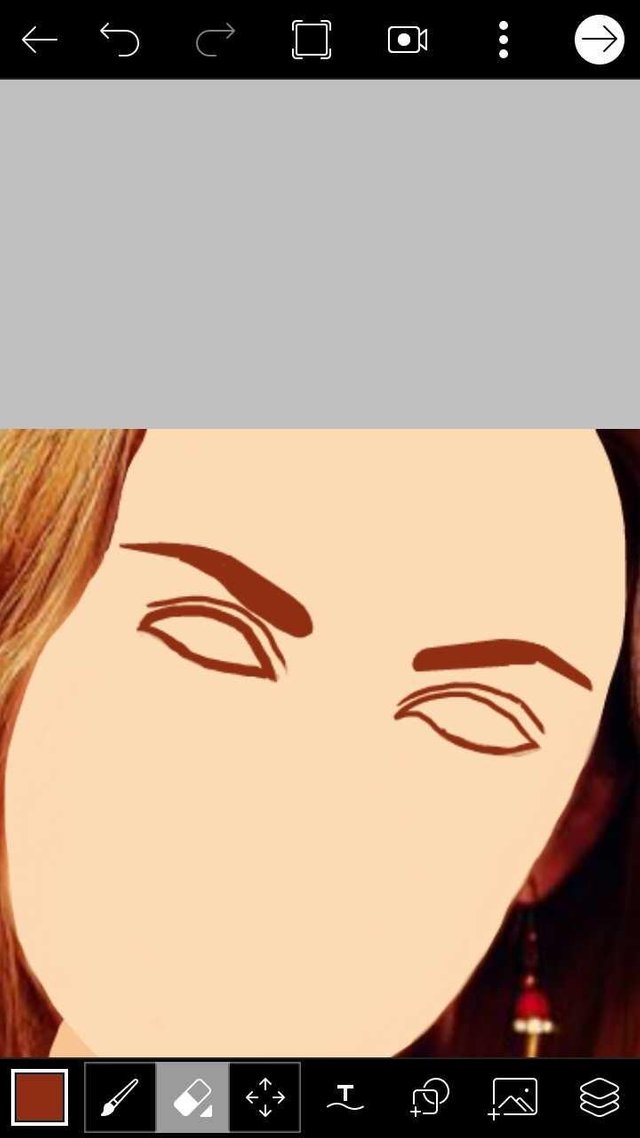
The second step, add a new screen and start drawing eyes, nose, mouth, and eyebrows.
 )
)
The third step, just like the first step. Add a new screen and paint body parts and shirt. Do not forget to add some indentation lines.
Step four, re-add a new screen and do the painting on the hair.
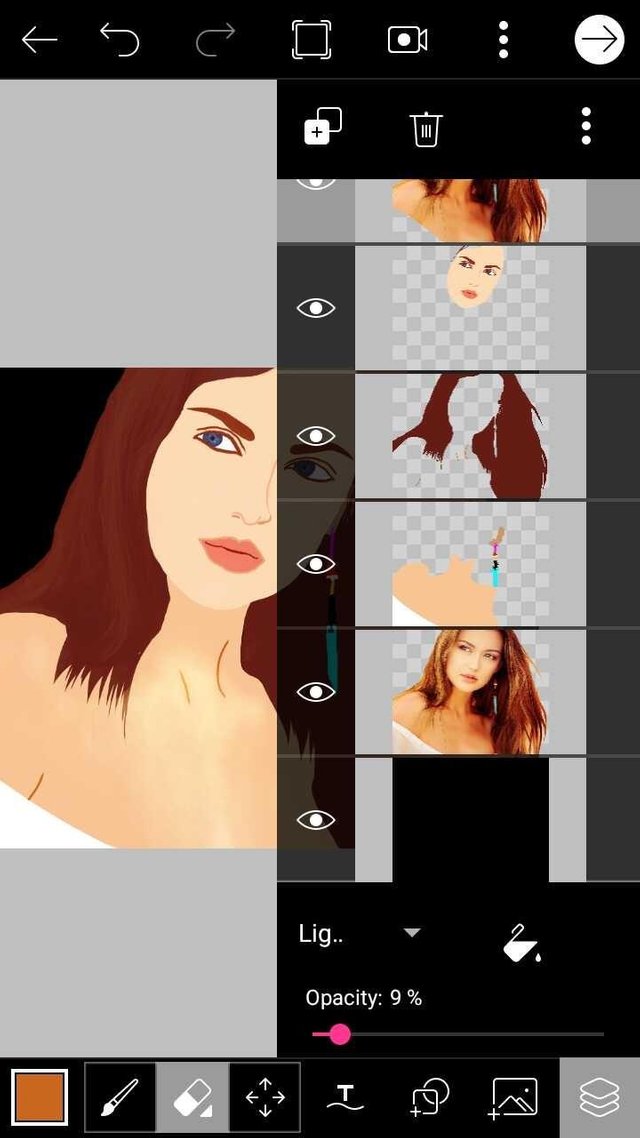
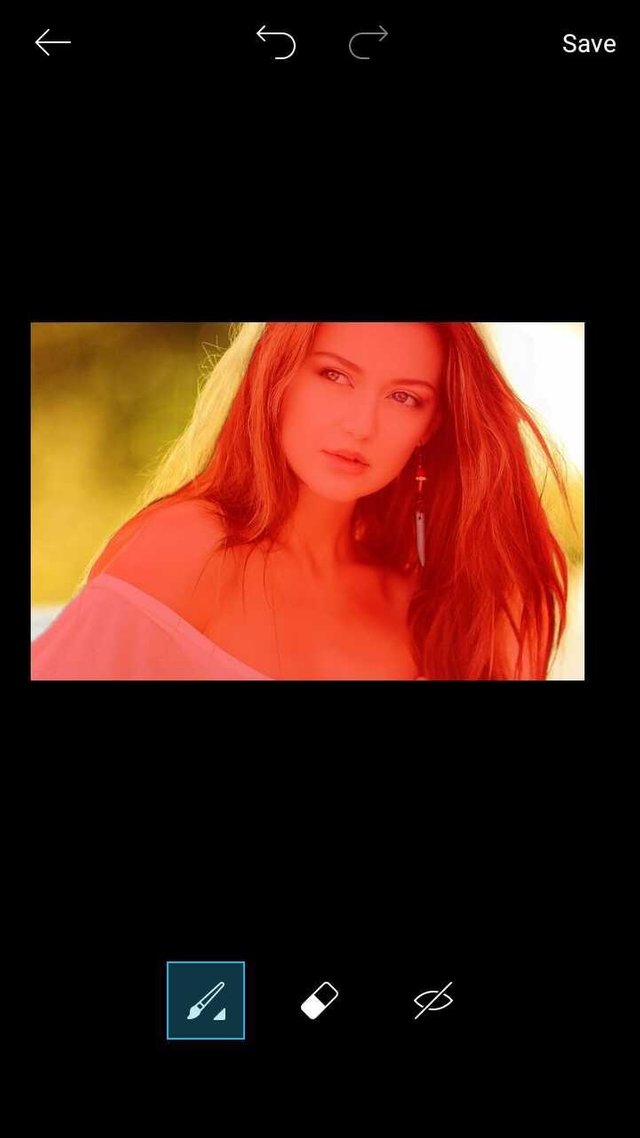
Step five, go to the effects menu and select Artistic and select HDR1. Set the intensity around 25%.
Done and save.
How easy is not it? Hope this simple tutorial can help you. Thanks.
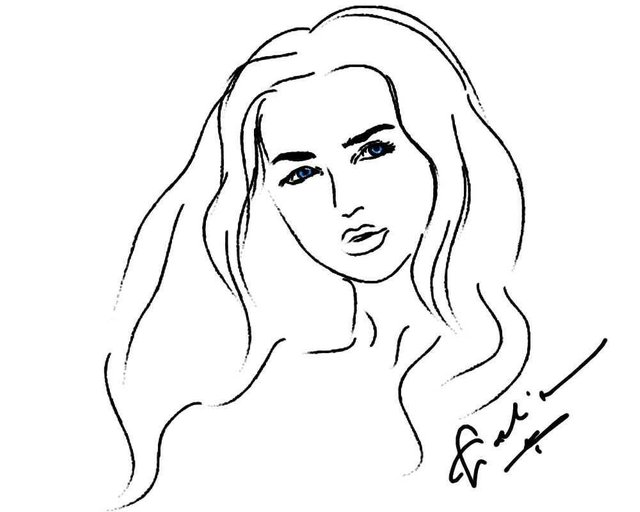
See some examples of other images I've made below:
 )
)
.
Dalam Bahasa Indonesia
Hi Steemit lovers, pembaca, artis digital dan kurator
Belakangan ini tentu Anda banyak melihat beberapa Steemian yang menggunakan foto profil bergambar kartun atau dalam bentuk vector seperti foto profil saya. Anda tidak perlu risau jika tidak memiliki skill untuk menggambar lewat media komputer, karena saya akan membagikan tutorial cara membuat gambar 'Cartoon yourself' hanya dengan menggunakan media Smartphone.
Seperti biasanya, saya akan menggunakan Aplikasi Picsart untuk membuat gambar tersebut.
Langkah pertama, buka aplikasinya dan pilih edit. Lalu isi dengan gambar yang ingin Anda edit.
Langkah kedua, lakukan pemotongan foto di menu eraser, lalu masuk ke menu draw dan tambahkan layar baru diatas layar yang telah terisi gambar. Mulailah mengecat permukaan wajah.
Langkah kedua, tambah layar baru dan mulailah menggambar mata, hidung, mulut, dan alis.
Langkah ketiga, kembali tambah layar baru dan lakukan pengecatan pada bagian rambut.
Langkah keempat, sama seperti langkah pertama. Tambah layar baru dan cat bagian badan dan baju. Jangan lupa untuk menambahkan beberapa garis lekukan.
Langkah kelima, masuk ke menu efek dan pilih Artistic lalu pilih HDR1. Atur intensitasnya sekitar 25%.
Selesai dan simpan.
Bagaimana, mudah bukan? Semoga Tutorial sederhana ini dapat membantu Anda. Terimakasih.
Lihat beberapa contoh gambar lain yang telah saya buat diatas:
TERIMAKASIH
.
Memang droneuh jago, hebat dan gawat. Nyan ka suwah pameran tunggal di Bireuen.
Cihaaaaa... insyaAllah jeut tapresentasikan.
Jaroe 10 ateuh ulèe keu @muhajir.juli
You got a 2.87% upvote from @emperorofnaps courtesy of @chalidteuku!
Want to promote your posts too? Send 0.05+ SBD or STEEM to @emperorofnaps to receive a share of a full upvote every 2.4 hours...Then go relax and take a nap!
Thanks..
Thanks for sharing.
Yup.. You welcome