Simple Homemade Wreath Part 2 - Making It!

Part 1 was about gathering and preparing the fir cones and evergreens, and so now in part 2 we can put it all together!
I'm not one for rules and absolute perfection, but prefer instead to have a go and find my own ways of doing things. I used to look up online 'correct ways to do this, that, and the other', and half the time the method sounded so complicated that I'd decide I couldn't be bothered. I'm sure there are particular methods and 'proper' ways to make wreaths, but making it without any guides worked for me! So if you want to make one but don't have this exact thing or can't do it this exact way, just make your own adjustments and as long it doesn't fall apart, it'll be fine!!! This is my first ever homemade wreath and I enjoyed it so much I'm going to make one every year for sure.
I just needed one last essential thing from the forest - sticks to make the frame. You can buy wire wreath frames, and I do actually have one, but I think making it from sticks is part of the fun and it feels so satisfying to know you made every last bit of your homemade wreath!
So, back out into the forest I went (on a dry day of course, I didn't want damp wood)...

And again I was joined by Happy Monday...

No surprises there was an abundance of sticks on the forest floor - I tried to get the bendiest ones I could find as in my experience now that's the key to a successful frame...
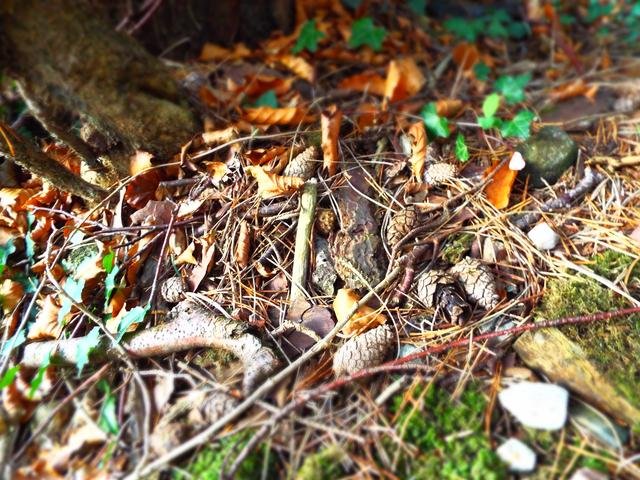
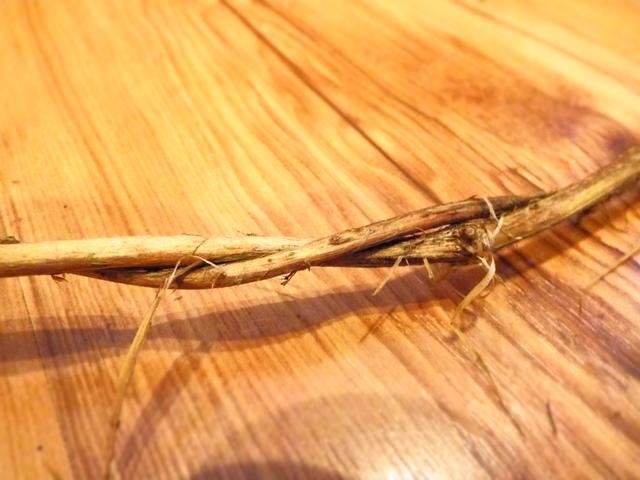
I was happy to find some dried woody vines that are perfect, as they come in long pieces and already have a lovely twisted effect going on...

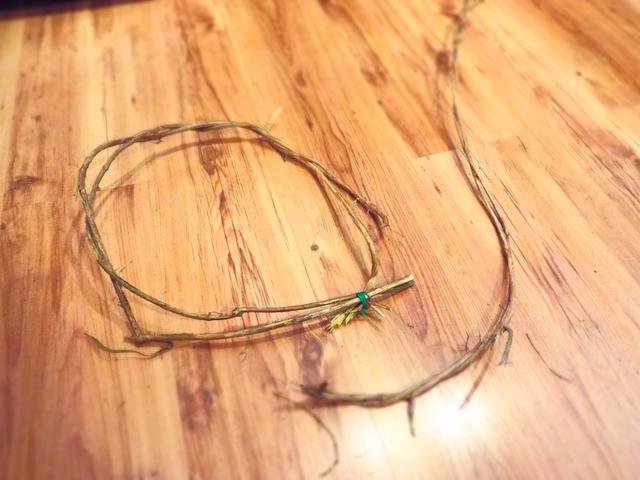
I bent one of them round into a circle (ish) shape and used garden wire to secure it...

I then took another piece and wove it around the initial circle...
And then it's simply a case of weaving more and more sticks in and out, posting bits into gaps and securing bits with garden wire to hold them in place and get the shape you want. It's not hard, it's just a little time-consuming, but enjoyable as it's actually pretty therapeutic...
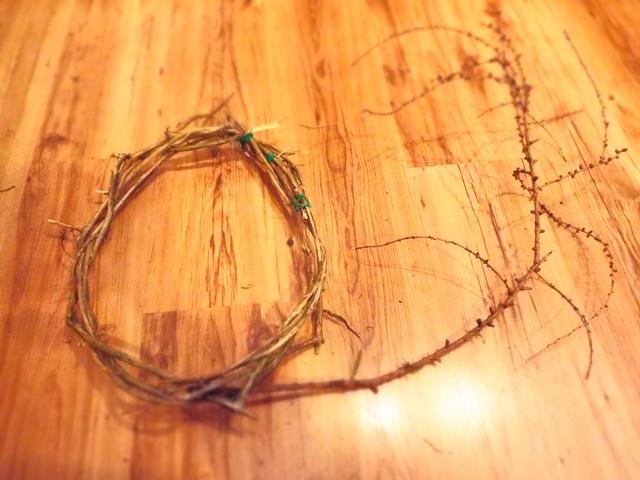


You could keep going and make the frame as thick as you like, but I decided this was thick and strong enough, ready to add the evergreens and fir cones...

I layed all my bits and pieces out on the table, and then simply posted branches of all the different evergreens into the frame. My method was to do the whole lot of one type, and then the next lot of a different type, as I decided this would help it to be evenly arranged. I suppose it may look a little lop-sided if you accidentally end up with too much holly on one side or something! I also used garden wire where needed to hold bits in place...
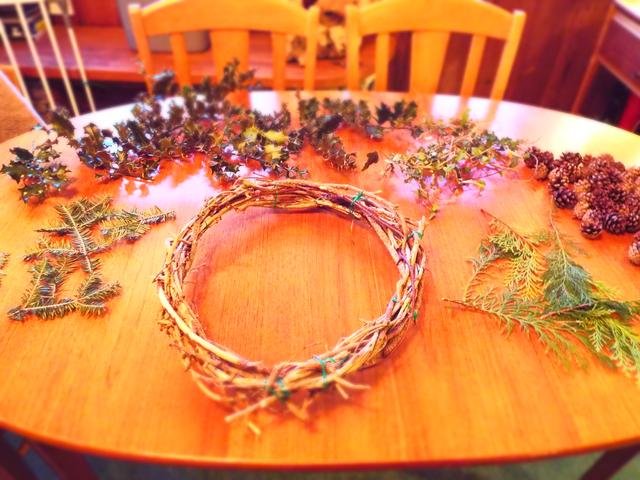

Once my evergreens were all woven in, I then moved onto the fir cones. I wound garden wire around the cones, and then twisted the wire around bits of the frame or evergreen, anywhere is fine as long as it's fastened securely onto something...


I found using fir cones not only help it to look lovely, but they're great for filling in gaps...
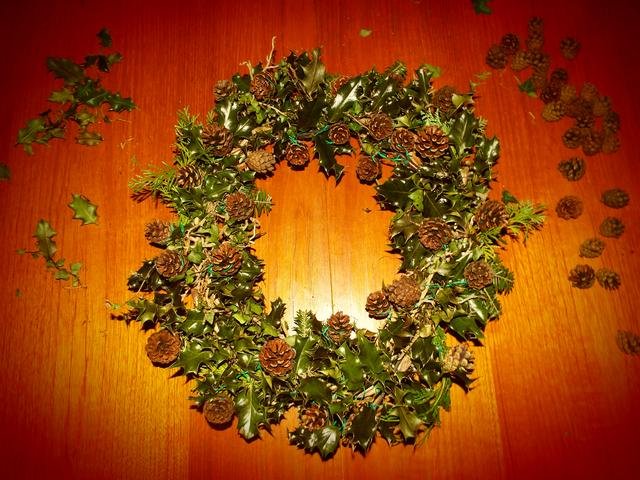
I then fastened a long length of garden wire to the frame to enable me to hang it up. You can leave it very plain and natural looking like this if that's your preference...
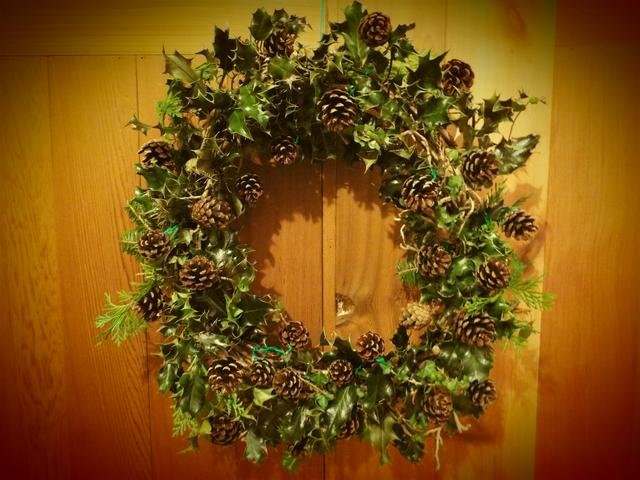
But I decided a splash of red gives it that finishing festive touch! If you don't have a ribbon you can use red berries (real or fake), red fir cones (bought or painted yourself), red bells, anything you can think of really, it's in your creative hands :-)
If you liked this post, please follow me for more seasonal healthy recipes and crafts throughout December!
Many thanks.
All photos in this post are my own original.
You can also follow me as Natural Health Mama at https://www.facebook.com/naturalhealthmamma and https://naturalhealthmamablog.wordpress.com/

Logo kindly created for me by @papa-pepper
Really cool project, I love that you made every last bit of it!
Thanks! I figured if I'm going to do it I may as well do it thoroughly with no cheating!