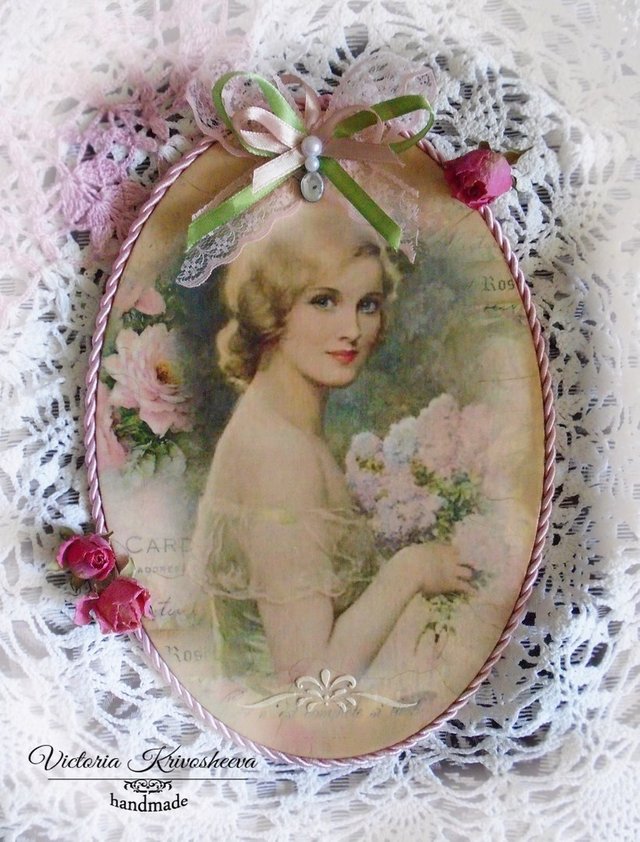
DIY: A Cute Decoupage Interior Picture
Hello Steemians! Do you like handcrafted things? I like them very much! As I’ve written in my Intro post, I have an art studio and I make items for interior and for home comfort by my own hands. Now I’m going to show you how to craft a cute interior picture/panel. And of course it'll be a decoupage technique.
We need:
- a wooden panel/board
- acrylic primer
- acrylic paints
- decoupage glue
- decoupage shellac varnish
- crackling varnish
- decoupage acrylic varnish
- golden powder
- oil paint (any colour)
- polishing paper
- brushes
- scissors
- super glue
- a picture printed on white office paper
- sticky tape.
You can find all these materials in any DIY or HOBBY supermarket.
Let’s start!
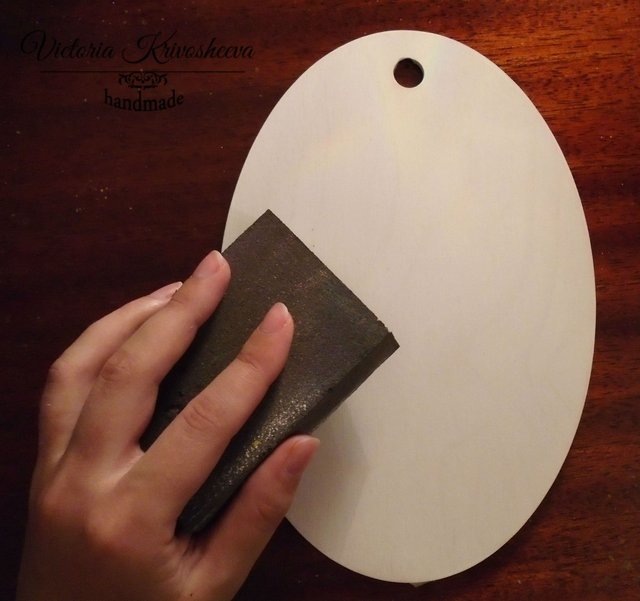
1. Polish a wooden board with polishing paper. Do it two or three times. This procedure will help you to smooth the working surface.
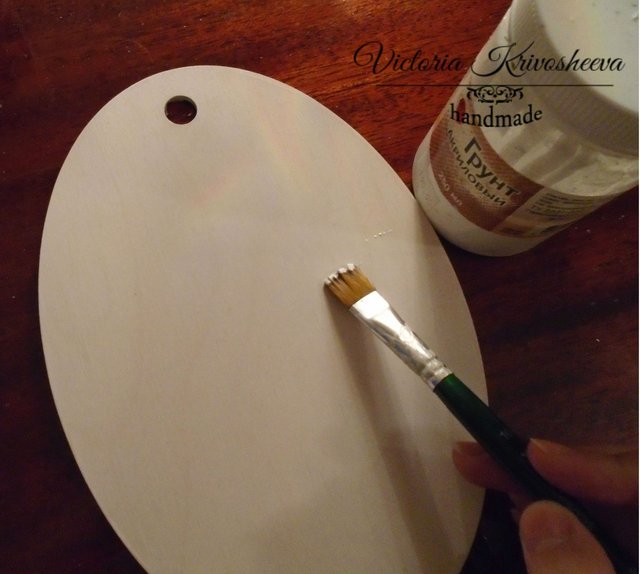
2. Cover the wooden board with the acrylic primer. Make two layers of acrylic primer. Let the board get dried out. In half an hour gently polish the board with a polish paper. I anticipate that you should polish an item after every step. The surface should be smooth without any dust particles or paint/varnish micro bubbles.
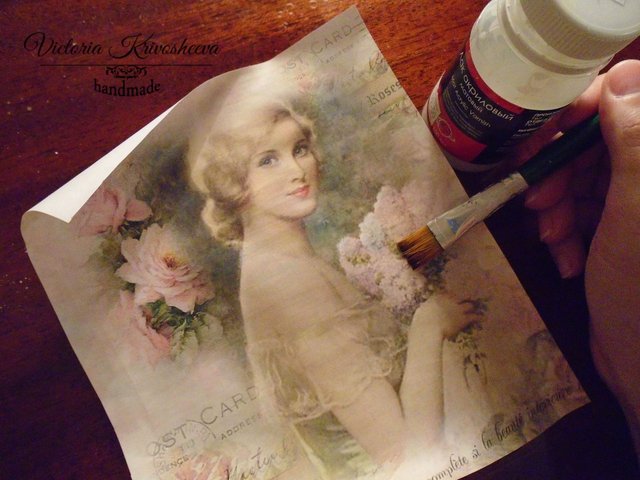
3. Take an image/photo printed on the white office paper. Cover the image with three layers of acrylic varnish. Dry out (20 minutes) each layer before applying the following one. Then leave this paper for half an hour.
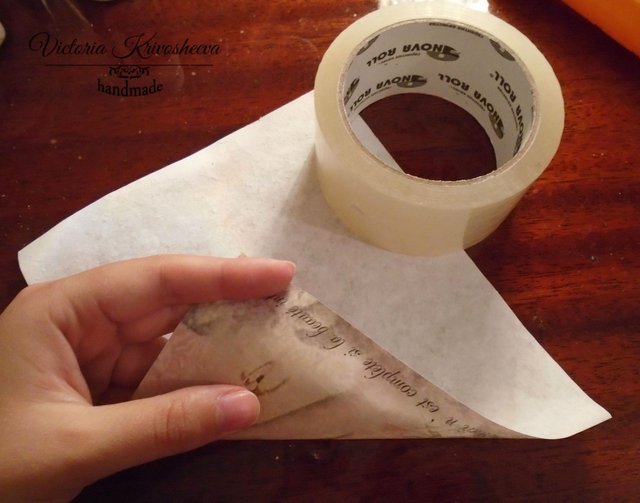
4. When the varnish layers are dried out, it is the time to make the paper thin. The main thing in decoupage technique is to glue a thin paper image to an item’s surface. So turn the printing with the white side up. Take a sticky tape and apply it over the whole surface of the image. Apply it line by line. Each line should cover half of the preceding one. Press the taped surface firmly with your hands. The tape should stick to the paper. Now you should gently…very gently separate paper and sticky tape. Try not to tear the paper. Office paper consists of two layers, one layer is a thin colored membrane or coat and another layer is paper itself. We should separate them, because we need just upper colored layer for decorating the surface.
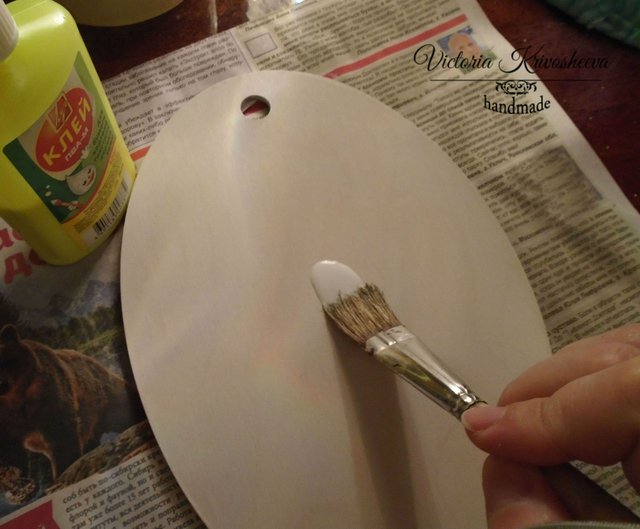
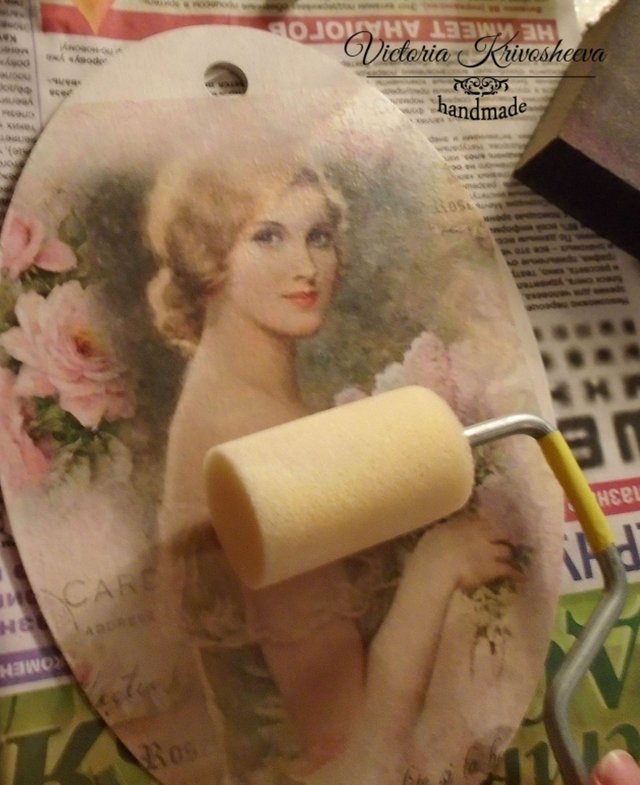
5. This step is one of the most difficult and interesting at one and the same time. Pour some glue on a wooden board and spread it over the whole surface. The layer should be rather thick. Apply the image to the board. Try to work as quickly as you can, don’t let the glue get dried before you apply am image to the wooden board! Remove all the pimples and bubbles from the surface by using soft cloth or clean paint roller. Be careful, as the paper is getting wet quickly and it can be spoiled by rough careless movements. If the surface is smooth and if you are satisfied with the result, leave the item for 3-4 hours until it is fully dried out. Then remove the pieces of paper from the edges with the help of rough polish paper. The edges should be smooth and neat as well.
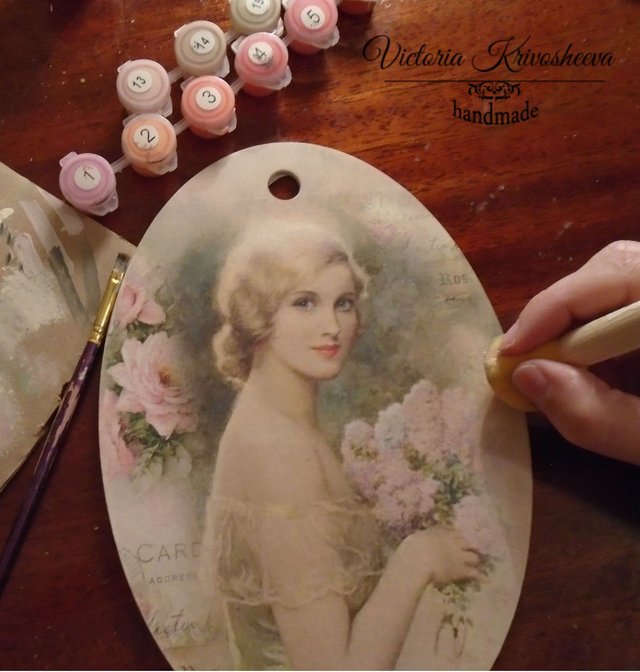
6. This step will reveal your artist’s skills. Take a sponge, a thin brush and some acrylic paints. The colors should be similar to the image gamma. Paint white blank spaces with a sponge and correct white spots or some other defects on the surface.
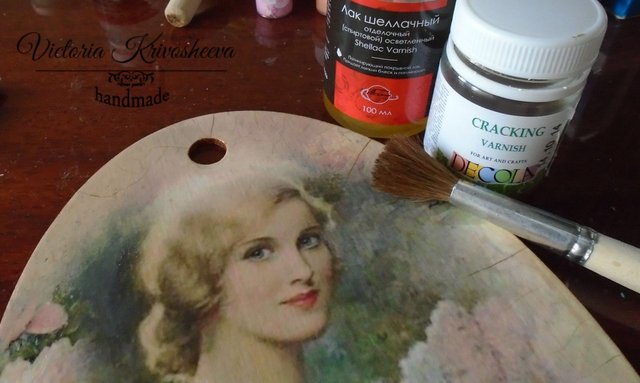
7. To fix the result of your artist’s efforts, cover the item with one layer of acrylic varnish. Let it get dried out. Now cover the surface with one layer of shellac varnish. Wait for half an hour and cover with another layer. Wait for another 30 minutes or so. Apply the third layer of shellac varnish and wait for 5-10 minutes, the surface should be a bit sticky. Now pour some crackle varnish on the board and gently spread it over the surface with your fingers. Then leave the item for a night, the both varnishes have to get fully dried out. In the morning you will see beautiful crackles. Size and depth of the crackles depend on the crackle varnish layer. The thicker the layer, the deeper and larger the crackles.
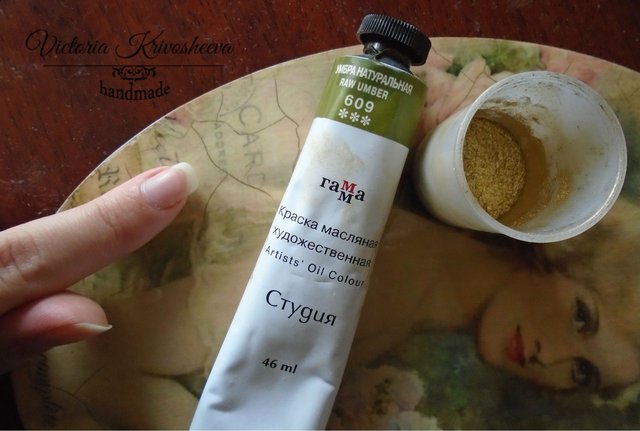
8. The next step is to rub oil paint (1st) and golden powder (2nd) in the crackles. Oil paint is a bit sticky and golden powder won’t peel off. When this work is done, wash the decorated side of the board by the cold water. The goal is to remove the leftovers of crackle varnish, oil paint and gold powder from the surface. Wash the item gently because the crackles should remain golden! Let the item get completely dried.
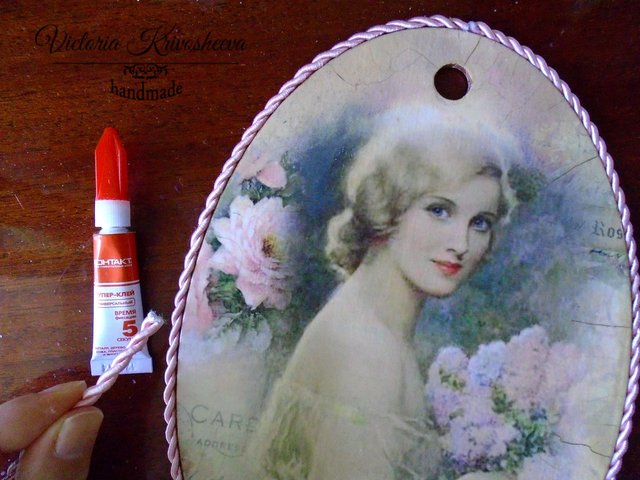
9. Now cover the surface with 3-4 layers of shellac varnish. Dry properly every layer before applying another one. 10. The final step! Take any ribbon you like and glue it to the item’s edge with superglue. Decorate the board with bows and pearls. Work gently, because the item should remain smooth, neat and beautiful!
Your handcrafted interior panel is ready! Good job!
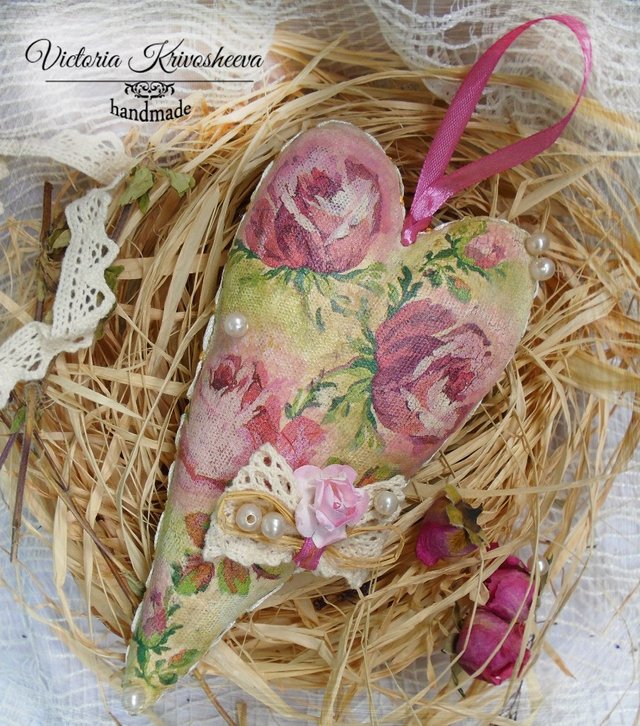
Some other examples:

Feel free to leave your comments and questions.
Hope that you liked this master class.
Follow me @victoriart
CONTENT WOW
UPVOTED
This is a very elegant art You
have here, People Like this
kinda stuff on Ebay for sure
thanks!
What a wonderful heart you have made too! A future tutorial?
Of course, I'll post a tutorial for this heart. It ia aroma heart, by the way:)
thank you!
I make little lavender hearts for my draws and cupboards, but this is beautifully embellished. I think people would enjoy seeing this made- plus so many uses!
Fun! Upvoted!
Thanks!