Blender as a reference tool for artists
Hi Steem people!
I wanted to share with you a tip for artists that related to a project I'm working on. this one is mostly directed at blender users, either modelers or animators etc.
I illustrate but I do some 3D work so I fall on both categories. that's how I found blender to be a pretty nice reference tool for human poses and lighting conditions. It's often har to light a scene completly from imagination, and you might find one reference image that fits with your target but no others that are lit in exatcly the same way. there are software packages that help an artist visualize the lighting setup of a scene and find poses of humans, but the ones that I know are freemium or paid software. blender, on the other hand, is open source and also a modeling tool called MakeHuman.
you can get it from here: http://www.makehuman.org/
In this particular workflow, you don't actually need to know anything about rigging (skinning a mesh object to an 'armature'). MakeHuman generates everything for you procedurally. you create a model of a human with simple sliders used to control parameters, you can choose cloths to be exported with your model to a 3D editing software. you can generate a skeleton object called an armature- that perfectly matches the body shape of you exported model.
here is the process breakdown, kinda:
- Install blender, on whichever machine you've got: go to www.blender.org
- Download and extract the Make Human software.
- Download the 'blender tools plugin' for MakeHuman from the MakeHuman site.
- Move the export plugin folder into the plugin folder in MakeHuman's directory.
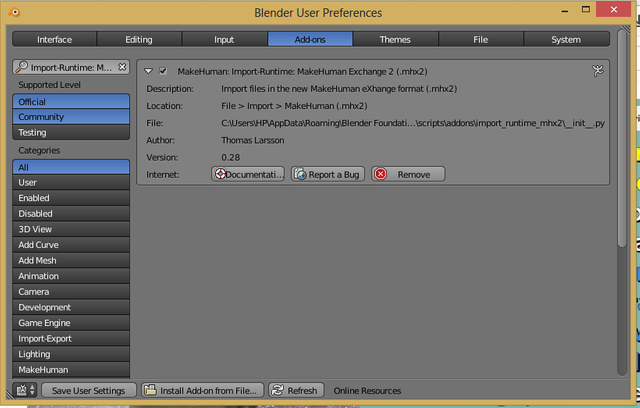
- Go to the preference panel on blender and open up the addons tab. then click on 'install from file' and locate the MakeHuman blender import plugin.
- enable the plugin in blender by checking the checkbox, and you can click 'save user settings' for blender to remember your choise on the next program reboot.
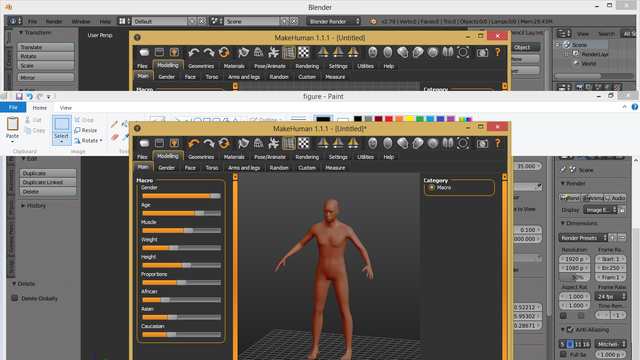
- fire up MakeHuman and start configuring your model with the sliders. go to the pose/Animate tab and select a 'rig' from the right hand side. basically it's like a skeleton that enables you to control the pose of the model. use the one that best fits your purpose- if you intend to have an hand reference then choose the default one, but you might looks for something more simple and abstract like the game engine one.
the simpler rig takes less fidgeting but is limited in the range of motion and detail it can provide.
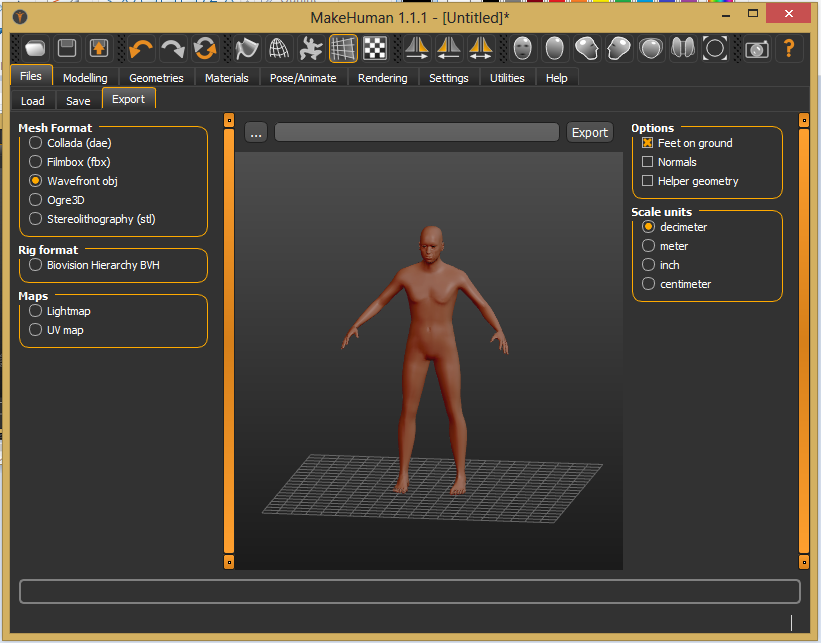
- go to the files->export tab and check the option "MakeHuman Exchange (mhx2)". I won't go into advanced export options, I'm just keeping in the stuff that's relevant to the tutorial.
- your model has been exported to a folder of you have specified, by default it's in myDocuments\makehuman\v1\exports.
- open up blender, delete the default cube and light and go to file->import->MakeHuman Exchange (mhx2), then select your exported model.
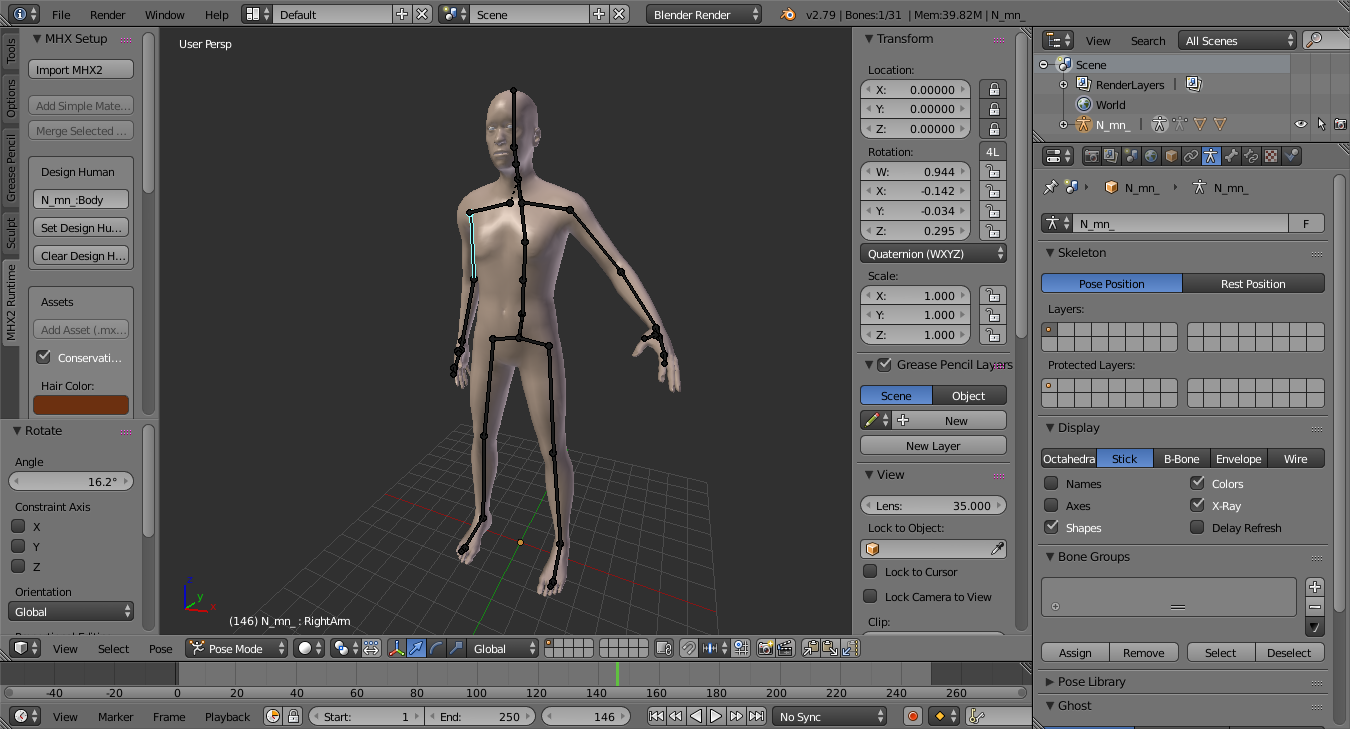
- note that if you chose a rig then this rig will alread appear in the scene and be linked to the model. when you select the armature and tab into pose mode (clicking tab of course), you can manipulate individual bones with the R/rotate key.
- go into 'material' view (right next where it say object mode) down below. now you have a viewport preview of the lighting setup. it'l be pitch black if you havnt got a light object in the scene yet. create one using shift+A->lamp-> whichever one you need.
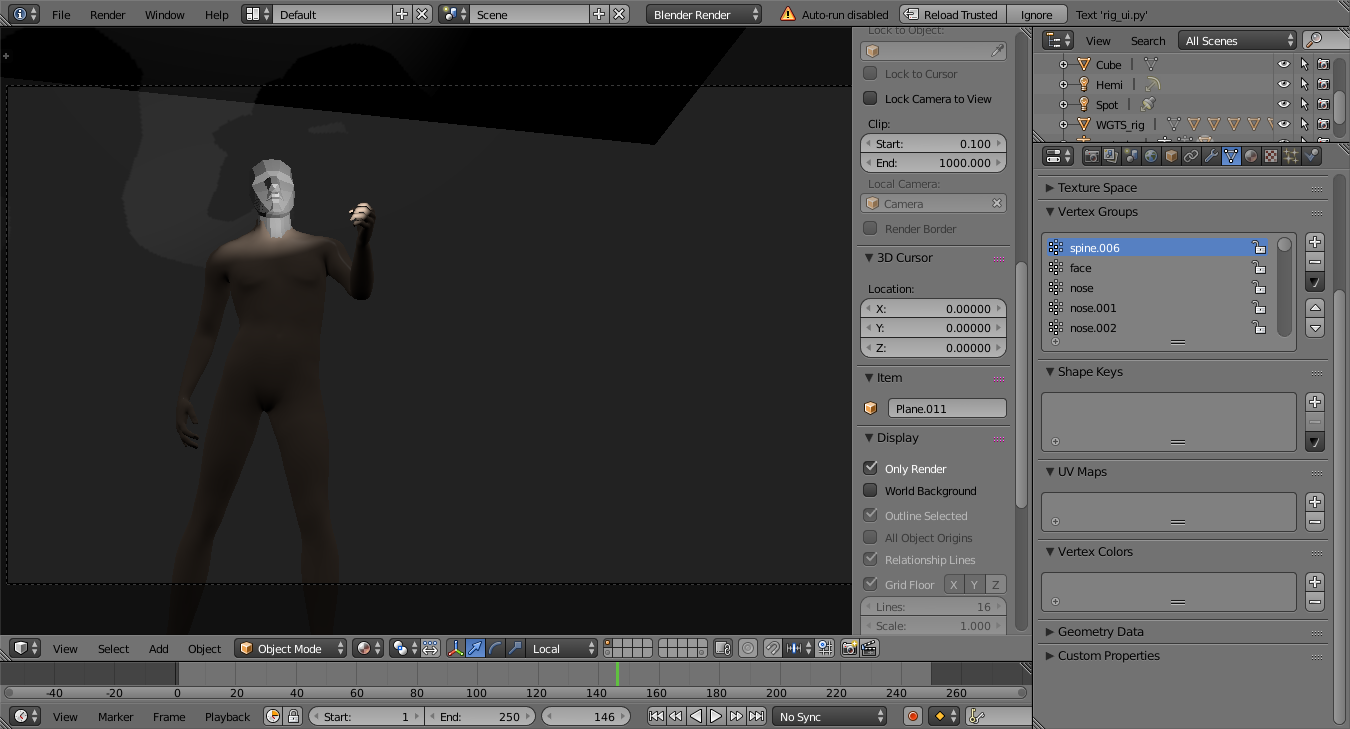
in my case I intend for the character to hold up a candle, so I have a spot light created that I moved (G key) into place in his hand. there's another hemisphere lamp that's supposed to represent a top light source like a chandalier.
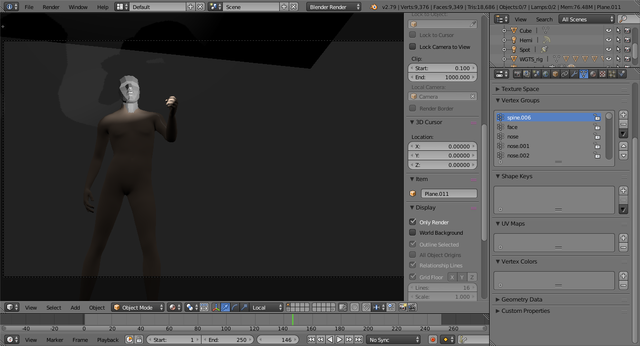
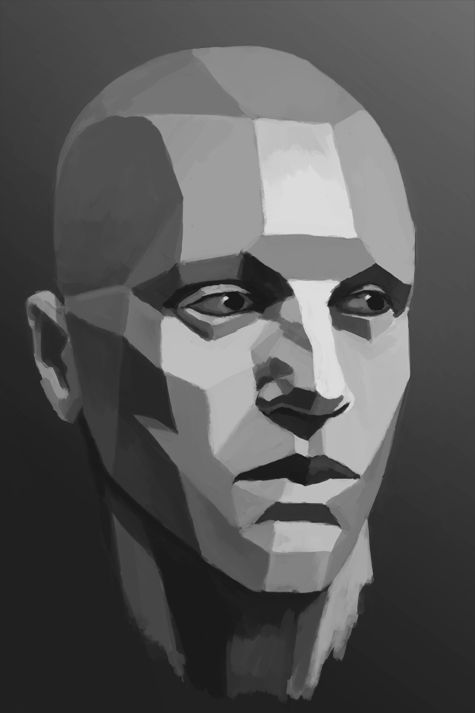
I also added a cube to represent the sides of the room he's in. all of this will prove usuful to determine the value range later when I use it as reference. - notice that the head looks rather abstract and triangular. this is intentional as I'm looking to get a very simplified model for the 'planes' of the human face. meaning you can group together areas of the face to get an aproximation of the angle that this area is in as related to the light source. the areas that are facing to light source more directly are brighter, naturally, unles they are occluded by cast shadows.
.jpg)
that's why I chose a nice simplified face model from Blendswap.com courtsy of the user Kavabanga.
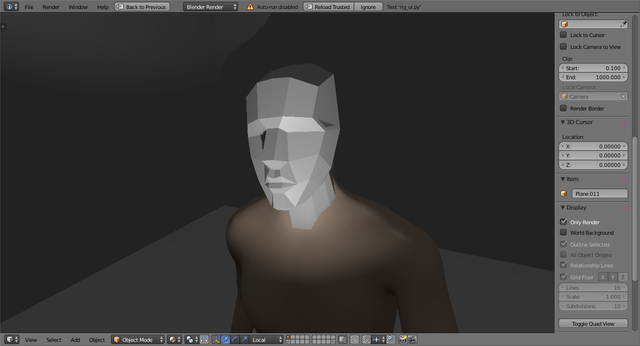
I've selected the body mesh object and went into edit mode, the alt+right clicked on a neck edge-ring and pressed H to hide it. this makes it possible to select only the head from the neck up, and so after selecting it I assigned it to a new vertex group (you do it in the 'data' tab on the properties panel.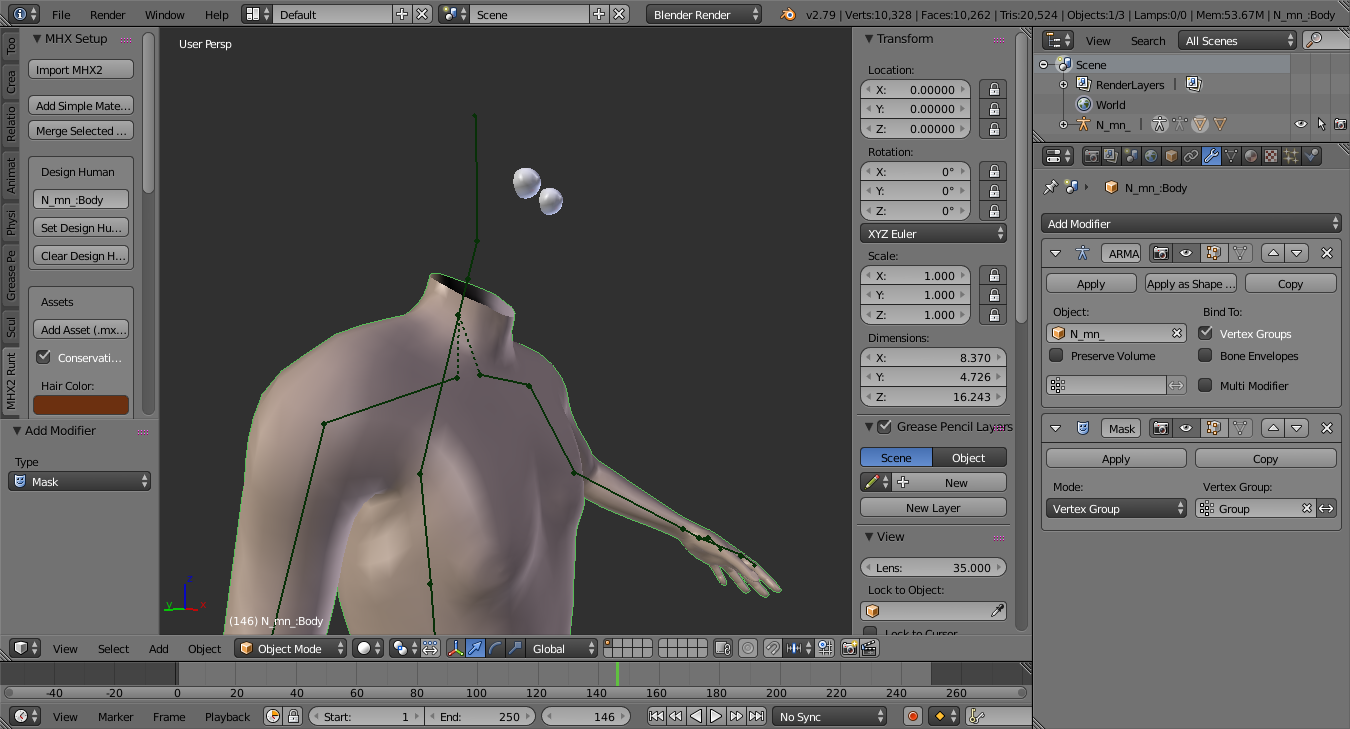
following that, I've added a 'mask' modifier to the object and selected the said vertex group. sorry for the creepiness guys :D... and yeah also I've hid the eyes with the H key :)
The last thing I did was to enter camera view (alt+numpad 0) and select 'lock camera to view' in the 3D viewport right sidebar. I manipulated the viewport to give me the composition I was aiming for. and by the way, here's the kicker- you can zoom in and rotate around the model if you need to- something not possible with using basic 2D references.
Now, this is completly OPTIONAL- you can also use the 'rigify' addon for blender to create a meta rig which allowes for a finer degree of control over the armature. I reccomend against it for beginners, as I had to learn about manipulating a character rig because it interested me- but I fully understand not every one has the desire to bother with it. it's a required skill for animators- but not cencept designers or illustrators!
I want to thank you all who got so far. thanks for your time and attention!
I wish you a great new week and happy Steemin'!

GIF by the awsome @carlos-cabeza
Thank you for sharing. Very good write up on getting this set up. Do you know about www.manuelbastioni.com. Same guy who developed makehuman. This is his new project - full addon for blender.
Interesting. Thanks! I'll check it out
It is basically the way to help others by sharing own ideas lot of thanks and keep it up.kindy upvote my posts and comments.
It a very good idea for all of us
Thanks
Great post. I have similar workflow and can confirm it works.
Thanks☺️ I still believe the reason I started learning 3D is seeing how easy it is to use blender
Nice post, beautifully presented and explained. detail oriented with nice pics. thank you for sharing this with us, Upvoted
Thank you so much for the feedback. Steemit is where I started writing tutorials so I'm trying to get better at it.
Resteemed your article. This article was resteemed because you are part of the New Steemians project. You can learn more about it here: https://steemit.com/introduceyourself/@gaman/new-steemians-project-launch
Nice one. I use Blender all the time, more as the Fork Bforartists, but yeah! It's a great thing to play with with some great autorigging capabilities. Hope to see more articles on Blender, and carry on!
Thank you 😊 you can check out my previous blender posts, I'll try to continue making more
nice plugin. Can this be animated in Blender with keyframes? or exported as an obj file?
Yes the armature can be animated. You can export the obj but I'm not sure animations can be included in obj format