Crafting with Surly Kyle: Making a Basic Knife Handle (Hidden Tang)
Okay so, before I get right to the meat of this tutorial I have a short story to explain what brought me here.
My folks run their own homestead out in Eastern-Canada, and I visit them about once a year; the last time I visited was this past July/August. I had been there for nearly a month by the time I started to itch for some creative work. It didn’t take me long to realize that I was surrounded by my favourite material.. wood. The property my folks have is completely surrounded by trees. I very quickly decided that some excellent weap- I mean tools could be made.
Now I’ve always had a fascination with knives and things of the like, so I decided to give it a shot and make my own. The only problem with this was that I don’t have a forge or the knowledge to make a blade yet. After some head scratching and brooding, I figured I could probably pick up an old knife in an antique shop somewhere and work from there. My goal going into this was to spend very little money in order to make a finished product, and old beat up knives can sometimes be found for very cheap. So doing as I set out to do, I searched around The Maritimes and managed to pick out a grungy-old-rusted knife. The best part of this knife was that the handle was already broken and the blade was still solid, it was as if it was there just for me to fix it up!
Now that’s the story of how my boredom and creativity brought me to teaching myself how to build this beauty.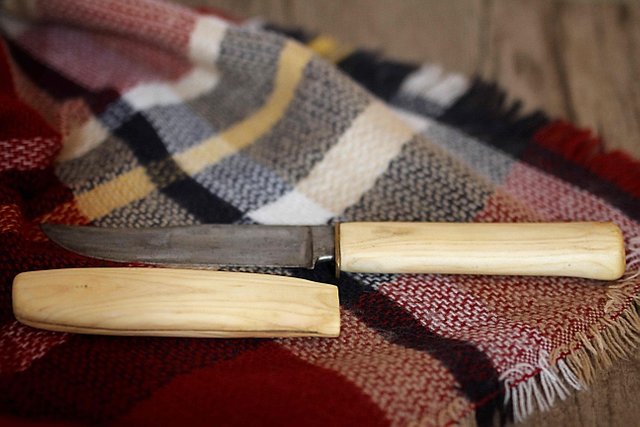
So let’s jump right in to the first step of the project. Also keep in mind that I’ve only done this once, so everything here is based off of that first try. (many photos were not taken so you’ll have to use your imagination for some)
STEP 1: GATHERING YOUR TOOLS
This is a listing of items that you'll want before you start
A Drill/Drill Bits
Any electric drill will work, however if you have a “Drill Press” that’s even better. You’ll want bits that vary in length and diameter. This will be used to make a hole through the length of the handle, this is to insert the “tang” of the blade into the handle.
Large Clamps X2 & a vice
The vice is to hold the handle in place while you drill your hole. The clamps are used to, well, “clamp” your finished piece together while you give it time to set (The epoxy).
A Hand Saw (or Electric Chop Saw)
This is used to gather your wood, as well as making a few cuts during construction.
A Whittling Knife
Any standard sharp knife will work, the best thing would be a blade that is fixed (meaning it doesn’t fold in), this is for safety. *Also please don’t use any kitchen knives as they are not as sturdy and are not designed for this kind or work.
Pencil & Paper
This is to draw up the original design, as well as to mark your “cut lines”.
Various grits of Sandpaper (60, 80, 120, and 360/ or better yet 600)
Sanding by hand can be a long task so if you happen to have a “belt sander” then it will save you large amounts of time.
STEP 2: COLLECTING YOUR MATERIALS
These are the things you'll need to put your knife together
Pick out a blade
The easiest thing to do would be to order a “knife blank” online, they vary in prices depending on their sizes, types and quality. For this project cheaper is good, also we will be using a “hidden tang”.
Pick out a knife guard
Same as the previous step, this can be picked up online, just make sure the size fits with the blade.
Choose your type of tree/wood
Different woods have different hardnesses and durability so keep that in mind while choosing. You can also order knife handle materials online if you’d like. OR...
Cut a thick branch off the tree you want
Roughly 3X as wide & 1.5-2X as long as you want for your handle, it gives room for mistakes. This is less optimal as it will be “green wood” and will dry out and possibly split over time.
Buy a nice wood oil
For this project I used hemp oil for the finish, this brings out the natural colour and grain of your wood. It also helps to protect your handle from cracking and seals it slightly.
Buy a strong Epoxy
This is used to adhere the “tang” (blade) to the handle.
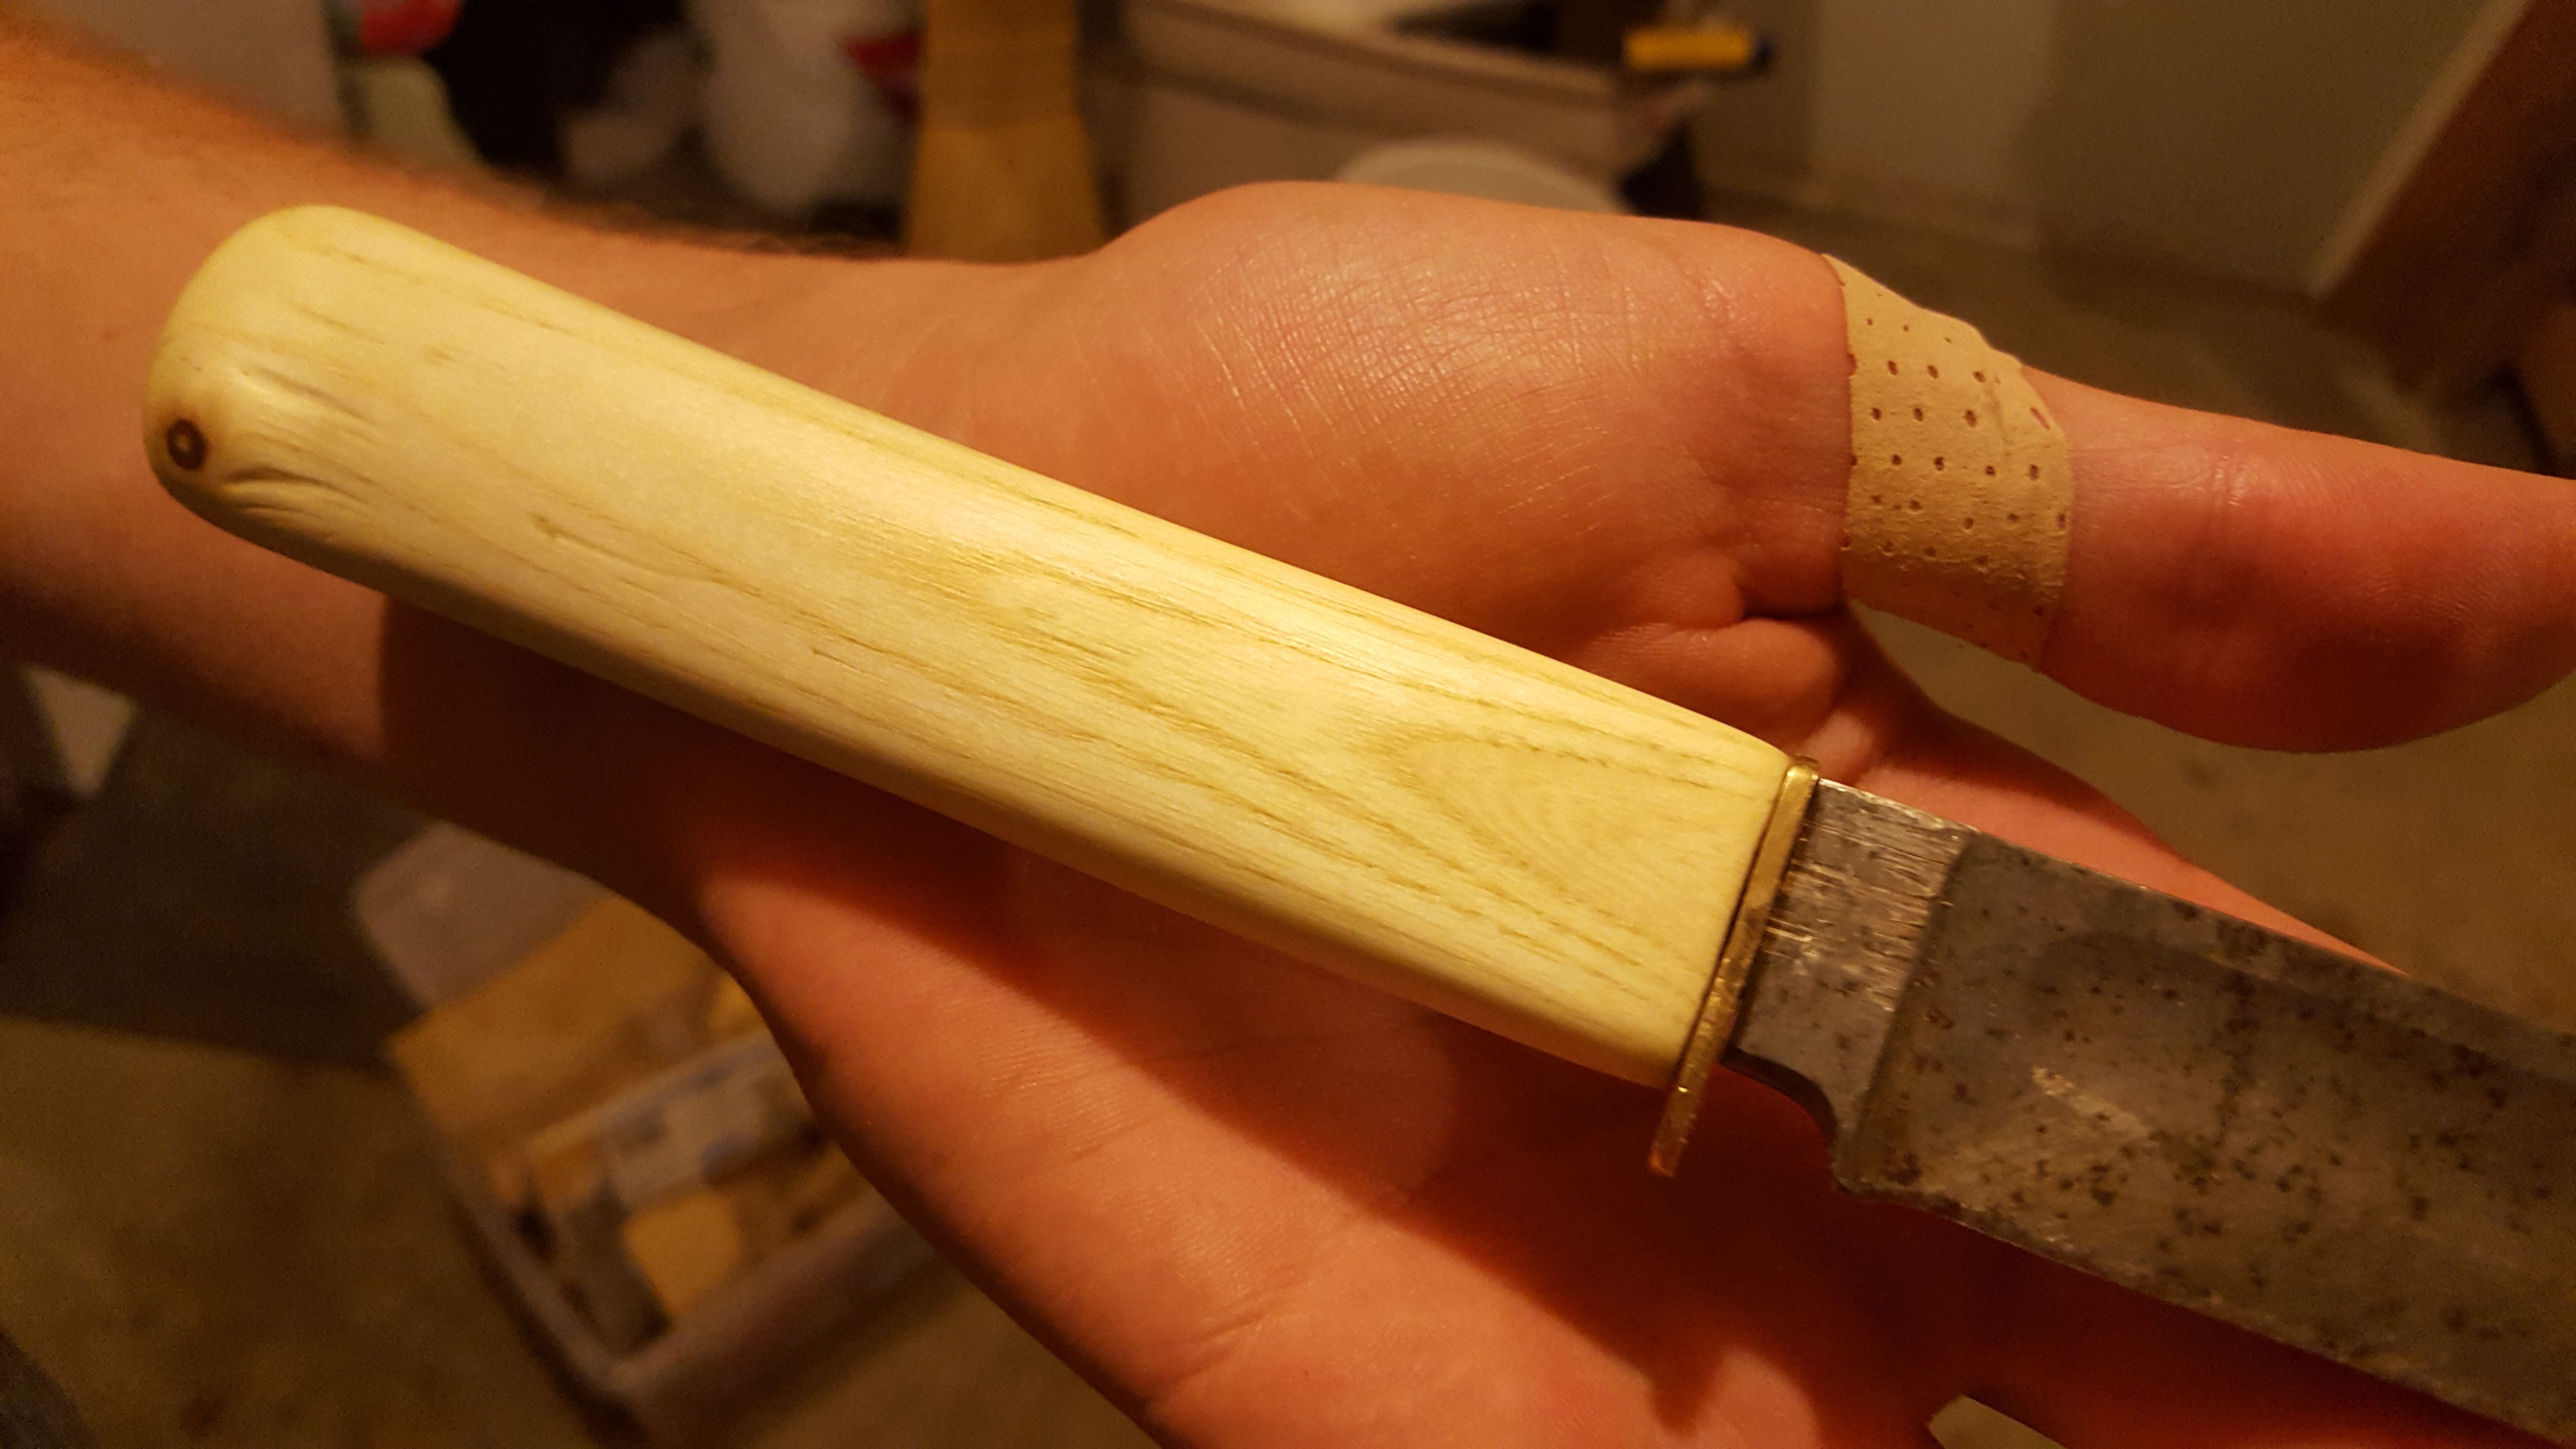
*As for what I did, plenty of mistakes were made as far as materials go but it’s fine as a learning experience. I found an old blade and brass knife guard in an antique shop, that kept things cheap and easily accessible. For my handle material I cut a large branch from a birch tree which has a nice light colour and is soft, so it was easier to work with. The problems that come with this are that the wood it still "green"; this means it will probably change size over time and crack. My method seems to have worked so far, 6 months after construction and it has held strong.
STEP 3: CONSTRUCTION
Step by step, everything I've done
Draw your design, simple and rough is best. All you need is a rough outline of what you want for a finished product. Trace out the blade and then sketch a simple handle onto it.
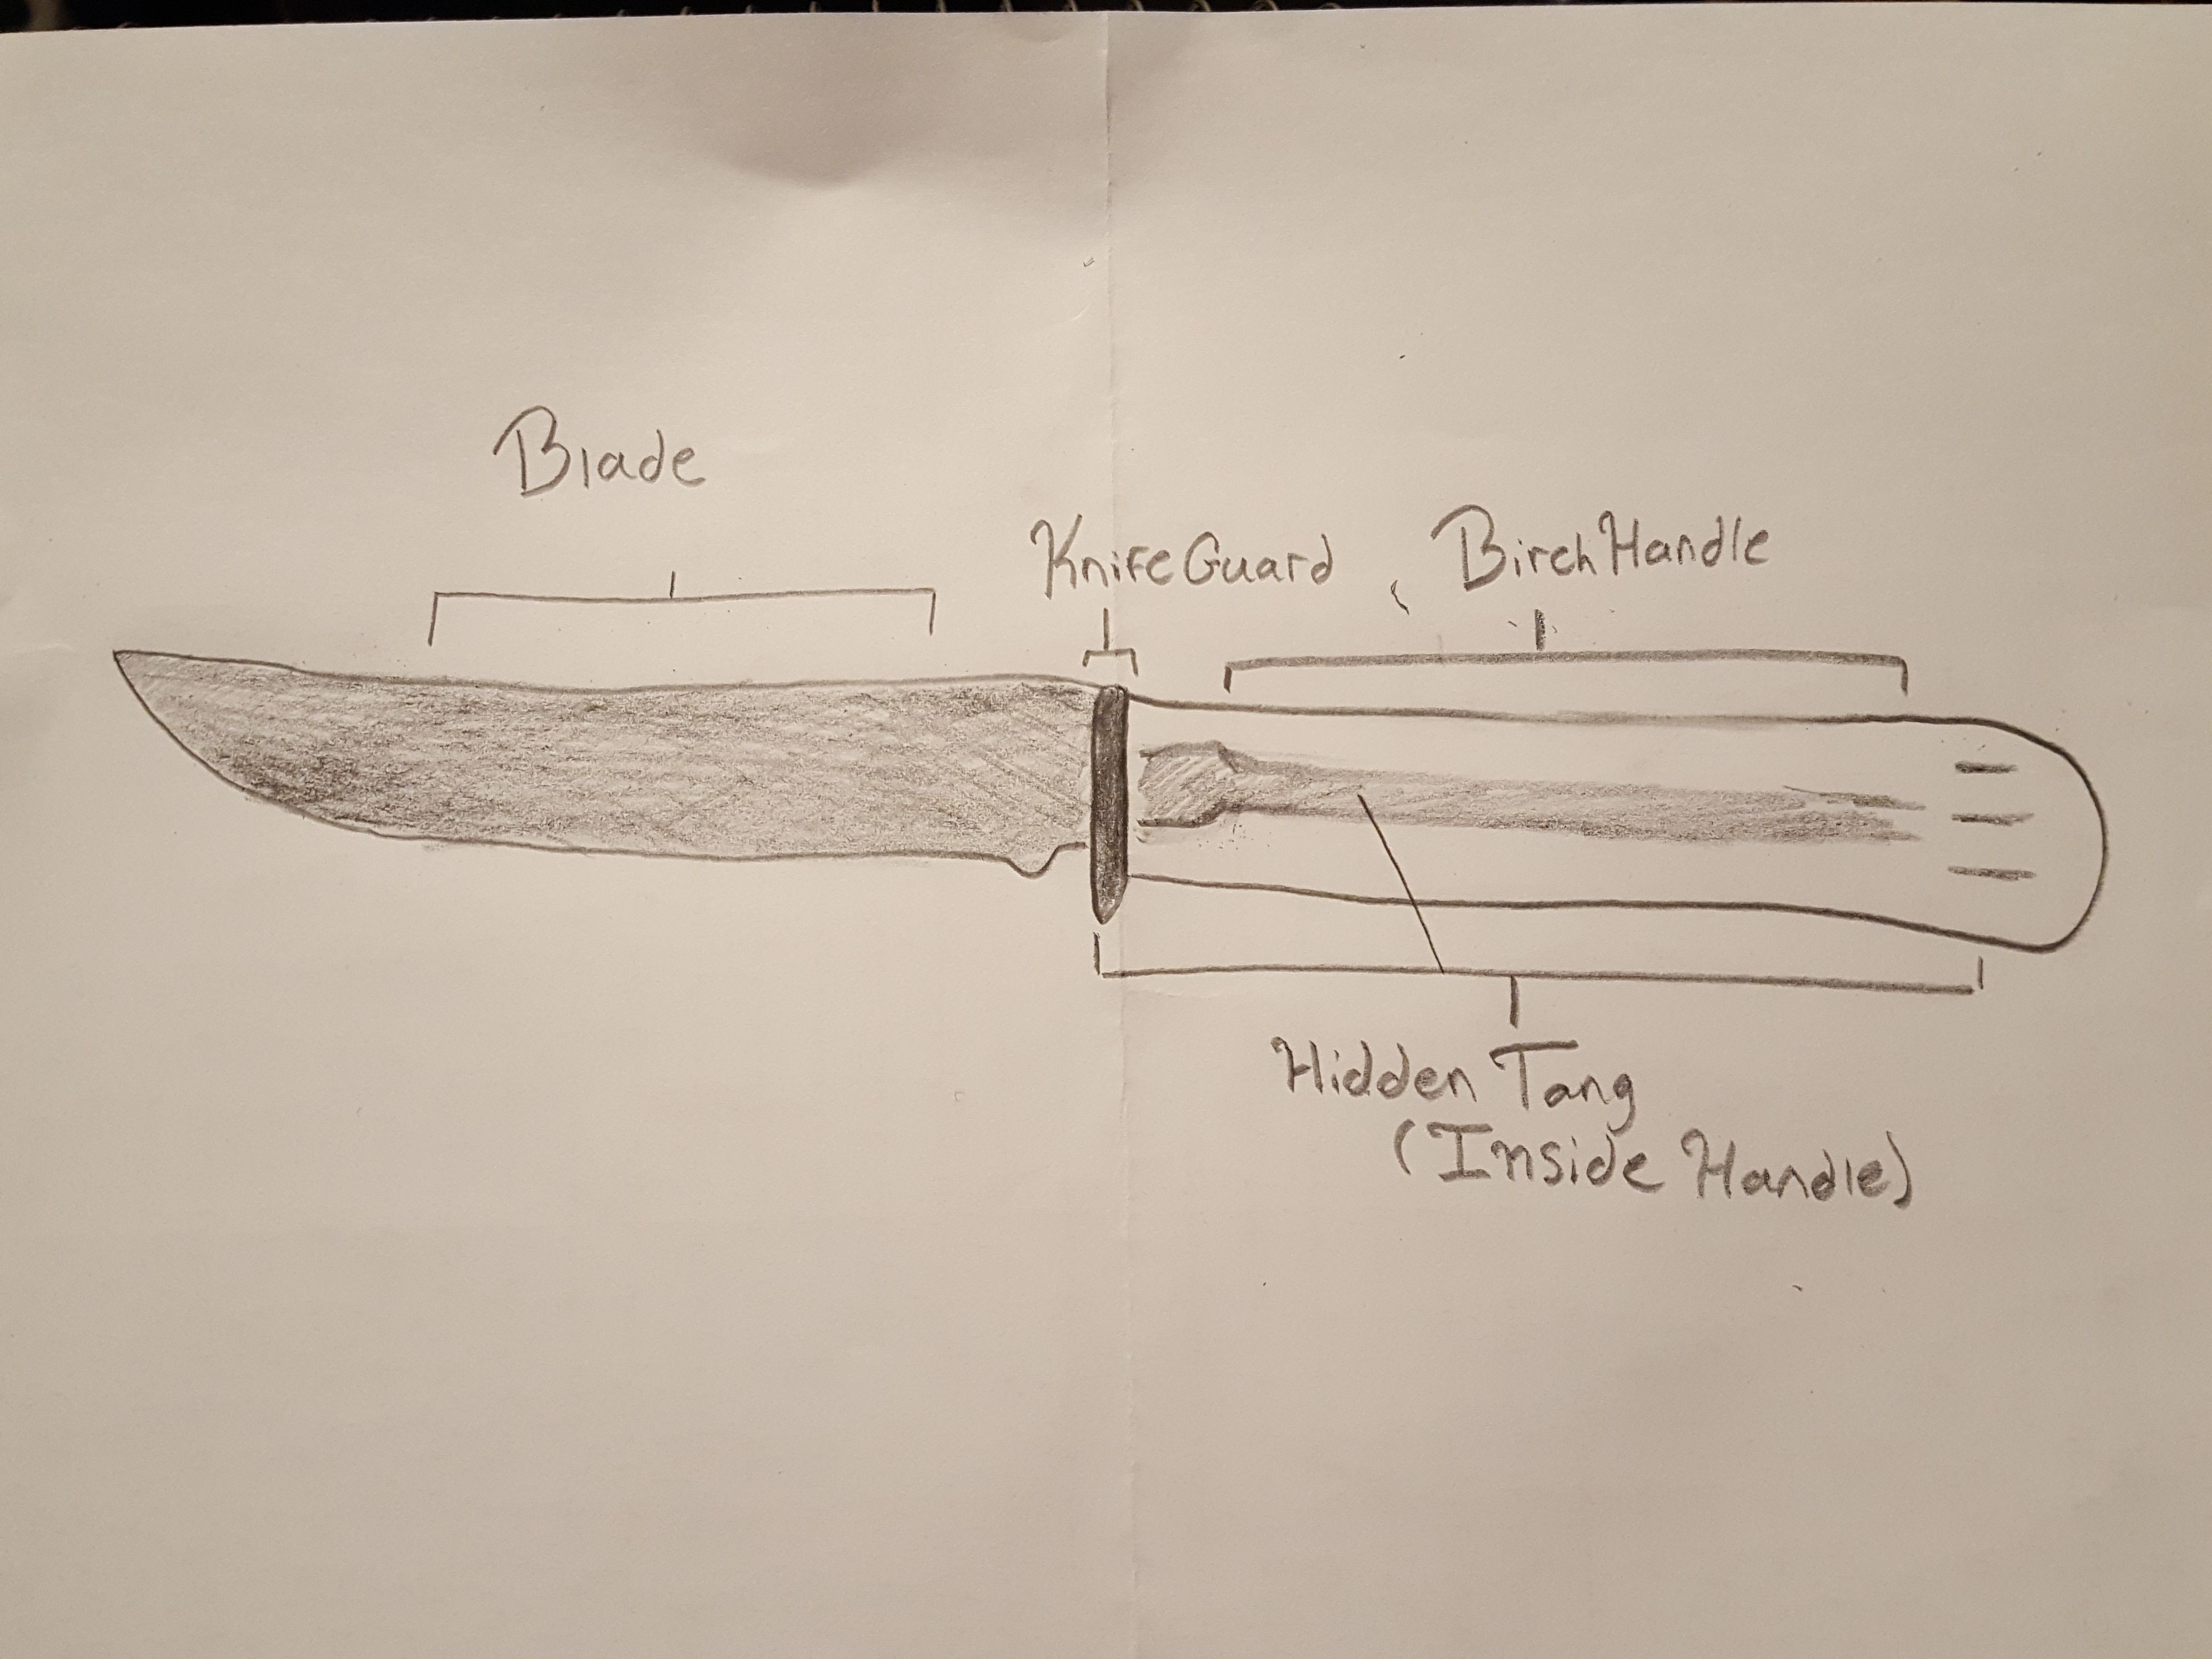
Grab your handle material. Cut a small bit off one end and make sure it’s straight, this will be the side that meets with your blade and guard.
Drill the hole for your “tang” (This is the metal bar attached to the blade). This can be tricky, start by drilling your initial hole in the centre of the material, this hole will run the length of the material (only as long as the tang). Only drill your hole out to the same dimensions as the tang itself; you want it to be able to slide in with minimal resistance, but you absolutely do not want it to “wiggle around”. This step is easy the mess up so take your time. *note, I did this step after I carved my handle and it caused a number of issues, you will notice this in my photos.
Place the guard onto the tang and insert it into the “handle”. Trace out your guard onto the end you just cut. However as your guard will hang over the edge of your handle, you will want to shorten the long end of your mark by a few cm. This will essentially be a stopping point for when you will be carving.
.jpg)
Remove the blade. Make another cut on the other end of the handle and make sure it’s roughly two inches longer than you plan on your finished product being. (This give room for error)
Start whittling your material down, this can take a long time so don’t be discouraged to set it to the side and take a break for a day. This is to get the actual shape of the handle so try not to take off too much material.
.jpg)
Before you start sanding, it would be a good idea to let your carved wood sit for a day or two, this will let it dry out slightly.
Now it’s time to sand, start with your lowest numbered grit of sandpaper and slowly work your way up to a finer sandpaper. What you are doing here is getting rid of imperfections and rough edges.
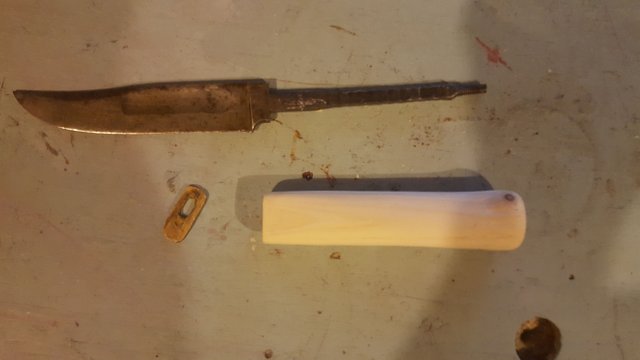
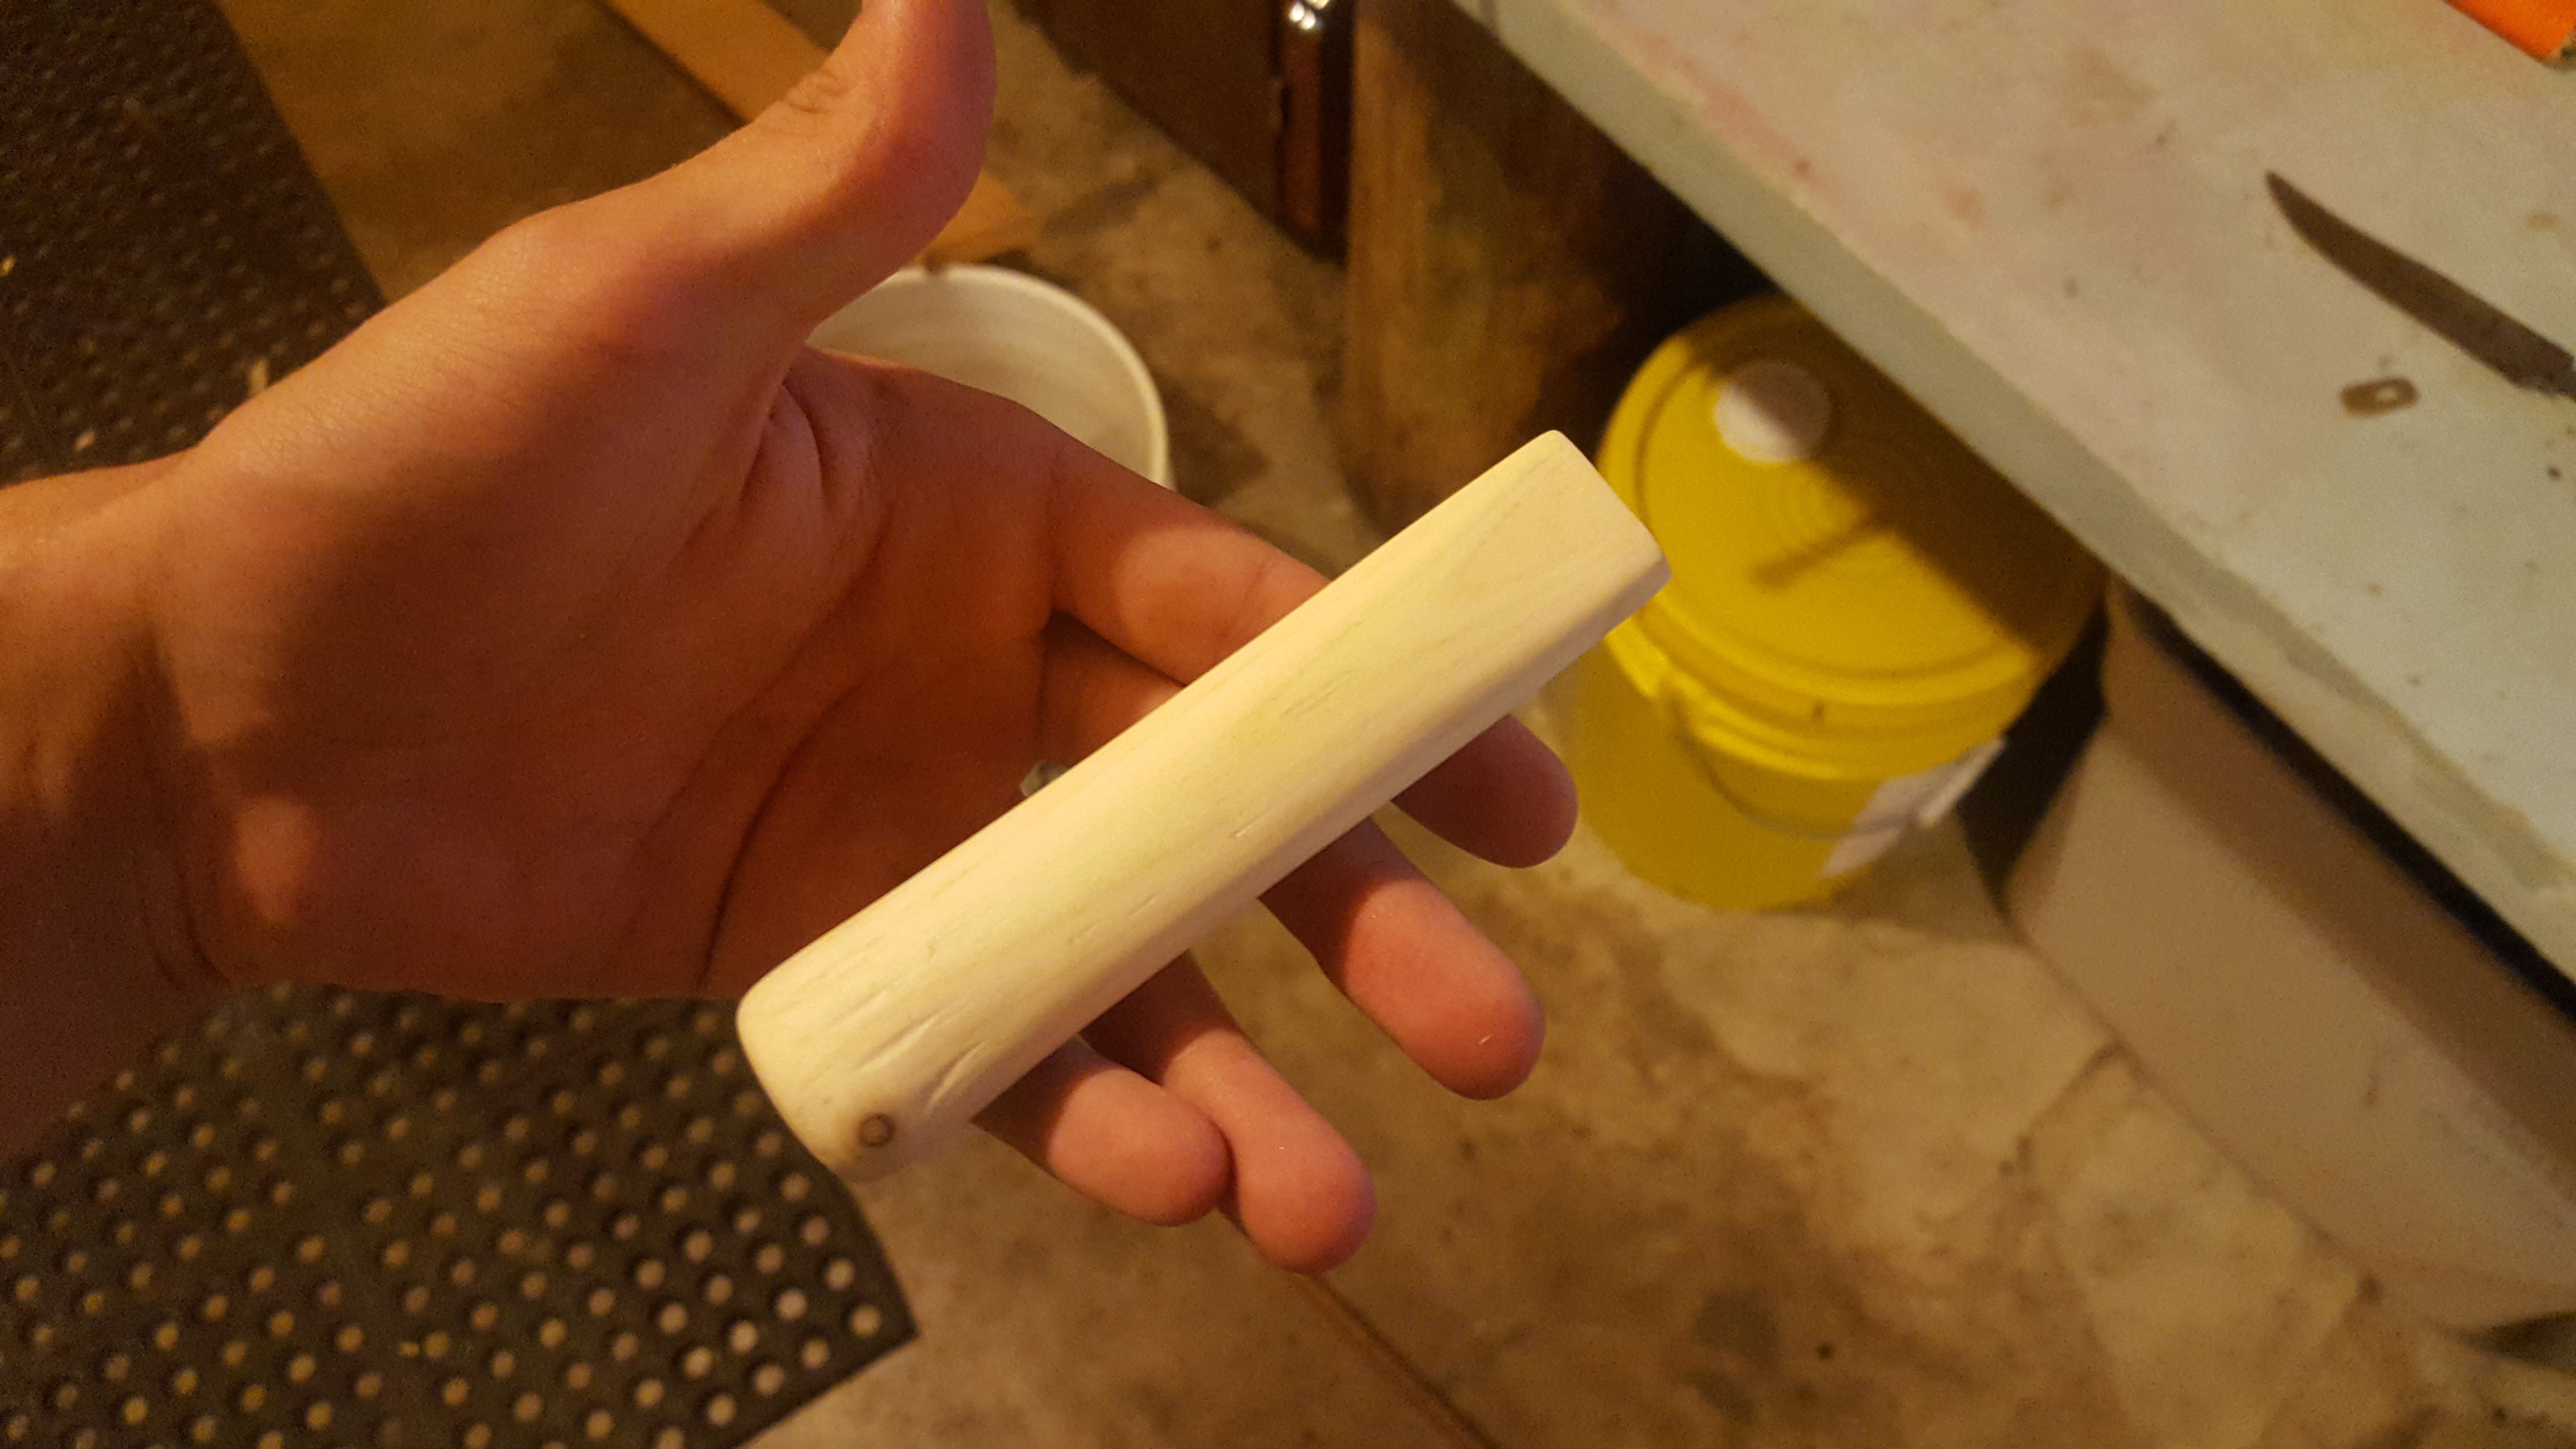
Once you’re happy with the feel of your handle it’s time to “stain it”. You can use a wood stain or you can use an oil, I prefer to use hemp oil because it keeps things natural. You’ll want to do a minimum of 3 coats if you’re using oil, but the more you use the better (I used around 12-15, over 3 days). Use a cloth to apply your oil evenly to all surfaces of your handle. Make sure to let each coat dry fully before applying your next, this can take an hour or more to dry depending on your climate.
.jpg)
The last step is simple, take your epoxy and fill the hollow handle. Place the tang inside of the handle and wipe off any excess that should come out. Take your large clamps X2 and two blocks of wood. You’ll want to place the tip of your blade into one block of wood and place the other block at the base of the handle. Now clamp both blocks together, keep each clamp to opposing sides of the wood to avoid bending your blade. Make sure it holds tight but not enough to damage the blade.
The rest is a waiting game, it takes time for the epoxy to set but once it does you should have a decent knife.
In the end this is all a learning experience and mistakes are bound to happen, especially when you’re doing something for the first time. My biggest piece of advice to is to be patient, even a small project like this took something like a week and a half for me to finish. You don’t have to be the most artistic, talented, or even wealthy; you just have to get creative and be patient.
This was my favourite project to date and I learned a lot doing it, and I’m extremely excited to share the process with the rest of the community. If you have any questions for me, or even tips, I’d love to speak with all of you about it. Let me know what you all think, and stay tuned for the next exciting post.
-Surly Kyle
That’s awesome!
Can I suggest a change in tags. Change howto to diy. Also maybe knife as a tag, there are a lot of people who collect knifes.
Thanks for the advice, I'm still getting used to tagging so I really appreciate to help.
No prob, I’m still a newbie. Just trying to help 😊 I have a hard time trying to figure out what tag to use sometimes too.
Es asombroso, me gusta mucho tu forma de arte.
Muchas gracias!