The Most Beautiful View I Have Ever Painted - Art and Painting Process
Hello Steemers
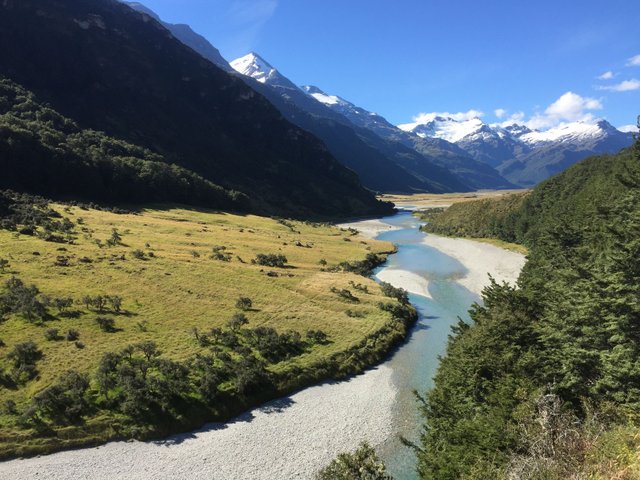
A few weeks ago I spent some time in Glenorchy, New Zealand painting outdoors with a group of plein air painters. One of the painters took us to the Rees Valley which is characterised by beautiful high mountains, rivers and native beech trees.
As we drove into the Rees Valley we pulled over off the dirt track and one of the painters who is local to the area said, come and have a look at this view. When I saw the view it was so beautiful I thought I have to come back and paint it, so the other day I came back.
This is my painting and in this blog post I'll show you how I created it.

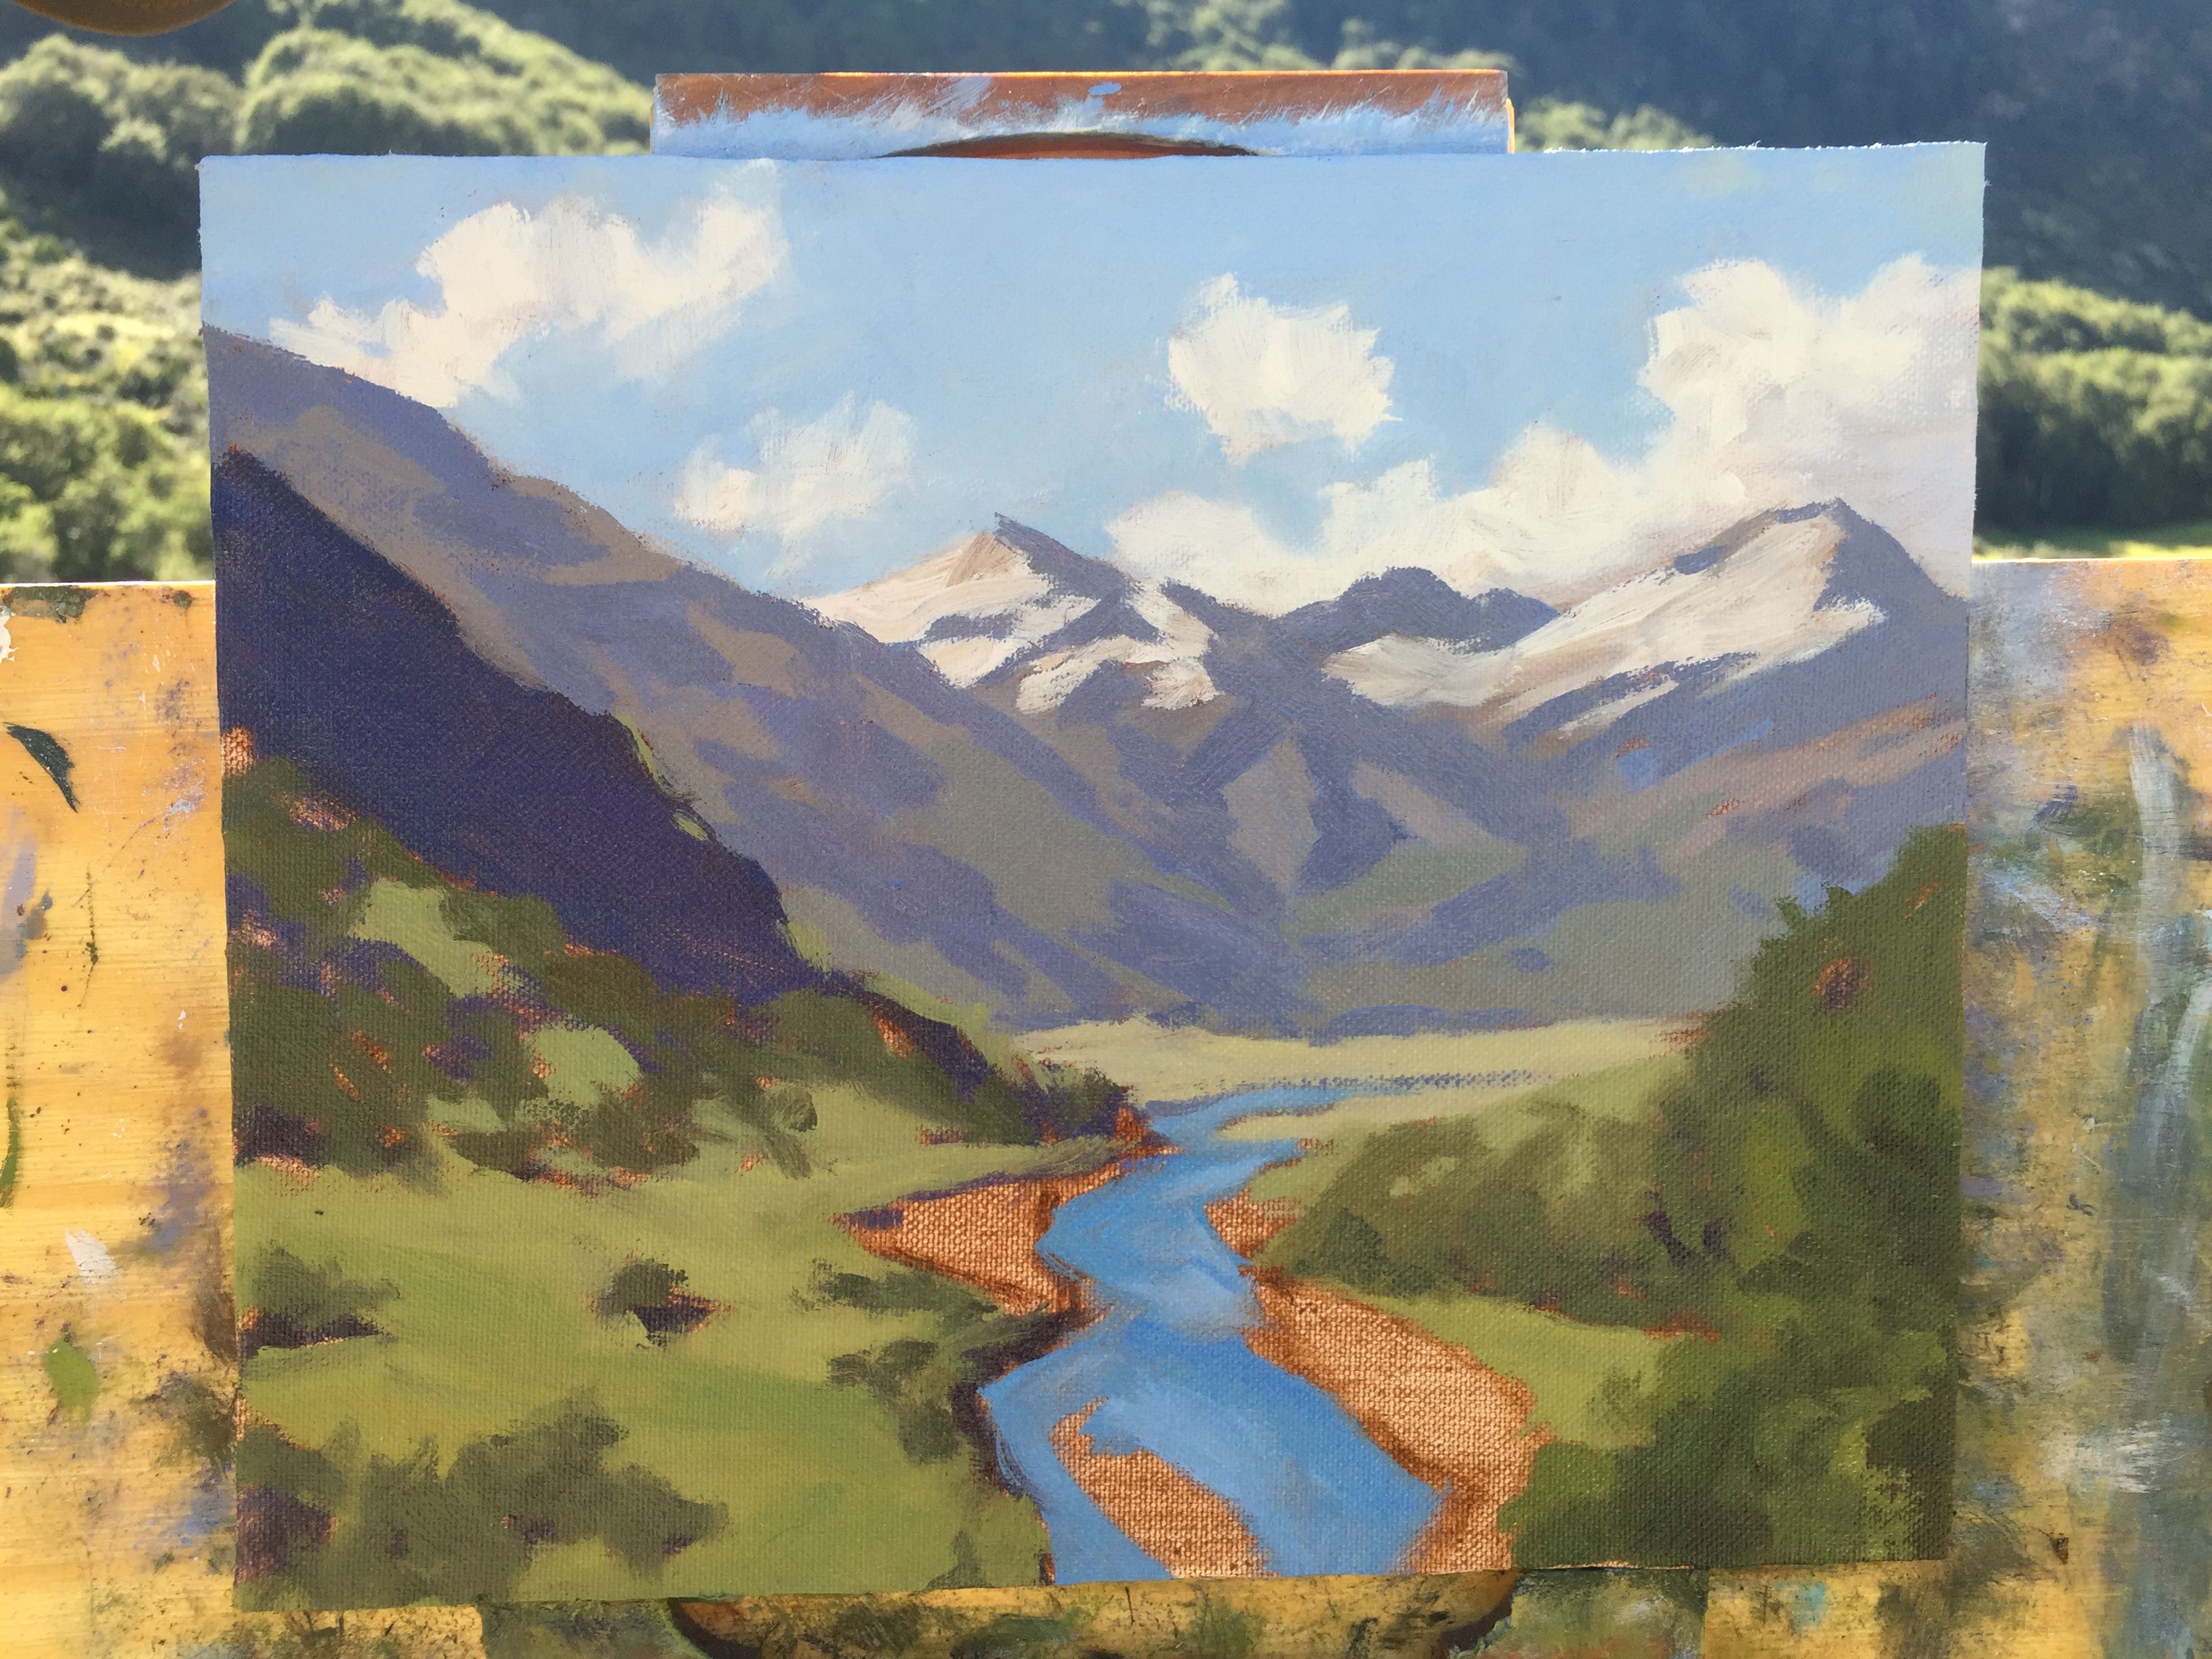
Rees Valley, New Zealand, 8" x 10", oil on canvas panel.
This is one of the most amazing views I have ever painted, I love the atmospheric depth of this scene and how the river leads the eye to the distant mountains.

When I first saw this view I thought it was so beautiful that I immediately thought, I want to do a studio painting of this scene. Whilst I took a few photos of the view I knew I wanted to come back.
Normally when I create a studio painting I gather my photo reference and sit down with a sketch book and draw some compositions. Following that, I'll paint a colour study, a small painting to refer to that I can use when I paint the actual studio painting. However I decided that instead I would revisit the location and paint it from life, outdoors 'en plein air'.
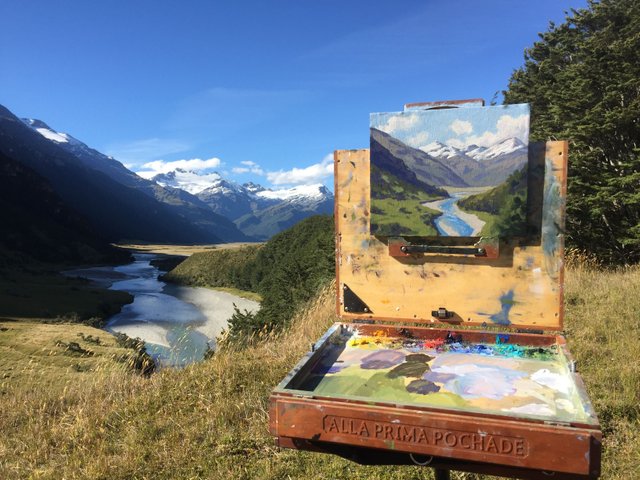
I set up all my gear including my pochade box easel and I have decided also to film the process for my YouTube and DTube channels.
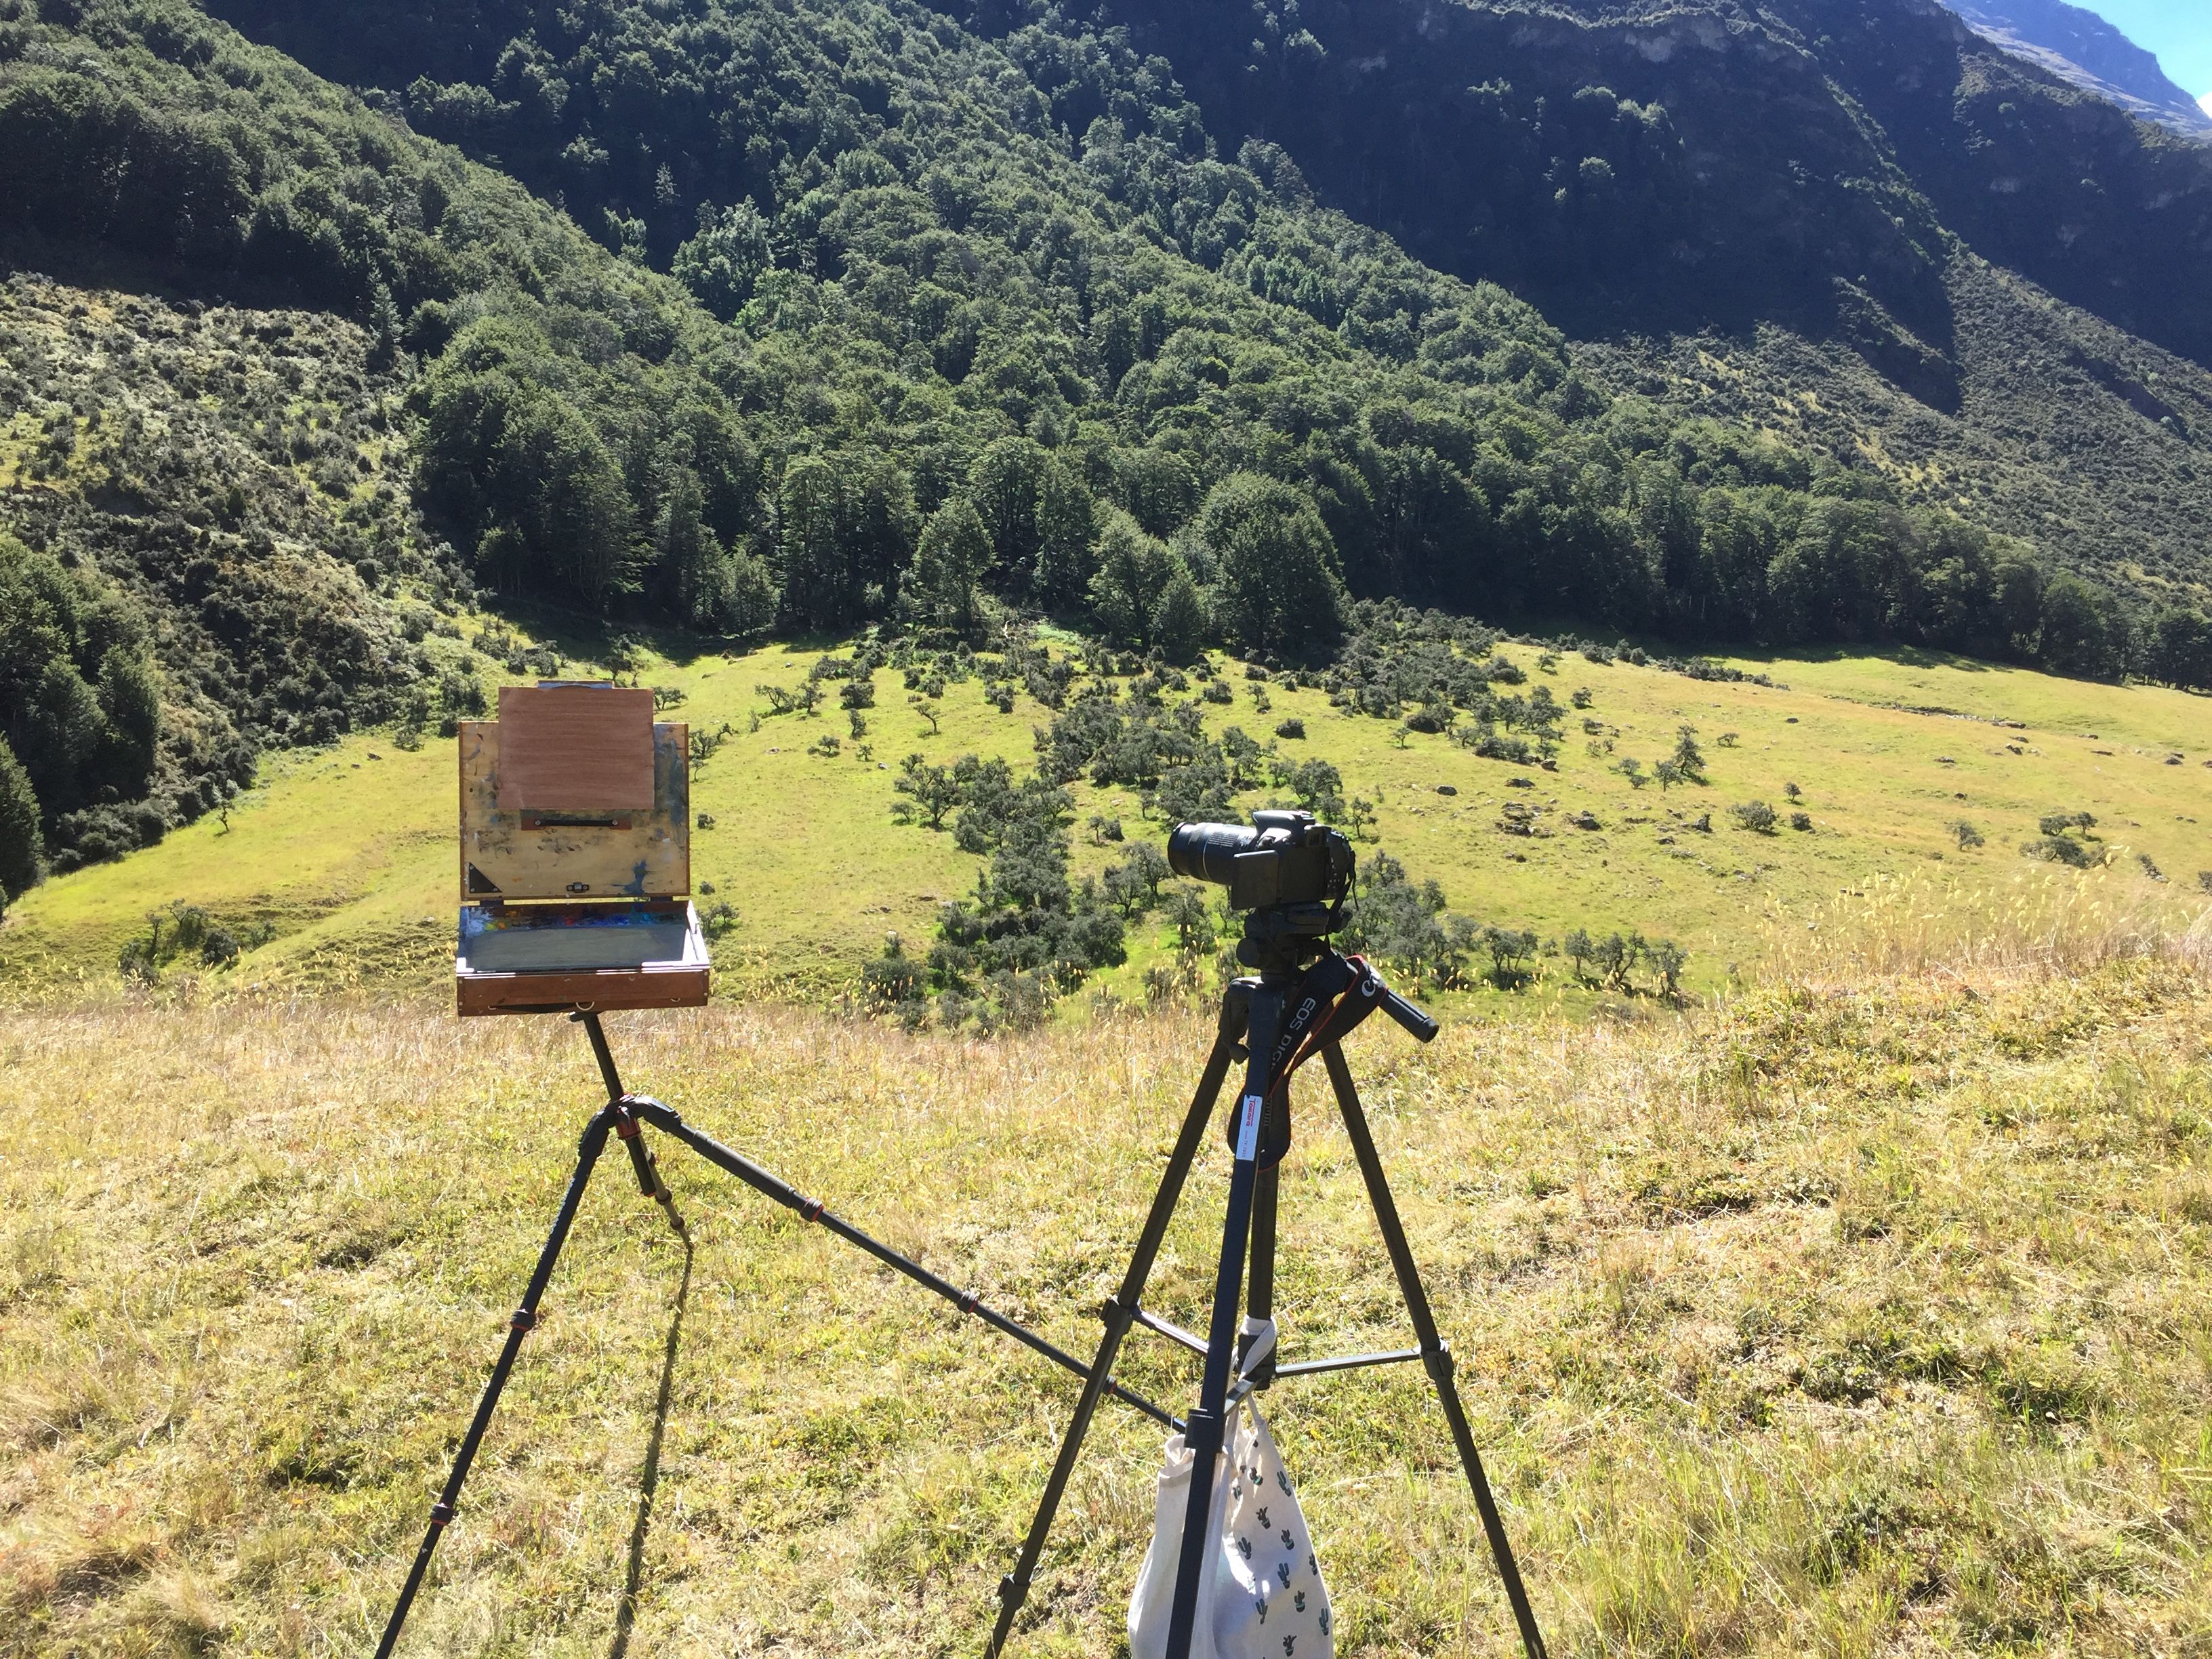
When painting outdoors, it's important to have your easel and canvas in the shade, that way it's much easier to judge your colours and tones properly. Also if the colours look good in the shade they'll look even better under studio lighting.
I set up my easel and started painting.

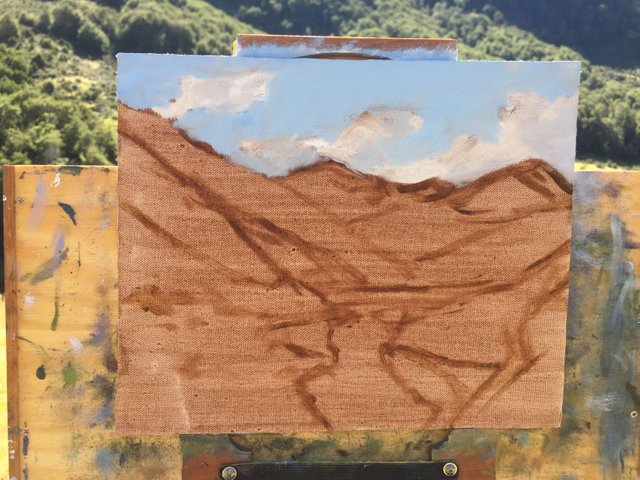
It was pretty windy when I started painting, but the weather was nice so I was determined to paint this view. I sketch out the scene with burnt umber mixed with liquin which is a medium I use to improve the flow of the paint and speed up the drying.

I always start by painting the thing that is furthest away in the painting and that's the sky. I start with titanium white mixed with liquin and using a No.6 flat brush I start forming some basic cloud shapes.
Next I start painting the sky using and combination of ultramarine blue, cobalt blue, cobalt teal and titanium white. Next I paint some cloud shadows using ultramarine blue, burnt umber which takes out the saturation, quinacridone magenta which gives it a violet tint and lots of titanium white to in crease the tone.
When painting outdoors it is important to establish all your dark tones and shadows as quickly as possible. The light will change and quicker than you think, so getting shadows establish quickly is priority.
Using a No.6 flat brush I mix the same colour combination that I used for the clouds, ultramarine blue, burnt umber, quinacridone magenta and titanium white. Using these same colours creates harmony in the painting as it contains common elements.
I darken the tone as the more I approach the mid and foreground of the painting, remembering that darks are at their darkest in the foreground. In the distance, my darkest darks are a mid tone due to the particulates in the atmosphere, darks in the distant mountains and not quite dark.

Now my darks are in it's time to establish the areas in light. Colours in the distant mountains are going to be desaturated as greens and yellows don't travel well over long distances, so I need to use colours that are not of a high chromatic value.
I mix the colours of the distant mountains using a combination of ultramarine blue, burnt umber, quinacridone magenta and titanium white. I then start introducing yellow oxide and burnt sienna into the mix but being mindful to keep the tone light.
The colours will look like light muddy grey on the palette but when juxtaposed next to the blue mountain shadows can have the appearance of green foliage or grey mountain rocks.
I paint the river by using the same colours I used in the sky.
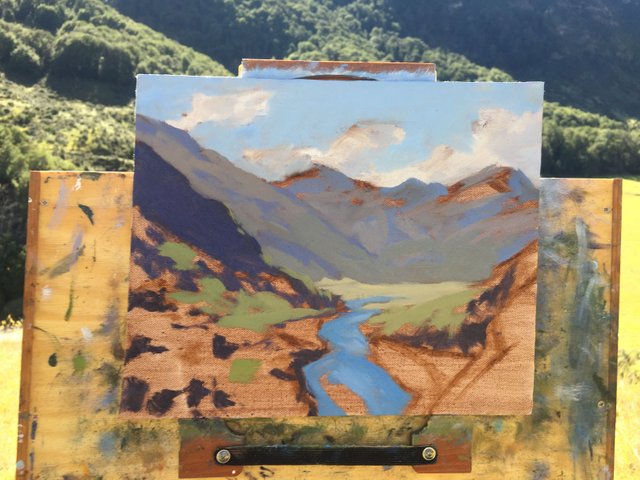
Now, as we come forward in the painting as objects come closer to the view our tonal scale increases and so does the saturation of colour. I have used desaturated greens in the distance but as I approach the mid and foreground I need to turn up the colour intensity.
I mix the mid ground greens by using yellow oxide, ultramarine blue, a little phthalo green and quinacridone magenta and burnt sienna to earth the mixture. As I approach the foreground I introduce cadmium yellow deep which increase the saturation of the green.
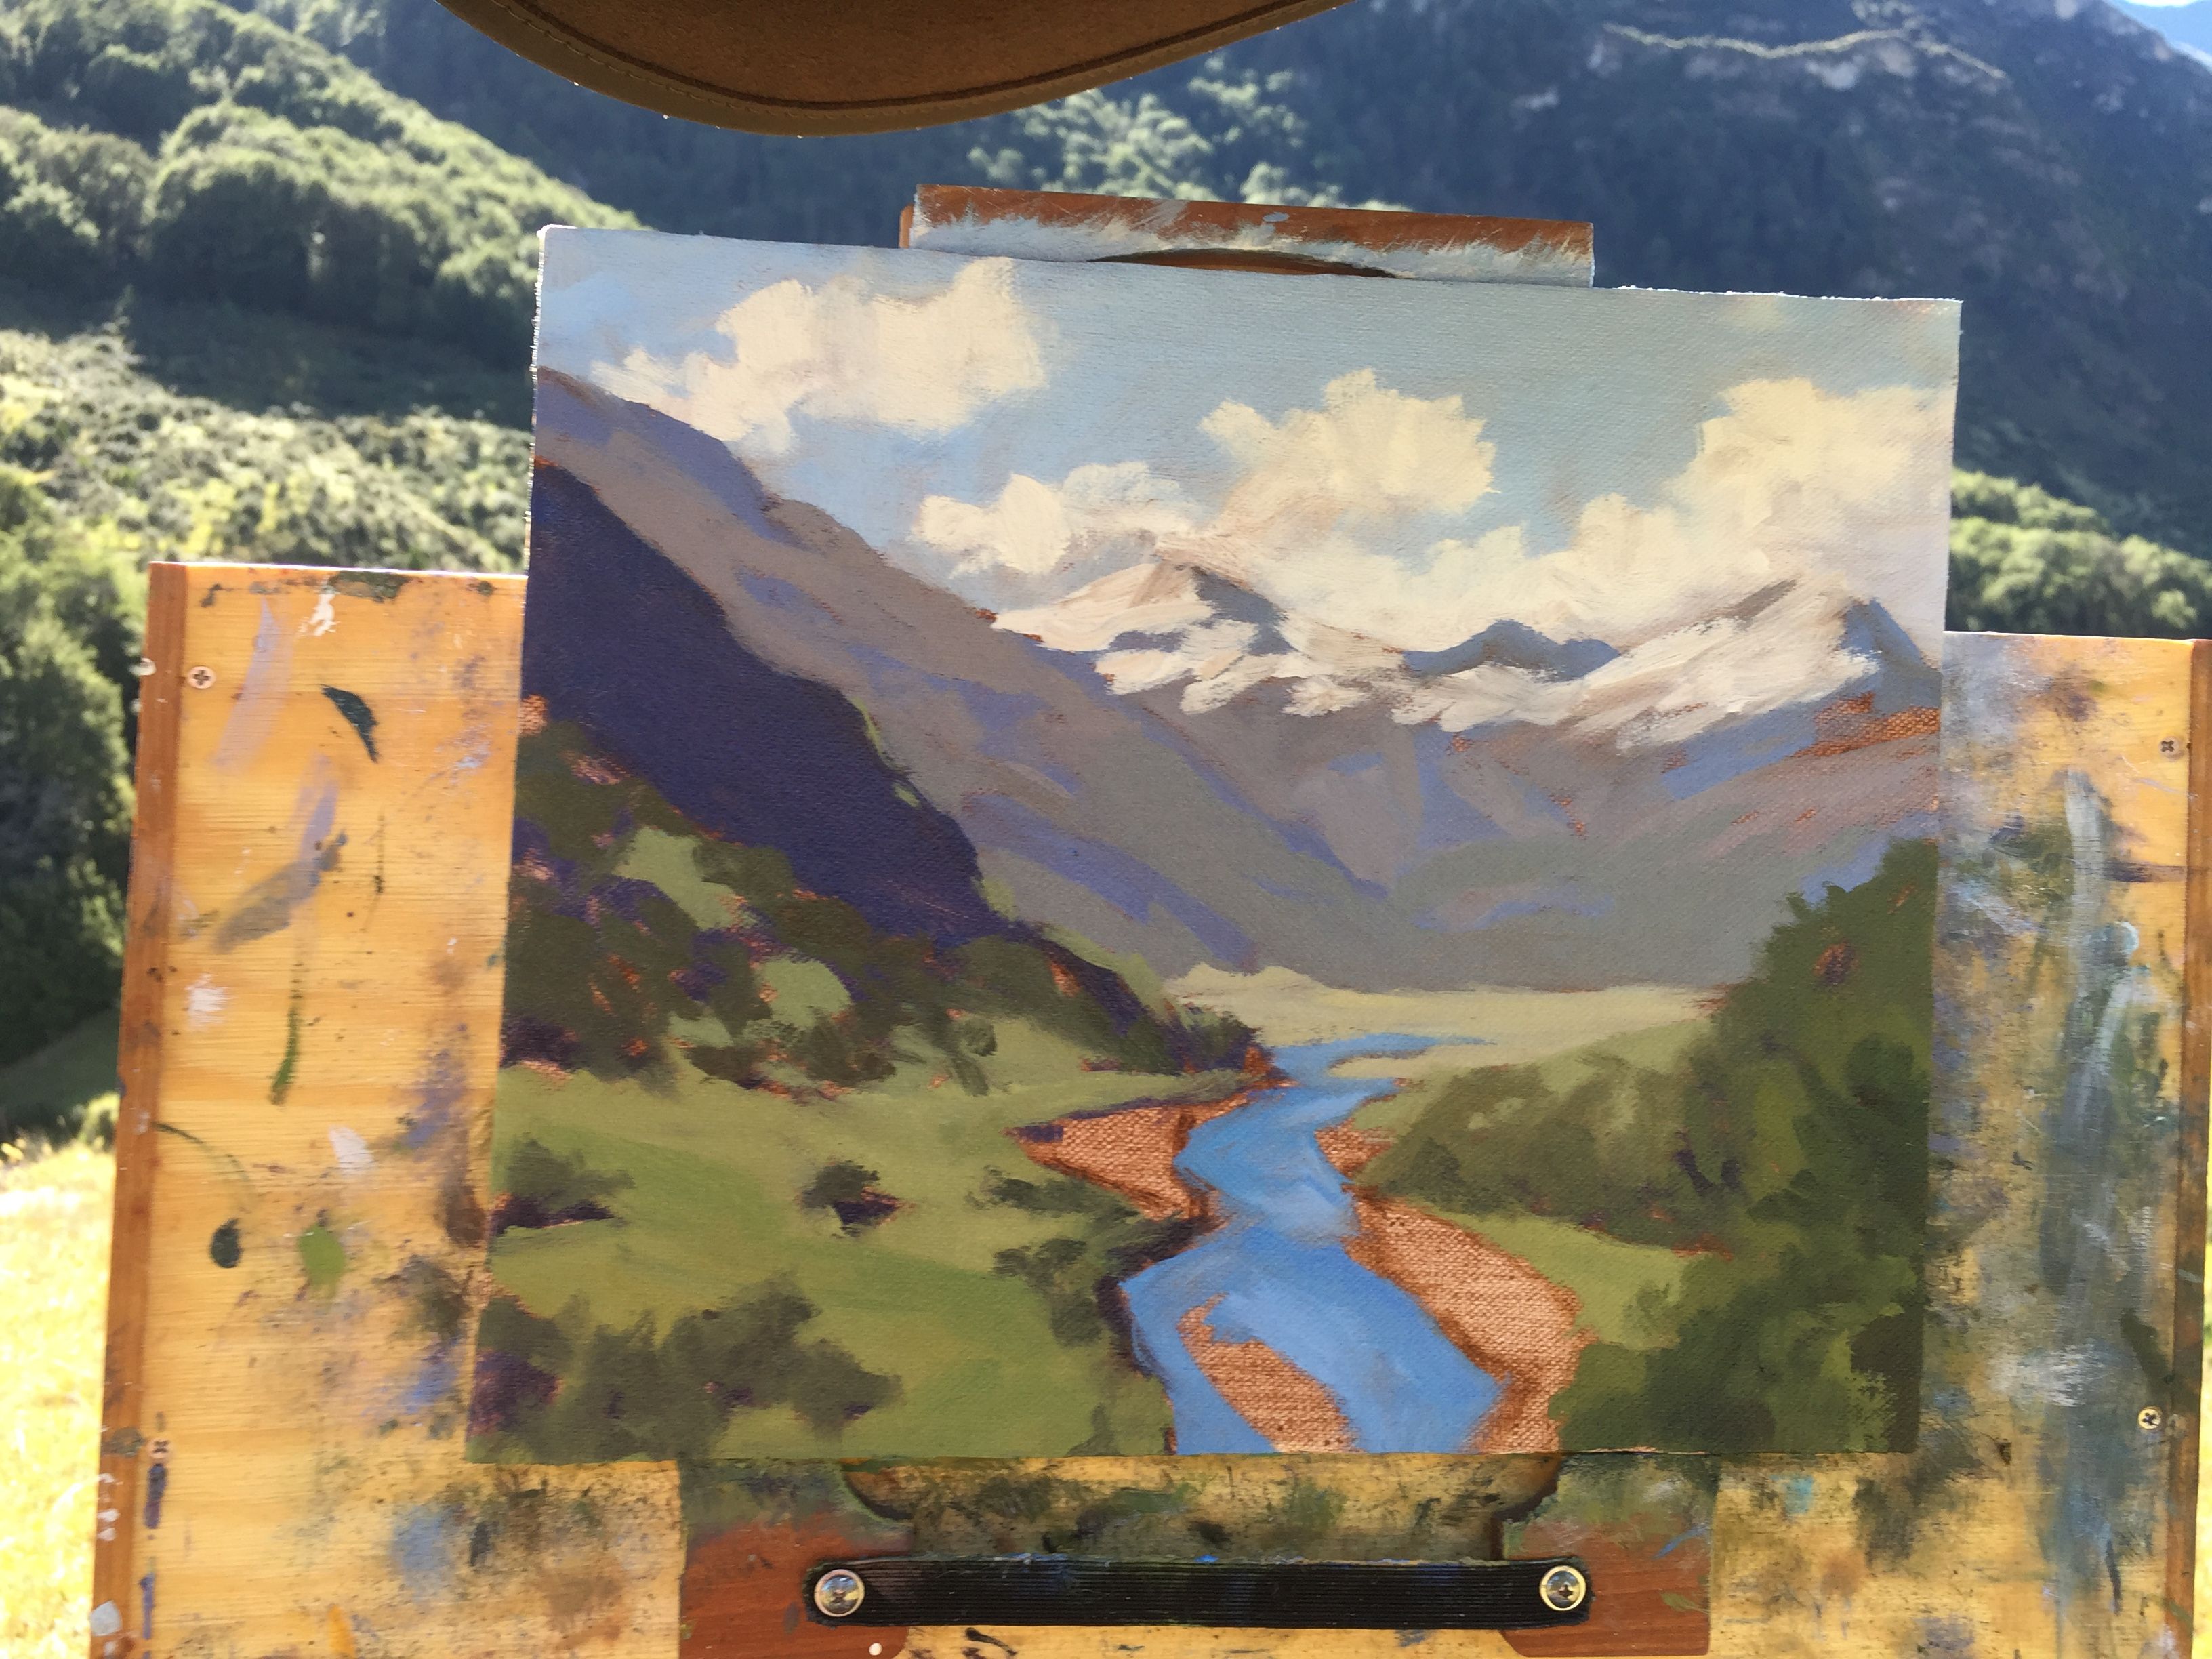
Now the light is changing and in dangers of disappearing behind the mountain so I need to work quickly.
Now that I have covered most of the canvas the liquin medium I have been mixing with the paint is already starting to dry which is ideal because it means I can rework and new layers to some of the areas I have just painted.
I start be refining the sky and clouds by adding fresh layers of paint and increasing the tone of the clouds. I don't want to use bright white in this zone of the painting otherwise it'll jump forward and I will lose some of that sence of perspective.
Now I'm in the refinement stage of the painting where I am adding more lighter tone to the foliage in the grass and the trees.
For the trees in the foreground I mix ultramarine blue with cadmium yellow deep, then add phthalo green and burnt sienna to achieve that native beech tree colour. My shadows here will be at their darkest so I mix a combination of ultramarine blue, burnt sienna, phthalo green and quinacridone magenta.
I finish the painting by refining my shadows and the little trees and bushes in the foreground. I add some highlights to the mountain river to give the illusion that it's a fast flowing stream.
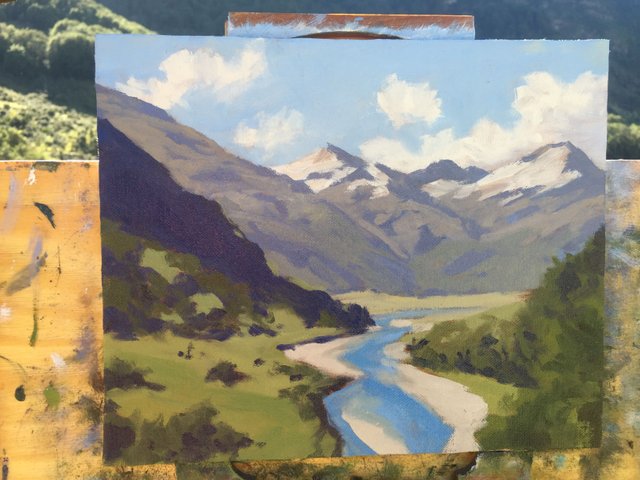
My finished painting on my pochade box easel.
I finish my painting just in time before the sun disappeared behind the mountain casting the whole valley in shadow.

I hope you enjoyed this blog post, I am now already into the sketches ready for starting the final painting which I will document on Steemit and I will also film it for my YouTube and DTube channels so stay tuned. The link to my YouTube channel is below:
https://www.youtube.com/c/SamuelEarpArtist1
Check out my website for more of my art: samuelearp.com
Subscribe to my mailing list for news, new paintings and art tips and receive a FREE digital art print download of one of my seascape paintings suitable for printing an image of any size: https://www.samuelearp.com/subscribe/
wonderful and beautiful pictures and painting dear friend
Thanks @mdarifk10 :)
Mother nature such a wonderful and beautiful pictures and painting dear friend
Thanks @soufianechakrouf :)
That is awesome! I don't think I would be able to paint a scenery like that. I always paint from photos. However, it would be worth trying with a cool set up like that with that beautiful view.
Thanks @bosssarah, I paint from photos also and I will be doing a studio painting of this scene, but I decided I'd paint it from life first.
It looks great! Seems like I great way to really enjoy nature also.
Beautiful painting, you really did the scene justice. As a non-artist it was interesting to get an insight into your set up and the creative process. Resteemed!
Awesome work! nice to see the step by step.