How to Paint Trees and Light - Painting Demonstration
Hey Steemers
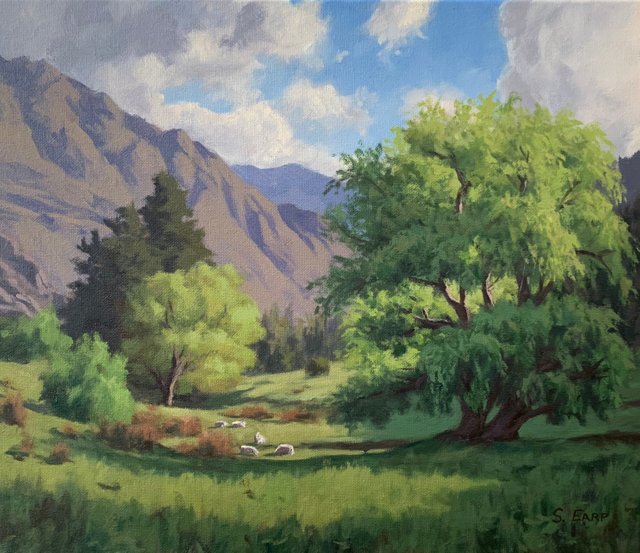
It's been a while since I posted a painting demonstration on Steemit, but I'm back again here with a new blog post. In this painting demo I will cover how to paint willow trees and evening light effects which are so common in Queenstown, New Zealand in which this painting is based from.
I have made a video for YouTube that accompanies this blog and I will upload it to DTube also if I can get it to work. Check out my website for more step by step painting tutorials: https://www.samuelearp.com
Inspiration For This Painting
The inspiration for this painting came from a location just a five minute drive from my art studio in Queenstown, New Zealand where I live. I happened to be driving through the valley one evening when I noticed the evening sun shining through the willow trees. Given it was spring and there was fresh foliage on the trees, the different hues of greens where really vibrant. I pulled over at the side of the road and took some photos. The idea for a painting was born!
Reference Photos
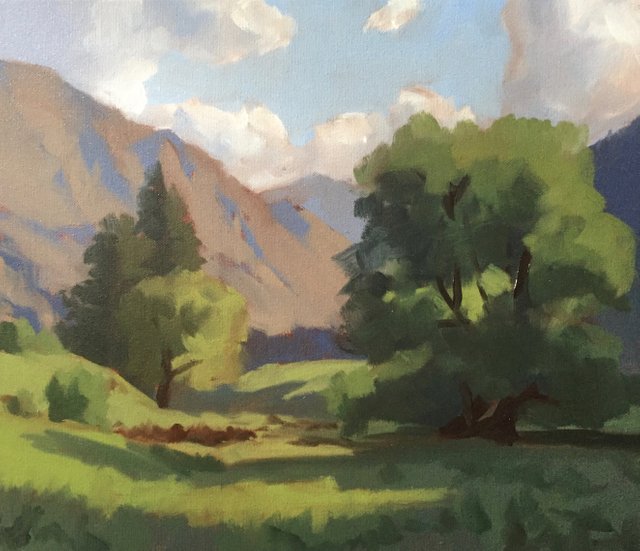
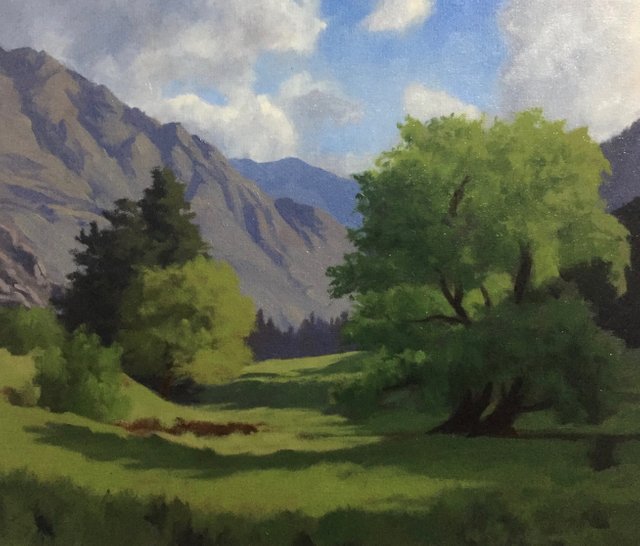
Here are a couple of the reference photos I took. Please feel free to use them or copy them if you would like to have a go at painting this art work.
In this tutorial I will cover the following:
- Colours
- Brushes
- Composition
- Blocking in the painting
- Adding detail
- Final details
Colours
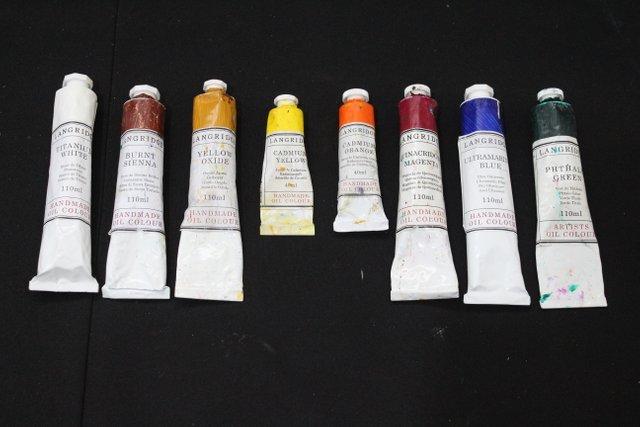
The colours I used in this painting are as follows:
- Titanium white
- Burnt sienna
- Yellow oxide
- Cadmium yellow
- Cadmium orange
- Quinacridone magenta
- Ultramarine blue
- Phthalo green
Brushes
Here is a list of the brushes I used in this painting:
- No.6 flat
- No.2 flat
- No.2 filbert
- No.1 round
Composition
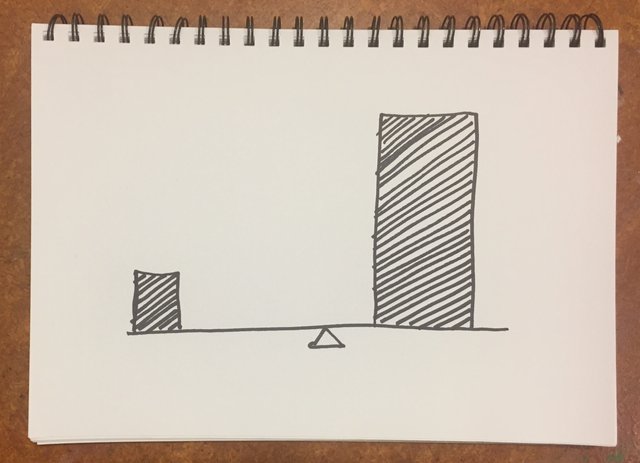
The design of this painting is based off a composition known as a ‘steelyard’ composition, it’s one of the simplest compositions and is a particularly good if you are painting outdoors en plein air. One of my favourite artist’s Edgar Payne frequently used this style of composition in his paintings.
The steelyard composition is formed of a large mass that is counterbalanced on a theoretical fulcrum by a smaller mass further away from the centre.
In applying the steelyard composition to my painting I have made the willow tree on the right the largest mass which is then counterbalanced by willow and conifer trees in the mid ground on the left side of the painting.
Before I began the painting I sketched out the composition and then a final sketch. I'd always recommend sketching before you begin a painting so you can create a good composition before you start.
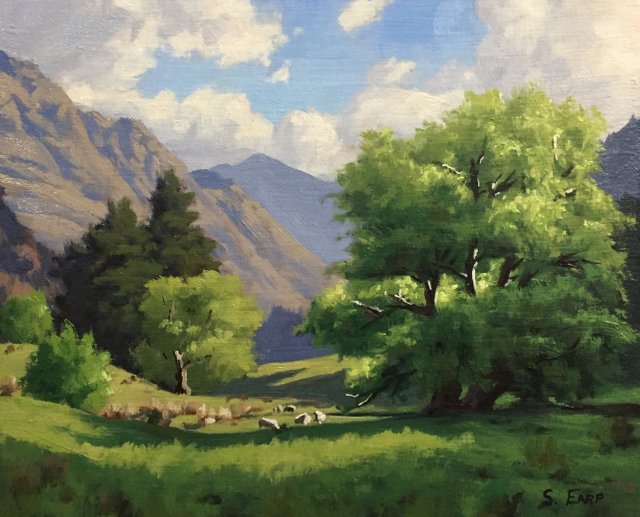
Following the sketch, I then did a small colour study to make sure the painting would work before starting the final painting.
Willow Trees, Queenstown, 8” x 10”, oil on wooden panel
Blocking in the Painting
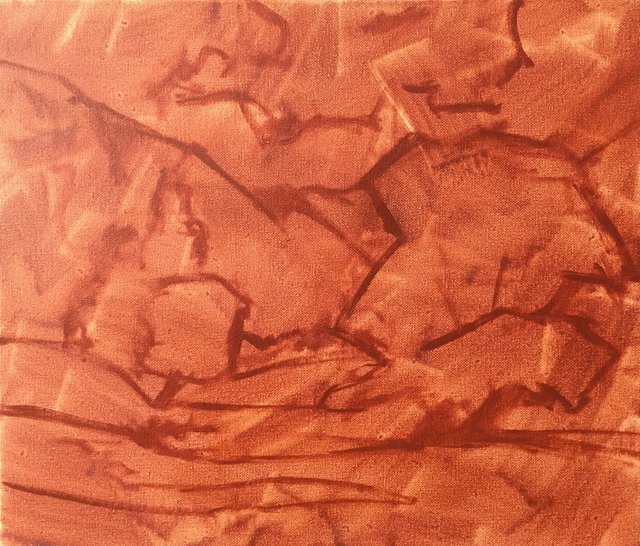
I'm using a 40cm x 50cm canvas. I prepared it with a layer of burnt sienna which helps with tone and colour. I sketch out the composition with a No.1 round brush using burnt sienna.
In order create a looser feel with the painting I carried out the entire blocking in process with a No.6 flat brush. I prefer using bigger brushes as I can cover more ground quickly and have a more vibrant feel to the painting.
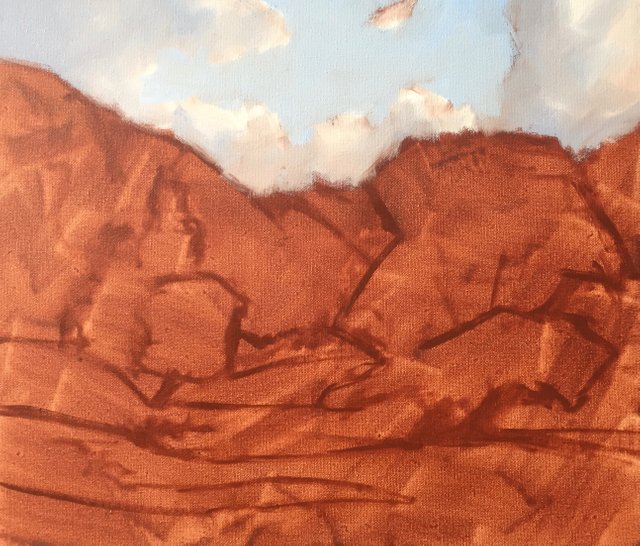
I start this painting by blocking in the sky first and as it’s one of the zones in the painting that is lightest in value I will use it to gauge the tonality of the rest of the painting. What is value? Value is basically how light or dark a colour is. The foreground of a landscape painting will likely have the darkest and lightest values but as the painting recedes into the distances the values are likely to become more mid tones.
Using a No.6 flat brush I paint the cloud highlights with titanium white. I then paint the cloud shadows using ultramarine blue, burnt sienna, quinacridone magenta and titanium white.
I paint the sky with a combination of ultramarine blue, a very small amount of phthalo green and titanium white.
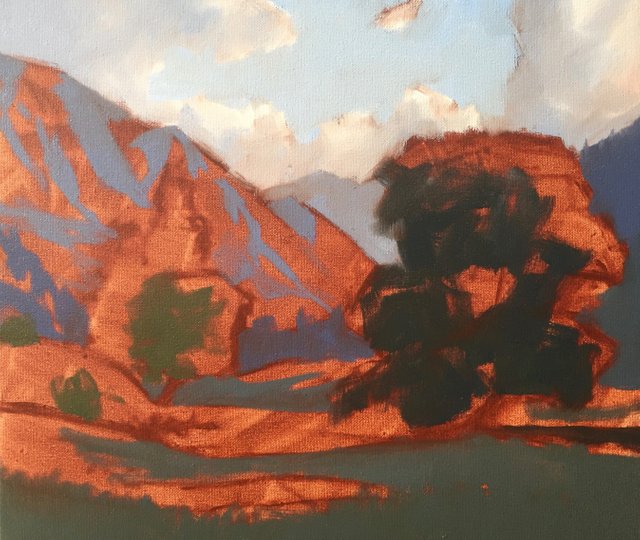
I start marking in the shadows in the mountains using a combination of burnt sienna, ultramarine blue, quinacridone magenta and titanium white, the same colours I used in the clouds however because it is darker in value I use less titanium white. Using the same colours makes then painting more cohesive as it contains common elements.
The mid ground shadows are darker than the shadows in the mountains and I mix the shadows of the trees using, ultramarine blue, yellow oxide and a very small amount of burnt sienna as a base. I use this same colour combination for the shadows in the willow tree in the foreground to start with but later on in the painting I’ll be adding more colours.
The grass in shadow was also mixed with the same colour as the willow tree shadow mix but with a little titanium white added to lighten the value.
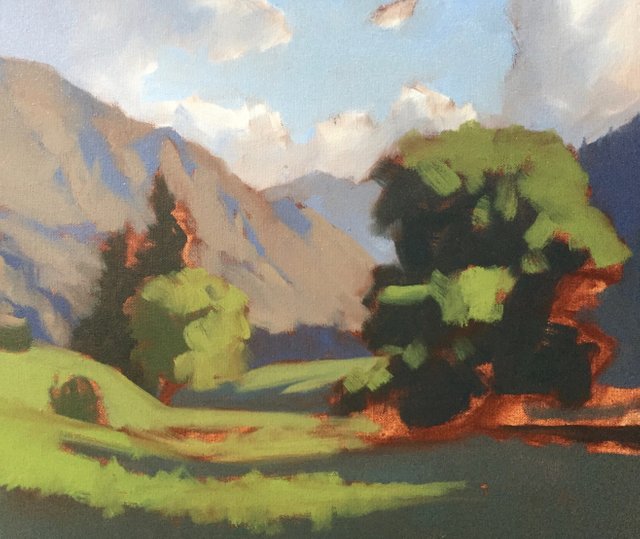
I’m still using a No.6 flat to block in the areas of the grass and the willow trees that are in light. I’m starting my colour mix with cadmium yellow and ultramarine blue and the adding yellow oxide, quinacridone magenta and titanium white to lighten the value in the mid ground grass.
I use the same colours for the grass in the foreground but I am using burnt sienna instead of quinacridone magenta.
Why am I adding quinacridone magenta or burnt sienna to my grass? Well, both these colours contain red, so why is that important? Red is opposite to green on the colour wheel so by mixing red or a colour that contains red it will desaturate the green and reduce its chroma and vibrancy. This will also make the colour look more natural and organic.
Green is a tricky colour to work with, get it right and you can create some very rich, vibrant and natural looking landscape painting but get it wrong and it can form a massive overpowering distraction in your painting.
I complete the blocking in stage by painting the basic forms of the trunks and scaffold branches of the willow tree and as these form dark accents in the painting I mix the colours with a combination of ultramarine blue and burnt sienna.
I add some darker tone to the grass in the foreground again with a mixture of ultramarine blue, yellow oxide and quinacridone magenta.
Once the blocking in stage is complete I allow the painting to dry. The blocking in stage just serves as a map from which I can add detail to afterwards and its also a means of establishing the tonality of the painting. I can make changes afterwards once the painting is dry.
Adding Details
Once the painting is dry I can start adding detail, I revisit the clouds and refine the forms. I am still using a No.6 flat brush and the same colours as I used in the blocking in stage.I emphasise those cloud highlights more by adding titanium white mixed with a little yellow oxide and burnt sienna.
I use a No.2 filbert brush to form the cracks and ridges of the rock faces in Cecil Peak, the mountain in the background. I use the same colours that I used in my shadow mix during the blocking in stage.
I then start adding detail to the willow tree and conifers in the mid ground. For the conifers I mix yellow oxide, ultramarine blue and burnt sienna, but I add a bit more titanium white to lighten the value and create texture. I apply horizontal marks in the direction the foliage is growing.
I start forming the texture of the foliage in the mid ground willow tree with a combination of cadmium yellow, yellow oxide, ultramarine blue, burnt sienna and titanium white.
Next I focus on the foreground willow tree on the right side of the painting, which is closest to the viewer and forms the largest mass.
I start by using a No.6 flat brush and mix a combination greens including greens for my shadows and for the zones that are lit up in the sun.
For the shadows I mix a combination yellow oxide, ultramarine blue and burnt sienna but I also vary the texture and tone by adding phthalo green and/or cadmium orange. I’ll be adding lighter tone to create the illusion of reflected light as I build up the detail of the tree.
For the areas of the tree in light I am mainly using cadmium yellow, ultramarine blue and cadmium orange but I am also creating texture by adding burnt sienna, yellow oxide and phthalo green in places. If I need to lighten the value I add titanium white and if I need to increase the saturation I add more cadmium yellow.
The process of building up the detail in the foreground willow tree can take a while and may require several passes but this is fine because it will add more texture and interest to the tree and help to establish its form to make it look three dimensional.
As I build up the detail I switch to using small brushes including No.2 flats and No.2 filbert brushes.
With each successive layer I apply lighter tone as I generally want to save my lightest values until the end of the painting.
Final Details
I finish the painting by adding the lightest tone to the leaves in the willow tree and I apply this with a No.1 round brush. I am still using my same green mix but lightening the value each time with titanium white, but also adding more cadmium yellow and cadmium orange as white also has a desaturating effect on the colour. The cadmium colours will increase the saturation in your mixture.
I add highlight to the scaffold branches in the tree with a combination of titanium white, burnt sienna and yellow oxide. I can also add a little ultramarine blue to desaturate if required.I finish up the painting by adding some sheep which adds a bit of life to the painting. The shadows in the sheep are mixed with a combination of ultramarine blue and burnt sienna and the highlights are mixed with a combination of titanium white, burnt sienna and yellow oxide.
Once thing to keep in mind throughout your painting is to try and use common colours throughout your painting, this will make your painting more cohesive and the colours more harmonious.
I hope you enjoyed this painting tutorial, check out my website for more painting demos and my art: samuelearp.com






thats pretty awesome ...as per normal :)
Hi @samuel-earp-art! I can't believe how detailed and professional you are. It's very different from most art posts where artists just make use of sheer talent and imagination, instead when I look all I see is the power of dedication and years of work and mastery. I loved this tutorial and I want to tell you that:
I am a curator for the You Got Snekked curation project and
You got SNEKKED! ;)
Expect a certain Snek to come 'round and give you a bite soon ;)
You Got Snekked is a curation project!
We aim to find good content, share a happy moment, & some visibility. Your post got our upvote, and we will feature your post and possibly an image from it in our 35th curation compilation if you don't mind! If you don't want to be featured, please let us know!
Also, feel welcome to join our community on Discord! -:

https://discord.gg/VWJxTEz
I love it. The composition is great! I have been trying to improve my landscapes so it’s very inspiring to me. It has great movement and the greens are enchanting!
Your post was upvoted by the @art-venture account after manual review and included in Art-Venture magazine. The upvote and support of Art-venture magazine would greatly appreciated!

What a beautiful post, in both the writing and the artworks. It is really quite delightful when a talented painter like you explain the thought process that is going on when you created a painting.
Very nicely done, Samuel ^_^.
This post was shared in the Curation Collective Discord community for curators, and upvoted and resteemed by the @c-squared community account after manual review.
I would love to have myself a little cottage that's sits right where the artists perspective sees from.
AMAZING POST !!! <3 Gorgeous detailing of your process and materials and the result is absolute astounding ! I love this, Samuel !
upvotes and resteems
This is such a great breakdown and step by step. And indeed how I work as well. It's funny even with my digital oils I still do all the same steps as I did IRL like this, only no dry time :)
This is definitely worth a share, so many people will love this detailed outline.
It also makes me think of the landscape paintings of the American school in the early Victorian era, which I love.
Hello @samuel-earp-art, thank you for sharing this creative work! We just stopped by to say that you've been upvoted by the @creativecrypto magazine. The Creative Crypto is all about art on the blockchain and learning from creatives like you. Looking forward to crossing paths again soon. Steem on!