Photoshop Manipulation : How to Add Lighting Effects In Photoshop (Quick Tutorial)

Photoshop is the great software for editing the photos and creating amazing scenes. For every artist it is the must have tool, whether he is in any field like video editing, animation, 3D artist etc. Every field of art is affected by photoshop. It is the amazing tool to play with photographs and creating the amazing scenes. Adding light effects to any image changes the entire mood of the scene. In this quick tutorial I am sharing the steps involved in this photoshop manipulation. As this is a quick tutorial, so you should be an intermediate user of photoshop. Without much talking, let us start the tutorial.
Step 1. Selecting the Raw Images
For this tutorial I have selected these two images, One is for the main character and the second one is for the forest background. You can select any images. If you want to use these images, you can download them here.

Main Character

Forest background
Step 2. Setting Up the character, scene and background
Set up your character in the forest background. Lower half of the scene will be of the character image and upper half will be of the forest background and apply the Gaussian blur to the forest background in a separate layer. Always put images in separate layers. It is the most important thing to remember. For this you have to cut the character out of the scene and create a png file of it, then place it on the scene on the top layer by overlapping the character in the below image. Cut the extra part of the character and use patch tool to fill that space. So now you have three layers. Forest bg, Main Character and the character cut png file.

Character cut out of the scene

Three layers placed one by one
Step 3. Adding gradient Fill and Adjusting the brightness
After this add the gradient fills adjustment layers and adjust the gradient to get the desired result. You can add more than one gradient fill adjustment layers like one for linear and one for radial gradient fill. Change the blending mode to soft light for the bottom gradient fill and upper will be at normal. After this adjust the brightness.

Step 4. Adding the lantern Light
Select the brush and choose the yellow color and add the light to the lantern. Change the blending mode to the color dodge.

Step 5. Adding the Light on the ground and on the character
Again select the brush and add the light on the ground and on the character. Keep the opacity about 20% and change the blending mode to overlay.

Step 6. Add the shadow of the character on the ground
Now carefully observe the direction of the light and according to it, draw the shadow on the ground. Opacaity should be around 15% and blending mode will be overlay.
Step 7. Making some color correction
Adjust the curves, levels and brightness. Make the scene more appealing and you are done.

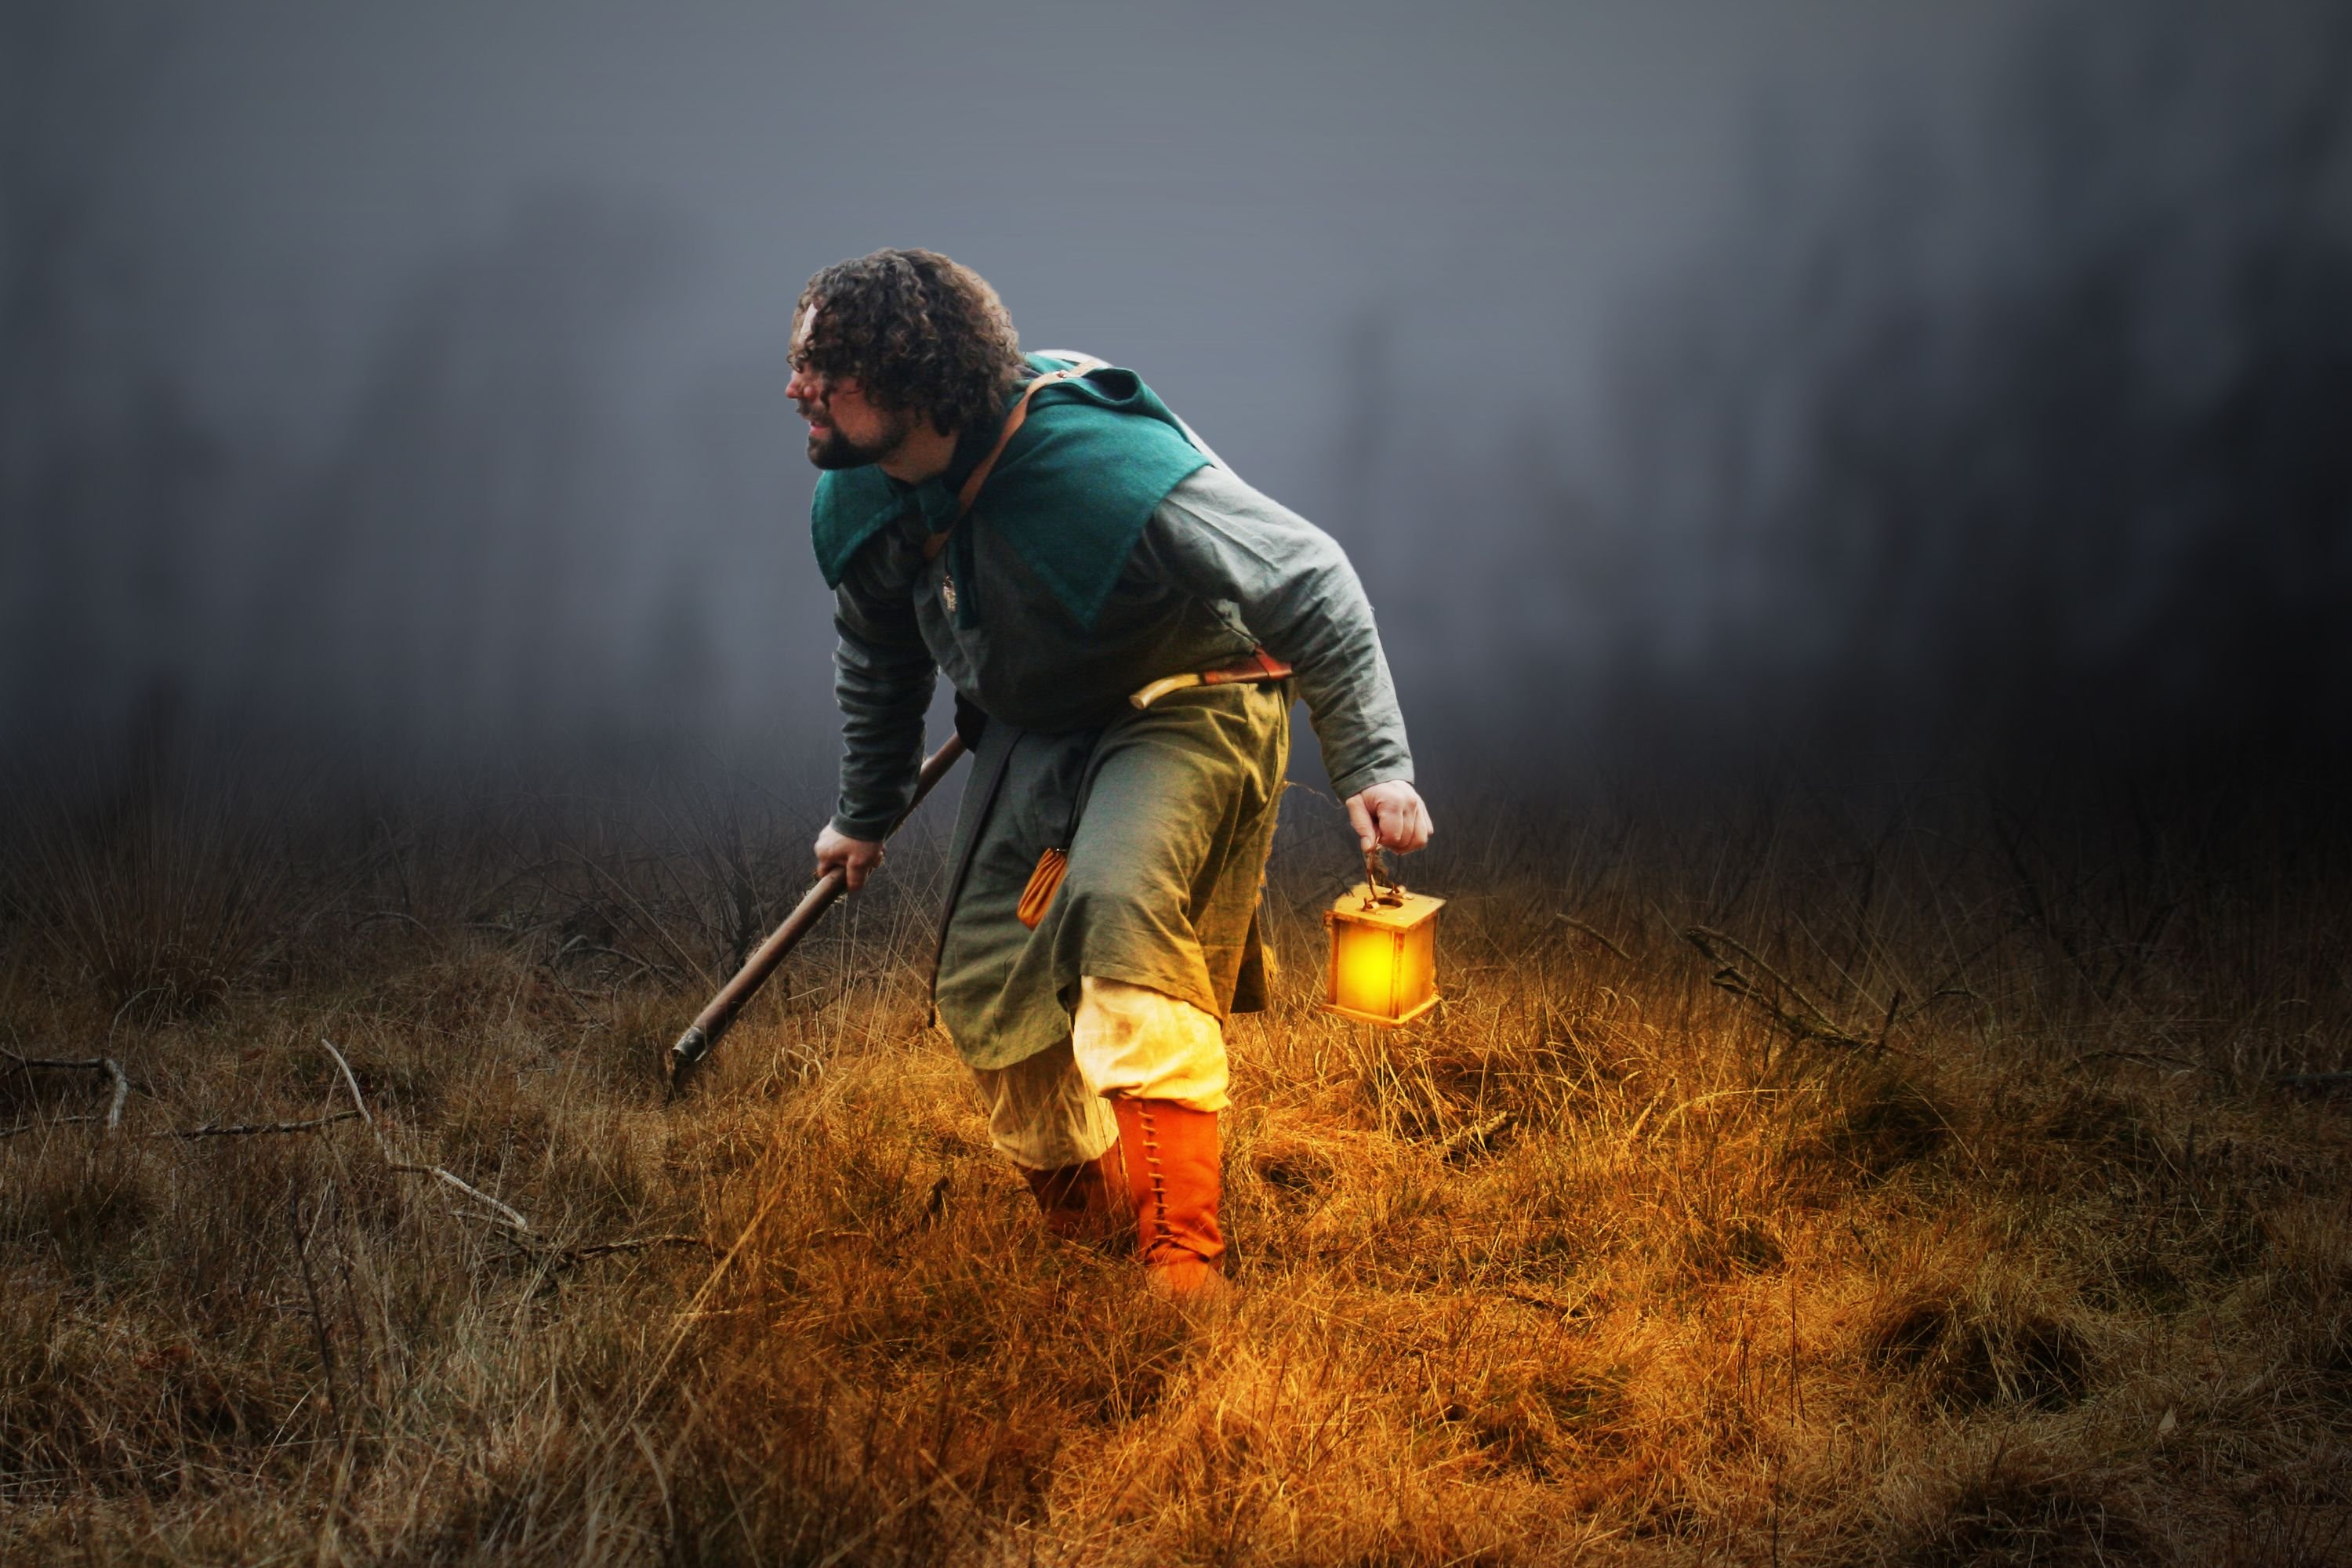
Final Image

All Photoshop layers and settings
I hope you liked this tutorial. I have tried my best in making it, if you have any questions regarding it, you can ask in the reply section. Kindly Upvote and resteem it so my hard work will reach to the maximum users.
Very nice example and explanation, now if you could just invent a way for this to be retained in a mothers' brain lol
Did not get you dear?
It is a good explanation but I wont retain that info, so I better take notes ;)
You can bookmark this post and resteem so it will be on your blog forever.
Good suggestion ;)
Thanks! So awesome. Following you now :)
Happy that you really enjoyed it.
Great tutorial. I wasn't able to follow most of the steps, as I'm using GIMP, though. This would be very valuable especially to those people who are into image manipulation. Good job!
thanx a lot dear.
Play with photoshop is cool but the original is importnant !
How?
Thats really amazing work what you do..great work friend
I am a 3D artist.
Nice, but I still use Gimp. :)
I have never used it.
Simple and impressive, thanks!
I am happy that you really enjoyed it.
Awesome step-by-step!
thanx buddy