Pikachu having the time of his life - Mini tutorial on how to create different lighting effects with copic markers
I started drawing a year ago, and have been using markers for about 8 months.
Recently I've started experimenting with different light sources and techniques, and thought I might share with you guys how I do it. My method isn't something special or advanced, but it gives a nice result without having to know a lot of color theory.
Size: A6
Paper: Strathmore Bristol Smooth
Tools: Copic sketch markers, Copic multiliners, Sakura white gel pen
Mini tutorial on how to create different lighting effects with copic markers
Before you start to color your sketch you need to:
- Establish your light source
- Pick out colors that blend well together
I often use a color wheel to pick out my colors or to get new ideas on what might look good together.
There are a lot of free apps available, I use this one (for android):
https://play.google.com/store/apps/details?id=org.dobbo.colour
The colors I picked out for this tutorial:
- Highlight: Purple - RV000, V000, V00
- Midtone: Yellow - Y00, Y11
- Shadow: Dark Yellow - Y21, Y23
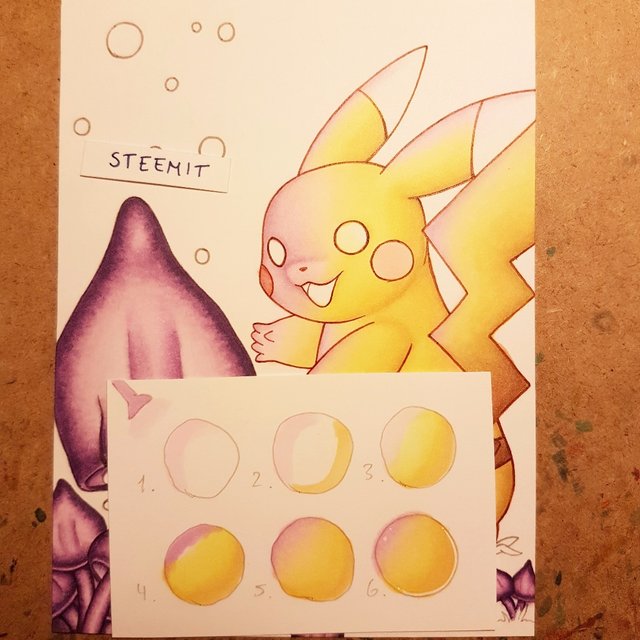
- Use the lightest highlight color to draw a color guide for where the light hits the body
- Use the lightest shadow color to draw a color guide for where the darkest shadow hits the body
- Shade the object using the shadow and midtone colors, but avoid coloring the part where the highlight hits
- Color the highlight, start with the most vibrant highlight color directly where the light hits and blend the color out to where it meets the midtones
- Blend the lightest highlight and midtone colors together until it looks smooth
- Add details with white gel pen if wanted
How this technique was applied to my drawing
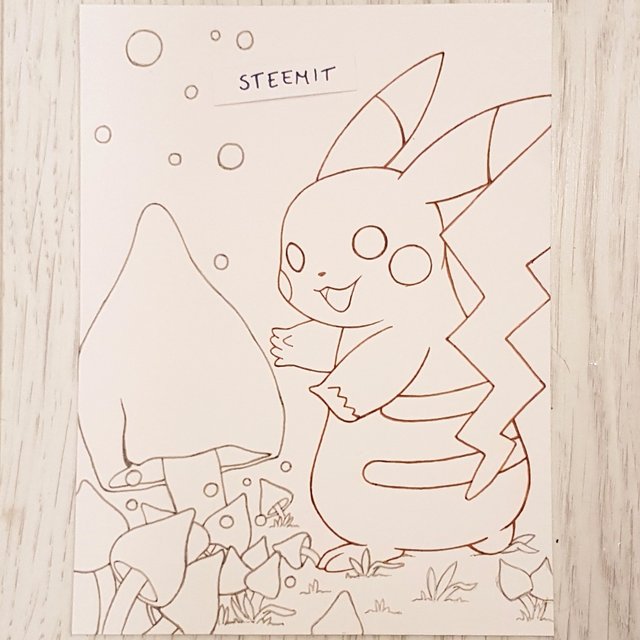
The sketch
I use colored multiliners for my drawings, since that gives a softer look to the finished illustration than using a black multiliner.
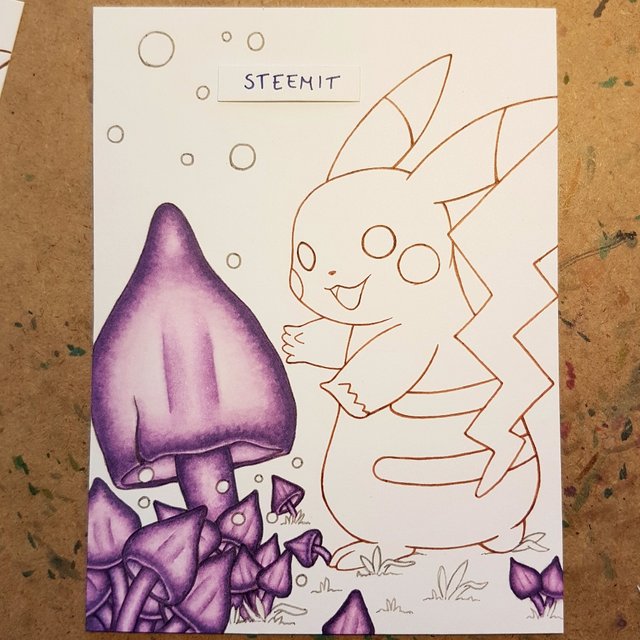
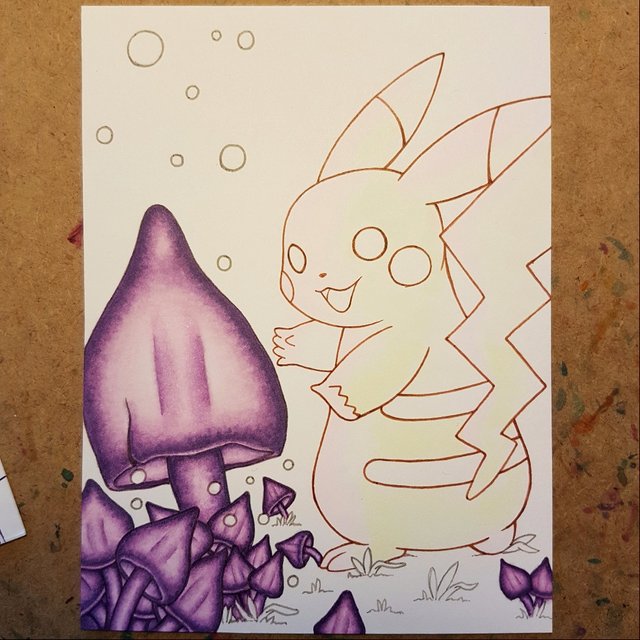
The light source
I always start coloring the light source. This will help to set the mood for the entire illustration and to establish where the light will hit the different objects.
Color guide for highlight and shadow
Here I have added a very light color guide for the highlight and shadow. Adding a color guide will help you to notice your mistakes and hence give you a chance to correct them before you color with more vibrant colors.
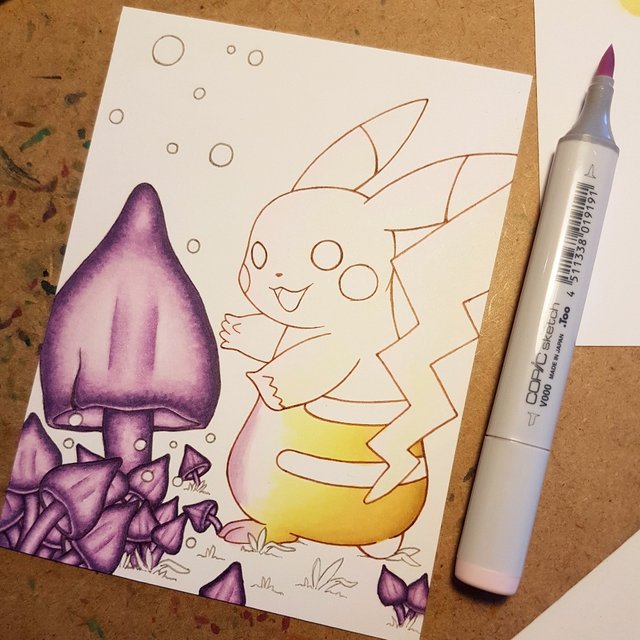
Coloring and shading the body
Then I shade the body, but avoid coloring where the highlights hits. I fade my lightest midtone color out towards the highlight so that it's easier to blend it with the highlight later.
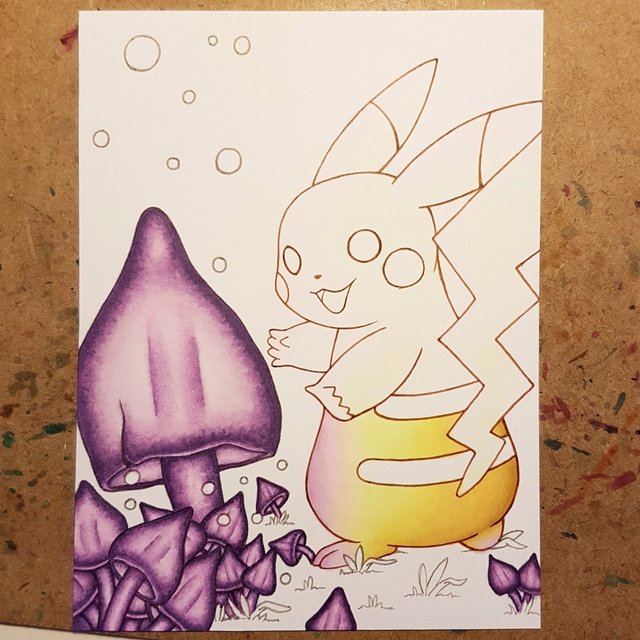
Coloring the highlight
The last thing I do is adding the highlights and blending it together with the midtones. I blend the lightest highlight and lightest midtone together until it looks smooth.
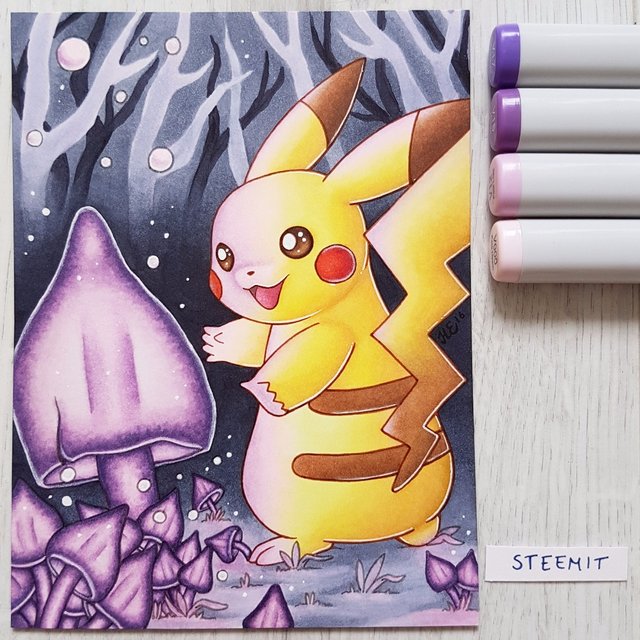
The finished drawing
I used the same technique on the grass and then added a simple background. Usually I color the entire background before coloring the objects, but since I choose a dark background I wanted to avoid the dark color bleeding into Pikachu. At the very end I added some details using white gel pen, just to make the illustration pop a bit more.
#art #illustration #draw #pokemon #tutorial #life #cartoon #anime #steemart
Tripachu! Awesome art, keep up the good work :)
Tripachu, wish I could edit the title now, haha. And thank you ^_^
This is a great tutorial. Thank you for sharing your talents (both drawing and teaching) with us.
Thank you so much :D
Beautiful drawing and thorough tutorial! Thank you and keep posting! ^_^
Thank you <3
I love your art so much! I really love when people draw or paint Pokemon scenes :)
Thank you so much ^_^