STEP BY STEP VECTOR ART(TOON) TUTORIAL FOR BEGINNERS.
Hello all.
Today I'm doing a tutorial on how to easily draw a vector art.
It isn't a difficult process at all. All you need is a P.c and a little knowledge of the pen tool in photoshop
so Here we go:
Software used : PHOTOSHOP CS5.
You can get this programme at a software store near you
Steps:
- First; you pick a subject.
my subject here is pretty, so please don't get carried away.
Get your photoshop running, then hit (CTRL + O), navigate to the folder where you have placed your subject.
Double click on the image to start.
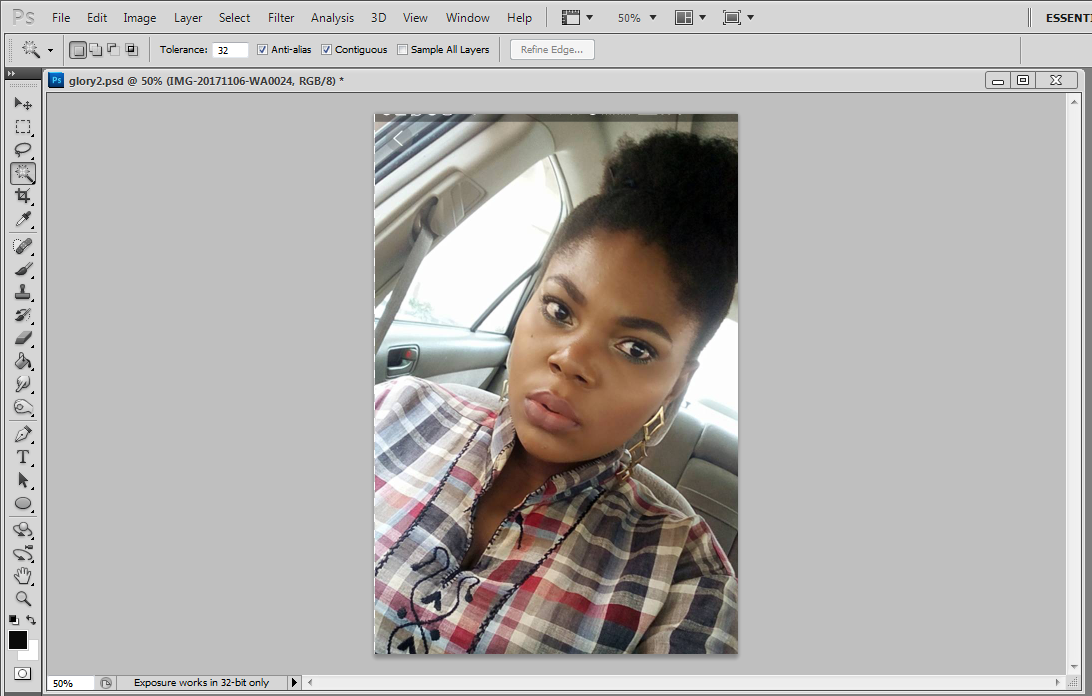
With your subject in position
- Create a new layer and rename it as "OUTLINE"
Hit (P) on your keyboard to use the pen-tool. (I suppose you already know how to use the pen tool).
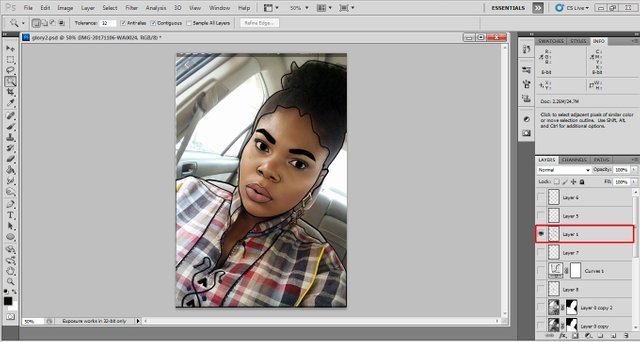
Create an outline of your subject by creating paths with the pen tool.
Right click and then select stroke path.
You should have something similar to this
And this, when you turn off the subject image layer.
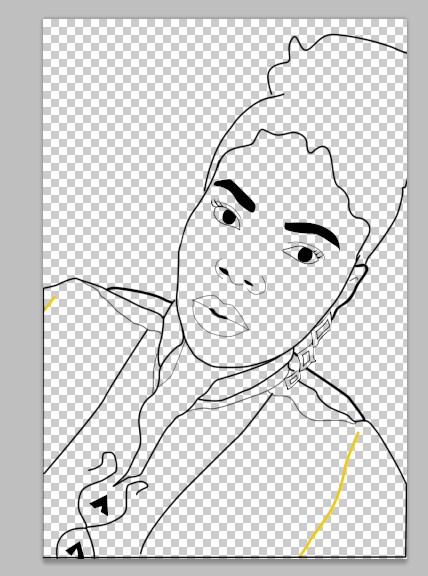 .
.
Please note that, I used Face-outline and Face-layer, read carefully, so you don't get confused.
- Create a new layer and rename it as FACE or SKIN, depending on the size of your subject. Locate your Wand tool and select it as shown in the picture below.
Now on the layers panel, select the outline layer. Place the wand tool on the Face or skin outline and click.
The Face Outline shoud be selected.
Now select your Face layer,
Locate your paint bucket, choose your prefered colour and splash within the selected area.
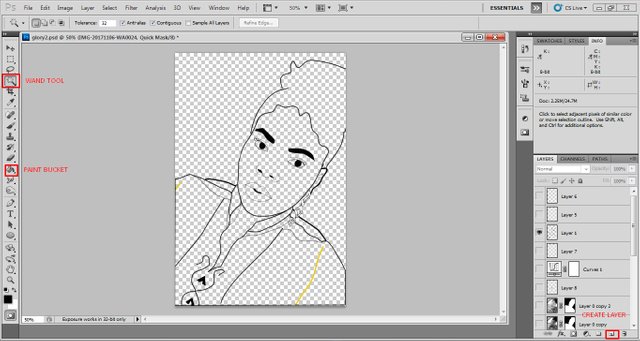
Create different layers for lips, hair ,clothe and whatever you'll need to paint and repeat the step above to paint.
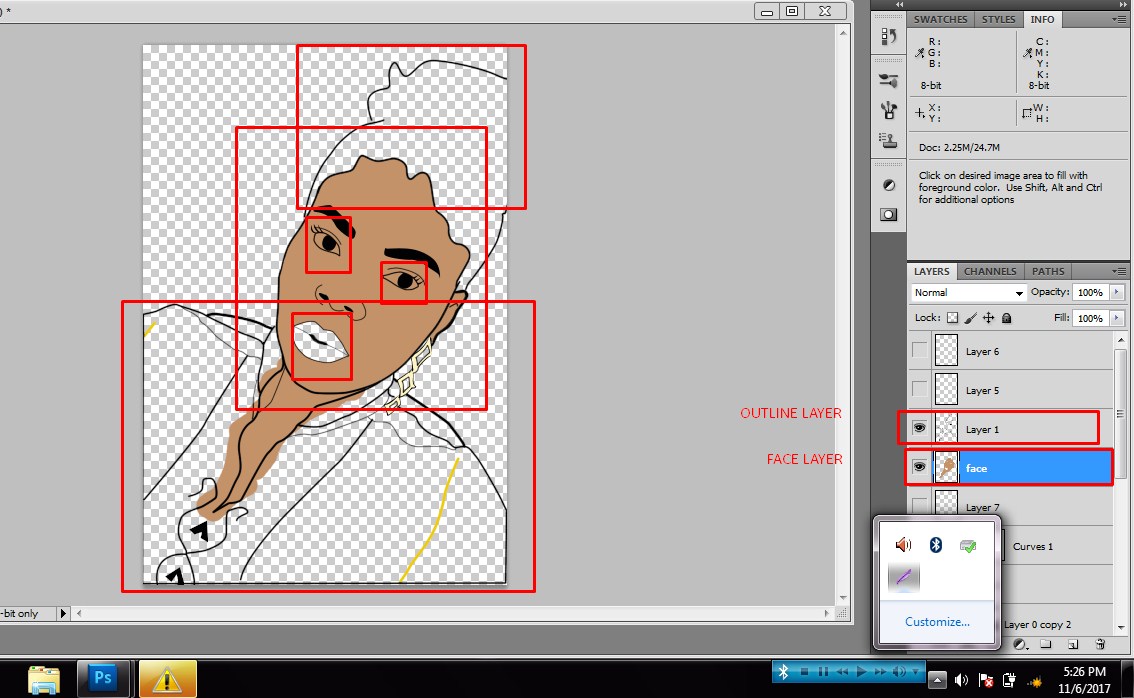
Your subject should be fully coloured now and looking all like a toon but without details. To add these details
*Duplicate your subject layer, by dragging the subject layer down to the "Create new layer" icon.
You should have two subject images. One label copy
Now move the copy to the top of the list of layers.
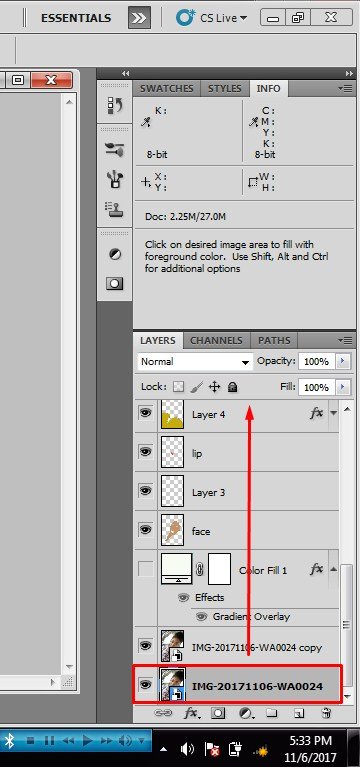
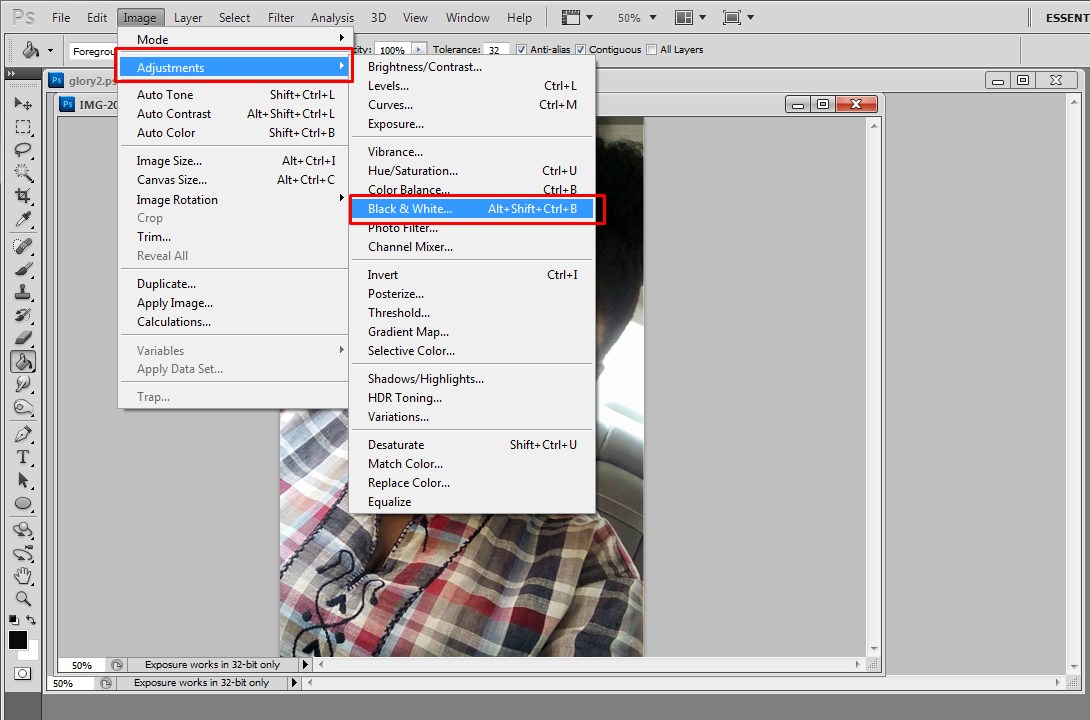
- Select the Subject-copy layer, that you have placed on the top of the list. Locate the Option "IMAGE" as show below. navigate through to convert the image to black and white.
- Locate the option "FILTER" → "FILTER GALLERY'
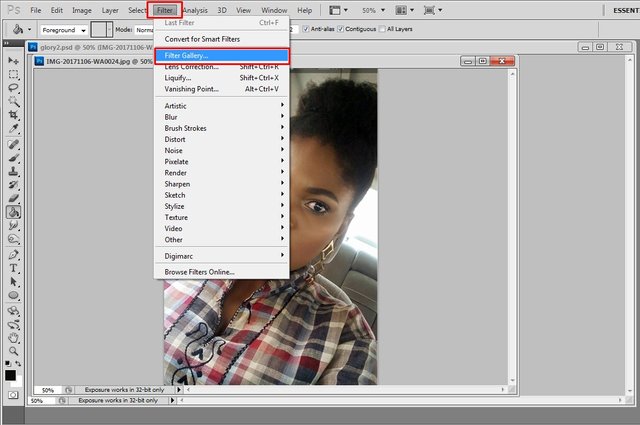
- Fom the options listed choose 'CUT-OUT'
Set the values as shown below.
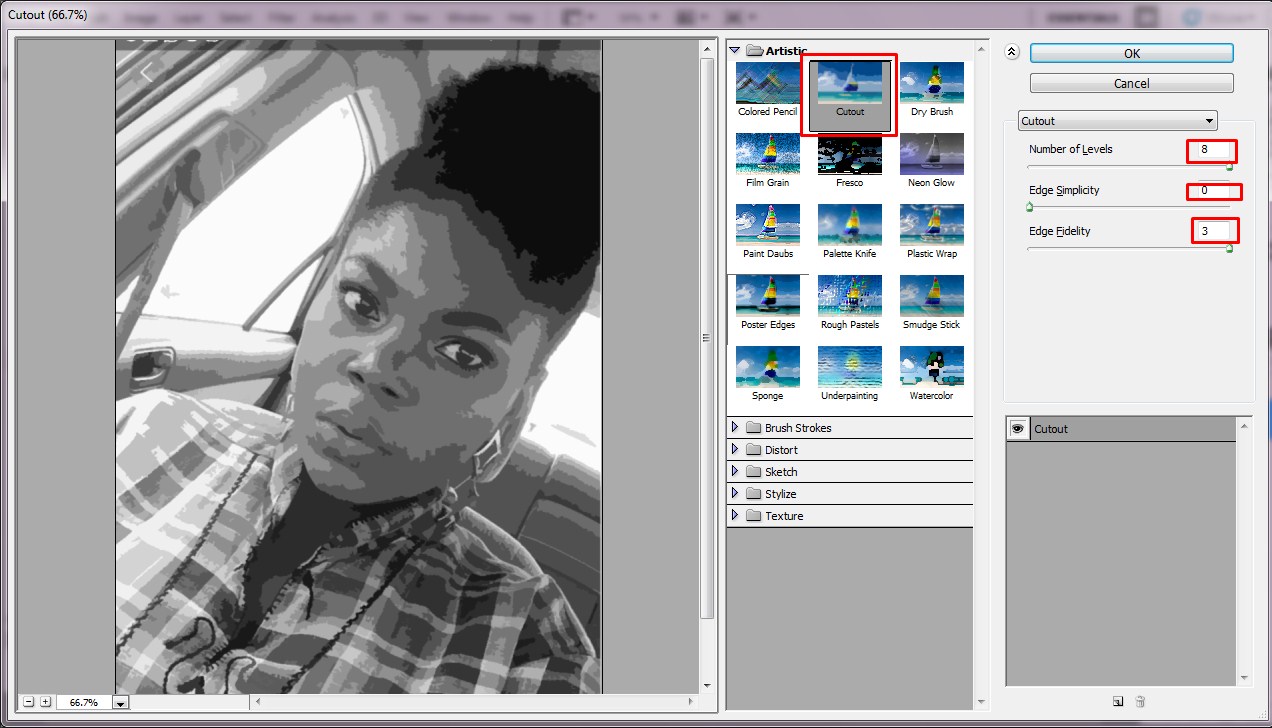
Click OK!
- Now do this, Where you find Normal on the layers list, click and select "multiply"
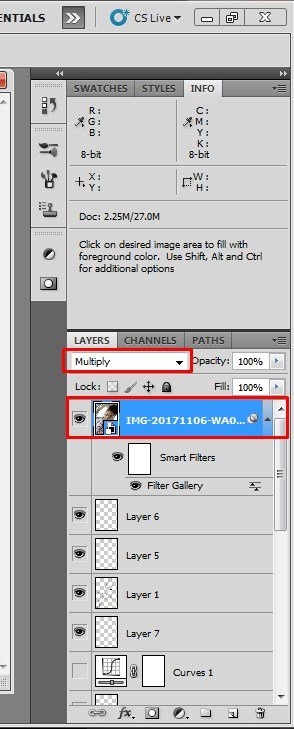
Now your SUBJECT-COPY should be looking rough from apply the call out effect.
You would notice 3 colours.
To fix this, hit 'I' on your keyboard to pick each of the colours, then hit B to use the brush tool and bush the edge where necessary to smoothen it.
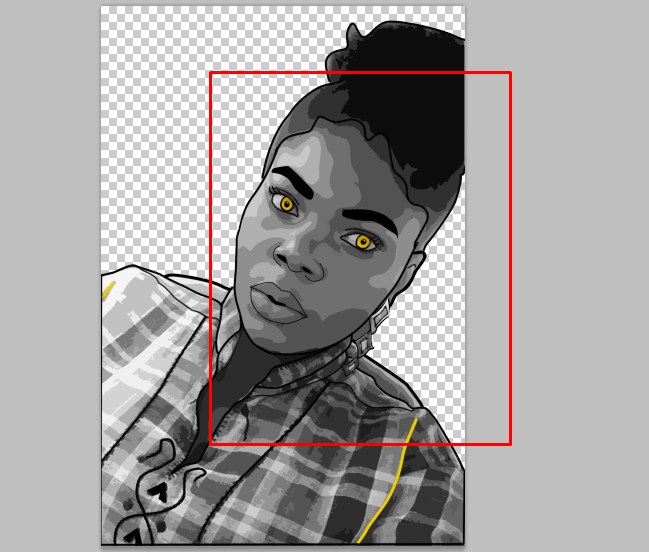
As you can see, it is smooth and neat.
Note: Before doing this, change the option from 'Multiply' to "Normal" . And from "Normal" to "multiply" After that.
The Option "Soft Light" may also be used and Opacity reduced to somewhere between 70-60.
All done.!!!!!
And now to remove the unwanted areas from your Subject-copy image, In may case, its the back seat.
Even after reducing the opacity, some bits of it remain visible and would like show up over a light background colour.
- Select the Outline layer, use your Wand tool, place it on the unwanted area and click. If it would require two or more clicks, Hold Shift and click again.
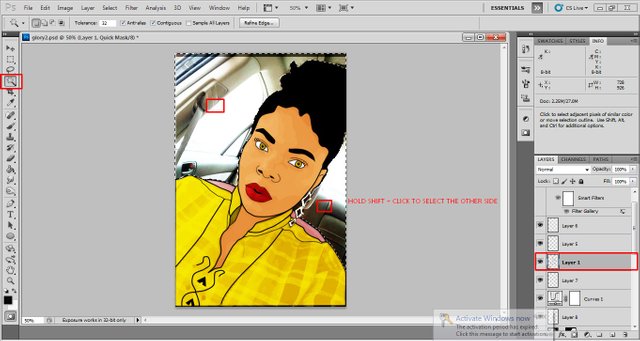
- Select the Subject-copy layer and hit the layer mask icon as shown below
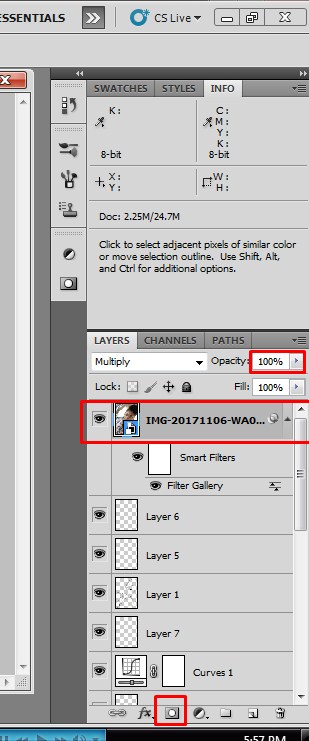
Now hit CTRL + I.
All done!!!
The unwanted areas should be deleted now.
Congrats!!
Adding a background
- create a new layer at the bottom of the lost.
click on the semi circles Icon, below the lists and choose solid colour.
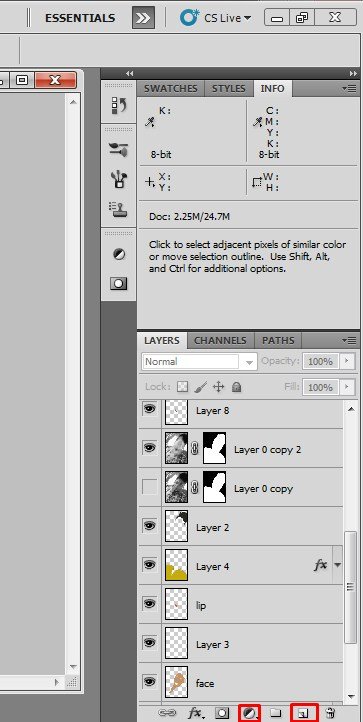
- Now choose , prefered colour and click OK.
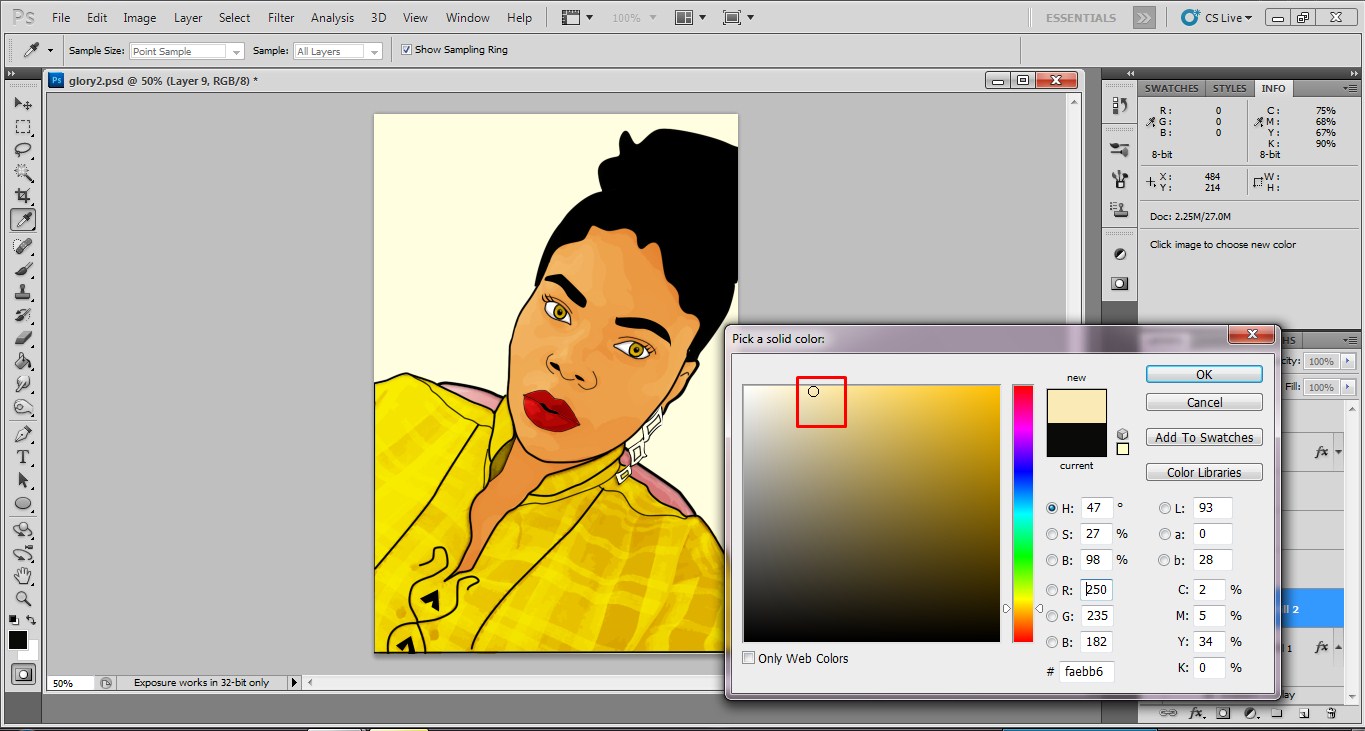
All done!
You may add a bit of contrast.
Now save your work!!!
You can do this by locating "File" on the top left corner, Click and choose 'Save as' and choose preferable extension.
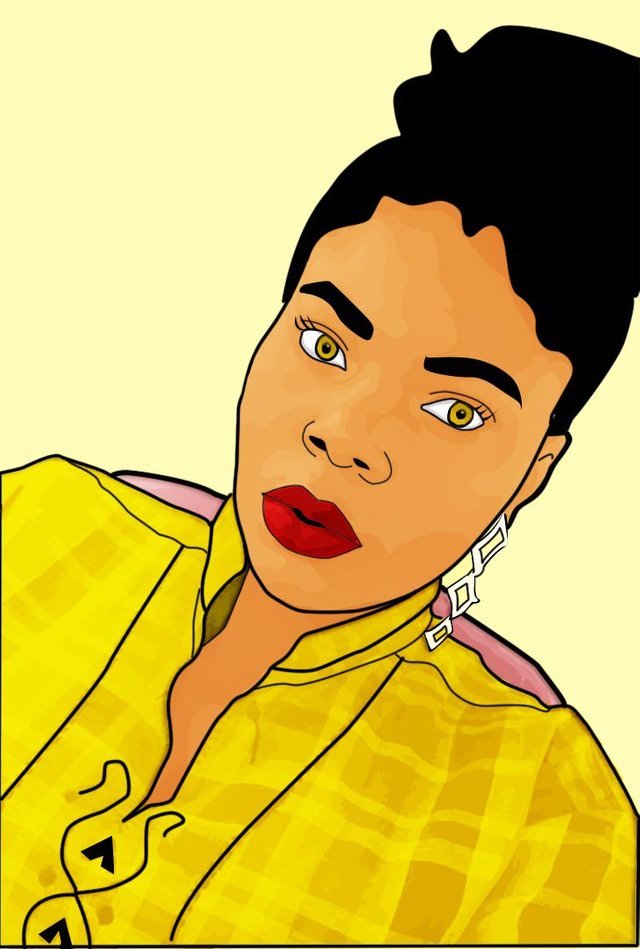
The end
Big thanks to @ewuoso for his support and encouragement.
Always check back for more tutorial.
Thank you for your time!!!
Congratulations @organik, this post is the third most rewarded post (based on pending payouts) in the last 12 hours written by a User account holder (accounts that hold between 0.1 and 1.0 Mega Vests). The total number of posts by User account holders during this period was 2024 and the total pending payments to posts in this category was $1820.13. To see the full list of highest paid posts across all accounts categories, click here.
If you do not wish to receive these messages in future, please reply stop to this comment.
I can only imagine the effort it took to get this done. Thank you for sharing this. Now I can do my toon ✌️
You're welcome; @greenrun
Thanks a lot.
Congratulations @organik! You have completed some achievement on Steemit and have been rewarded with new badge(s) :
Click on any badge to view your own Board of Honor on SteemitBoard.
For more information about SteemitBoard, click here
If you no longer want to receive notifications, reply to this comment with the word
STOPReally helpful... I've always wondered how they do this! Guess Im gonna need Photoshop express now 😕
Lol, this is all to it, No magic.
The Photoshop express I know, is for android platforms and it lacks specific features. Unless there's a windows version of it. And this tutorial was made for Photoshop CS5 and perhaps prior versions.
Oh well, I was not refering to the andriod version... Forgive me, would have just written photoshop. Lol.
You did well... I think hope this post will get massive curie post
Delighted to find you here @honourmaus, Just trying to affect the community in my own little way.
I'm sure people will find this more interesting
Definitely
i like the way you have taken your time to explain this. there is a difference in knowing how to do something and knowing how to teach others. i am sure a lot of people will learn from this.
thank yhu so much for this.
i wish yhu good luck
Many thanks to you. I hope they do!!!
The steps are quite easy, I simplified it to my best for photoshop noobs.
very well put together tutorial!
Thanks! I did my best.
You really explained this @organik. Thank you, so, I don't have to pay for a toon next time. Thanks for sharing
I guess so. Now you can just DIY.
Cool
Well done
This is so hard to compile but you did it
Thumbs up
Thank you @camzy
You picked euronation queen!! Well done brother. You did great and i like your step by step guide. Thanks for this.
I need a fair maiden and she qualified with distinction. Thank you boss. Happy to find you here.