Painting with selections - Digital painting tutorial #2 [IT/EN]


Dipingere con le selezioni - Tutorial sulla pittura digitale #2
Le selezioni possono essere uno strumento molto efficace come ausilio alla pittura. Personalmente le uso molto come corrispettivo digitale di quelle che, con mezzi tradizionali, si chiamerebbero mascherature, anche se non è il loro unico possibile utilizzo.
Le selezioni sono presenti in tutti i programmi di pittura digitale, ma come sempre, farò riferimento a Photoshop.
I due strumenti che uso mentre dipingo sono il lazo manuale e il lazo poligonale.
Ecco alcune funzioni utili:
- la possibilità di aggiungere o togliere selezioni ad una esistente;
- la possibilità di sfumare la selezione indicando un valore dentro la casella nella barra delle opzioni in alto degli strumenti selezione (in questo caso la sfumatura avrà effetto PRIMA di selezionare) oppure indicando un valore in menu Selezione => Modifica => Sfuma (in questo caso la sfumatura avrà effetto DOPO aver selezionato). Nelle versioni vecchie di Photoshop il valore doveva essere tra 1 e 250, adesso il limite è molto più alto;
- arrotondare la selezione per smussarne gli angoli e le curve con menu Selezione => Modifica => Arrotonda.

Painting with selections - Digital painting tutorial #2
Selections can be a very effective tool as an aid to painting. Personally I use them a lot as a digital equivalent of what, by traditional means, would be called masking, even if it is not their only possible use.
Selections are present in every digital painting software, but as usual, I will refer to Photoshop.
The two tools I use while I paint are the free lasso and the polygonal lasso.
Here are some useful functions:
- the possibility of adding or removing selections to an existing one;
- the possibility to feather the selection by indicating a value inside the box in the options bar at the top of the selection tools (in this case the feathering will have effect BEFORE selecting) or indicating a value in the menu Select => Edit => Feather (in this case the feathering will have effect AFTER you have selected). In the old versions of Photoshop the value had to be between 1 and 250, now the limit is much higher;
- round off the selection to smooth the corners and curves with menu Select => Edit => Smooth.

Vediamo adesso come si possono utilizzare per dipingere.
Let's see now how they can be used to paint.

Descrivere una forma con il lazo poligonale (per poi arrotondarla) può essere una buona base per inchiostrare dipingendo lungo i suoi bordi o tracciando la selezione con menu modifica => Traccia.
Drawing a shape with the polygonal lasso (and then smoothing it) can be a good base for inking by painting along its edges or by tracing the selection with menu Edit => Stroke.


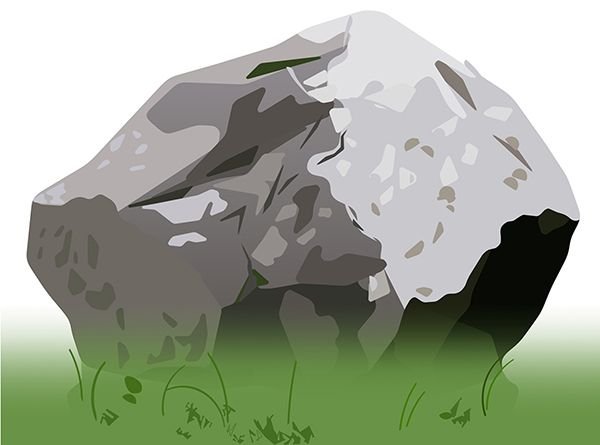
Sempre con il lazo poligonale è possibile disegnare delle forme da riempire con secchiello, pennello o gradienti.
Se ci sono linee curve è sempre consigliabile arrotondare la selezione.
Molto adatto per rocce o terreni rocciosi.
Generalmente uso questa tecnica come base per poi dipingere sopra ed applicare texture.
With the polygonal lasso it is also possible to draw shapes to be filled with bucket, brushes or gradients.
If there are curved lines, it is always advisable to smooth the selection.
Very suitable for rocks or rocky terrain.
I generally use this technique as a base to paint over and apply textures.

Cambiando tipo di utilizzo, con il lazo a mano libera molto sfumato è possibile dipingere lungo la selezione per sfumare il colore che stiamo applicando rispetto allo sfondo su cui si trova. Per selezionare e usare questa tecnica velocemente è consigliabile preimpostare un valore di sfumatura nella casella della barra orizzontale in alto.
Changing the type of use, with the free lasso you can paint along the selection to blend the color we are applying with the background. To select and use this technique quickly, it is advisable to preset a feather value in the horizontal bar at the top.


Altro modo per sfumare un'area colorata è includerla in una selezione sfumata per poi sfocarla con il menu Filtri => Sfocatura => Controllo sfocatura. Una volta usato il filtro, lo si può usare di nuovo con la combinazione di tasti ctrl+F che serve per ripetere l'ultimo filtro. Quindi, riassumendo, con un valore di sfumatura già impostato, basta disegnare al volo una selezione intorno ad un'area per poi sfocare con ctrl+F. Qualora il valore di sfumatura in combinazione con il fattore di sfocatura non fossero adeguati, l'effetto ottenuto potrebbe non essere soddisfacente. In quel caso si può tornare indietro con il ctrl+Z e provare valori diversi.
Another way to blend a colored area is to include it in a feathered selection and then blur it with the menu Filter => Blur => Gaussian blur. Once the filter has been applied, it can be applied again with the shortcut ctrl+F which is used to repeat the last filter. Summarizing, with a feather already set, just draw a selection around an area and then blur with ctrl+F. If the feather value in combination with the blurring factor is not adequate, the effect obtained may not be satisfactory. In that case you can go back with ctrl+Z and try different values.


Come sempre tutorial ben impostato
Grazie carissimo, adesso mi sto incartando il cervello con i tour a 360° gradi (illustrati ovviamente), se raggiungo conclusioni decenti ci faccio un post...
La cosa mi incuriosisce...
Ottimo tutorial. Complimenti!