HOW TO CARTOONIZE YOUR IMAGES WITH YOUR SMARTPHONE
Hey steemians,
Its your very own klaus again, today i was going through my archives and discovered an old time blog i started at a very early age, just after highschool, i spent a few moment reminiscing my plans i had then for the blog but was too broke and lacked enough resources to actualize it, now Crypto and trading got the better half of me and i can barely focus on any other stuff,, grrr not funny mehn....
So, i found an old article of mine in the blog about cartoonizing of images with just an android phone and i believe this information will be very helpful to most steemians crazy about photography and cartoons as well as art in general but find it hard to understanding the complexity of adobe illustrations or photoshop.....
This was done by me and several others which was paid for a long time ago(way back in highschool folks love this and i monetized my skill, it probably still trending though)
So without wasting much of your time am going to be teaching a simple method on how you can transform your photo into a cartoon using your Android Device and the Autodesk Sketchbook Pro.
**Basic Requirements:
1.) An android device
2.) Autodesk Sketchbook Pro
3.) Keen Attention
4.) Your Time
Download>> Autodesk Sketchbook pro
Step 1:
Download autodesk from the link above and install it into your Android device.

Step 2:
Open Autodesk and click on a compass and ruler shaped icon ( the third icon from the right)

Step 3:
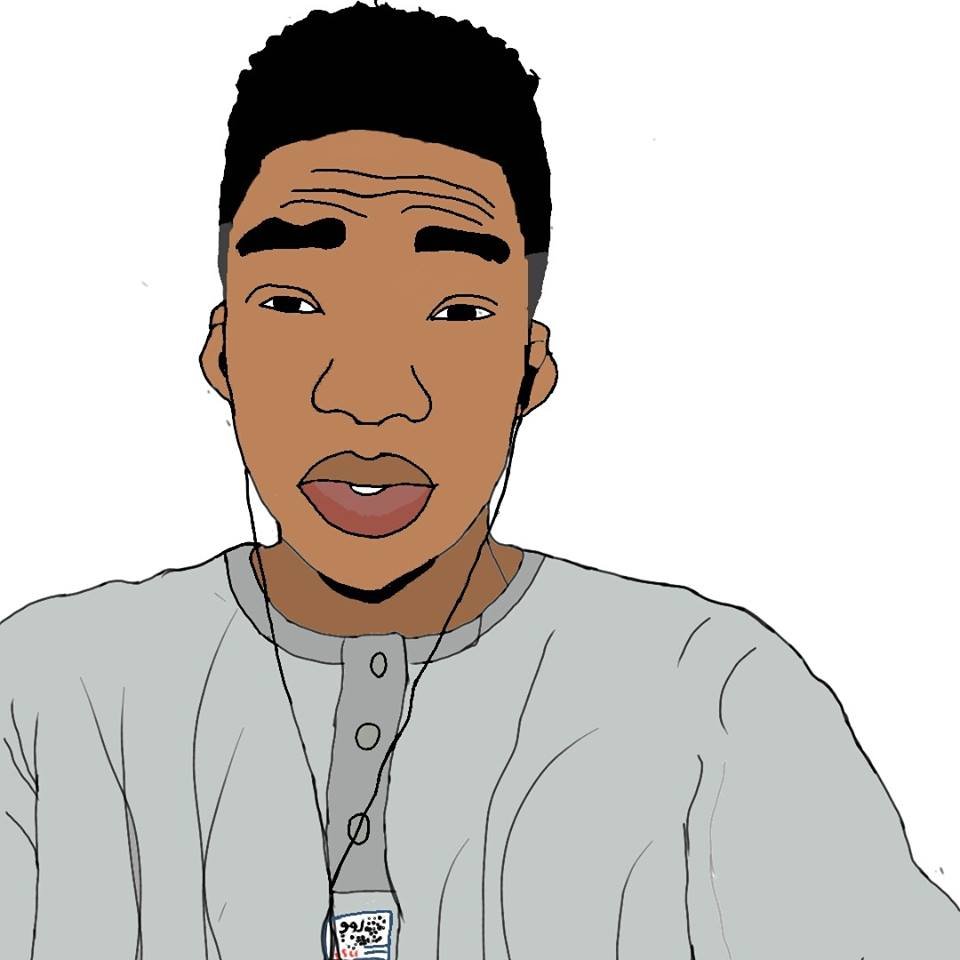
Click on “Import Photo” and select the photo which you wanna cartoon. (i advise you to use a simple white background photo for beginners)

Step 4:
Click on the layer button and click on the first layer(the layer that contains the image you want to cartoonize). After clicking a menu should pop up…look for Opacity then reduce the opacity bar a little to the level it suits you ( 70 or 60 would b okay )…. .

Step 5:
When you are satisfied with the opacity,then click anywhere outside that box and your image should have a white fade…. Depending on your opacity

Step 6:
Click on the layer again and ensure the blue box line is on the empty layer.

Step 7:
Click on the pencil icon at the top and pick a pencil…i prefer this one tho…. Use my Opacity and Radius too.

Step 8:
Zoom your image by placing two of your fingers on the part you want to zoom and enlarging the fingers…. Place two fingers on the image to move from one side to another also and to also rotate for better sketching.
Start using your finger to trace the image… Start from the head,to the eyes, to the nose and mouth then to the hands and body. Note…. If this is your first time don’t worry it can’t be perfect…while tracing,zoom in to see tiny parts and for more accuracy.

While tracing you can check your progress by clicking on the layer button and clicking the eye button on the first layer…this would hide the layer, then click the button again to make the layer visible( always ensure the blue line is on the empty layer on which the sketches are to appear).

Step 9:
After you have finished tracing,click on the layer button and increase the opacity of the 1st layer to 100%.

Step 10:
It’s time to paint,Click on the colour button at the top and select the pick tool.

Use the pick tool to pick the colour of the skin of the photo you are drawing by dragging it to the colour you want.
Step 11:
After picking the colour,then click on the the compass icon on the top of the screen.. a drop down menu will pop select the fill (bucket icon) ….

Step 12:
Click on the Layer button and hide the first layer by clicking the eye button. Then fill the part you have selected with the colour picker by clicking on it.Click the eye button again to pick another colour from the image,you can adjust the colour by clicking the colour button and moving the circle inside.

Step 13:
After filling the whole parts with there colours then make the first layer visible. Click on the 1st layer, then keep reducing the opacity till you are satisfied with how the image looks…. The more you reduce,the more it looks like a cartoon.

Tips:
1.)To undo a mistake … Click on small round circle on the bottom of your screen then click the red arrow at the left corner of your screen
2.)To redo double tap the green arrow at the bottom right corner of your screen.
3.)Always start from the head
4.)Start learning with a simple photo.
5.) Use your eraser to erase mistake lines
Beyond all reasonable doubt I believe you now know D WAY OUT to cartoonize your images.
To some cartoon lovers this is a dream come through (wink) lol..
Please leave a comment below if you have any problems and also to support me.
Feel free to ask anything at all.
I remain my humble self Ilechie Nicholas and am here to show you the way out…….
LoL so funny reminiscing on my past times..
Cheers mate and hope you enjoyed this article.
Nicholas Ilechie
_Disclaimer: this was a reposted content and i was the original author of this post found in http://dwayout.wordpress.com, all content therein are mine. Most content and words used were left unchanged as the original post and this was purposely done for memory sake...

Wow, i so much appreciate this post. I have always wanted to make a cartoon of myself. But with this post, i will be able to achieve that. Thanks
cheers mate
Interesante
glad you found it interesting
cheers
Realy helpful artical thanks for introducing autodesk to us.
you welcome sir
thank you mate.. usefull app
cheers buddy
Wow. This was so helpful. I love cartooning images. Restemmed.
thanks mate, appreciated
Thank u very much for this post. This was lovely i learnt alot.
cheers dear, glad you found it helpful