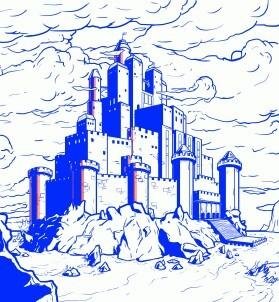
Step by step sketching of a fortress: How I drew it to nearly perfection
Hey great steemians, it's quite a cool Thursday and I hope everyone is much feeling the hot sun. For me, am much challenging myself to learning much on my drawing skills, although it's really a challenging one I must say.
Learning how to draw can be quite hard especially when you doing it alone but it's often a good challenge that I found so much a pleasure doing it.
Today, I came across a fortress and have to picture it much within my mind and bend down with my drawing materials to know how much I can go with the drawing of it.
The final result actually look quite cool, although I couldn't really colour it but I guess it worth the stress of drawing it.
This is how it looks after the final step.
Below are actually the steps I took to achieve the sketching of the fortress.
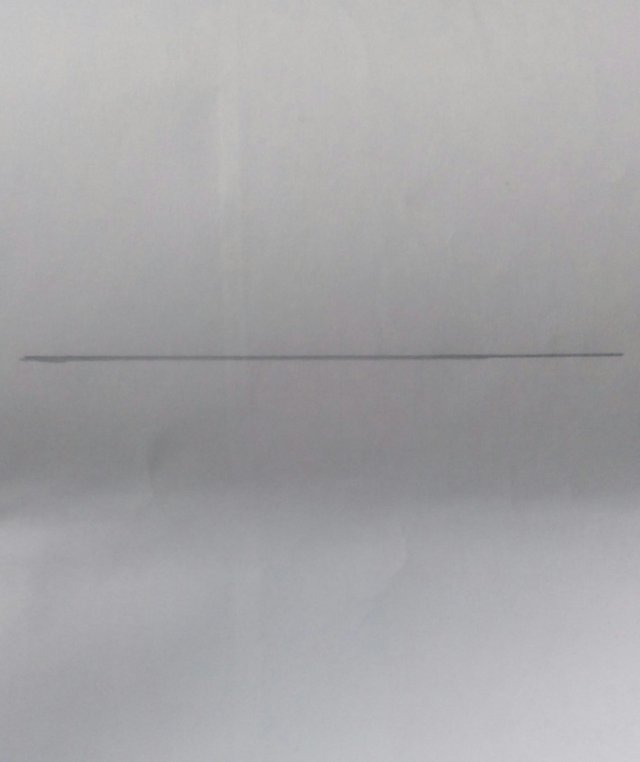
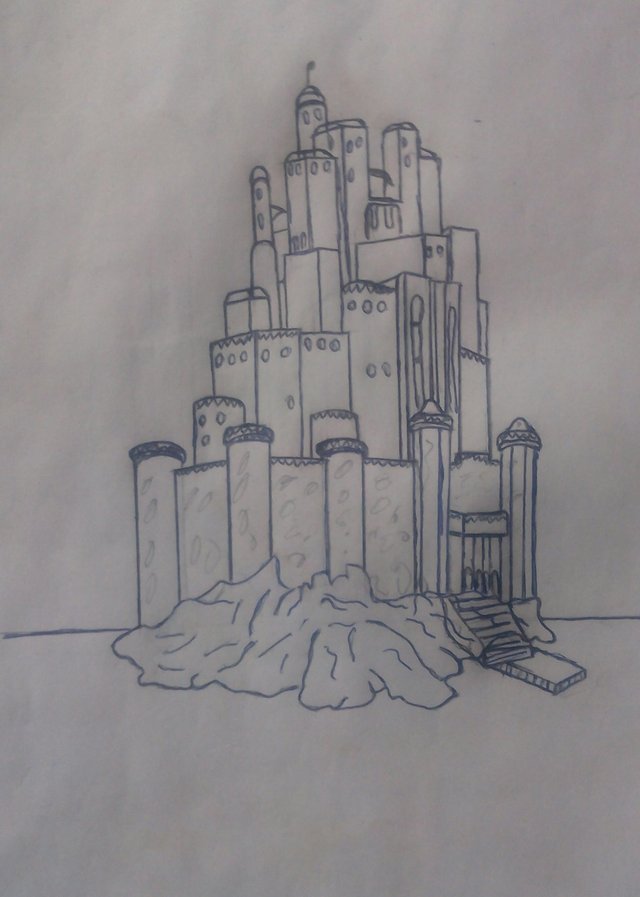
STEP 1:
Drawing a fortress can be a bit complicated but the first step in doing that is to start with a horizontal line as a reference point. I used my 2H pencil and with the help of a ruler, draw a horizontal line across the lower portion of the paper but drawing it to be light so as to be able to erase it later.
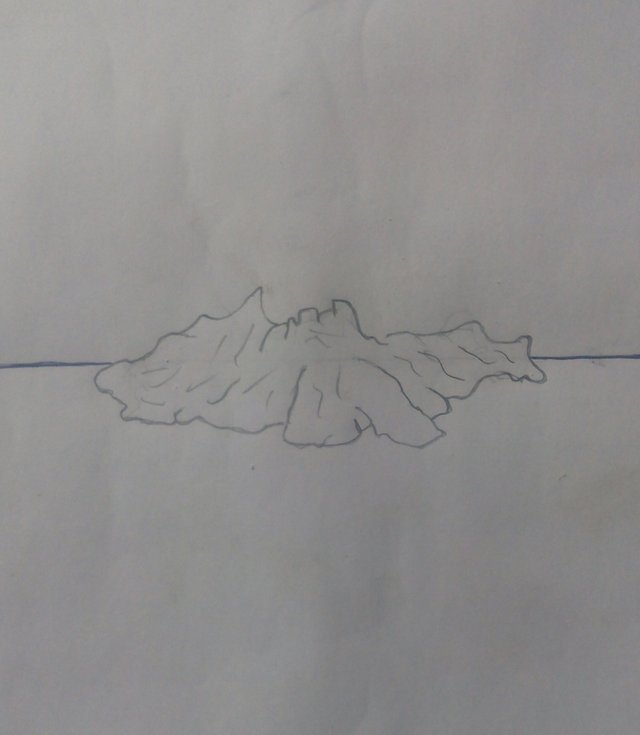
STEP 2:
In this step, starting from the ground up with the fortress, I drew a low level Island that is covered with a jacked, pointy rocks.
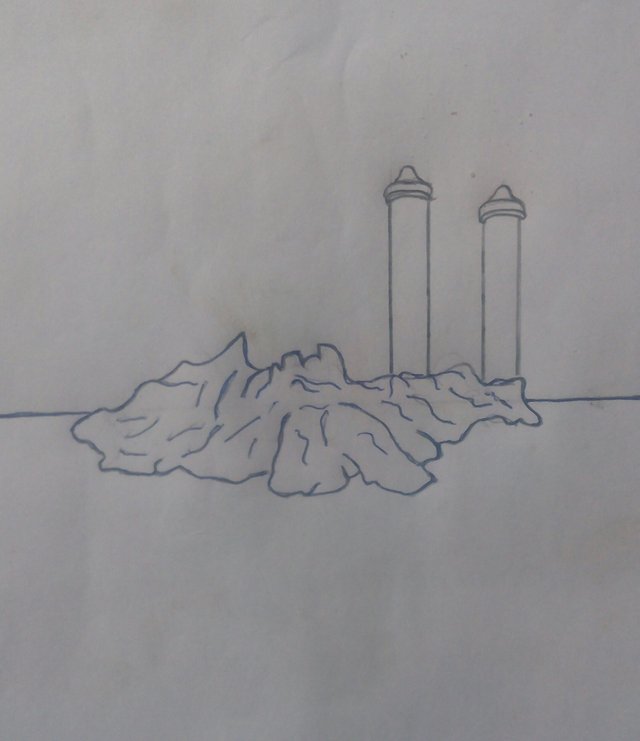
STEP 3:
Next step is to draw two tall towers on the right side of the island. This is for it to serve as an outer supports for the entrance into the fortress. I use my ruler to draw this vertical towers to make it smooth and well presented,and making sure that the tops of the towers should have a circular look out platform.
STEP 4:
In this step, the next is to draw the main entrance into the fortress but thinking of it as an edge of a cube protruding slightly between the two towers. I also drew a series of circles along the bottom of the cube and a ledge just above the circles.
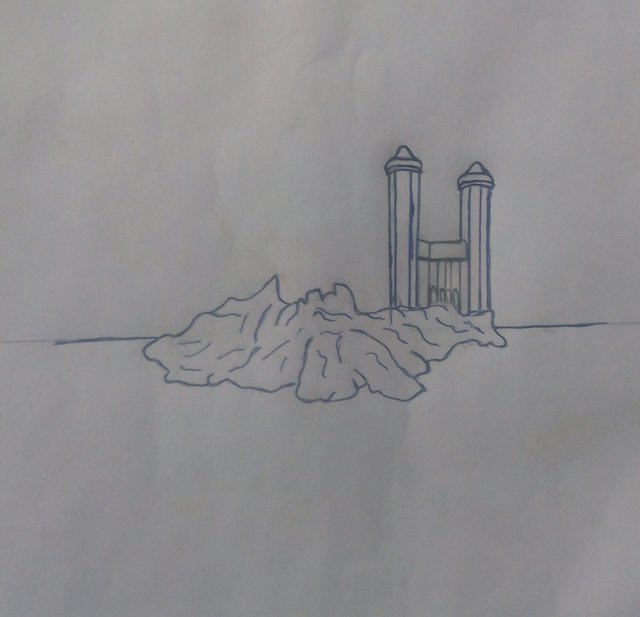
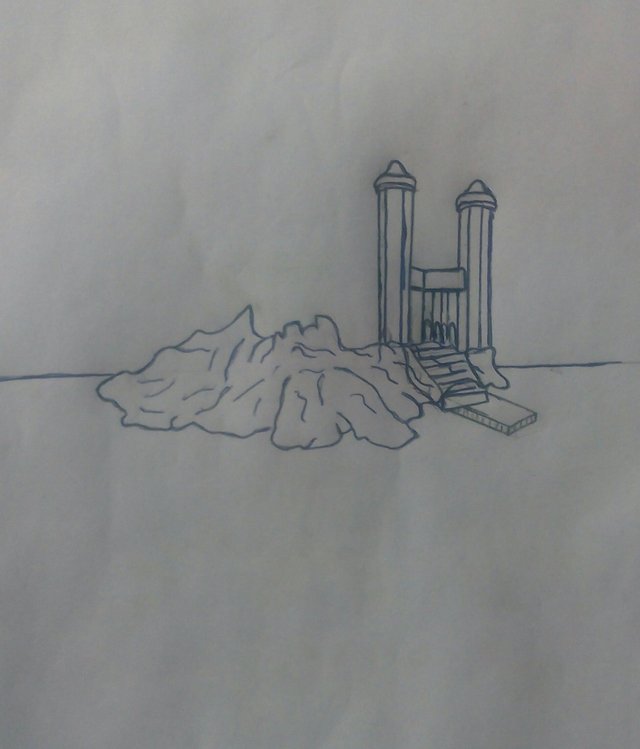
STEP 5:
In this step, I have to add up a wide staircase leading up to the entrance from the sea level.
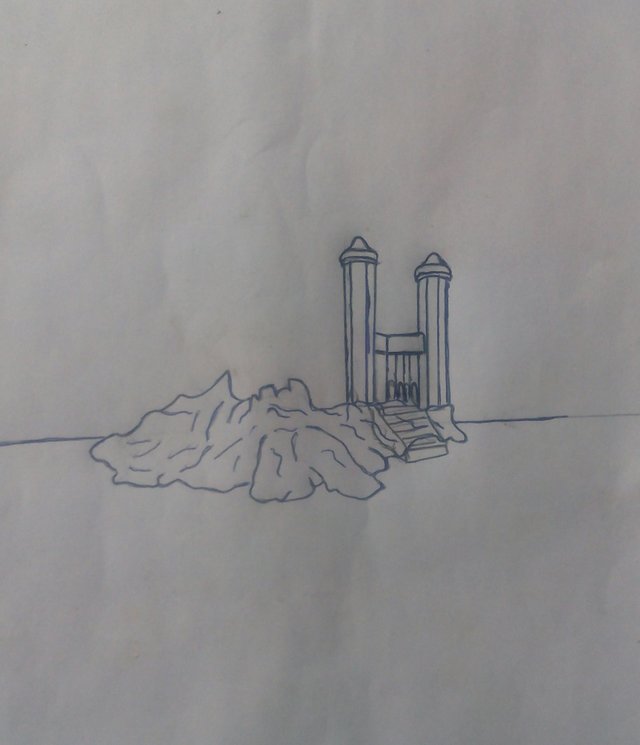
STEP 6:
Remember the fortress being in the middle of the water, so as a result, I drew a square dock at the base of the staircase that is held up by series of small arches that do disappear into the water.
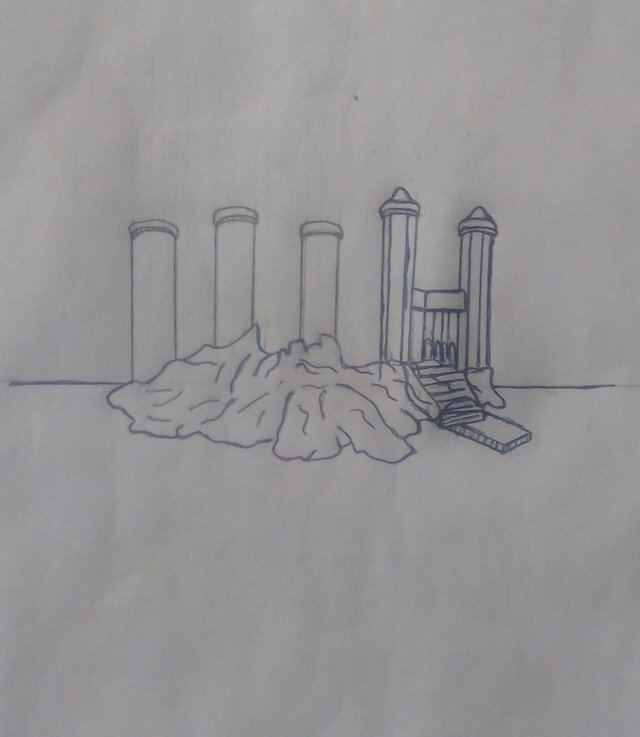
STEP 7:
Now, I drew and add up a few more towers along the rest of the island which seems more simple than the ones by the entrance. I made them cylindrical with round lookouts on the tops.
STEP 8:
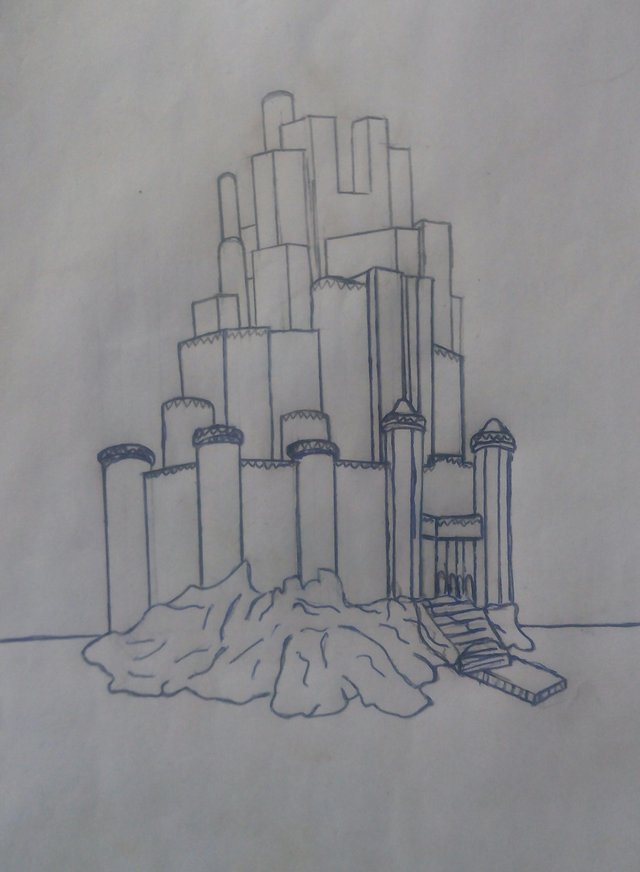
In this step, it's important to note the most feature of a fortress which is its outer wall, so I have to add up and drew the wall, making it tall and well connected to each tower.
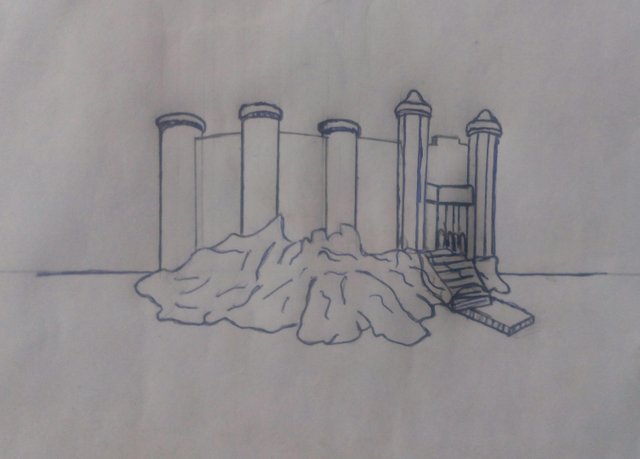
STEP 9:
Remembering that a key feature of the wall is the notches along the top. So I have to use my eraser to erase notches along each portion of the top and then drew a square notch inside each erased segment, but making sure that I have a series of cubes resting at the top of the walls and towers.
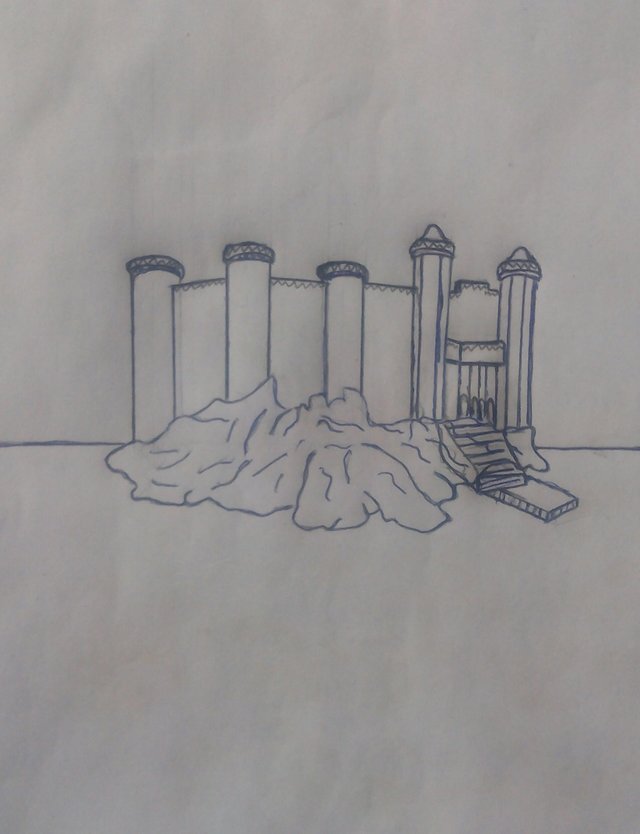
STEP 10:
Next step is moving on to the inner area or structures. Here, I drew a cluster of tall cube shapes and make it connect to each other but I try making it interesting, so I gave few of them rounded edge and others square edges and some short and some tall. I also drew and add up a series of vertical slits through the portion of the structures.
STEP 11:
Here,just to like with wall and towers, I drew some crenellations along the top edges of the inner structure but I didn't have to put notches on every structure, but I did it to add up to the uniqueness of the picture.
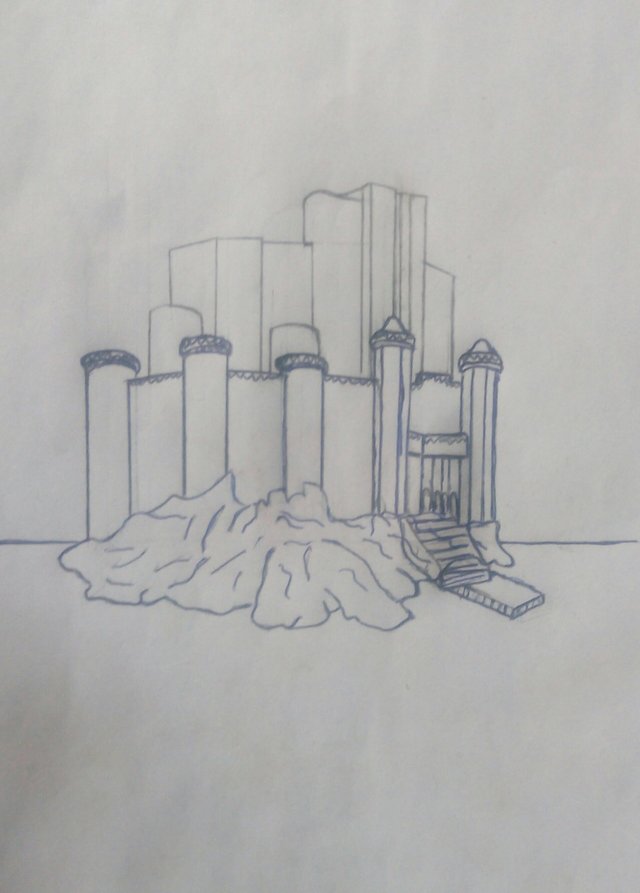
STEP 12:
Here,to add up to the outlook, I drew few yet another clusters of structures atop the existing ones but making sure that they are more taller and thinner than lower ones. I still add up some portion of the cylindrical tower taller than the rest of the structures peaking up from behind them.
STEP 13:
considering that some of the structures like the towers should have roof tops, so I drew the rooftops on the cube shaped structure and make it have four sides and making the ones on top have cone shaped size.
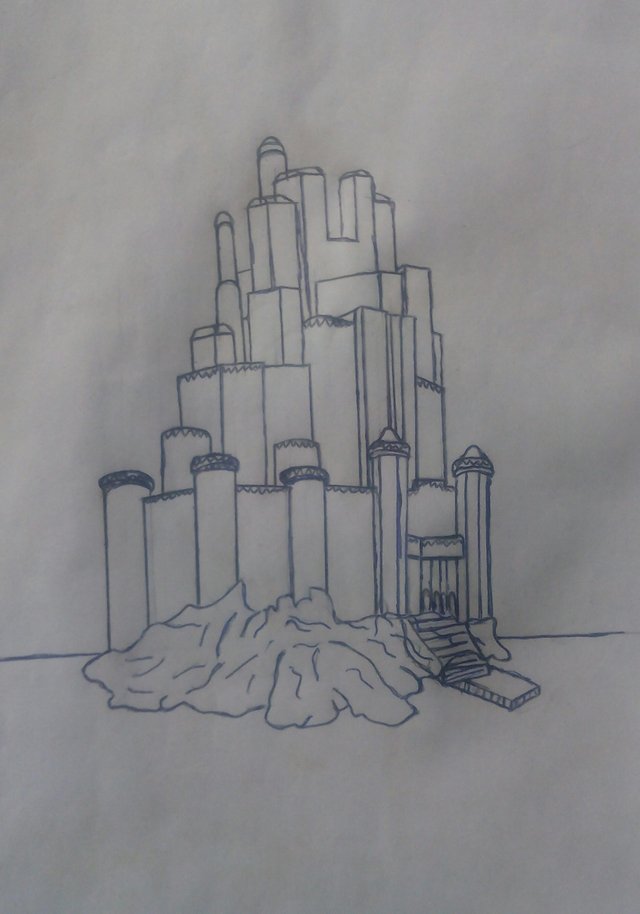
STEP 14:
To make it exciting, I added up some couple of bridges connecting the structures together. I try making the bridges have arched supports holding them up.
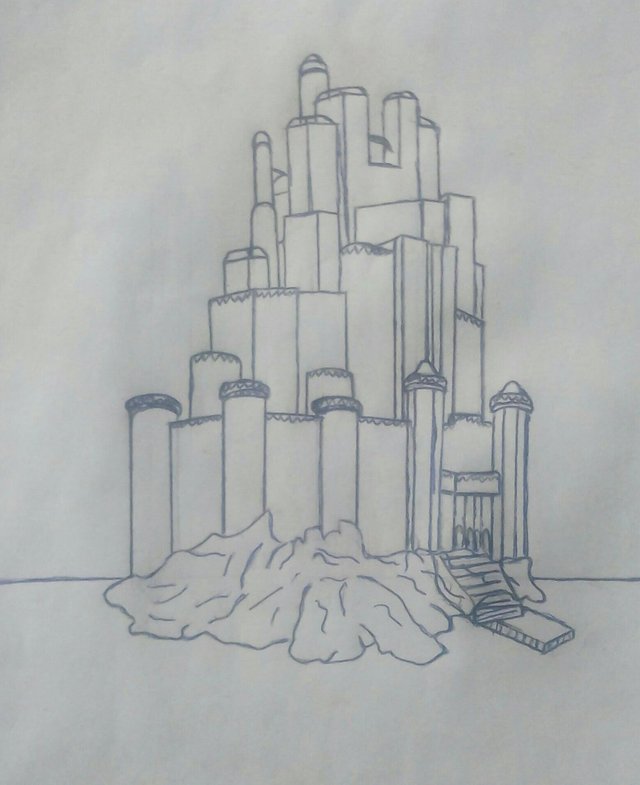
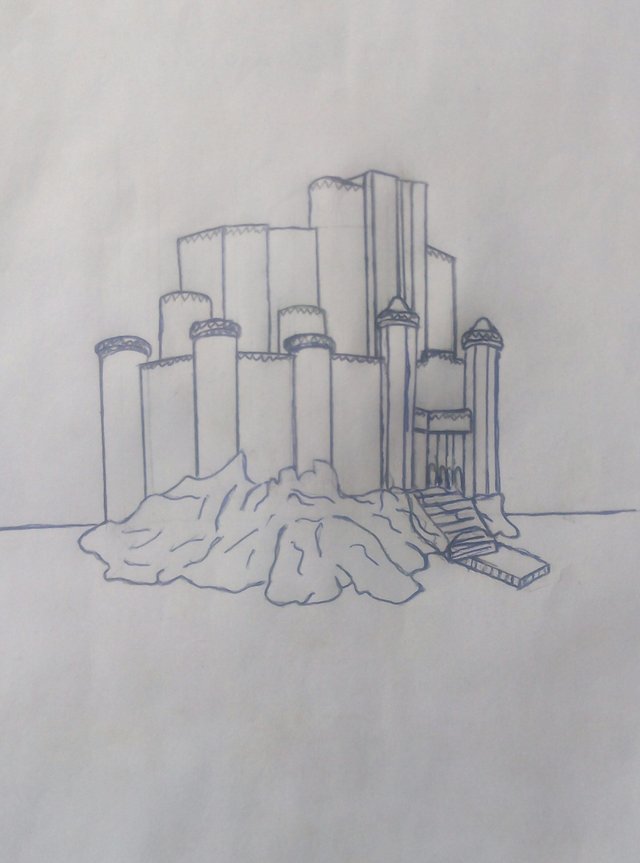
STEP 15:
In this step, I add up windows to the structures and also adding up taller windows for the face of larger structures.
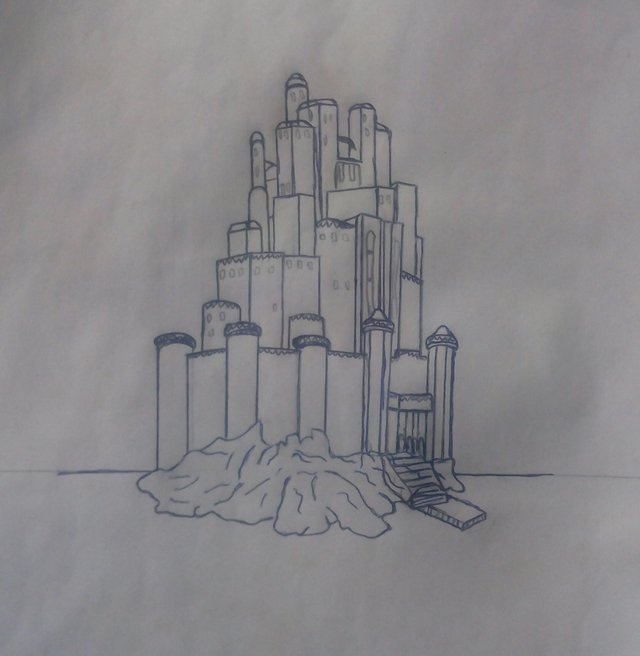
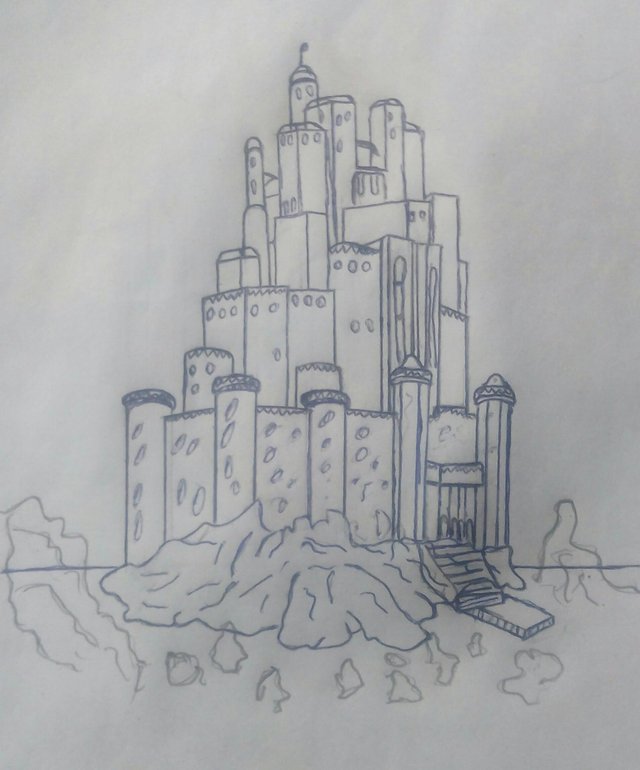
STEP 16:
In this step, I added up more details to the entire image, by adding up bricks to the outer wall and towers, texture to the inner structure and a flat at the peak of the tallest tower. I also add more rocks on the island resting against the sides of the outer towers.
STEP 17:
I have to add up to the sense of distance by inserting random small islands and rocks in the water surrounding the fortress. I drew a large section of Island in the fore ground on the left side of the papers. I drew clusters of rocks sticking out of the water as I chooses to add.
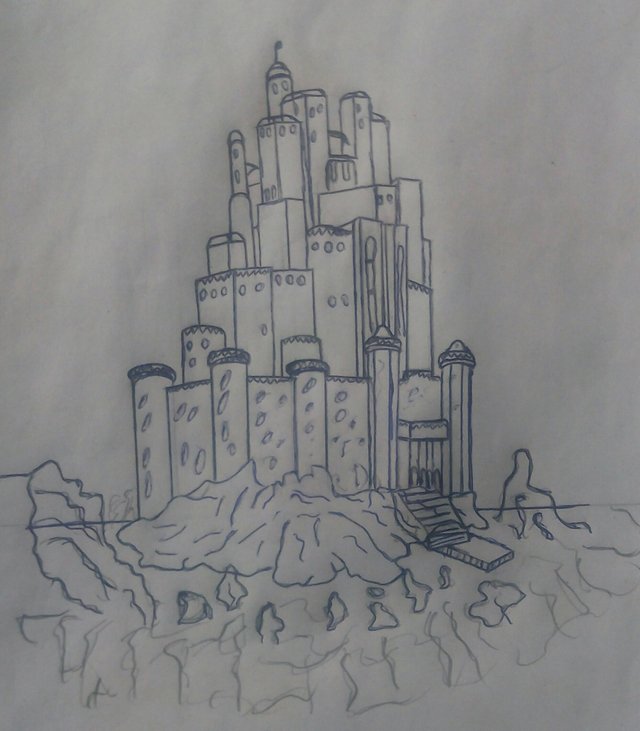
STEP 18:
Now I add ripples in the water and some waves crashing against backs of the rocks. The ripples should be squiggly lines but they should generally run parallel to one another.
STEP 19:
Next is to fill the sky with storm clouds. The right side of some of the clouds should be fluffier than the left side so as to suggest that they are being blown in by heavy winds.
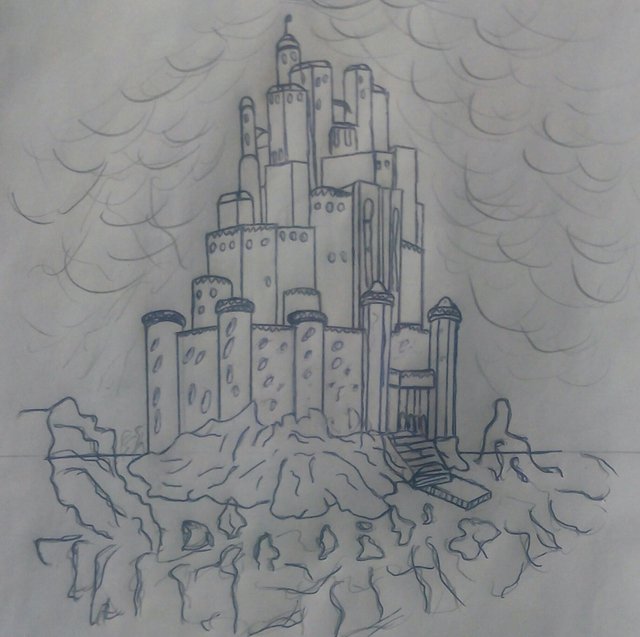
STEP 20:
This is actually the end step, and below is the outcome of it, I have to colour the background drawing paper white so as to get a much better picture of the fortress.
Although it's quite complicated and challenging one but I still hope that base on the fact that am still learning, you find it much worth your upvote.
I remain your humble friend @messinaldo
Suggestion on how I will keep learning much will be much appreciated.
Don't forget to upvote, comment and resteem.
Thanks everyone
It's lovely @messinaldo . I was following it up like I could do it but got lost towards the end because it was just too much for me to handle. I'll love to take drawing lessons from you
Wow thanks brother. I will definitely like we find a way to help each other and learn much. Thanks for your comment. Just followed you
Mehn..... I'm no artiste. But this is so mind blowing. What inspired this masterpiece!
Smiles. The zeal to take up a new challenge. It's quite lovingly brother. Thanks for your comment, just followed you sir
Nice one bro @messinaldo
Yea.. Thanks bro.
Nice drawing right here. What is it like to learn drawing like this? Reading through this is helpful but I got lost at some point..
Yea bro. It can be quite complicated. I understand that. Thanks for your comment bro