🔵 Learn LINOCUT technique with Marty - tutorial for beginners
Hi friends, today I would like to show you one of my favourite art techniques called linocut. I think some of you already know it.

Linocut is a printmaking technique like woodcut, but instead of a wooden block you use a lino sheet. It first appeaed at the beginning of the nineteenth century in Germany and it was used for wallpaper printing. It is quite easy and effective technique if you want to make more copies of your artwork, but you still want it to look original with a touch of your hand.
You can buy sheets of linoleum designed for this technique, or if you have some old lino at home like I do, try it. Nowadays it is a problem to buy a lino good for cutting, because it is more foamy and soft. The old linos were made of dense but still quite elastic gum, which was great for artistic needs.
If you buy lino sheets originaly made for linocut you may be dissapointed. Those I tried were too hard and grainy, but maybe in your country there are some other better types.

You will need:
- paper, pen/pencil
- lino sheet
- V and U shaped gouge
- rubber roller
- a sheet of glass/metal/wall tile
- printmaking ink or oil paint
- pressing machine or spoon
🔵 STEP 1
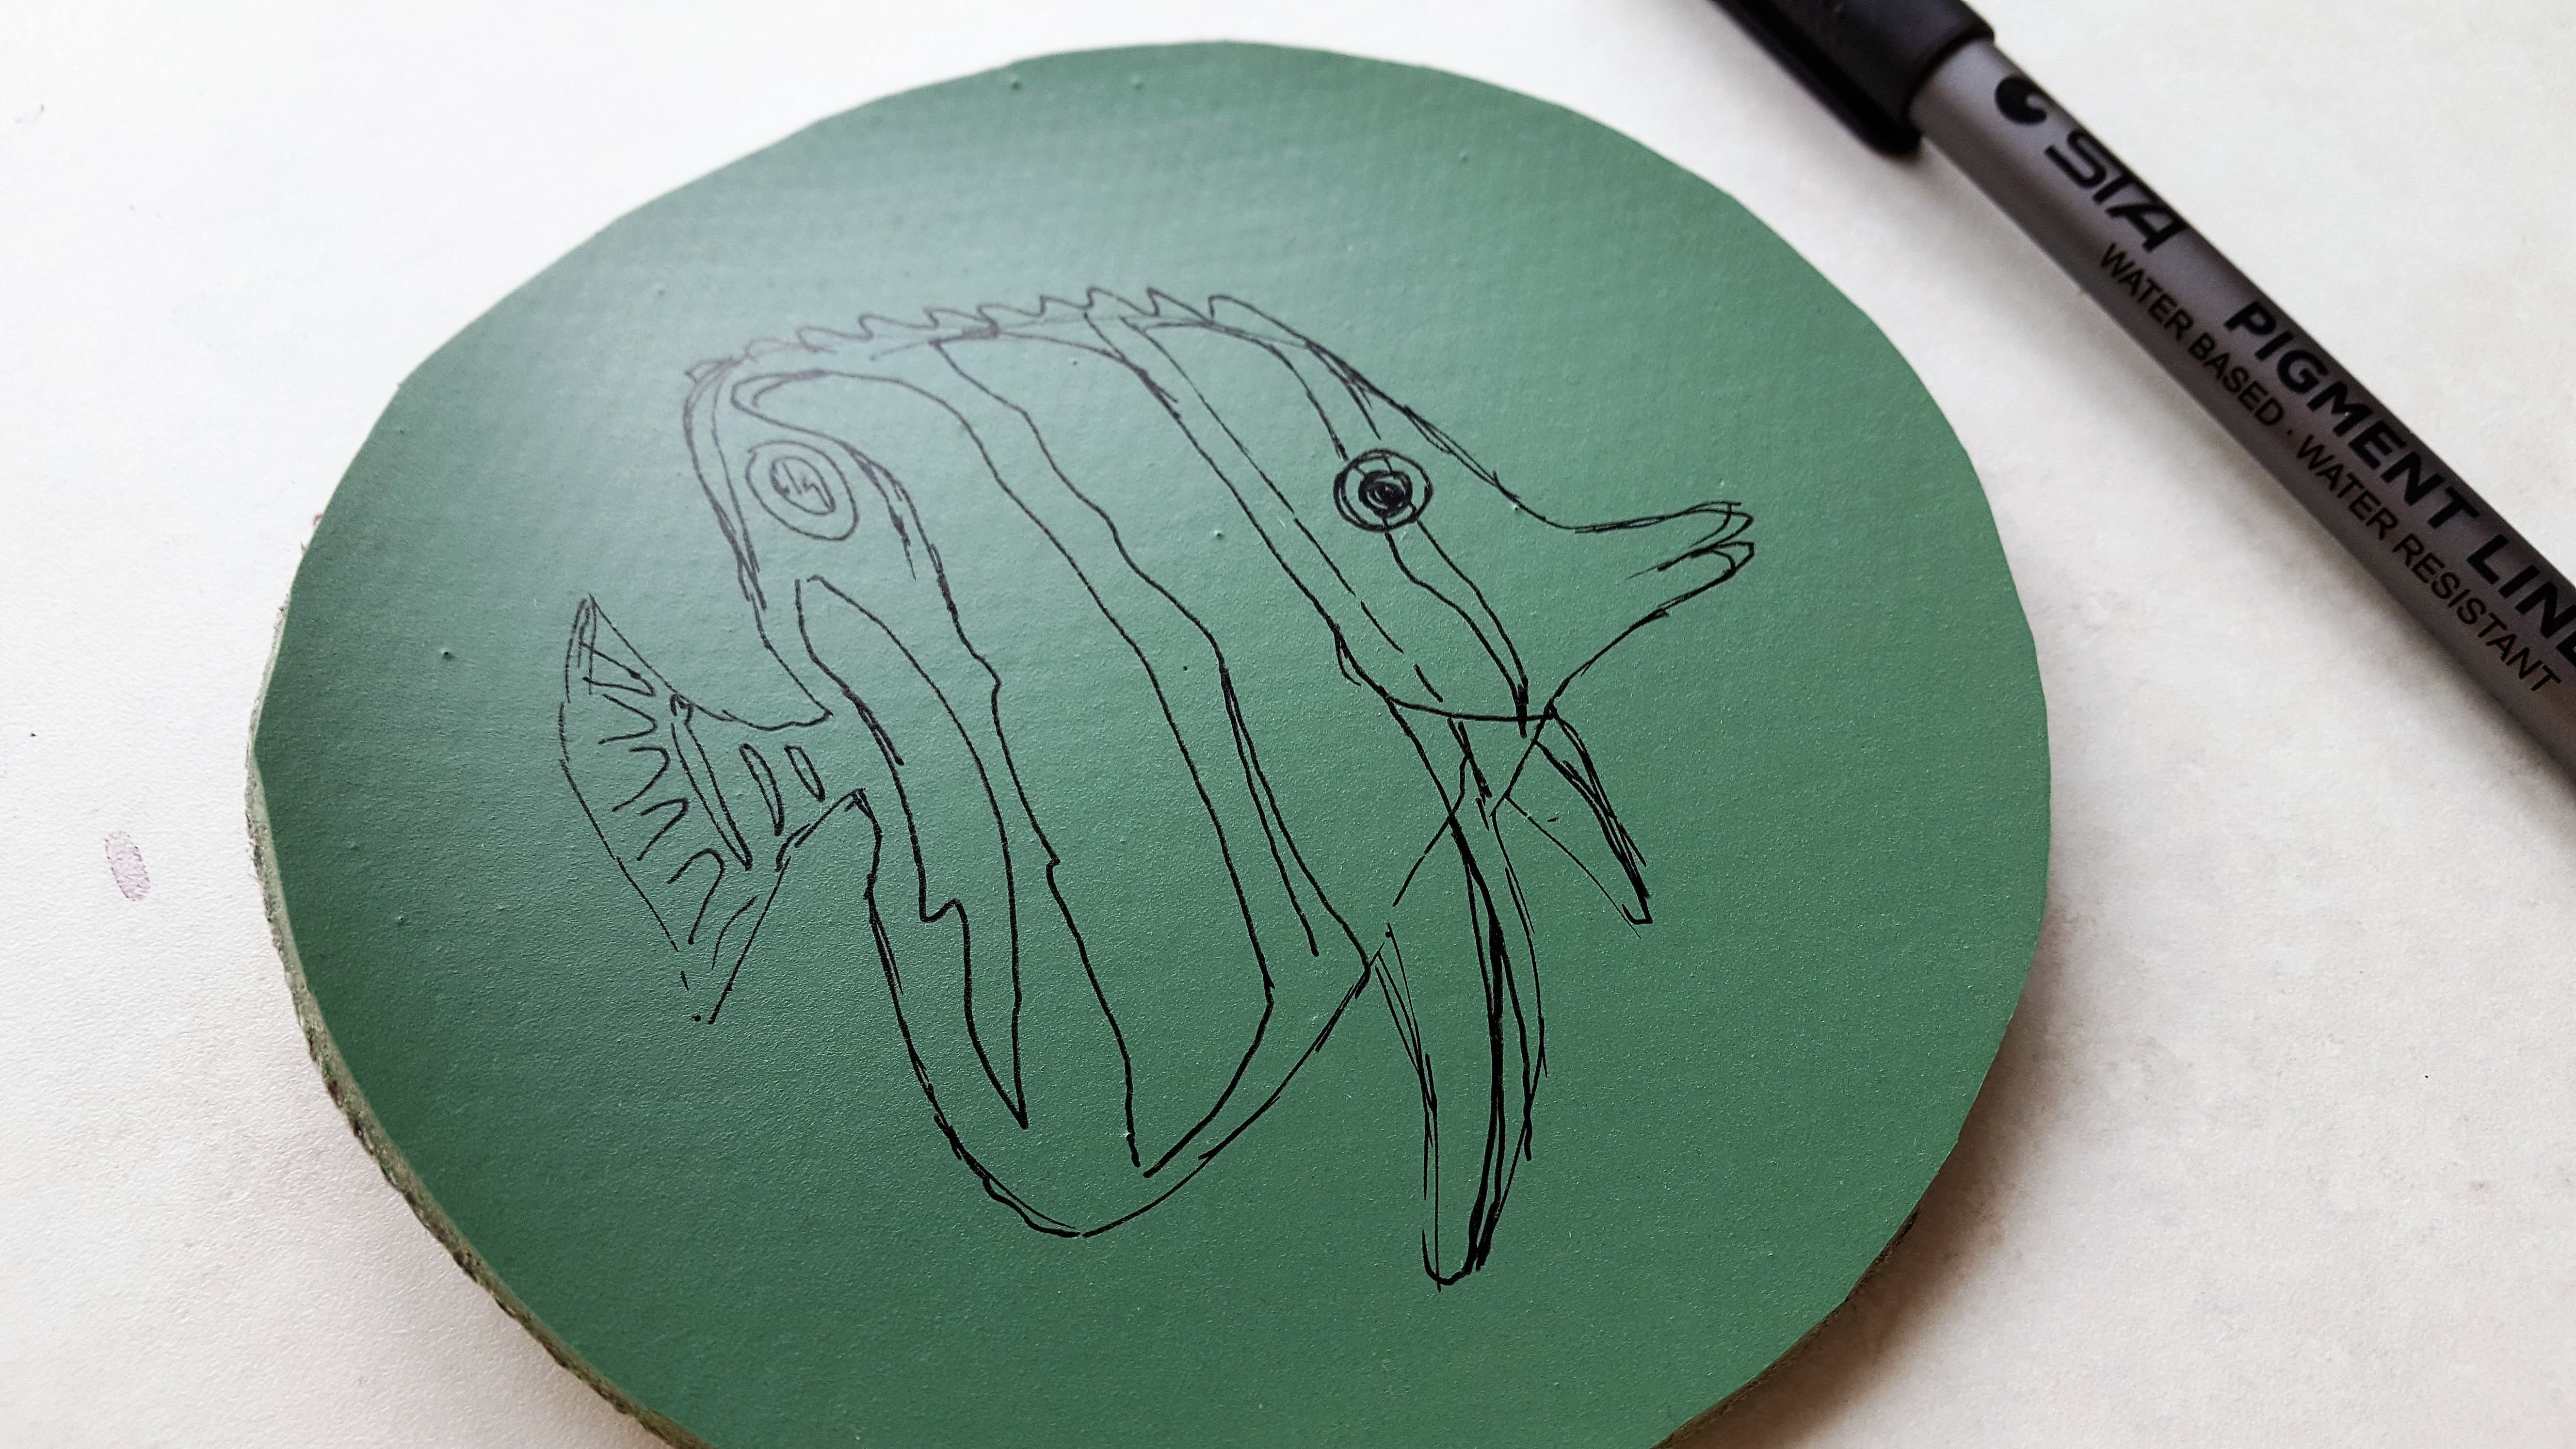
Prepare a picture you want to cut. You can start with something easy and smaller just to meet the technique. Draw it on a peace of paper in a size of your lino sheet and then draw it with a pen or a pencil on a lino. It is important to think about cutting. The parts you want to cut will be white. Adapt this fact to your drawing. Dont use shading, just black and white.
🔵 STEP 2
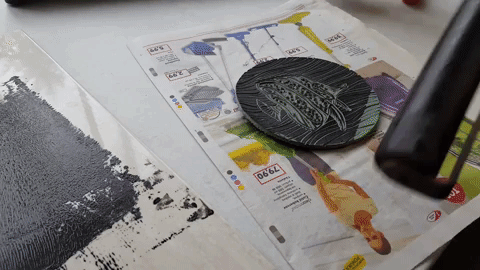
You can start cutting your design into the linoleum surface. Make the outline first . V gouges are better for making thinner lines with sharp edges. If you need to make a round hole use U gouge. Try to avoid cutting against the fingers of your other hand, because the gouge can easily slip and hurt you.

🔵 STEP 3
Now the cutting is over, so you can pripare papers. The size depends on your picture. It is nicer when a picture has some space around, so the paper should be bigger.
Prepare the paint. It is easier to start with a single color. Put a small amount of paint on a sheet of glass (or some other material mentioned) and start rolling it. Roller should have a small layer of paint on in. Put some old newspaper under the lino sheet and cover it with paint. Gain some more paint on a roller and repeat the process. The sheet should be evenly covered.
🔵 STEP 4
You have two options now. Take the paper and put it down on a painted lino, or in reverse - put down lino on a paper. If the piece is small I prefer the second way. Try to place in in the middle of a paper. Then you can take a spoon and push on the lino, so the paint could stick to the paper better. Or you can also lay it on a ground and use your own weight.

🔵 STEP 5
Now it is time to reveal the result. Be careful with it, the paint is still wet. Let the paper dry and make some more copies. The first piece may not be satisfying, so you can try again.

🔵 STEP 6
There are paints which can be cleaned with water, or with thinner, so do not forget to clean your tools.

Your design can be printed in many color variants. You can make transitions or use paper in various colors. There is also a possiblity of combining linocuts for one piece, so there is much to try.

I hope this post was useful for you and you are inspired. Let me know if you know this technique,or if you are going to try it :)
Thanks for watching!
Follow me on Steemit
Really cool never seen this done without wood.
Im in love, awesome tutorial!
thanks handsome :)
Wauw, beautyful post again!
Super step by step post on a truly wonderful art form! :) Resteemed! :)
thanks so much, I really like your posts, very good work, skilled hands! following you :)
Amazing work as always :)
Super tutorial buddy you and your art both are really beautiful :)
you are so kind, thank you :)
:) you are also very kind buddy :)
Lake Titicaca.....Nicaragua! Aqua! For my bunghole....
Grate tutorial :) I was doing some linocut yesterday so this hit me close to home ;) Resteemed!
yay, thanks so much, I would like to see the results :)
@marty-arts got you a $1.55 @minnowbooster upgoat, nice! (Image: pixabay.com)
Want a boost? Click here to read more!
Very good your art. I like. My name @ilyasismail from Indonesia. Thaks.
Great tutorial!