🔵 LEARN ART with MARTY - Blueberry cake study - PART 2 - pencil drawing - shading
Hi creative Steemians :)
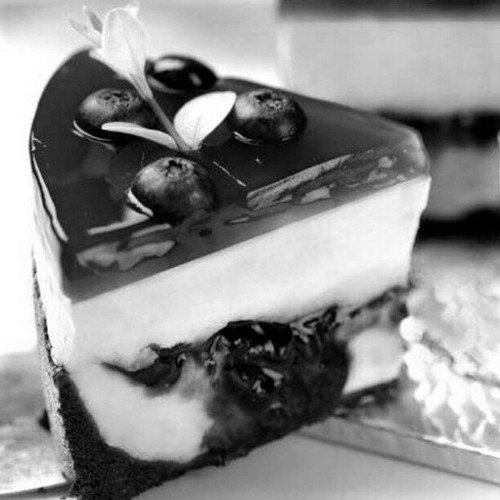
This is the second part of the Blueberry cake study - pencil drawing. In a previous part we learned how to sketch by using needle or a skewer. Today we are going to finish our drawing.

We will need
- Pencil / Mechanical pencil - it is good to have at least two grades - HB and 5B
- Rubber
The process
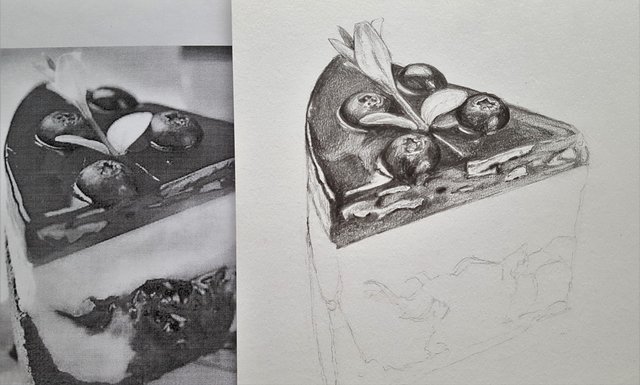
🔵 It is good to start from the left upper corner if you are right-hander, so you will not smear your drawing while shading. I will use mechanical pencil, so the drawing will be soft. If you want it to be rough and you do not want to spend too much time with it use a pencil HB and 5B for the darkest parts.
There are some bigger areas we can shade in one tone and then draw the rest.
🔵 When you do the shading in one way do also on the other like you want to create a grid. It will look better because the direction of lines will dissapear. The reflections can be made by skipping those white parts, or by using a rubber. I preffer the first way. Also the line around reflections can be darker.

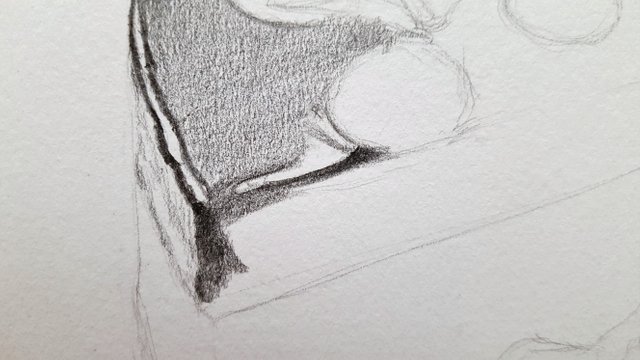
🔵 While shading round objects we should also use round lines. It is a rule for all shapes. The pencil should trace their shape. It is a common mistake to use straight lines when they should be round and the object looks flat then.
🔵We want to achieve nice contrast, so look at the photo and find the darkest places. Do not be affraid to press on the paper when it is necessary. Use also the second softer pencil to achieve even darker shades.
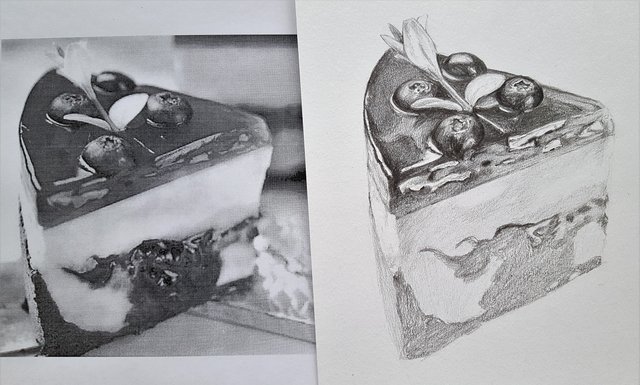
🔵 While the upper part was about reflections and lots of shapes, the part between is really light and soft. We should use any preasure, just slightly move the pencil. Rubber can used to make some lighter parts.

🔵 Now we can prepare also the lower part. The base can be drawn like this:
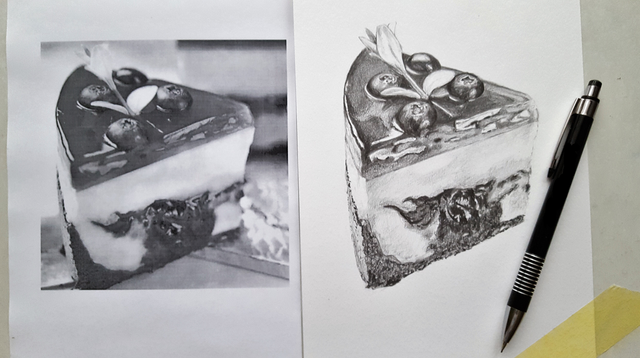
🔵 The structure is porous, so we can draw dark dots to achieve this feeling. I used only soft pencil for this part, because it is really dark and also soft pencil can make that grainy surface easier.
🔵 At the end we should check the drawing and compare it with the photo. There are always some repairs and finishing.
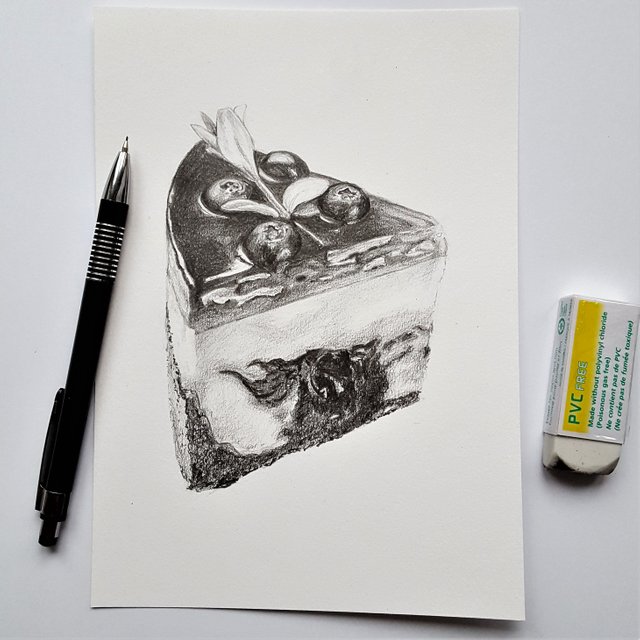
I hope you liked this tutorial and you learned something new. In the next part we will paint the blueberry cake in watercolors, so stay tuned! :)
Thanks for watching!
Follow me on Steemit
Step 1: train
Step 2: train
Step 3: train some more
Step 4: You have the skill now :)
yeah, thats it :D
THis is a great tutorial, and will help many I am sure to improve there drawing skills, but that is something I am not good at in the least way so I will not even try
thank you :) .. everyone is good at something else, thats unique :)
that’s a great way to look at it