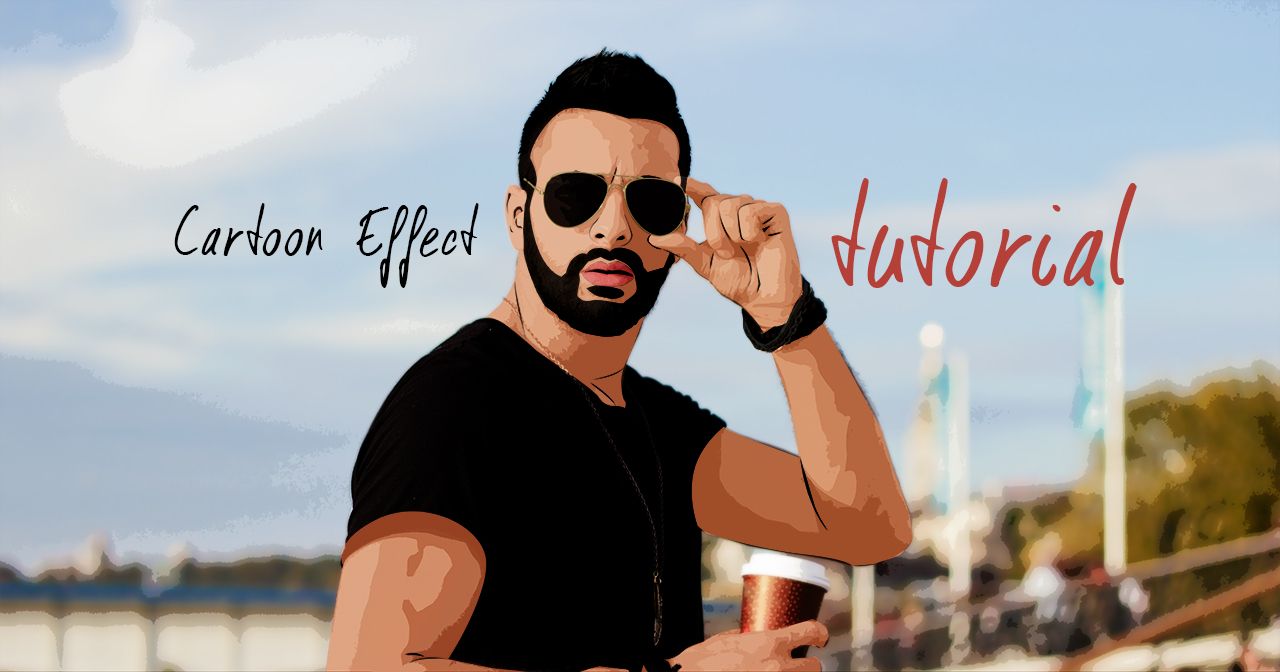
My First Photoshop Tutorial: Cartoon Effect Easy!
Hi Steemians! It's my first Photoshop tutorial but you will learn here how to understand human face/body and with it you will get cool Cartoon Effect. Really impressive to make as avatar or somethig like this on any photo! I use Photoshop CS 5. Let's do this!
PS. I will not teach you here how to use Pen Tool. But the tip is - if you can't make good shape hold left ALT + click last anchor point. Now you can make a shape you like. After creating path (closing path) click right anywhere on photo and choose Fill Path (with color of what you are already painting - just click on that surface after Fill Path. If you make glasses Right Click - Fill Path - click on glasses - Delete Key etc.).
Then delete current path with Delete Key and go make another paths.
Firstly, final result:
Step 1: Choose your photo.
I chose a difficult photo because it has a lot of details. You can find it here source image
or try easier one for example easier image
Step 2: Backup your image.
Simply duplicate it (ctrl + J) and hide the first one. 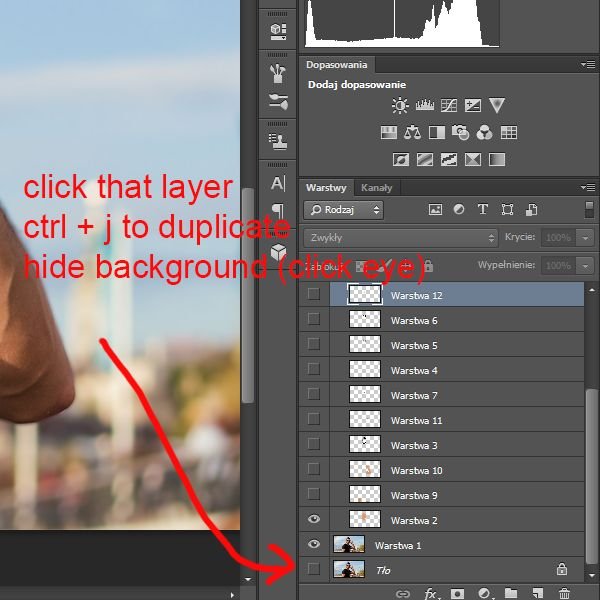
Step 3: Face and neck
We will be using Pen Tool (P) to make whole thing. Start to selecting face and neck shape like this:
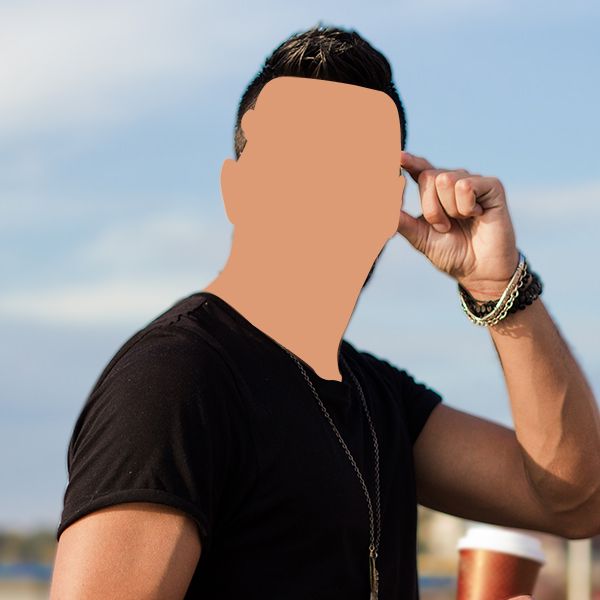
It does not have to be very accurate, I will send you psd file and you will see how (not) accurate I am 😂
Step 4: Make the same way bracelet, hair and beard - mustache.
Make it on one layer. And put layer above the skin layer. 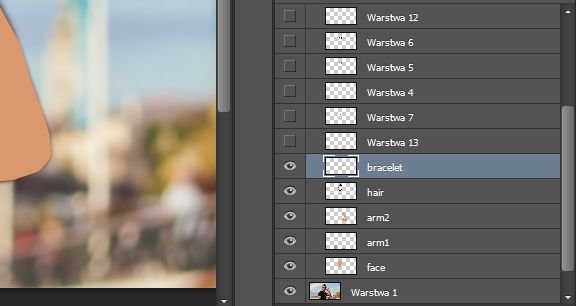
Step 5: Here comes the hardest part
If you make it successfull you will be fine! We have to create lines, shadows. Turn off the previous layers, leave only the layer on which you will draw the lines and the layer with the photo. Look how I did it
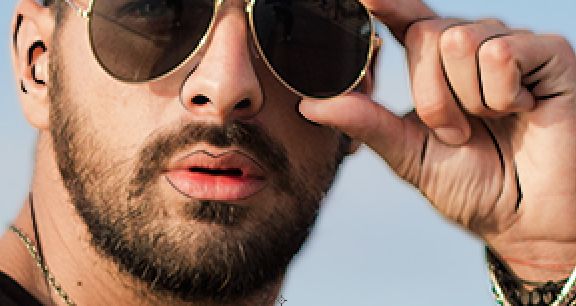
I just drew the lines of the nose, lips, ears (this first), then the neck, hands and drew eyebrows (which will be obscured almost entirely by the glasses). This layer is supposed to be over all that we have done so far. For preview, turn on all layers and rate how it looks with you, with me like this: #5
Step 6: Lips
See how I made lips - nothing difficult, just Pen Tool from the picture. Under mouth I painted with a Brush Tool (B) a dark background. 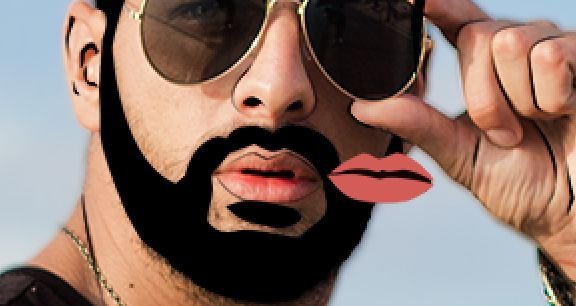
Step 7: Glasses
Glasses by the same method, first shape of the entire glasses with rim, then separate the glass on a separate layer. If you finished this point you should have something more like that: 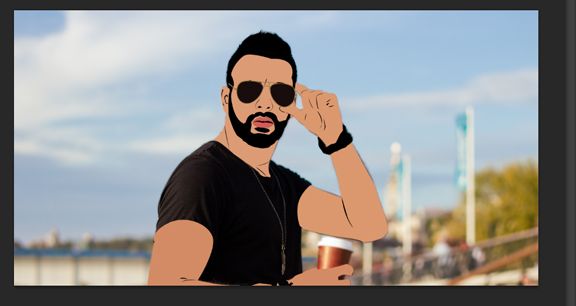
Note that I did not make a T-shirt (this is, because it is black, if it were of a bright color, then the same way - Pen Tool and apply lines like on the skin)
Step 8: If you are still here
Copy first photo and put it above all layers. Make it Black&White (Alt+Shift+Ctrl+B) and Ok, or (Ctrl + U) and slide the slider (saturation) to the left.
Go to Filter - Filter Gallery - Cutout Filter with settings: 7-0-1 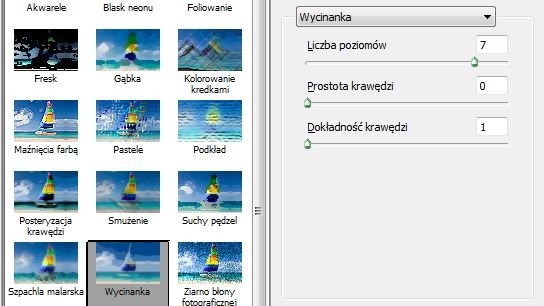
Step 9: Correction of the edges.
Notice how the edges are ragged, you have to make them pass gently. I will demonstrate on two pictures, first before and after improvement.
Before: 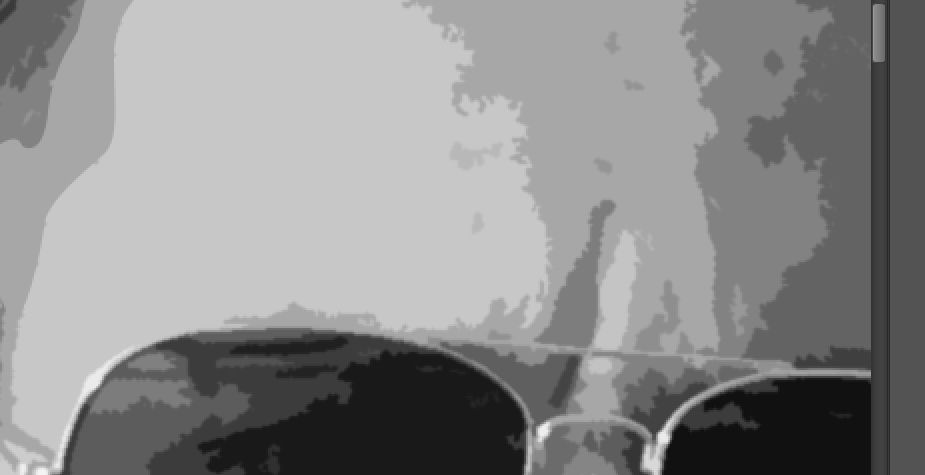
After: 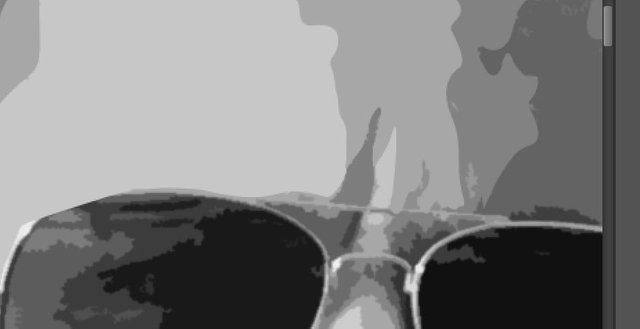
Apply corrections on the skin with Pen Tool the same way as before. (there is no need for hair and beard areas), but the skin, nose, arms, neck, polys need to be fixed. When you finish corrections, change layer Blending mode as "Soft Light". We will call that layer "Cartoon". Look screen. 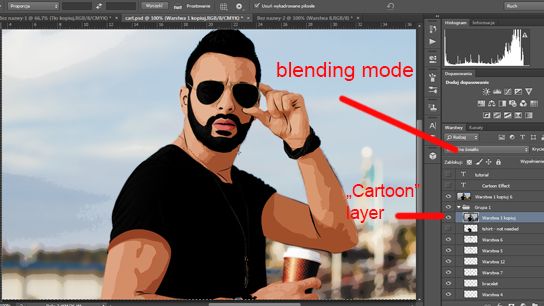
We could end here but...
Step 10: Last Step
Again duplicate first layer (original photo), duplicate Cartoon Layer, put them both above all layers. Cartoon Layer has to be above original photo layer, Change on new Cartoon Layer Blending mode from Soft Light to Luminosity and merge Original Layer with that new Cartoon Layer (ctrl + E) when both selected). If merged change opacity of that new layer to 15%.
Thats it! If you have any questions feel free to contact me :) I hope you enjoyed the tutorial!
If yes:
