AUTODESK SKETCHBOOK INTERFACE REVIEW(for andriod devices)
Hey guys! I am going to be reviewing my digital painting app briefly on the following points.
WELCOME SCREEN
WORK SCREEN
after reading going through this review, I believe that someone somewhere who has been keen to be convinced about the "dopeness" of the app as per "the tool" to producing a fantastic painting. So briefly I began, I'll be explaining the function of the features under the above mentioned points with images attached.

WELCOME SCREEN
It is a normal tradition that any app must possesses a kind of screen that first appear after launching of the app, this screen do carries the name of the app or the company that provides the operation of the app. By virtue, some happens to provide more welcome screens with un-talored time assign to the welcoming. One thing that interest me about autodesk is the fastness to opening and quick dropping of the welcome screen, it does this rightly before 5secs which I rated to be a good one. Some other apps can wait on welcome screen and while they do so ,ads and some other_ceremonies_ tends to make the zeal of wanting yo get started with something real quick die off. I know someone may be thinking this has to do with devices GPU speed yeah that contributes also but yet still not yet the big reason why welcoming screen has to be like the main thing the app as to offer.
Without much ado, without making look I'm giving much credits to the app, I'll like to introduce the next features after the welcome screen.
These includes;
Tool purchase screen.
•FOR ANDRIOD
•FOR ALL YOUR DEVICES.
Clicking on each of these features enables you to purchase the complete pro tools you'll be needing to have a better design and or painting both on your Android device and other devices such as windows,Mac etc. Clicking on them would take you to the device's store and with your debit or MasterCard,you can make payments to the autodesk server whereafter approval of all transactions, your devices would be loaded with the tools you applied to purchase. An "X" symbol is up right corner of the screen, once clicked will close that page and take you to the sketchbook drawing page or the drawing interface.
INTRODUCTION TO DRAWING INTERFACE.

On next is the drawing interface, its a white screen by default with six icons above the screen which when tap on each of them produces a pop out tab or drop down tab. These icons are the working instruments of the Autodesk sketchbook for your device(here Android). These icons actually don't have a specific name but for my own easy recognition and with how I understand the usage of each icons, I then tag each of these icons with names I'd be able to relate the purpose of each features under each icons. I named the icons as follows with order of appearances and their respective sub features and functions in accordance and with references to images.
they are as follows
THE MENU ICON
Under the menu icon includes:
The Autodesk sketchbook logo which when tap on pops out Another screen for login and registration Note: By default or working as a freelancer on the app would provide you with limited features such as brush sets and other drawing aids. So ensuring you carried out the registration process to success would expose you to unlimited varieties of Autodesk sketchbook working instruments (brush sets and color palettes)
NEW SKETCH ICON: clicking or tapping on the new sketch icon pops out another features, these features includes a very important function of the app, these function is known for the layer settings.


As seen in the image. You can choose from the list of canvases with a number of layers assigned to it and also, if you aren't satisfied with number of layers offered, probably your project work is going to require a reasonable numbers of layer, then you can choose the custom layer tab where you can then set the numbers of layers to meet up with your project work. Also, on the drop down arrow, we also have some more layer choices for mobile,web, video and film. On the mobile option, the installed or available layer has to do with the devices screen resolution,size and its capacities. For instance, the capacity of smartphone will be different from that of phablets and tablets and so would be ranges in the number of layers in this section.
Further more, we have the web,video and film. I'm not much conversant with with these sections as a result of satisfactory work delivery and ability of my choice of layer to meet upWith my work requirements. But looking at the video and film option, I assumed it to be used for drawing and rendering animation arts.
GALLERY:

The Autodesk sketchbook provide you with a gallery where all your completed or almost completed works goes to after save. Tapping on this pops out another features which says save current sketch, save current sketch as copy, discard changes(if you are conversant with the operation of computer, you should be able to go by with these features).

As said earlier, with the provision of gallery you can access either completed or almost completed work and these features let you either save the work, or duplicate the work by saving as copy or let's you discard some changes you made on the art and later feel it doesn't fit to be. Next after gallery includes the share and the store. Clicking on share comes a pop out option like save to device which when accepted goes to your device memory, submit to deviantart ( Deviantart is another art platform where artist can showcase their artworks.to be able to use deviant art, you must have registered on the site), while tapping on others let you share to your social media(Facebook,WhatsApp,Twitter, Instagram) and with your phone contacts.
PREFERENCE:

The preference let you do some major settings as seen in the image that follows, it let's you create shortcuts and choose shortcuts, restore the app to its factory settings and also in the preference you can login and logout your accounts both on DeviantArt and sketchbook. As you can see, I'm logged into both accounts so I'm enjoying all the packages fully and also can showcase my artwork on DeviantArt.

Below is all about About
ABOUT: it enriched you with the information about the app, trademarks,patents (protect orgs), third party software credits, licences, All right reserves and the likes.

_going back to the 2nd icon on the "drawing screen" which I called the utility icon
THE UTILITY ICON:

Tapping on the utility icon also pops out some other sub icons with there specific and unique functionality.

The first is the selection icon, tapping on the selection icon also produces some other sub features,about six of them.

Some are highlighted and some are faded showing the option cannot be activated until maybe when an object on the "drawing page" is being selected. On the list of highlighted ones, we can see magic Wand which when selected also produces sub magic wands. Selecting each of these wands enables you to be able to either pick the complete image that you've drawn or Some parts of the image for some proper modifications.
The next on these segment is the tolerance tool, this tool provides a kind of an adjustable meters on the scale of 0-255. Choosing scale on the tolerance for painting prevents painting overflowing to parts you do not want it to touch so with these feature you can easily select the value of tolerance you'd like to work on. The next icon allows you to add or duplicate your art or cut, more like copy,paste and cut here. On the faded segments, coming out first is a circle with arrows on it. This function as a navigator, it enables you to be able to move or drag your art work across any parts of the drawing screen "excellent" a feature that's impossible on the realife drawing paper (LOL), next on the faded segment is another one that works like a crop tool, it allows for resizing. The next after these enables you o undo the sanding I.e you already cast your art with the wand and later changed your mind from showing your sorceries (no pun intended) so by tapping on it, the parts captured would then let go. The small arrow close to it tends to minimize or hide the wands tray for clear view of the action.
The third icon on the "drawing screen" is actually called the "brush sets".

Like I said earlier, if you fail to register as user on the app, you will not be opened to varieties of brush sets. You can see i'm logged in from image below.


The pre-installed brush sets(default brush sets) for users that fails to register includes the basic brush sets and the legacy brush sets, copic brush sets, synthetic brush, traditional brush, fine art, half tone, texture, shape, splatter brush, glow brush, smudge, designer brush, _artist, pastels, and ,colorless. All these mentioned brush sets have there specific usage and or purpose they serves.

On the other part of the brush set is the settings,each brushes has its own specific settings ranging from size to opacity which are just on the basic settings and advanced settings which under it we can see the pressure of the brush ink,stamp,nib and randomness,
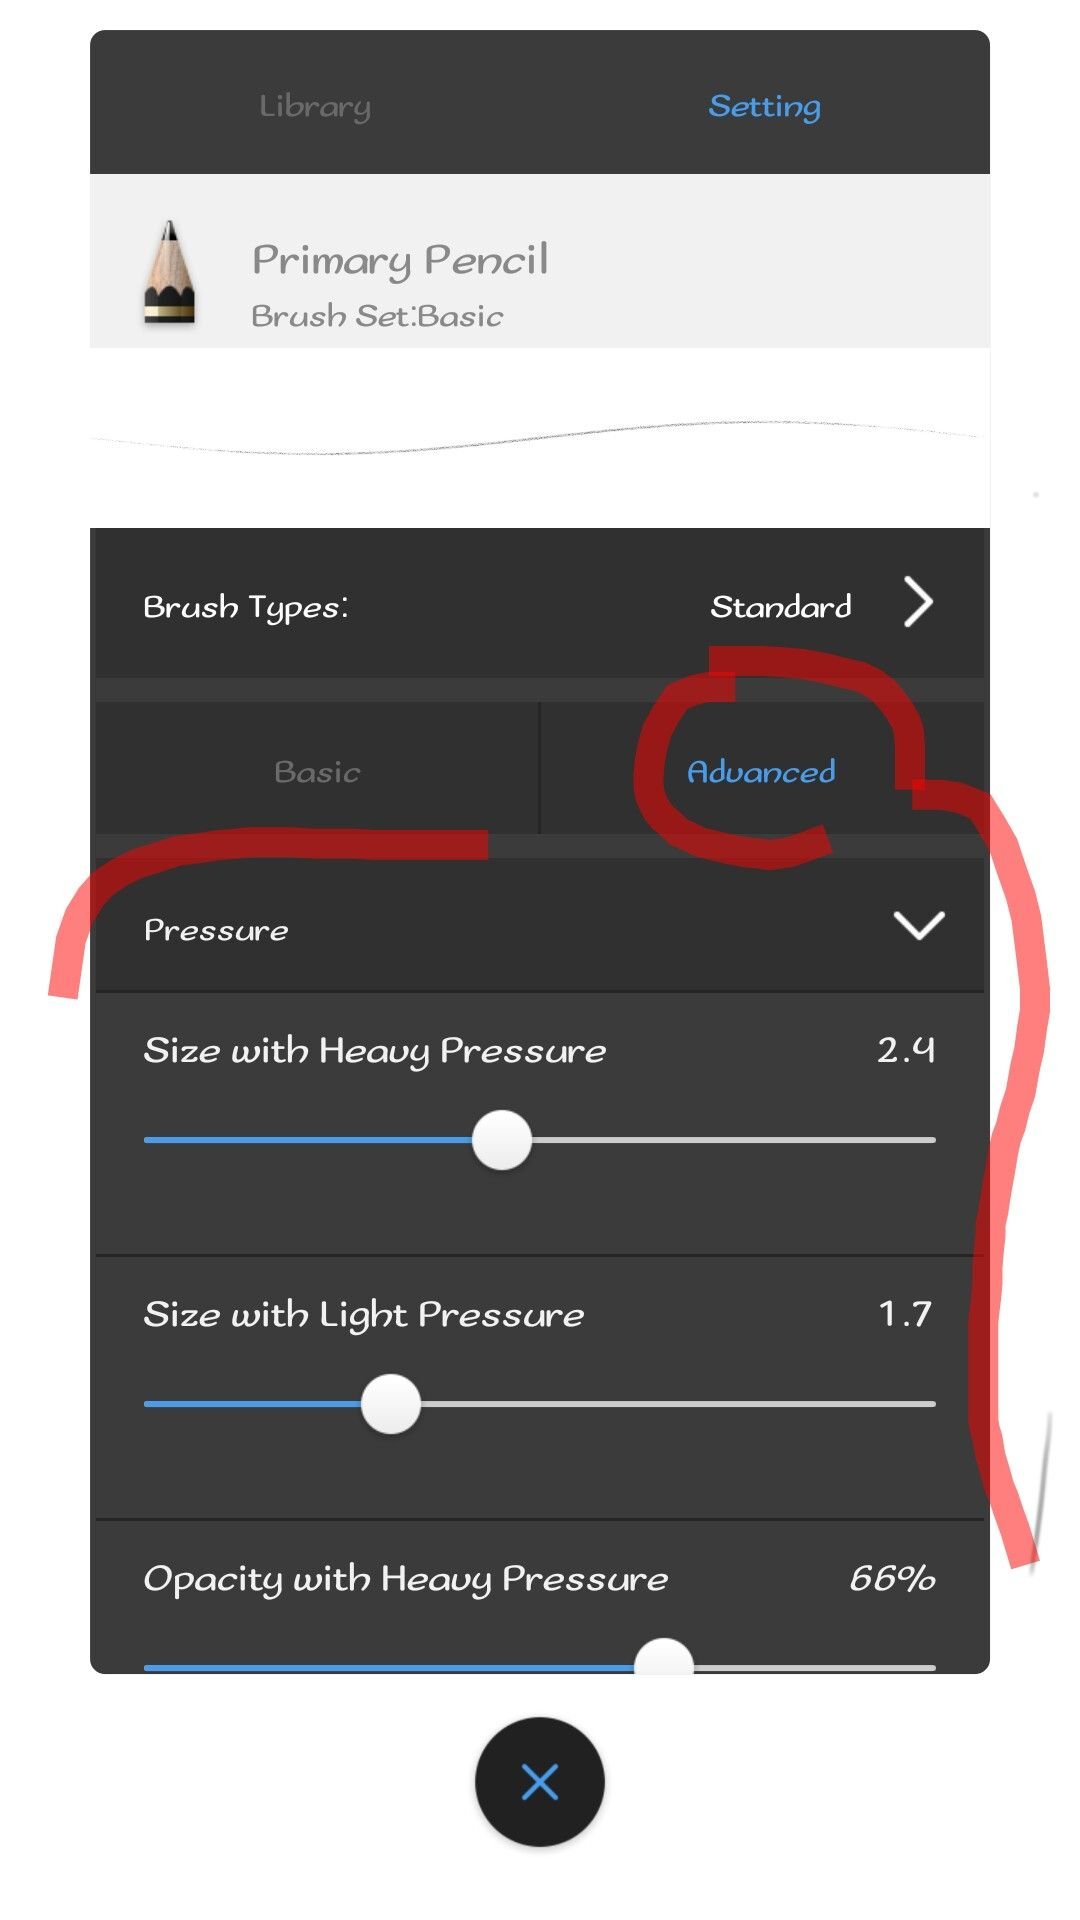

while tapping arrows in font of them let you further set the brush till you achieve your desired settings. You also get an option to reset your settings in case you found out your brush sets are not working in accordance to design as a result troubling its settings or probably another user wants to work on your sketchbook. Stay tuned for my next post where I'll dive deep into setting your brushes and how they works.
I will stop here for now while i go work on the app to gather more detailed tutorial on the Brush sets settings and applying them for drawing and also the remaining icons review. But before then, i hope you all will enjoy my post. Kindly leave a COMMENT, RESTEEM AND UPVOTE to help get this review to other users that might be in need of it. Thank you all and GOD BLESS.
@steemiansarena @surpassinggoogle @steemgigs @artcity #artzone #ocd-resteem
I will upvote and resteem your last blog post free to my 35,000+ followers if you reply with the word, "free".
Your post has been upvoted by the @steemiansarena community trail.
Our goal is to support minnows on steemit to help them grow.
You can join our discord server here;
https://discord.gg/rMK7VbG
You can support us by donating steem/sbd or delegating SP to steemainsarena trail to acknowledge our mission.