Drawing the Hand - Part Two
More on hands -
In my last tutorial, I gave a brief introduction to the hand and its parts. I think one of the hardest parts about drawing hands is their ability to assume so many positions. And those can be complicated if you aren't too sure about the mechanics of how the parts work. Sometimes we use two fingers, and other times we use the whole hand to pick up heavier objects. Sometimes we use a particular finger to express our feelings. As far as communicating, we use our hands to emphasize points in our speech. They are props for conversations, inviting us in or pushing us away. And in the case of the hearing impaired, hands become tools for an entire language.
So put your fears behind you - let's break the hand down into a series of steps.
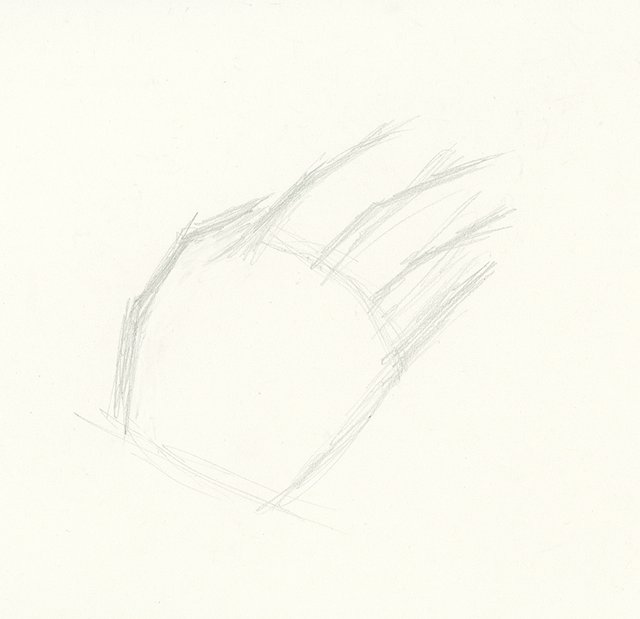
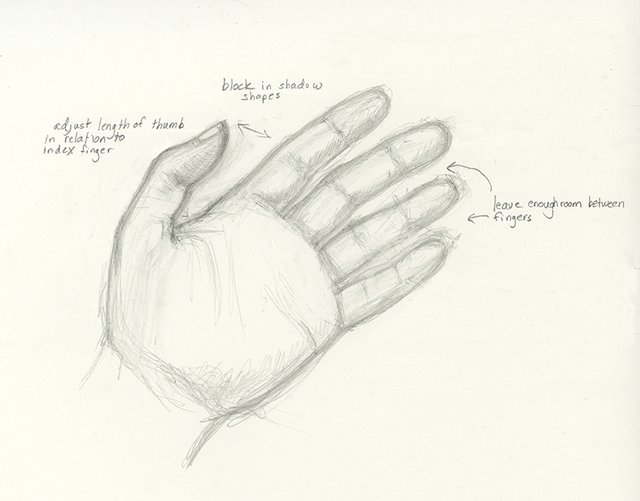
I start out with the general gesture of the hand shape. It will probably have to be adjusted as I go. Don't get too attached to your initial marks on the paper. I know I can correct as I go along.
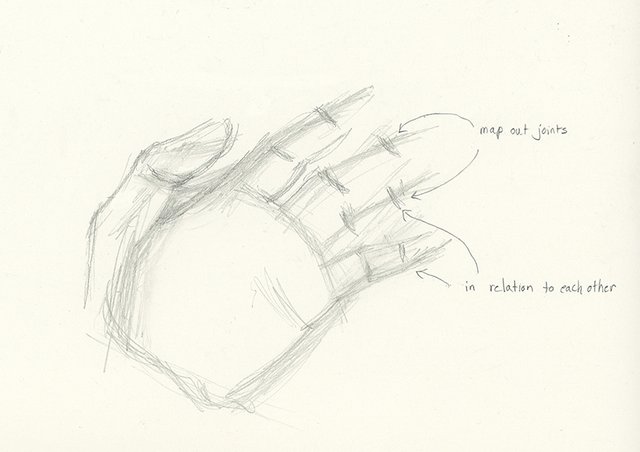
The next thing I do is look at how all the knuckle creases line up. Looking at my own hand, I am aware that it will move around a bit as I'm drawing it. But that's ok. We subconsciously know our own hands better than anyone else's, so they are perfect to practice with.
With drawing, it's all about the relationships of one part to another.
I ask myself, where does the end of my thumb appear in relation to the first knuckle bend of my index finger? And how to the other creases line up in relation to the fingers next to them? If you understand this principle, the fingers and their lengths are easier to line up.
You can see how I had to restate my lines, correcting the shapes as I go along. It's good to keep your lines pretty light at this stage and keep an eraser handy.
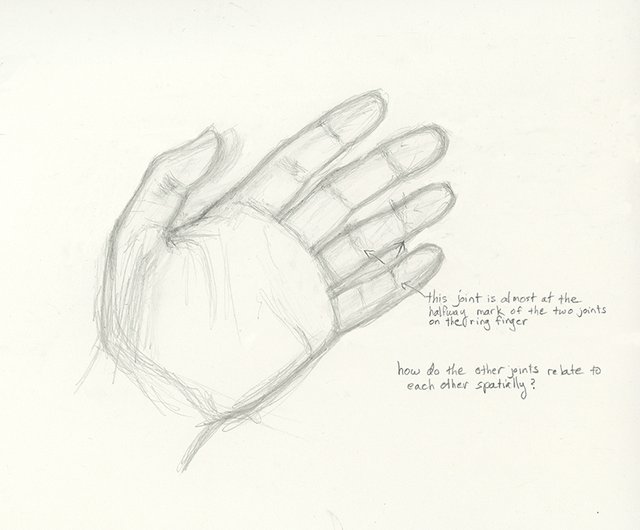
In this next phase, I'm more confident with the placement of the thumb and fingers, so I use some values of gray to block in the shadow shapes.
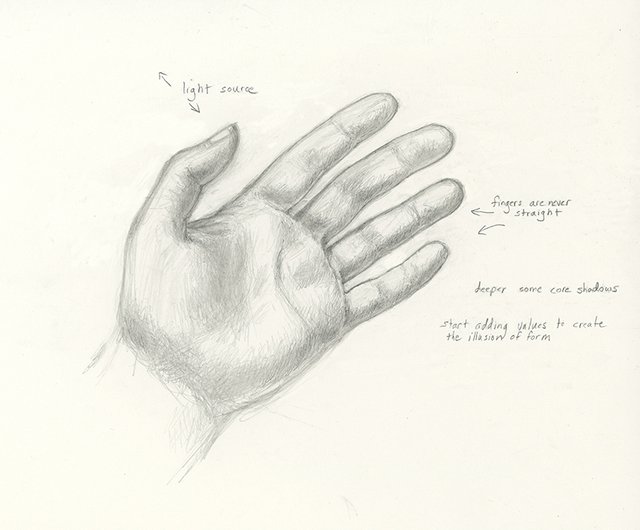
It is coming together, but it's hard to keep my fingers in the same position. I have a light source coming from the upper left.
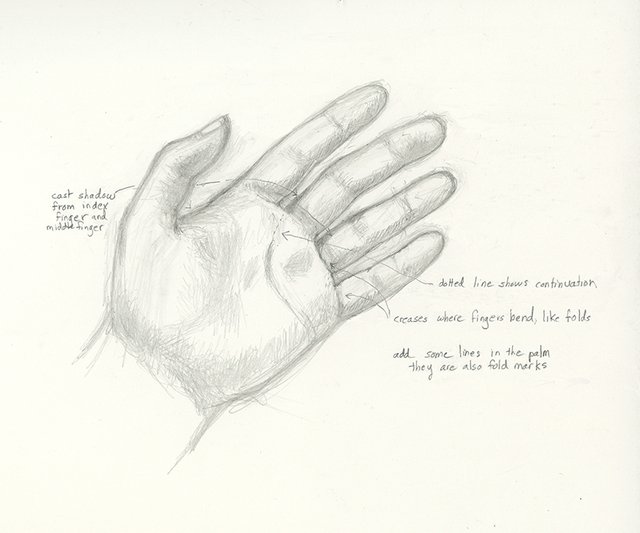
In addition to defining form shadows, when you have a strong light source, there are cast shadows as well that must be identified. My thumb makes a cast shadow on the upper left of my palm and index finger, and the index finger leaves a shadow on the middle finger, and so on.
When studying your hand, notice where the palm and fingers connect. It has to be wrinkly here to allow for a full range of motion in the fingers. If you hold your palm flat, your fingers are direct extensions of your palm. But when you cup your fingers a little, the crease there is much more pronounced, giving you wiggle room.
You can indicate this bunched up area with ranges of values. Light advances, darkness recedes. These are crucial parts of the puzzle pieces that fit together to make a more believable rendering.
Here's the thing about fingers.
They are rarely straight. Some of your fingers may appear to bend strangely completely independent from the other digits.
But the neat thing is once you put your fingers all together, you pretty much close the gaps. I start to pay more attention the creases where the palm and fingers meet - form and function, and darken/lighten accordingly.
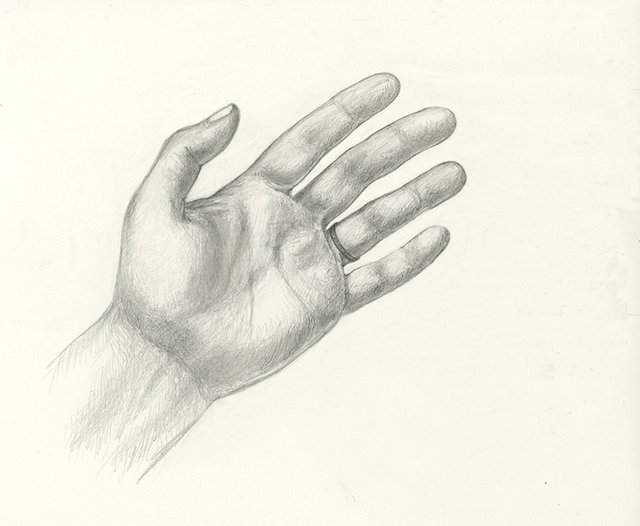
Final adjustments of values give a sense of three dimensionality.
You use lights and darks juxtaposed with each other to create the illusion of depth on a flat sheet of paper.
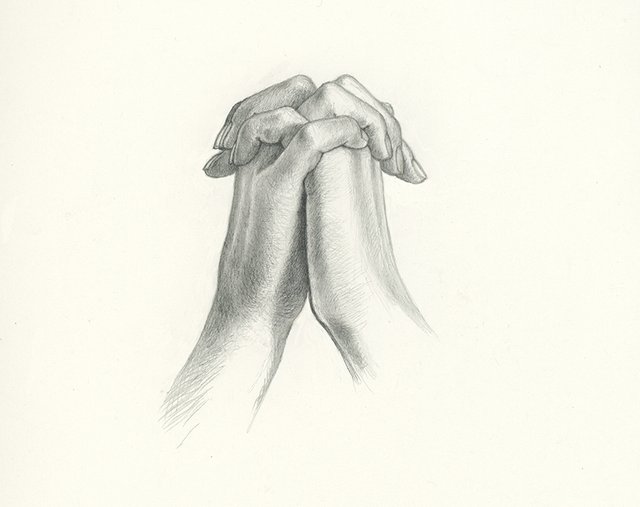
I left this drawing a little less refined than my usual degree of completion because it is more of a study.
Really look at your hands. Study them well. Remember the spaces between your fingers. They do fit together, but have to have room to move independently too. Think of the skeletal structure underneath. It's like a spider's web of interconnected bones, ligaments, tendons and muscles all covered by skin.
It's quite remarkable when you think about how important hands are to humans. We wouldn't be where we are today without them.
Thank God for the wonder of opposable thumbs.
All drawings © Johanna Westerman 2016
beautiful drawings, so sensitively handled. And you are a wonderful teacher - a rare gift!
Thank you, @natureofbeing. Every time I do one of these I learn something new. That's a good thing! When you teach something you have to approach it wth conviction and questioning what you think you know. For the hand, I was asking all sorts of whys. And not all quietly!
Really great valuable tips:)
Like it keep goin
Fantastic. Really enjoyed this.
Yeah.., this is definitely, well beyond a tutorial. Like you say -- A study of the hand... It gets you thinking about your, actual hand. And not necessarily about drawing a hand -- if that makes any sense. Amazing @fairytalelife!
When drawing the hands and feet are always the hardest part to get right, when I used to draw i did hundreds of studies of hands yet never really got them right. Some excelent pointers here though
The rough draft of the hand is very helpful.
In needing of resteeming this :)
Regarding the skeletal structure underneath... that reminds me of Klimt who would draw his models naked and then paint clothes on later. Would be interesting to draw the bones first, and then add in the flesh.
Great post, @fairytalelife. It makes me want to (try to) draw!
Wait until you are unpacked at least! Which box did you pack your pencils in?
Thank you!