Iron man illustration // Illustrator step by step
Hi. I would like to show you a work I did recently of an illustration of one of my favorite characters from the cinema, comic and the marvel universe.
Iron Man illustration
Adobe Illustrator CS6
Step by step
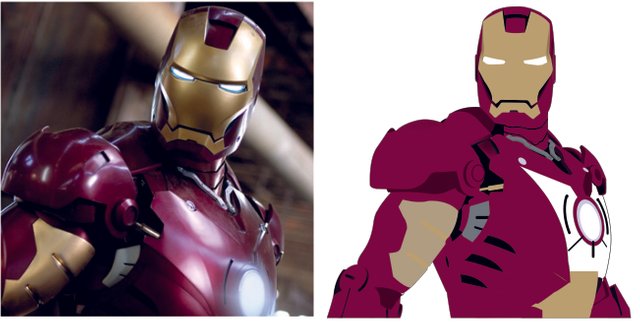
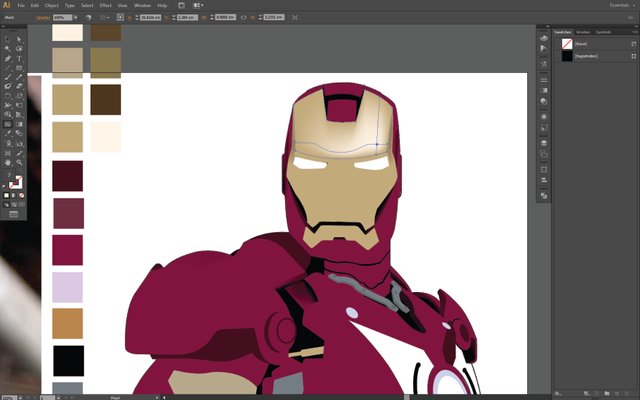
The first thing we need is a vectorization of our character, where you can differentiate each of the small details of the suit... as the next image.
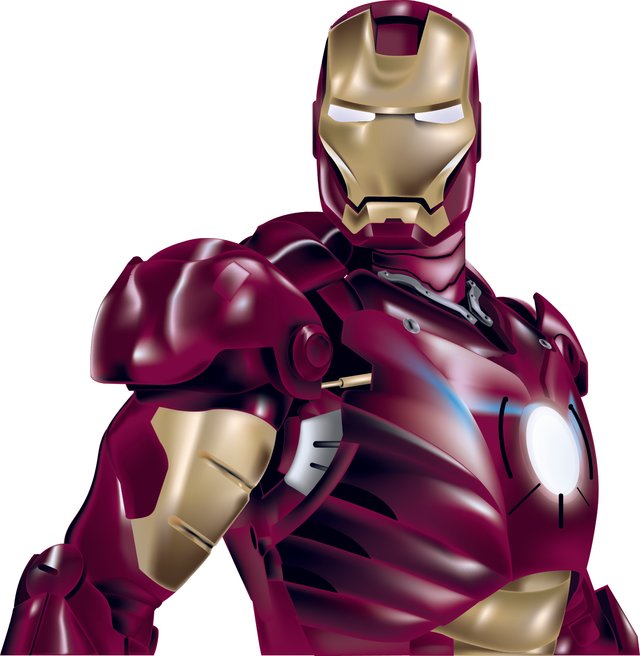
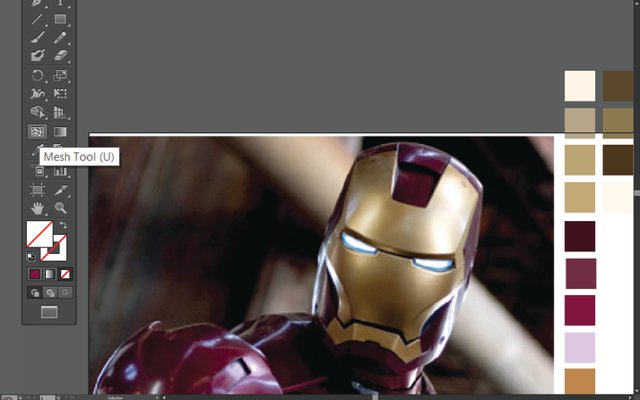
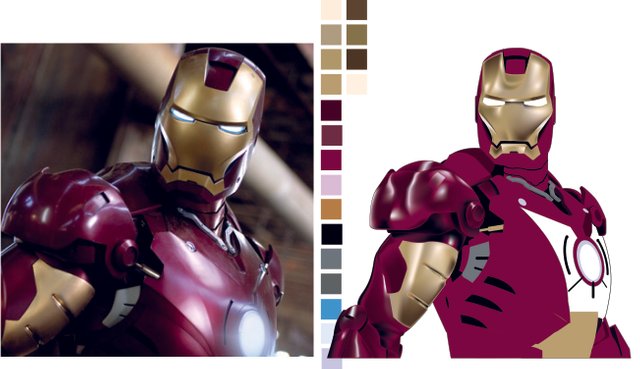
The next step is to look for an image that works as a reference to perform the effects of light and shadow.
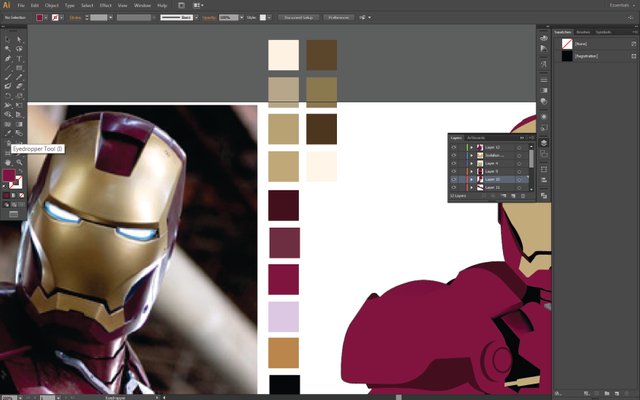
With the eyedropper tool we will create our palette of colors that we will use to give the effect to the suit.
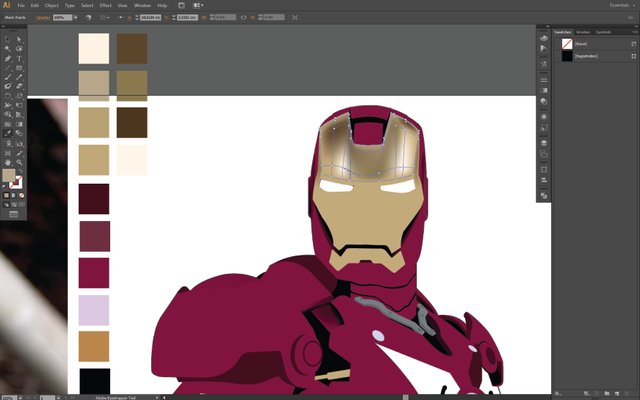
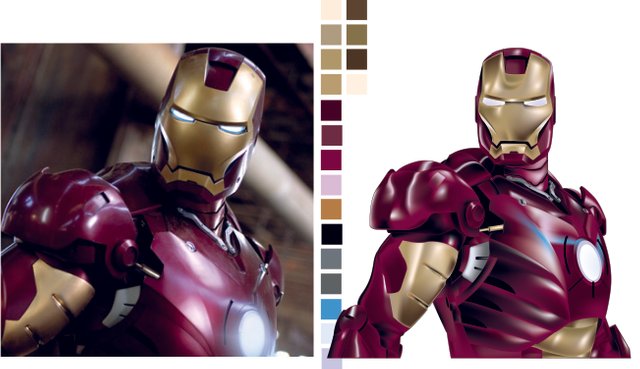
Then with the mesh tool we will proceed to add the points of light that we observe in the suit using the image as reference.
The mesh tool allows us to create a point of degradation in the selected object. As follows...
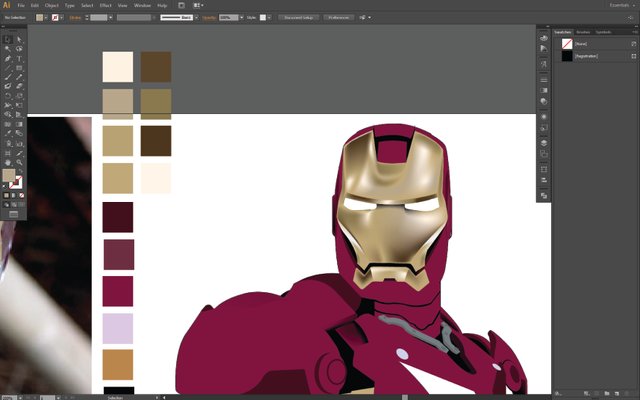
We repeat this process adding different points of lights and shadows to achieve the chrome effect of the suit of iron man.
As we add more lights and shadows we achieve a better finish. We continue in this way until we achieve the desired result.
We repeat the process of adding lights and shadows to the rest of the suit using the image as a reference.
Keep in mind that for darker areas we must add less points of light and use colors closer to black. To achieve the volume of the suit.

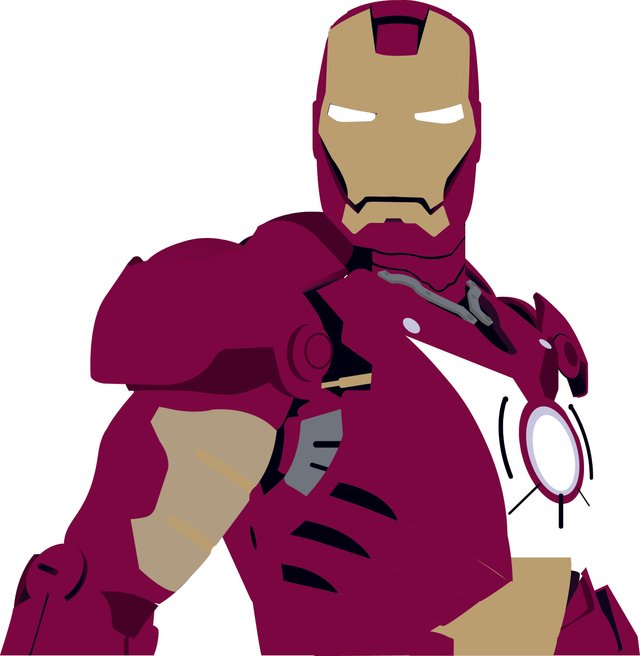
We continue until we get the next result ...
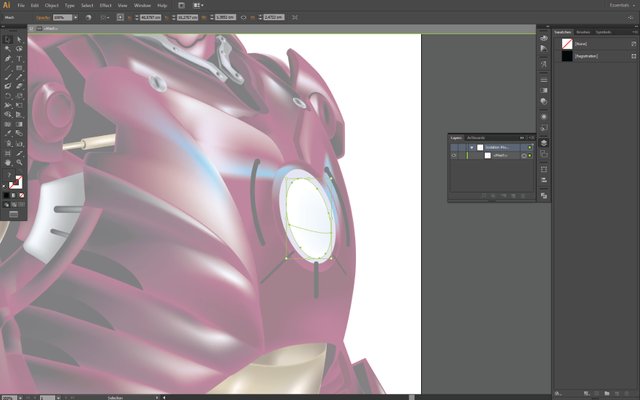
For the light effect of the power center of the suit we do the following ... We create a duplicate of the object to be blurred.
We expand the object and we go to "Effects" we select in "blur" and where it says "gaussian blur".
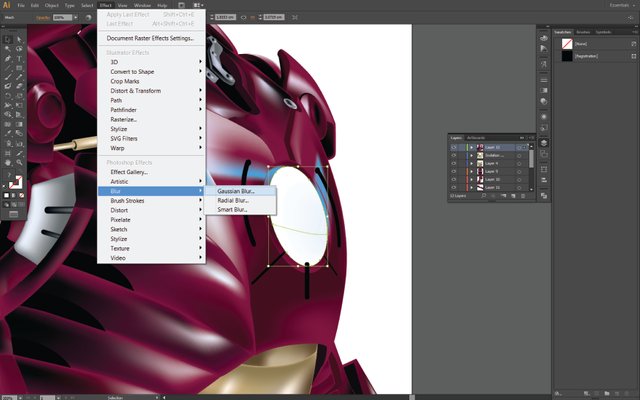
We modify the blur radius to our preference...

And ready!
Thanks