The Complete beginners guide to Adobe Photoshop Lesson #14 - Brush Tool
Comprehending the basics of Photoshop, you can not bypass the tool Brush. This is a very important tool that is not as simple as it seems to you. It has many functions and various settings. In this article, you can learn how to use the Brush tool. Go!
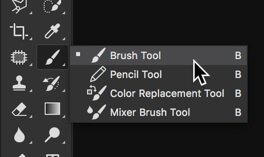
The Brush tool is located on the toolbar.
If you click on the small triangle, you will see all the tools included in this group: "Pencil", "Color Swapping", "Mix brush". For quick use, press the hot key - B.
What is it?
The Brush tool is a basic painting tool. It works like a traditional drawing tool by applying the color using strokes. It's located in the standard Tool Bar and its default shortcut is the letter B.
The Brush Tool works by adding a shaped mark on the layer, and if you continue pressing the mouse on the tablet. The essentials options for the brush tool are: Brush Tip Shape, Blending Mode, Opacity and Flow. You must understand those concepts before moving forward with the advanced settings.
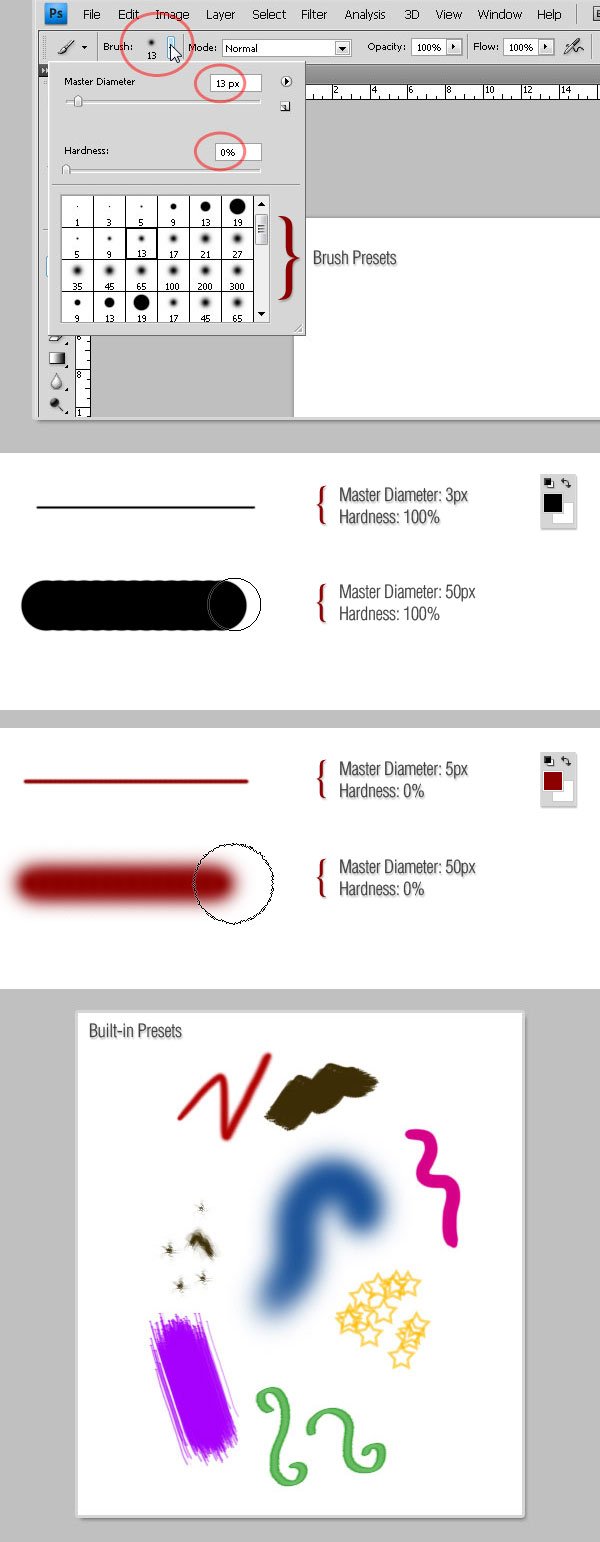
Photoshop includes several built-in presets, that are in fact pre-made brushes ready to use.
Part 1 - Basics
Brush Tip
This is the most basic option for any Photoshop User, the Brush. By clicking on the Brush Preset Picker in the default Options Panel you will see several built-in presets. On many of the presets you can easily adjust two very important values:
Master Diameter increases or decreases the size of the brush tip. The default shortcuts to the increase or decrease are the Left Bracket key and the Right Bracket key respectively. Photoshop CS4 allows you to create a dynamic way of doing it by Ctrl + Option (Mac) + Click or Alt + Right Click (Win) and Drag.
Hardness increases or decreases the brush tip's border strength, 0% means a really soft border (color fades out) and 100% a precise border. The shortcuts to the increase or decrease the hardness of the percentage are the Left Bracket key and the Right Bracket key respectively. In CS4 you can dynamically modify this value by Ctrl + Option + Shift (Mac) + Click or Alt + Shift + Right Click (Win) and Drag.
You can even combine Foreground and Background colors (we will see this feature forward). Most of the time the color is the Foreground Color.
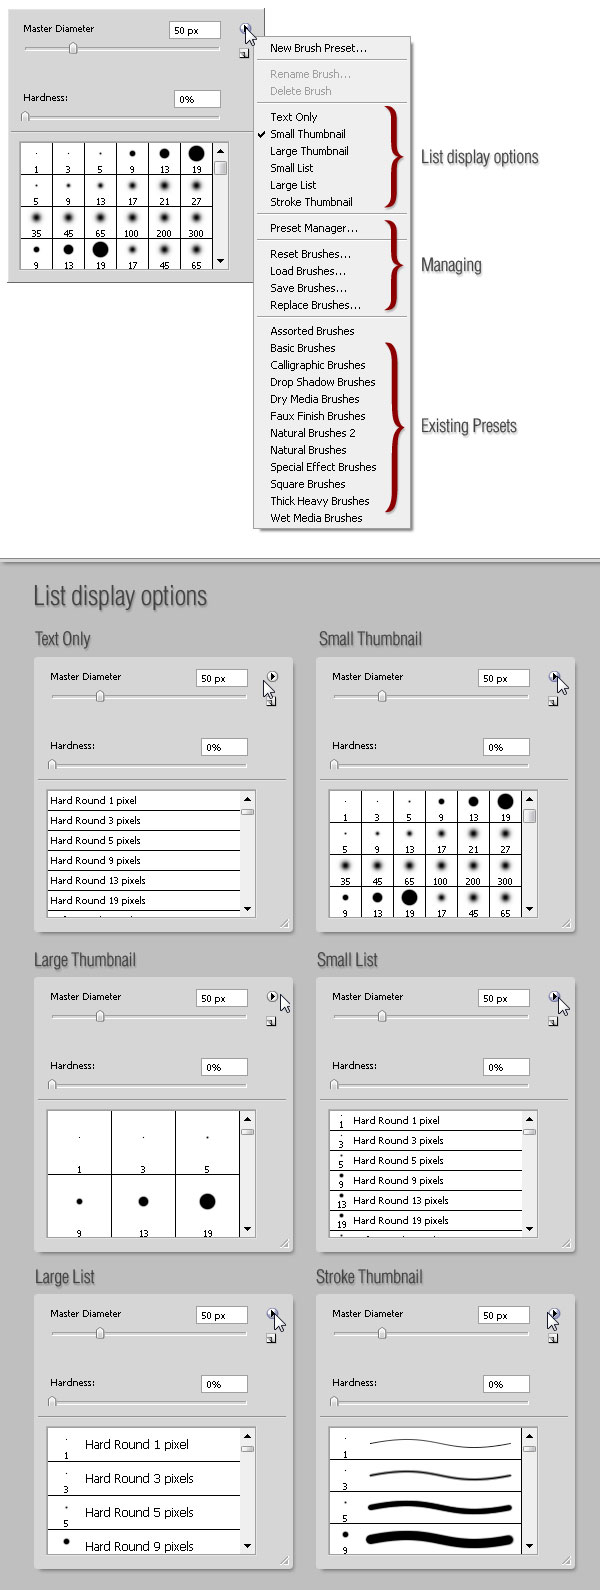
Preset Picker Contextual Menu
There are many useful tools at the Brush Preset Picker menu including Create a New Preset, Edit it, and Delete. Then there are some options to display the list of brushes in the Preset Picker panel, below there are some examples of this. Besides, you can easily Manage the Brush list by loading, saving and replacing brushes in the list, or Append one of the existing Brush collections. We will see more about preset creation shortly.
Brush Blending Modes
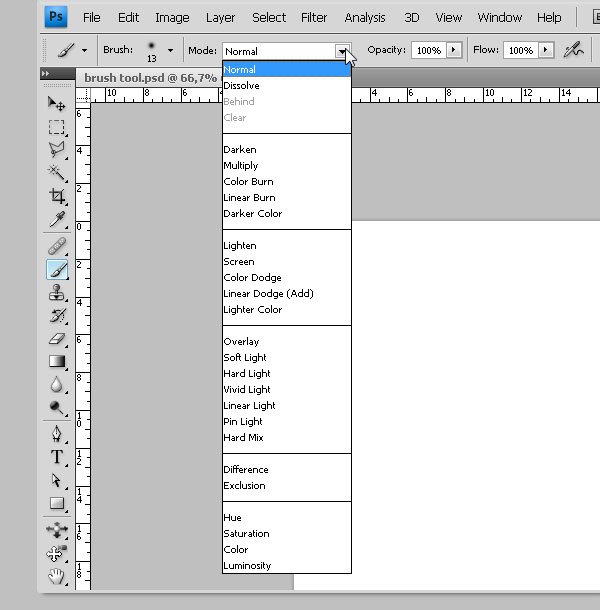
Each time you paint something using the Brush Tool you can chose a Blending Mode for the stroke. A Blending Mode is the way to mix the colors with the object (s) behind them using several mathematical formulas. Let's try some of them.
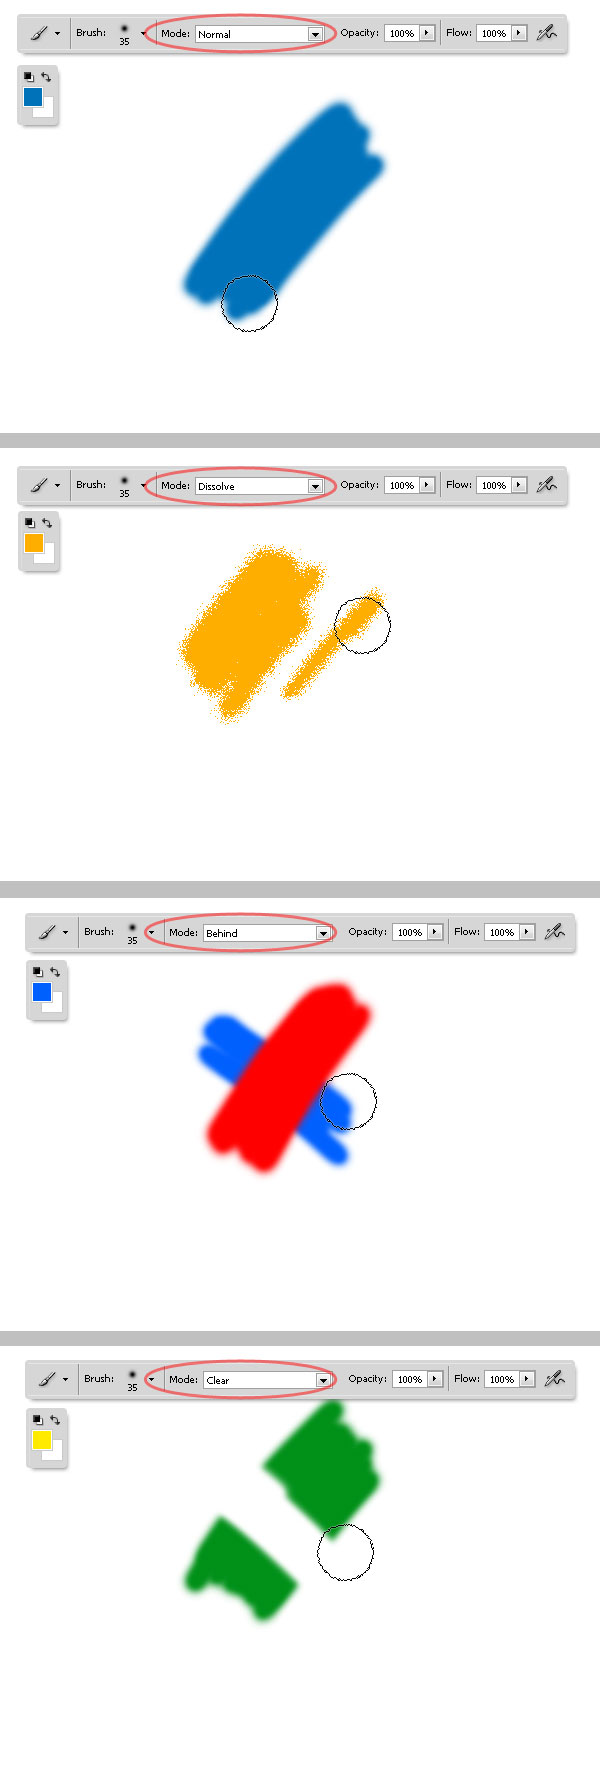
Modes: Normal, Dissolve, Behind and Clear
Let's review some of the basic Blending Modes.
The first on the list is the Normal Mode, which paints the color as is without applying any transformation to the color pixels.
The Dissolve Mode adds some noise at the edge of the brush stroke.
Behind Mode paints behind an existing stroke even if they are both on the same layer.
By using the Clear Mode you can delete a section of an existing stroke.

.jpg)
Congratulations @easy-art! You have completed some achievement on Steemit and have been rewarded with new badge(s) :
Click on any badge to view your own Board of Honor on SteemitBoard.
For more information about SteemitBoard, click here
If you no longer want to receive notifications, reply to this comment with the word
STOP