GRAPHITE PORTRAIT: AN ARTGUIDE THROUGH EXPERIENCE | LEARNING NEW PERSPECTIVE |
 ~
~
I always am very good with colors, that's what I know best myself and others have also said and complimented me that my forte in painting is giving life to it through colors. I thought that I can only be good with that. I thought that I couldn't go beyond what's my best. Then I started to realized that I can go beyond what I thought I could only do.
Two months ago, I joined an art group called GUHIT PINAS. There are a lot of aspiring artist there using each one's preferences in medium like oil painting, acrylic painting, watercolour painting and charcoal painting. I was inspired by the works of a lot of amazing artists from the whole Philippines. Mostly, artists in Guhit Pinas uses charcoal and graphite pencils as their medium. I never thought that though it's only black and white color, it could really be superb and that's what inspired me to make my first graphite portrait. I slowly bought my materials such as graphite pencils, kneaded eraser, eraser and brush. Although, I've bought my materials for graphite portrait, I still haven't made use of them until my cousin's graduation. I want to give her a gift since she graduated as Cum Laude. I am very proud of her achievement and success and I've thought of giving her a graphite portrait of herself.
I never had any experience with graphite as my medium but I was eager to do it and give it to my dearest cousin. I can show you how I did my first ever graphite portrait.
THE PROCESS
STEP 1:

I chose my reference photo and used the
Artist Grid application so that it will be easier for me to draw the grid lines. In the Artist's Grid app, you can edit how many grids you would like or you can edit the filters to B&W, posterize and edges. I cropped the 2 endline boxes of each sides.
What's the purpose for having gridlines?
The purpose for the gridlines is to have an accurate sketch of your reference. You can also do it in freehand but it takes longer to sketch than having a gridline.

STEP 2:
I started to draw the grid on my 9x12 inches Canson sketchpad.
I, then, sketch my cousin's portrait. I found it hard to sketch the mouth because I've only made a 6x8 gridlines and had bigger boxes. For more accurate and detailed work, you can have your gridlines for more than 10.

I almost forgot to take a photo of the sketch but gladly I remembered after I finished doing the first eye. 😂
STEP 3:

Shading is the crucial part in doing graphite portrait because shading will be the one to give life to your drawing. (I really don't know what I'm saying but just go with it. 😂)
I first shaded the eyes using a 6B and 7B pencils. I used 6B and 7B for the eyes because they both have darker shades.
Tip: Do not give hard strokes or put too much pressure on your strokes because if you happen to have a highlight or has a mistake
, you cannot erase it easily. Just light pressure and shading will do.
(I'm basing all of these tutorials and tips with my experience though it's my first time doing graphite portraits.)
As they said, "Experience is the best teacher"
STEP 4:

Next is, I shaded the mouth using my 2B mechanical pencil. I applied it with a light pressure for a lighter shade then I smudged it using a soft bristle round brush. I used a 4B pencil for the darker shade of the mouth.

Tip: Do not outline the mouth or any part of the face exept for the eyes. Shading and smudging will be the one to give effect to the mouth. Outlining it would make it messy and hard to erase.
Here's the brush that I used for the eyebrows
As others have said that girl's eyebrows are their life.
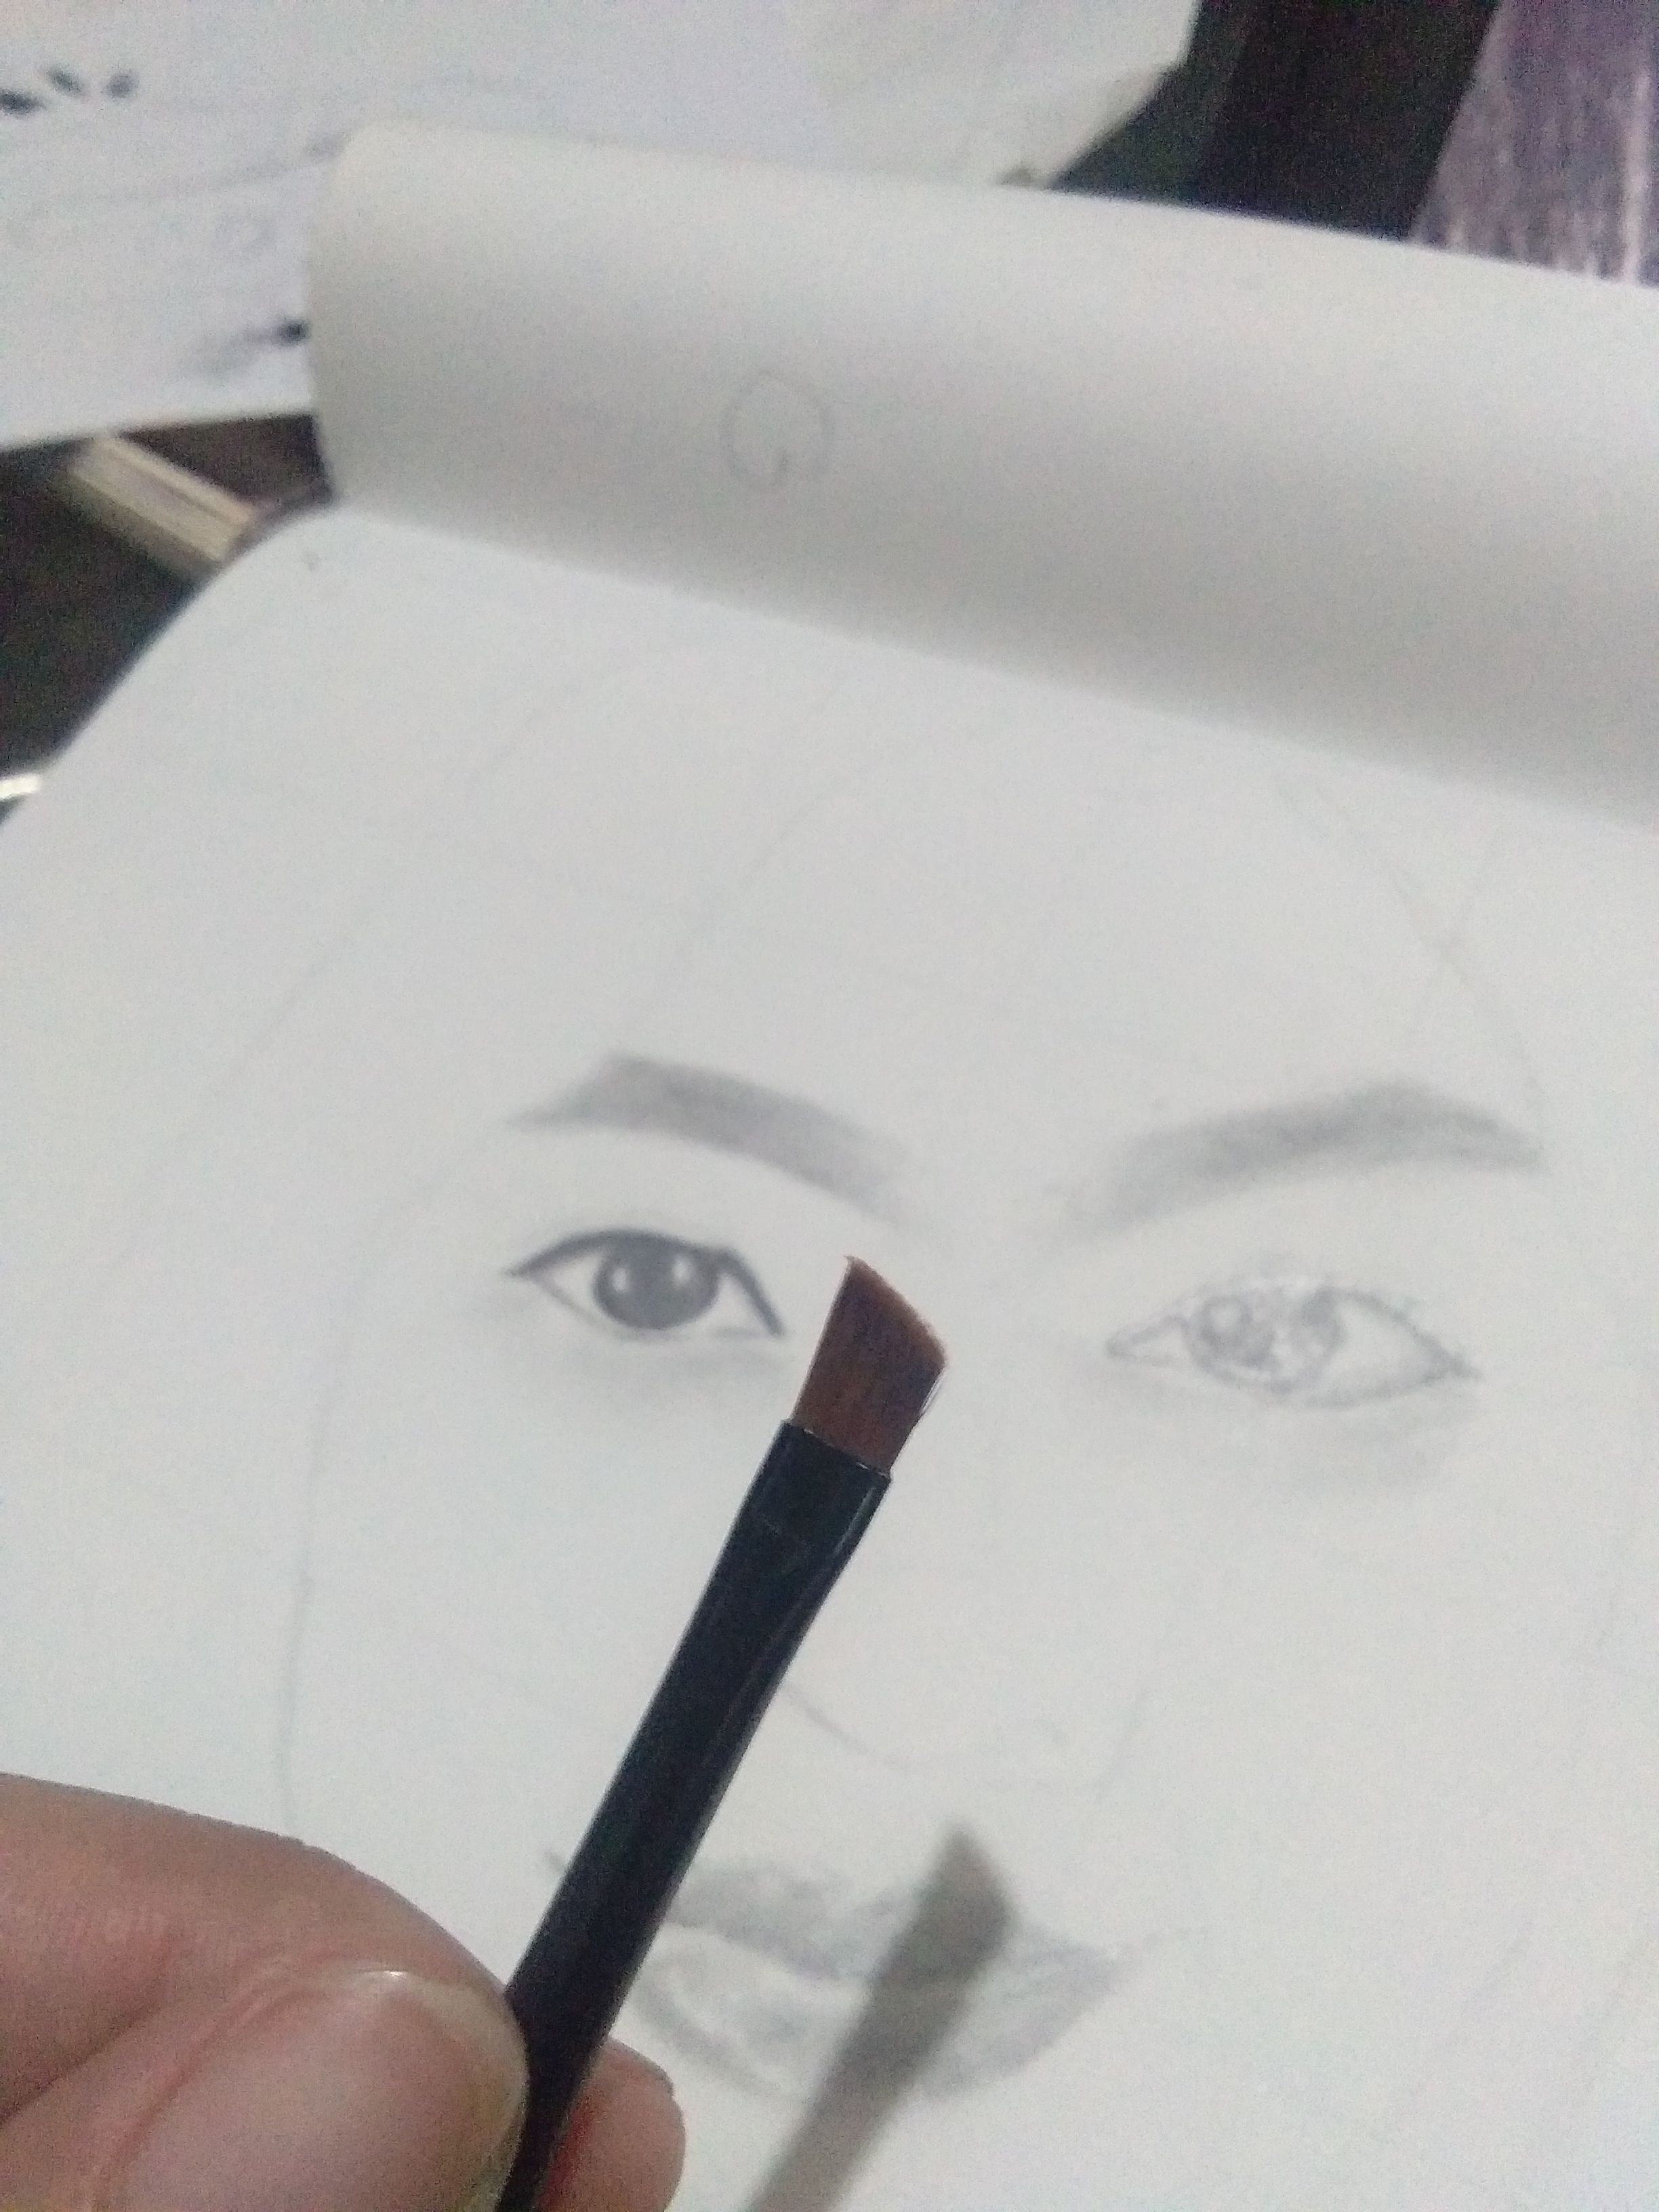
A girl can't go out without having drawn their eyebrows. Except for me, really. I really do not draw my eyebrows because my brows are already very thick.
STEP 5:
I also did put some lighter shade on the face, eyebrows and nose by scraping the lead of my 2B mechanical pencil to make a powder of it. I used my small round brush then smudge it in circular motion to the face.

I used a 6B pencil to darken the shades and smudged it again using a soft bristle round brush and a flat brush. To have some highlights, I used a kneaded eraser. I formed the kneaded eraser to a point then erase some darken part.


Still, I'm not satisfied with how I shaded the face and its smoothness, I erase some part then shaded it again with a graphite powder and smudging it using a brush.

I also did the same process to the neck. Shading and smudging.
STEP 6:
Let's now do the hair. As you all know, I never ever had any experience or even had any practice in realistic hair. This was the scariest part of the drawing. And look at what my first attempt with the hair. I thought that using charcoal would best fit for it and just scribble it down but I was totally wrong. I used the wrong pencil or maybe I really don't know how to use it so it turned out bad.

I really felt bad about this. I think I'd lose hope that I couldn't make this into a success but my determination to give it to my dearest cousin pushed me to strive harder and encouraged my self to try another attempt with the hair.
So, before I did my second attempt with the hair, I first composed myself and watch some tutorials about doing the graphite hair. I just watch that whole video then afterwards I also did try my 2nd attempt for the hair.
And gladly, I was able to do it properly.
How did I do the hair?
First, I used some lighter shades of pencils like 2b, 3b and 4b. I just applied enough pressure to it so that I can still erase when making highlights. Then I layered it with a darker grade of pencils such as 6b, 7b and 8b. I kept on stroking the hair and layering it until I've got the exact look of it.


So happy with the result of the hair and it's really becoming harder to draw as I am finishing it.


I am so proud of how the hair looks realistic and I'm a first timer in doing it. It may not be as good as professionals do but I really did do it great.
STEP 7:
Finishing touches. For the finishing touches, we only need to clean those areas where it's quite messy to look at and properly erase the gridlines and also the highlights and the smudged areas. And here it is. My first graphite portrait using graphite pencils.

I hope you did enjoy my tutorials and go through with my experience in doing it.
"The best gift you can give to someone is what you give from the heart."
I also wanna thank @badzkie123 because his curied post about the artguide in graphite portrait was a big help for me in starting my graphite portrait. You can also see his post with the link below. He's truly skilled with graphite and charcoal portraits. Please do visit his art blogs as well. 😁
https://steemit.com/cebuartguide/@badzkie123/graphite-portrait-using-charcoal-and-graphite-or-steemph-cebu-art-guide-contest
I have here's portrait of my love drawn using an ordinary pencil. I think I did used mongggol 3. This is a freehand drawing and the sketch literally took me 3-4 hours. It's hard to sketch accurately when doing freehand. I keot on reapeating it over and over again but I was able to do a good job here. The hair looks really bad but I realy don't know what I'm doing here.

I drew this last January 27, 2018 and I cam also see that my drawing have improved so far and will still improve.
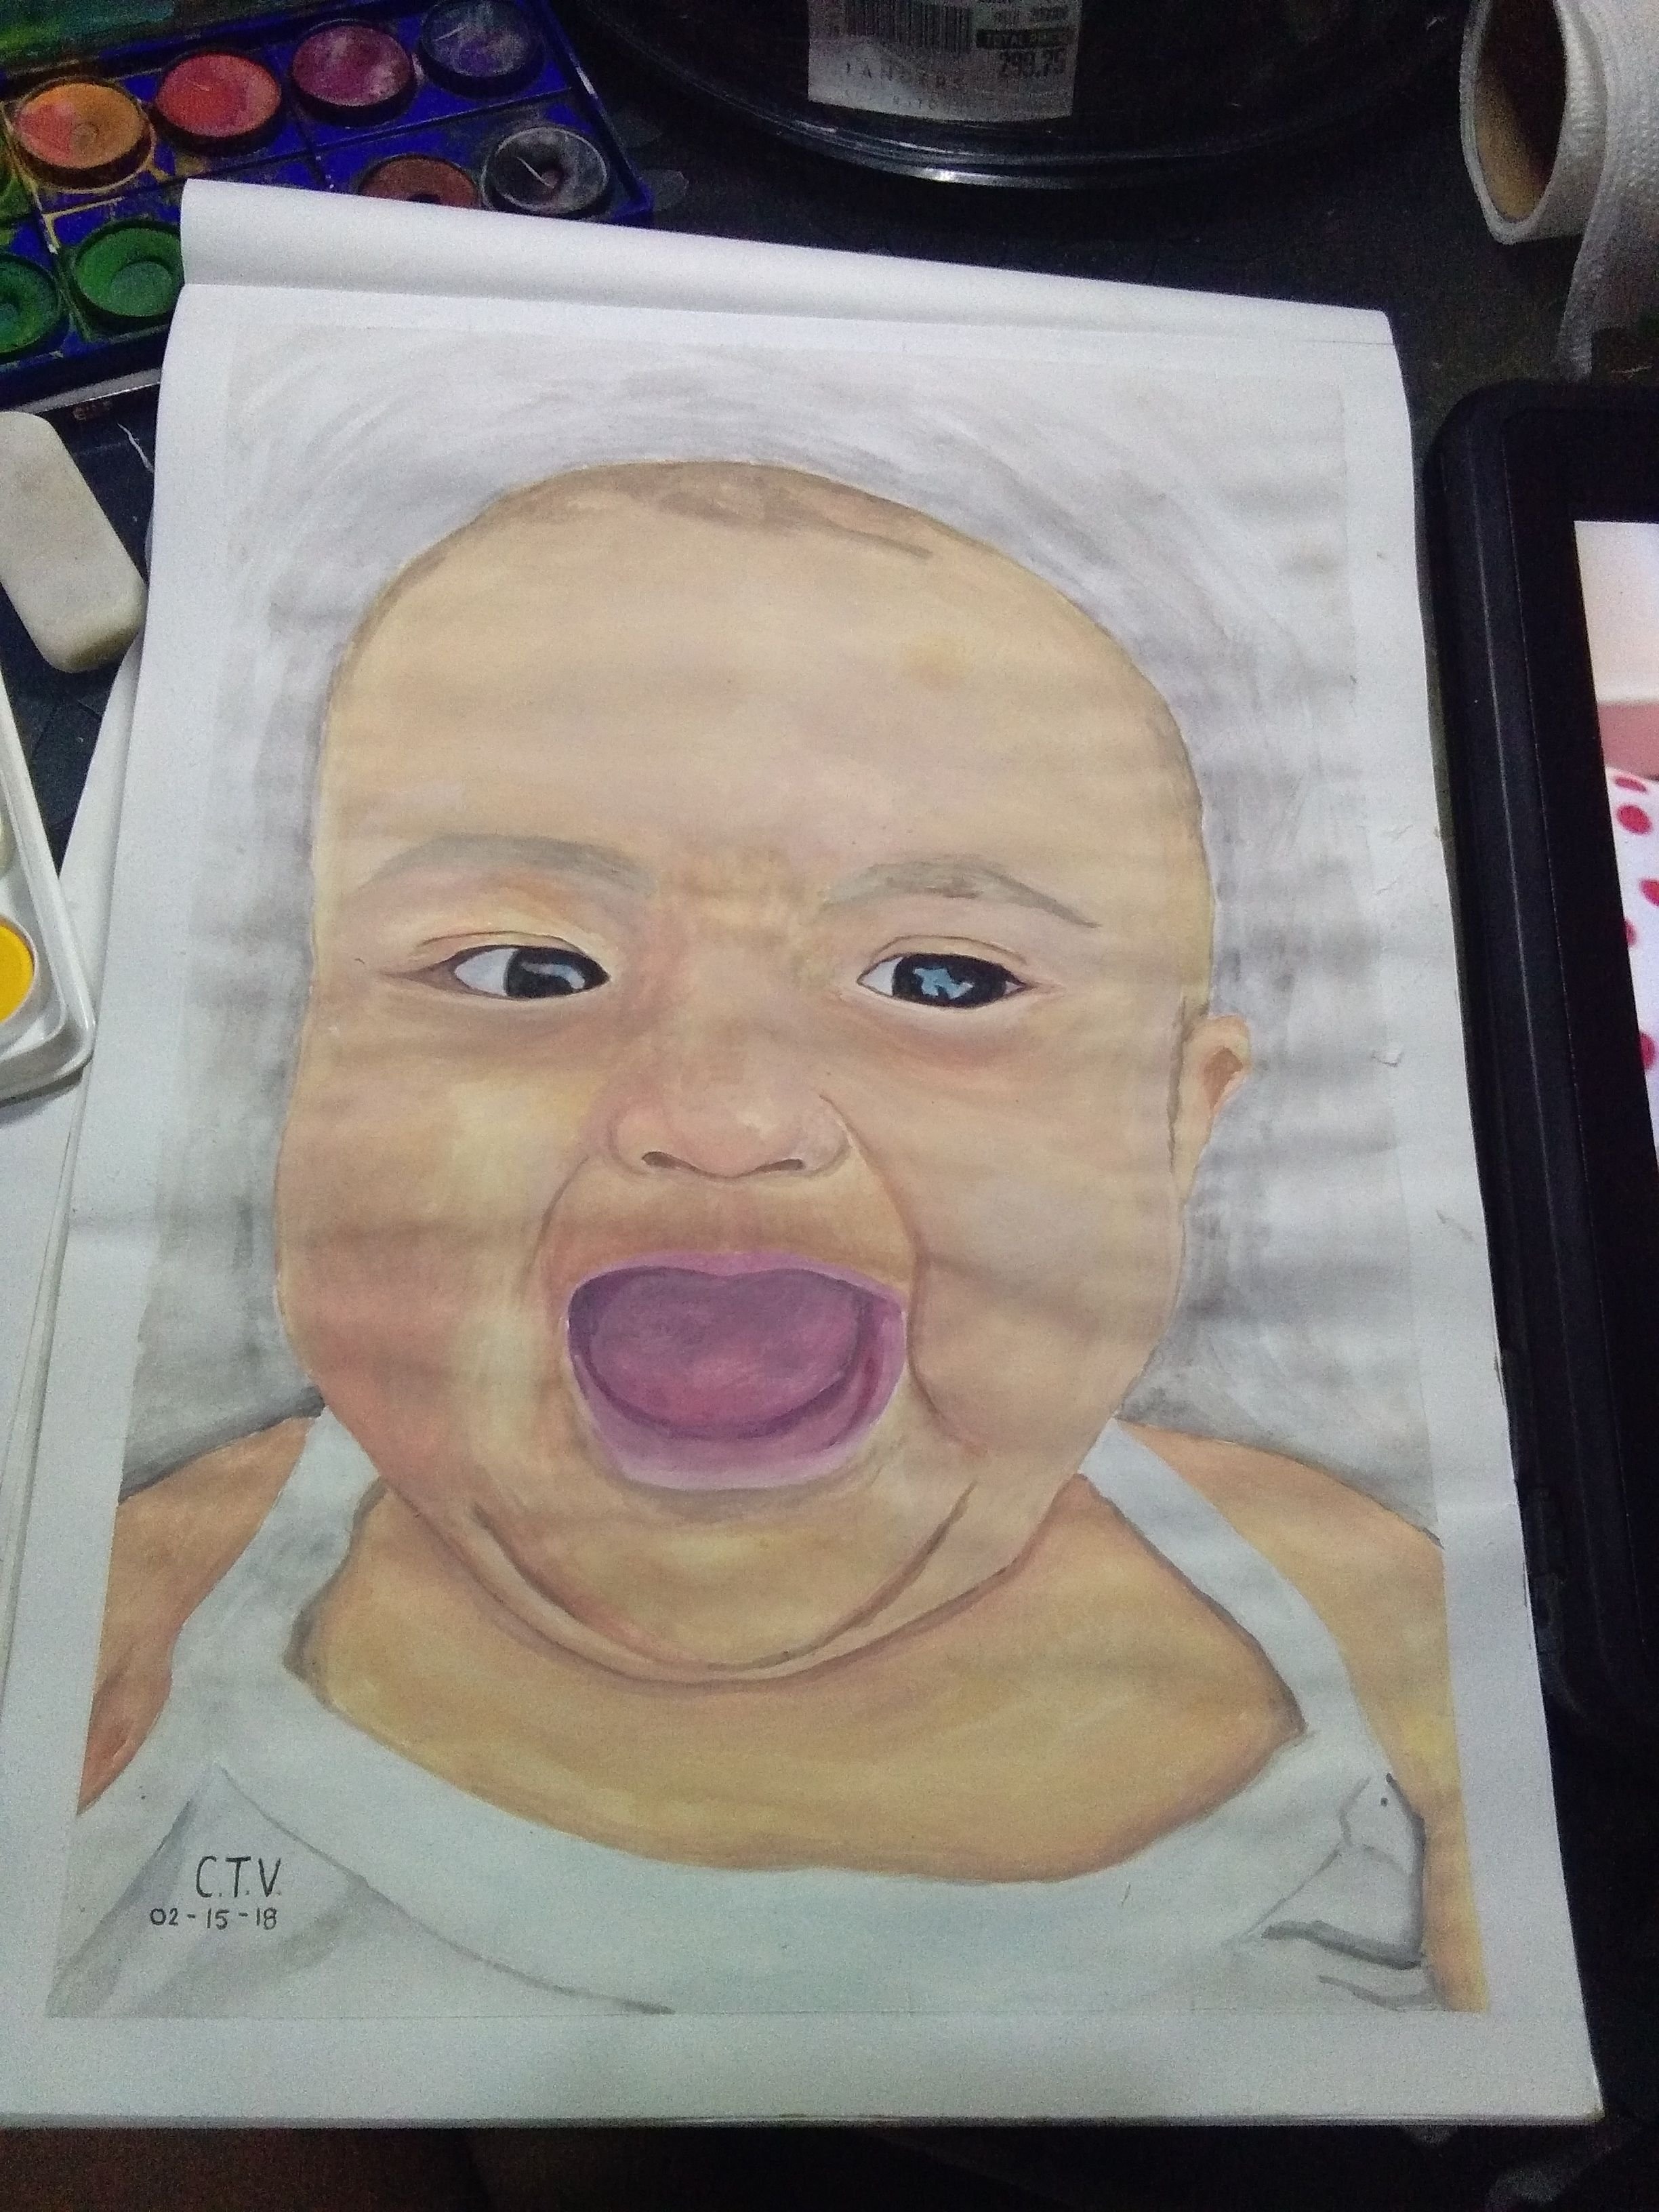
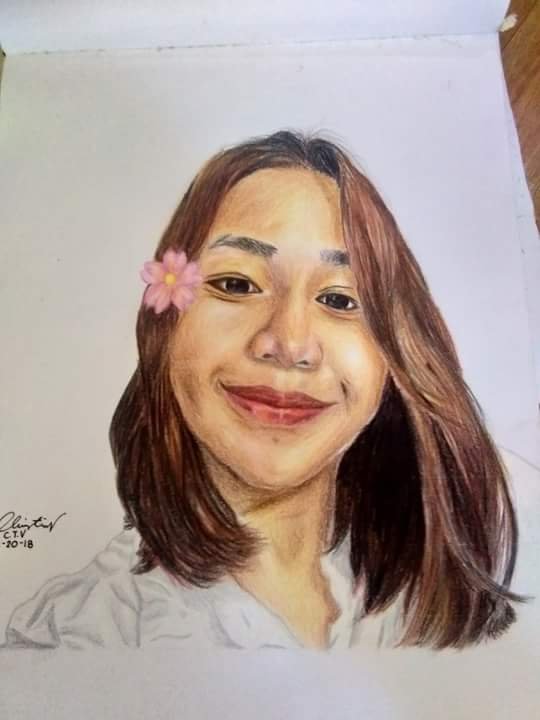
Here are some of my realistic portraits and colored pencil artworks.

Congratulations! This post has been upvoted by the communal account, @steemph.cebu by christney being run at Teenvestors Cebu (Road to Financial Freedom Channel). This service is exclusive to Steemians following the Steemph.cebu trail at Steemauto. Thank you for following Steemph.cebu curation trail!
Don't forget to join Steem PH Discord Server, our Discord Server for Philippines.
Congratulations! Your post has been selected as a daily Steemit truffle! It is listed on rank 9 of all contributions awarded today. You can find the TOP DAILY TRUFFLE PICKS HERE.
I upvoted your contribution because to my mind your post is at least 25 SBD worth and should receive 136 votes. It's now up to the lovely Steemit community to make this come true.
I am
TrufflePig, an Artificial Intelligence Bot that helps minnows and content curators using Machine Learning. If you are curious how I select content, you can find an explanation here!Have a nice day and sincerely yours,

TrufflePigwow thats amazing... guhitan mo rin ako lodi hehe
Thank you! 😊
If I have free time, I'll do one for you. 😁