Simple Thoughts #1: DIY Cork Bath Mat and Other Bath Mat Ideas
Dear Steemit friends :
A new bath mat is an exciting way to add style and personality to your bathroom. But where’s the fun in purchasing any plain old mat? We found 3 bath mats that will put your DIY skills to the test, including a wine cork bath mat we made, that will serve as a great addition to your bathroom space.
Moss Bath Mat
If you’re looking to add some greenery into your bathroom, try making your very own moss bath mat. Even if you lack a green thumb, the moss will thrive as it’s being watered every time you step out of the shower. The moss bath mat is also very soft and cushioned. Click here for the complete step-by-step on putting together your own moss bath mat.
Towel Bath Mat
A towel bath mat is another easy bath mat you can make yourself and customize to any size or color. By recycling old towels you don’t use anymore, you can create a super fluffy bath mat that looks great in your bathroom. Follow the tutorial here to put together a towel bath mat to fit your style.
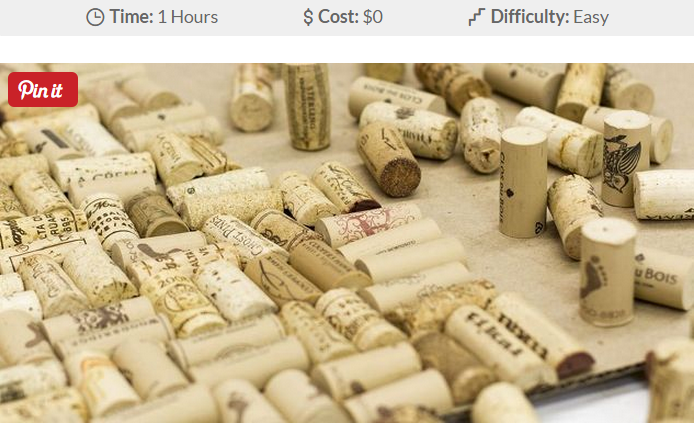
Wine Cork Bath Mat
The wine cork bath mat is one of our favorite bath mats you can make, so much so that we decided to make one ourselves. The process was super quick and easy, follow our instructions below and soon you’ll have your very own wine cork bath mat.
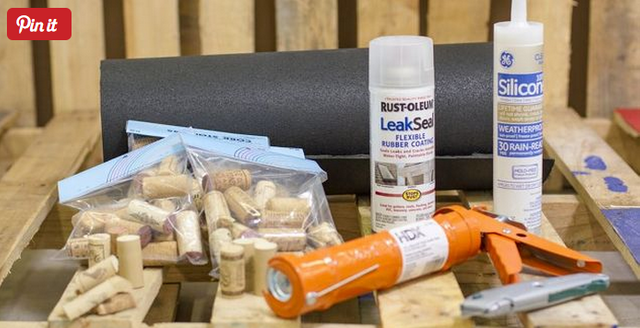
Step 1: Materials
Here are some things you’ll need before you can get started making your wine cork bath mat.
Rubber for the mat
100-150 wine corks
Silicone adhesive
Caulk gun
Box cutting knife
Rubber coating
The amount of wine corks you’ll need will depend on how large you want your bath mat to be. For our mat, we used exactly 112 wine corks. As for the base of the mat, we used a sheet of rubber that we cut down to the size we wanted. You can also use old exercise mats as well. The rubber coating is also important when making your wine cork bath mat, as it will prevent the corks from soaking in any moisture and getting moldy.
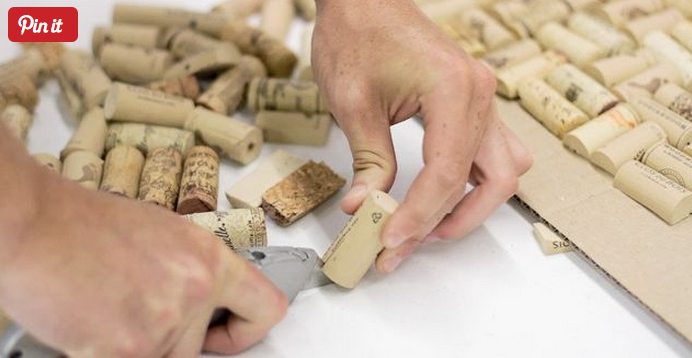
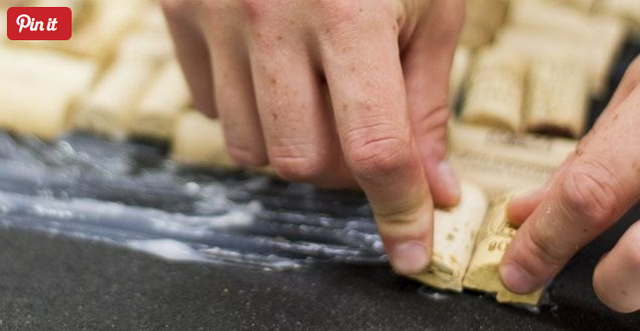
Step 4: Securing the Corks
After you have finished cutting the mat to fit your layout, it’s time to secure the corks. We used a waterproof, mold and mildew resistant silicone adhesive with a caulk gun to secure the corks to the surface of the mat. Our process involved adding the corks row by row using our pattern from earlier. We applied the silicone to the mat then spread it out with a piece of cardboard so there was a thick layer of adhesive. We then pressed each cork into the mat and repeated this until all the corks were on the mat.
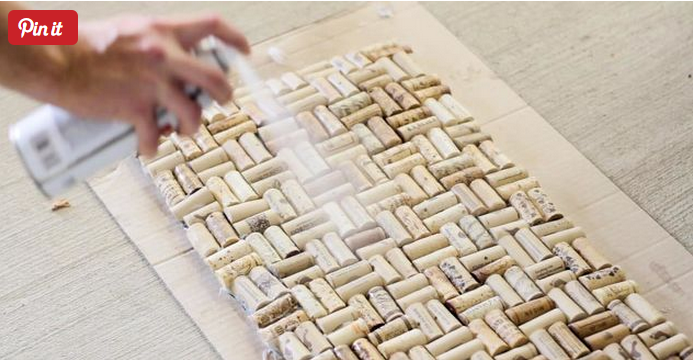
Step 5: Sealing the Corks
The next step is to seal your wine cork bath mat with the rubber coating. Wait until the silicone is dry before doing this so you don’t mess with the adhesive. The rubber coating will protect the corks from any moisture build-up which could lead to mold. The sealant also helps protect your cork bath mat so it lasts longer and you can enjoy it for many years to come.
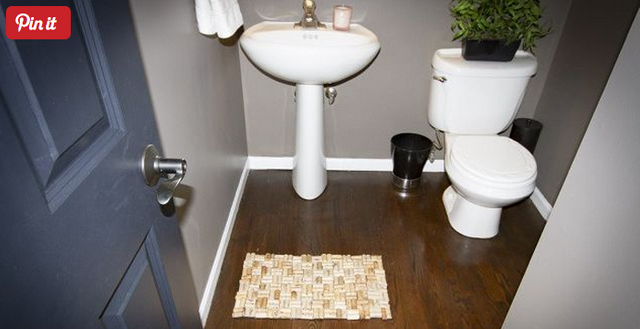
Step 6: Put it on Display!
After the sealant has dried, your cork bath mat is complete! The cork texture provides your feet with a nice massaging surface while stepping out of the shower and gives your bathroom a rejuvenated look.
Materials I used for this project:
Rubber for the mat
100-150 wine corks
Silicone adhesive
OMG...saw a huge bag of wine corks at a sale and passed them by, :( love how this looks especially against the dark wood floor, so cool. :)