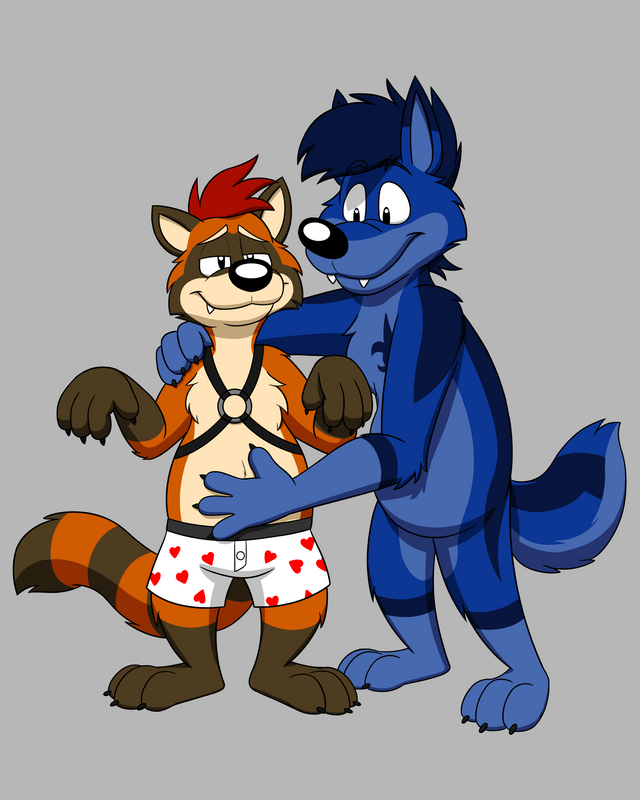
Raccoon Rubs | And Tutorial
Good raccoons need good belly rubs.
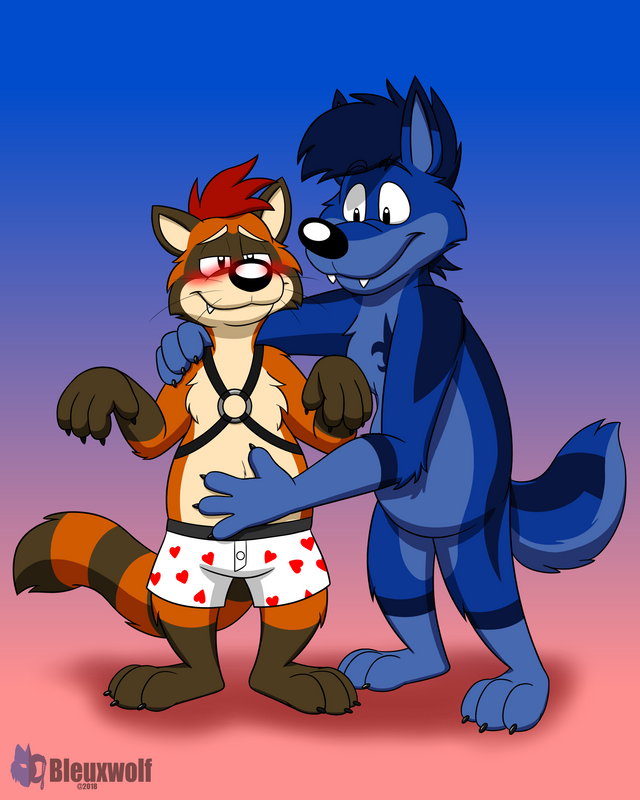
This is a Toony style full detail simple background drawing I did as part of an art trade with MrJames_Miller on twitter. This pic was pretty fun to do. As usual, I am going to show you step by step of how I produced this drawing from start to finish.
⚜ ⚜ ⚜ ⚜ ⚜ ⚜ ⚜ ⚜ ⚜ ⚜ ⚜ ⚜ ⚜ ⚜ ⚜ ⚜ ⚜ ⚜ ⚜ ⚜ ⚜ ⚜ ⚜ ⚜ ⚜ ⚜ ⚜ ⚜ ⚜ ⚜
Drawing Details
Digital | Krita
Wacom Cintiq 13 HD
Toony
Full Detail
Simple
2018-10-17
Art Medium:
Art Tool:
Art Style:
Level of Detail:
Background Detail:
Date Completed:
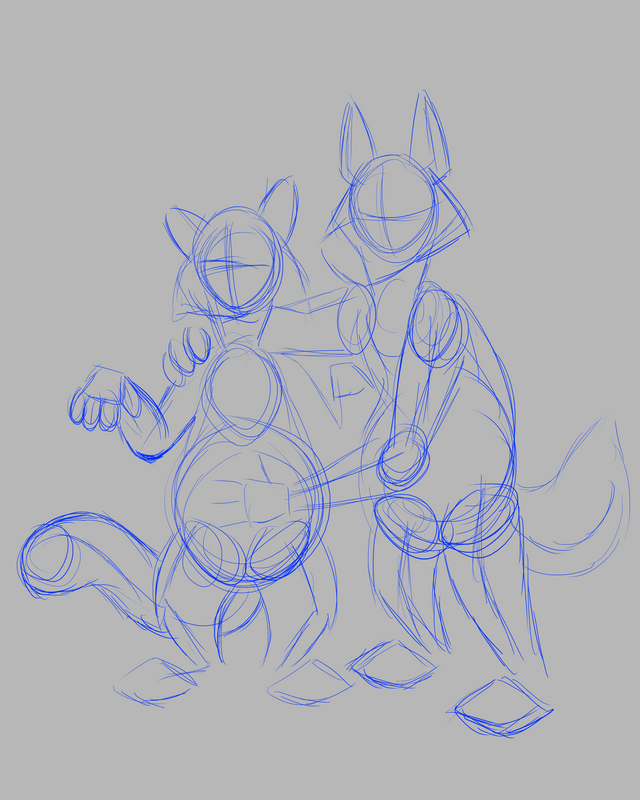
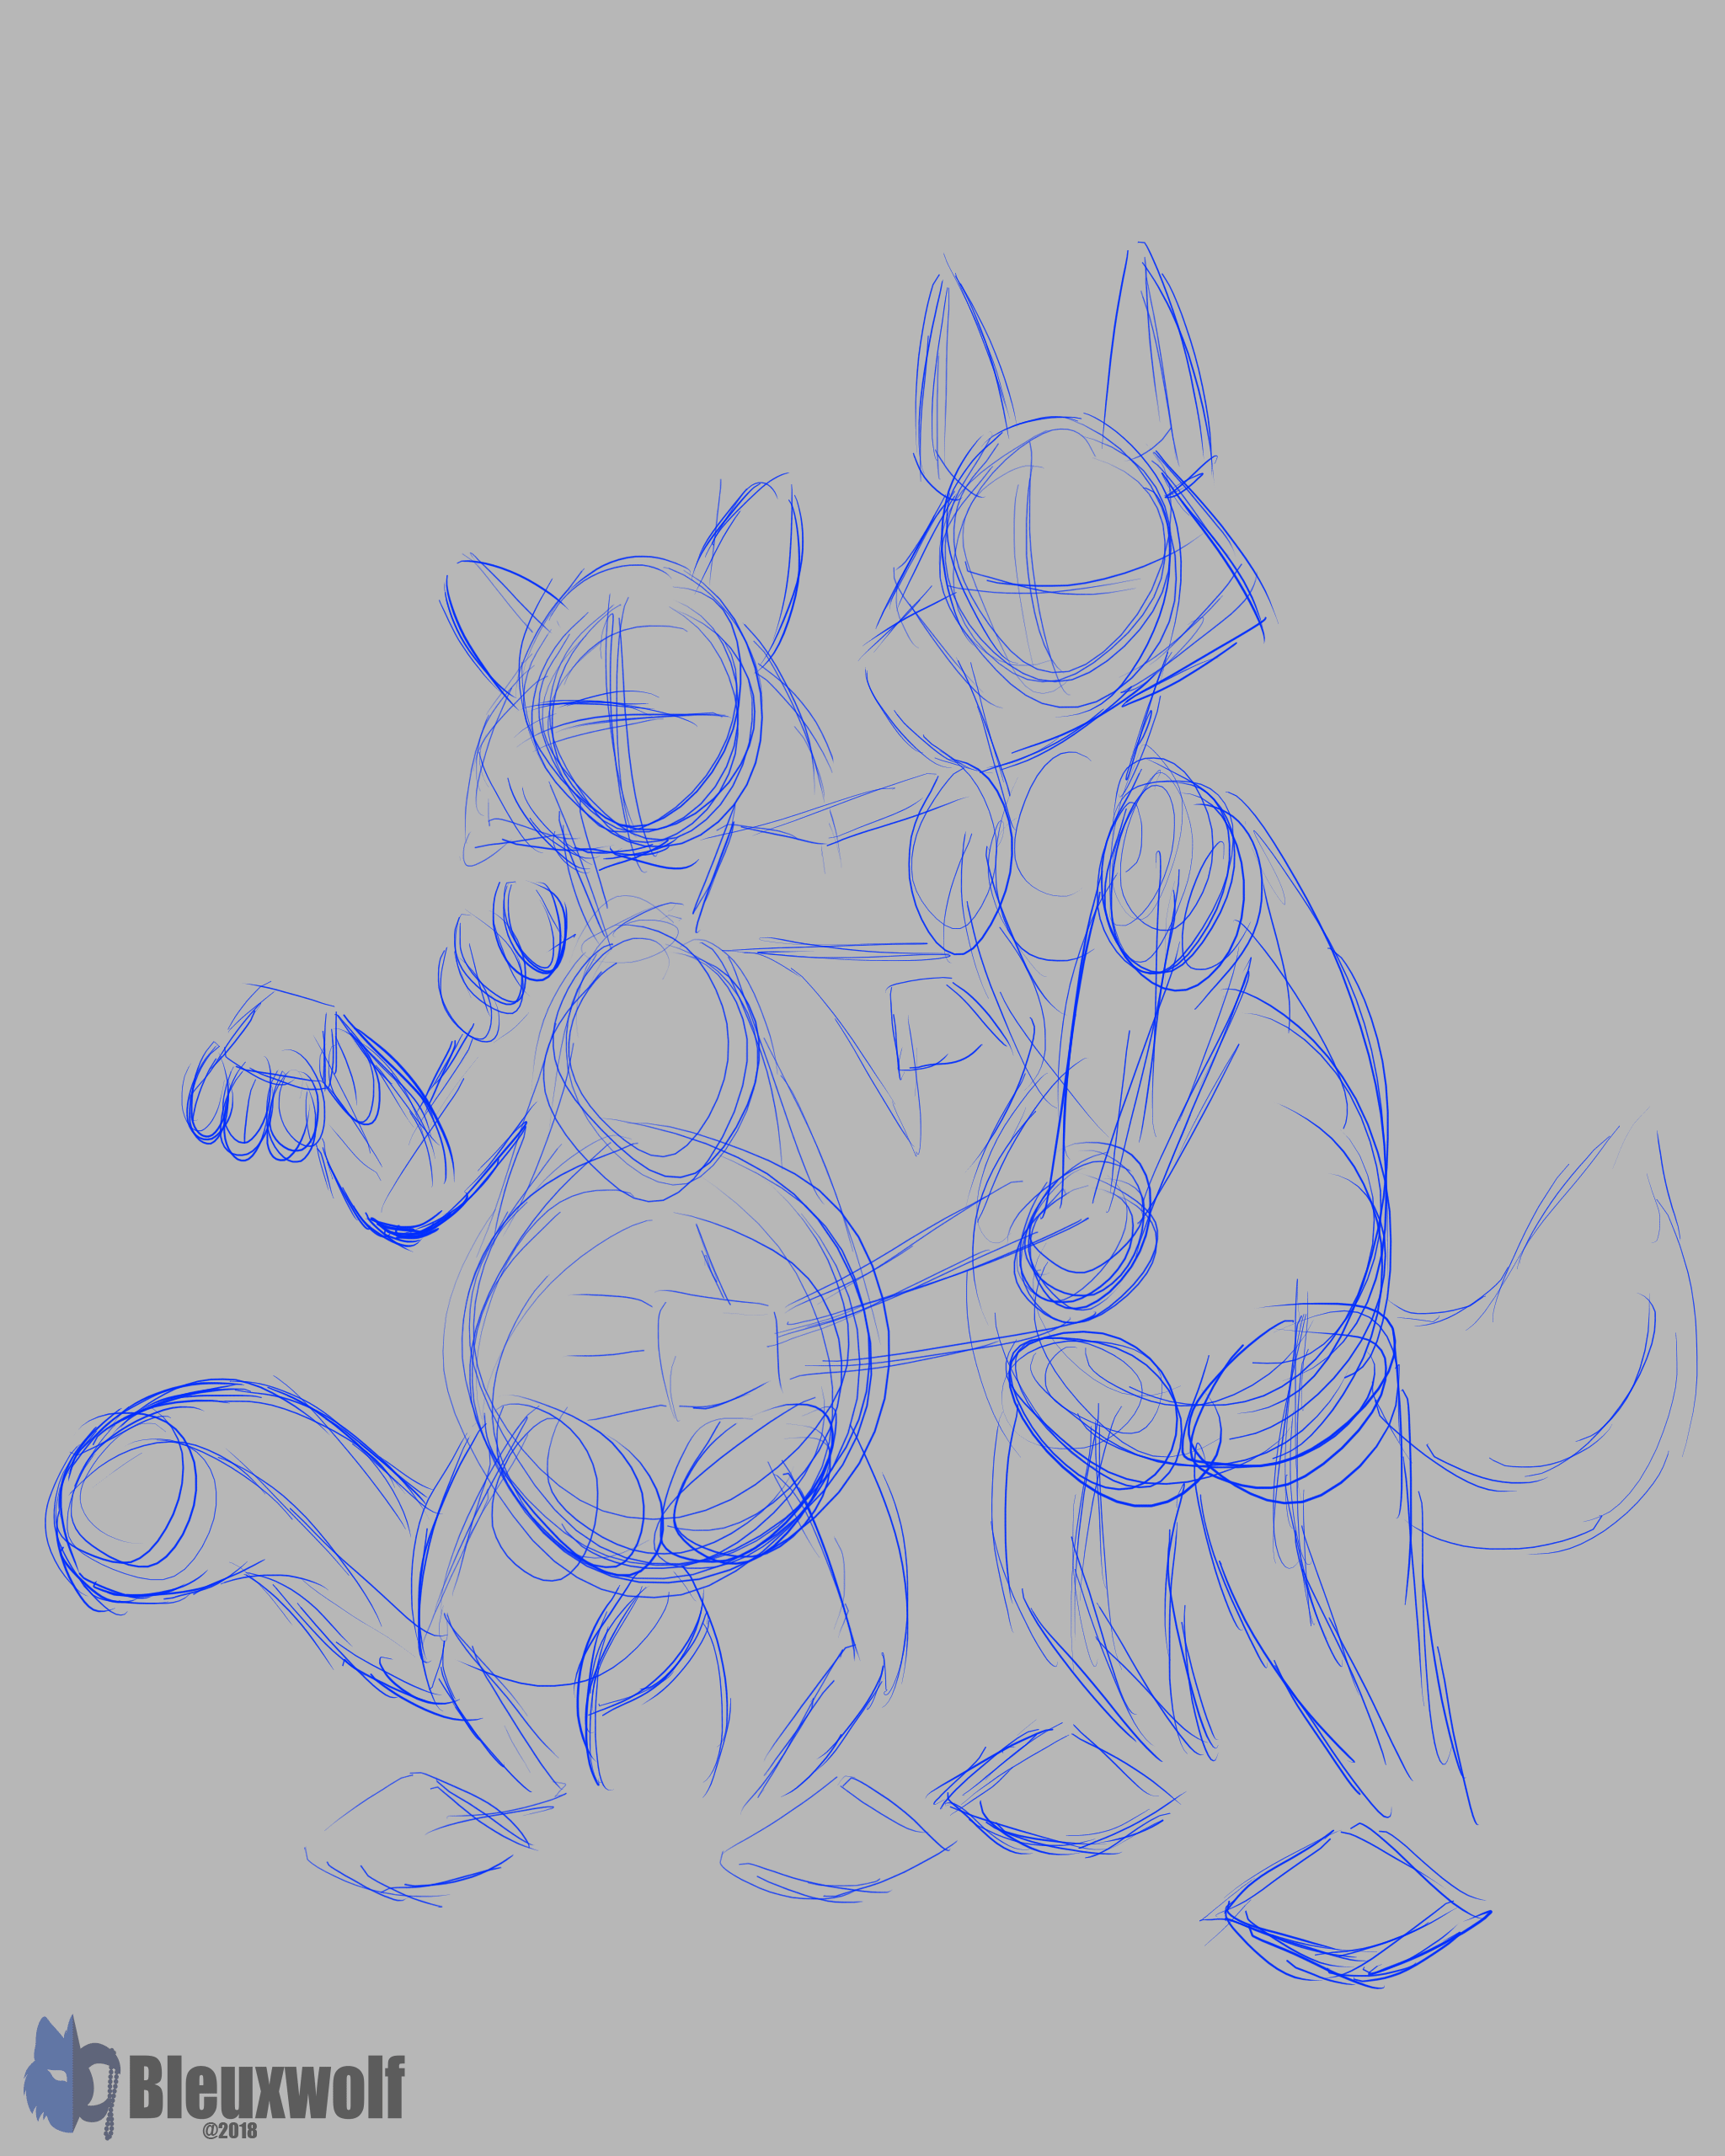
Canvas Prep/Rough Sketch
Start off with 4 layers (listed in order that appears in the layer section):
- Extra Sketch layer
- Fine Sketch layer
- Rough Sketch layer
- Canvas Background layer (neutral color like grey)
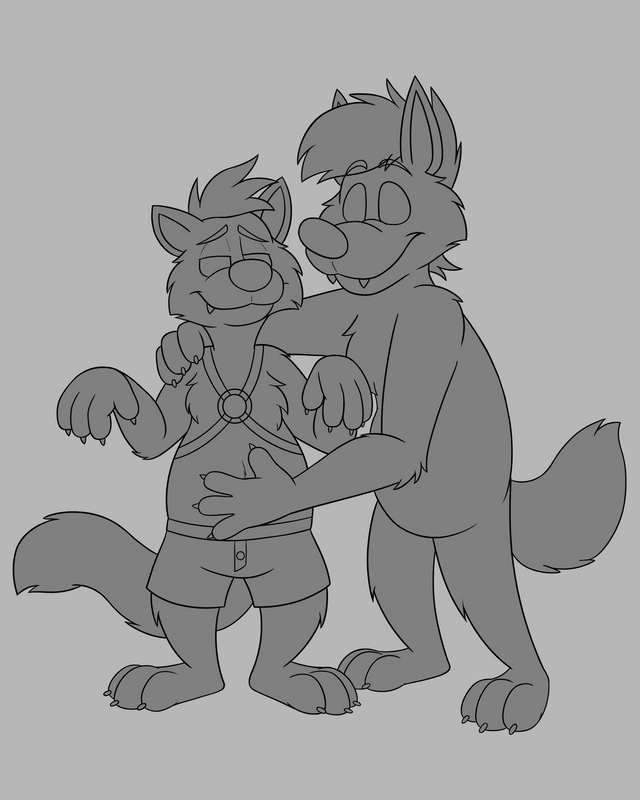
In the rough sketch layer, sketch out basic shapes of the characters and their poses.
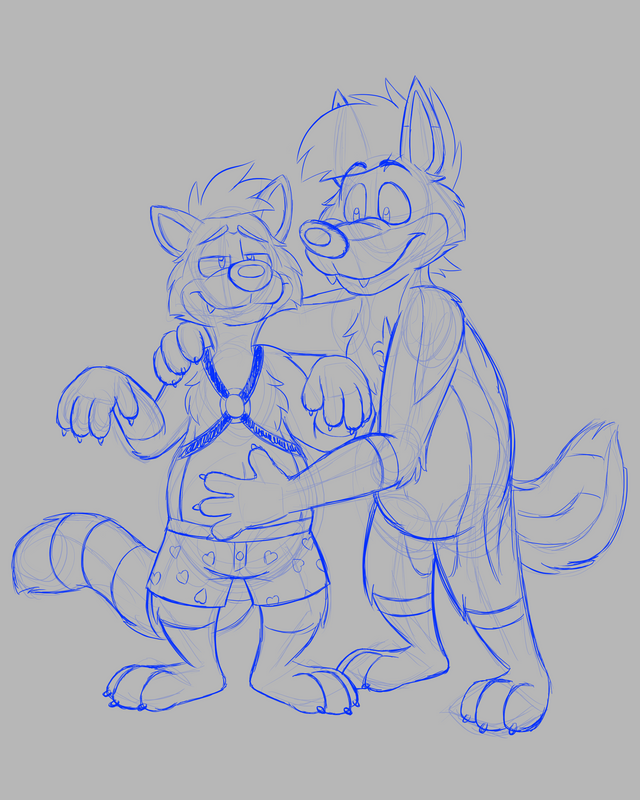
Fine Sketch
After the rough sketch is drawn to liking, sketch over the rough with a finer sketch to detail the sketch more. Make as much changes and edits as needed in this step to avoid having to do too many later in the drawing.
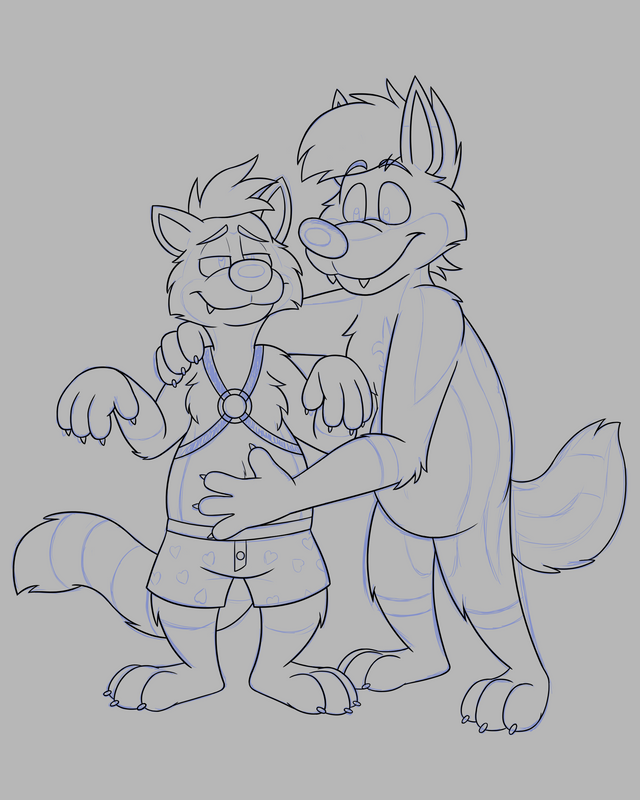
Lineart
Create a foreground folder with the following:
- Lineart layer
- Shading layer
- Folder for "Colors"
- Folder for 1st Character Colors (Folder will be masked to Base Color.)
- Folder for 2nd Character Colors (Folder will be masked to Base Color.)
- Base Color layer
Once the sketch meet satisfaction, simply trace over the sketch with a lineart in the lineart layer.
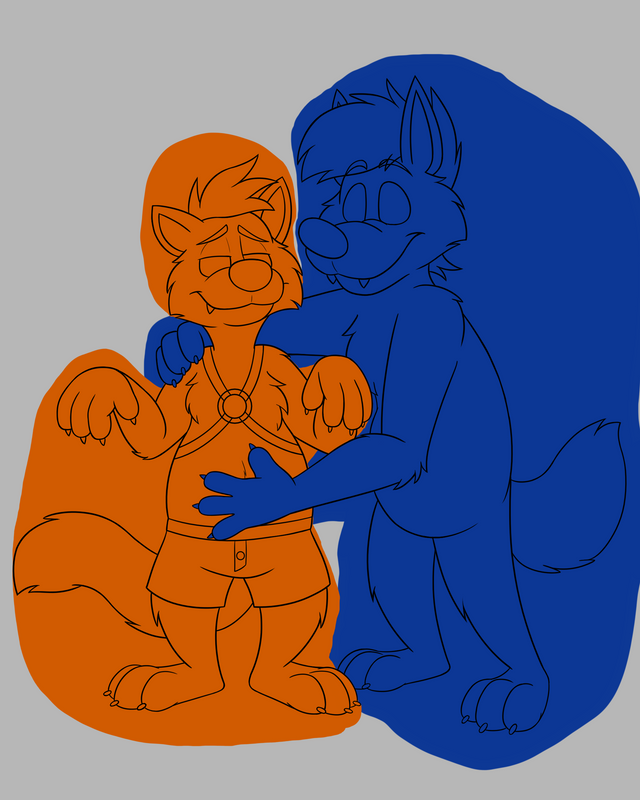
Base Color
With the contiguous (wizard) selection tool, select all areas that are outside of the characters' perimeters then invert the selection. This method is done this way to avoid having many gaps in the base color later on where they would need to be corrected. Then fill in the selection with a neutral color like grey in the base color layer. (Be sure the neutral color is not the near or the same as the neutral color for the canvas background so to be able to see the base color well.)
Primary Colors
This is what your character folder should look like for organization:- Folder for Character Colors
- Misc. Colors layer (Optional)
- Quaternary Color layer
- Tertiary Color layer
- Secondary Color layer
- Primary Color layer (folder's "base color")
- Folder for Character Colors
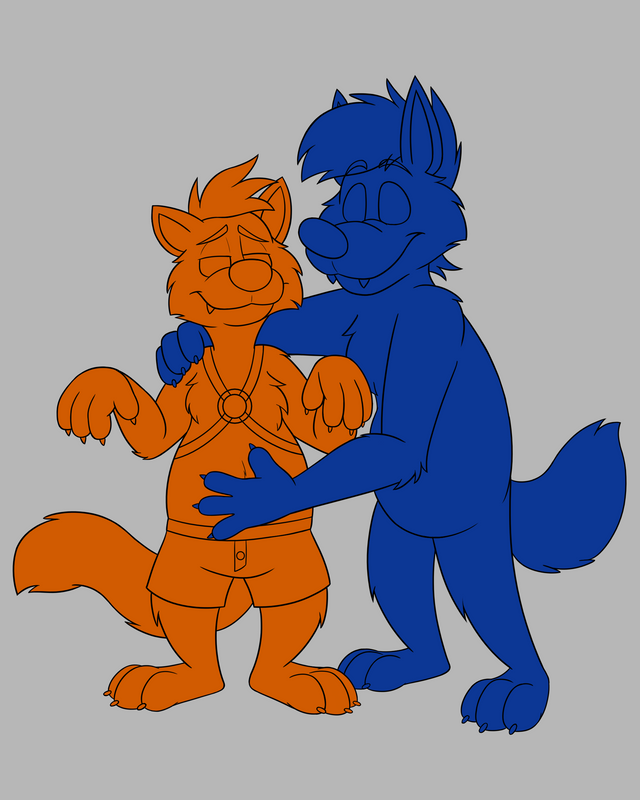
Begin drawing in the primary colors of the characters in their respective primary color layers, making sure their colors don't overlap in areas of the other character that is not desired. However, if coloring in a layer that is underneath the other, the color can overlap in areas that is not desired since the color above will cover over it.
Then simply mask the color folders down to the base color layer.
Detail Colors
Add in other color details for each of the characters in their respective folders utilizing each color layers in them for easy editing if needed. Mask the layers down to the primary colors in their respective folders.
Shading
In the shading layer using black color, draw in the shadows. Take note of where the light source is coming from. Turn down opacity or temporarily turn off any color folders or layers to be able to see the shading easier if needed. Turn down opacity in the shadow layer to 50% (and use Grain Merge if in Krita for better blending of colors).

Restore the other layers' opacity back to normal or turn back on is applicable.
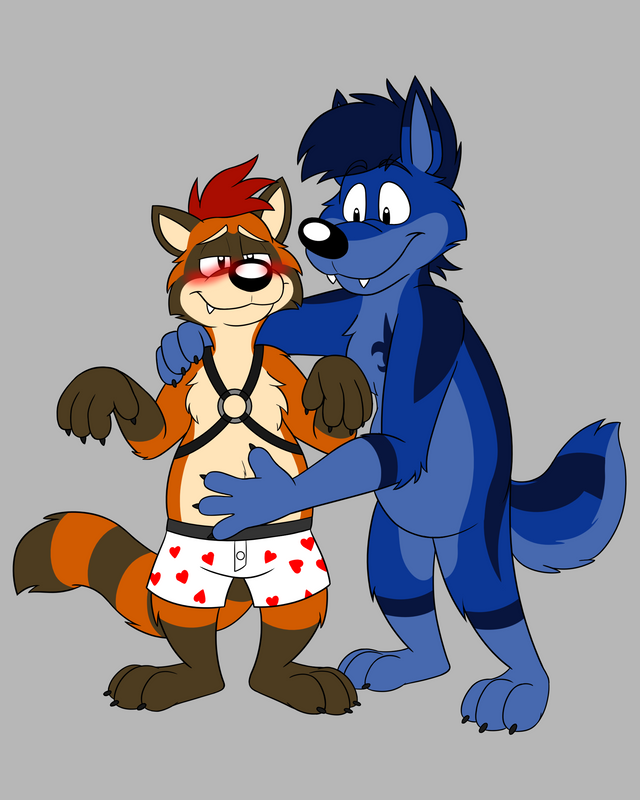
Background/Final Check/Final Result
Make two background layers outside and underneath the foreground folder (or just add one layer and use the canvas background layer as the background to work on). Add in a gradient background in the bottom most background layer and add some shadow underneath the characters in the other (top most) background layer.
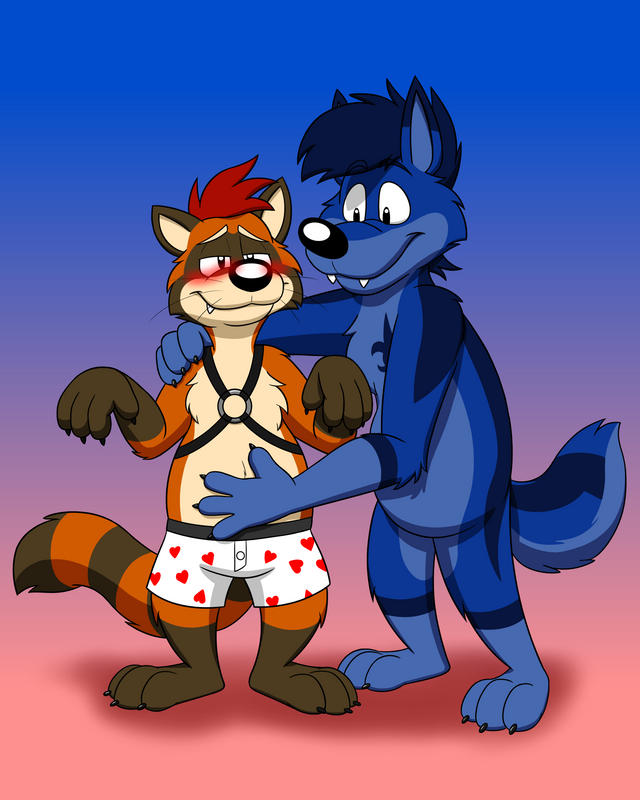
Then check over for any errors, add-ons, or changes that need to be made. And then sign and date and the drawing is complete!
Here is a animation of the steps.
Hope you enjoy the pic!
Jim © Tw: MrJames_Miller
Bleuxwolf © and Artwork by @bleuxwolf
⚜ ⚜ ⚜ ⚜ ⚜ ⚜ ⚜ ⚜ ⚜ ⚜ ⚜ ⚜ ⚜ ⚜ ⚜ ⚜ ⚜ ⚜ ⚜ ⚜ ⚜ ⚜ ⚜ ⚜ ⚜ ⚜ ⚜ ⚜ ⚜ ⚜
Interested more in my works or interested in me drawing you a pic, feel free to also check out my personal portfolio/commission site. Arts by Bleux
Hi @bleuxwolf!
Your post was upvoted by @steem-ua, new Steem dApp, using UserAuthority for algorithmic post curation!
Your UA account score is currently 0.108 which ranks you at #91027 across all Steem accounts.
Your rank has dropped 635 places in the last three days (old rank 90392).
In our last Algorithmic Curation Round, consisting of 329 contributions, your post is ranked at #325.
Evaluation of your UA score:
Feel free to join our @steem-ua Discord server
Hello @bleuxwolf, thank you for sharing this creative work! We just stopped by to say that you've been upvoted by the @creativecrypto magazine. The Creative Crypto is all about art on the blockchain and learning from creatives like you. Looking forward to crossing paths again soon. Steem on!
Thank you for the upvote and enjoying my work!