The birth, life, and death of a 3D print
Aries Figurine
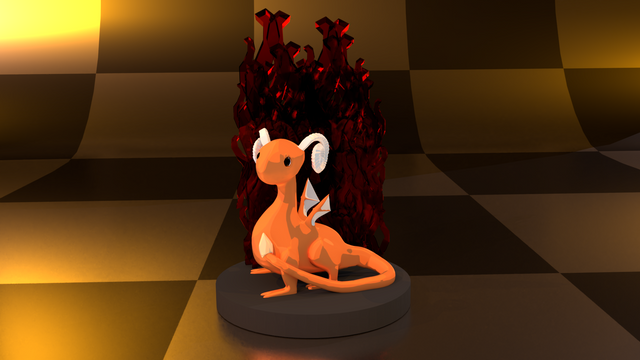
If you are one of my followers I'm sure you have seen several posts about this little dragon and where it originates. If not check out this post for all the details.
When designing something for use in a 3D printer you have to consider a lot of little things that you don't consider when making a 3D model for simple renders.
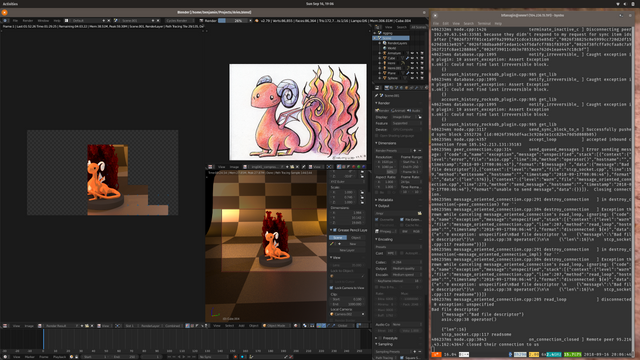
For one, the wings on this wee dragon were thin, far too thin for the printer to even attempt the job. Secondly the tail, though playfully drawn by @kristyglas it wouldn't have printed cleanly on anything but a dual head extruder (which I don't own). So I positioned the tail around her body and thickened her wings, but the model was lacking something. I wanted that Sky Lander / Amibo look so I gave her a nice solid base to sit on and still it didn't seem complete. So quickly I added the fire in the back and once that was there I truly had my piece. It may not be exactly like the source material but sometimes we have to find a happy medium and I think I have in this model.
Printing (Birth)
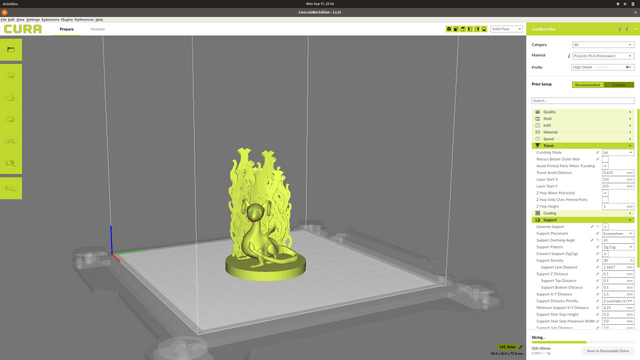
Once I had the model clear of issues I loaded it into Cura and tweaked a few of the settings I really wanted this model to come out well so I enlarged the model and set the print mode to "fine detail" loaded up this beautiful translucent PLA from Polylite (orange of course) and hit go. This was the first time I've used a translucent filament, but within an hour of the print job I was satisfied that I wouldn't be wasting plastic and went on to bed.
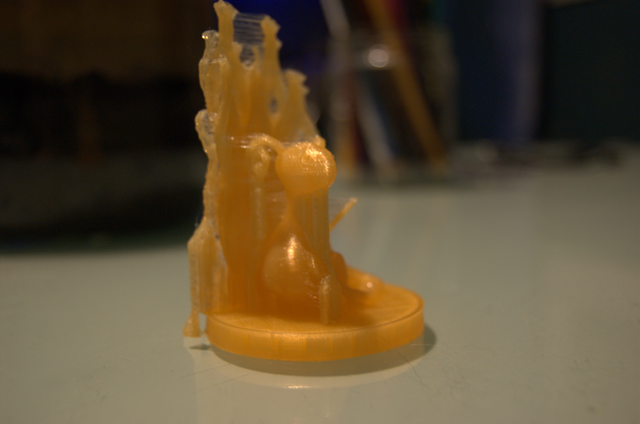
And so it was born at 2:30 AM a 3 1/2" baby complete with all its structural supports.
Life
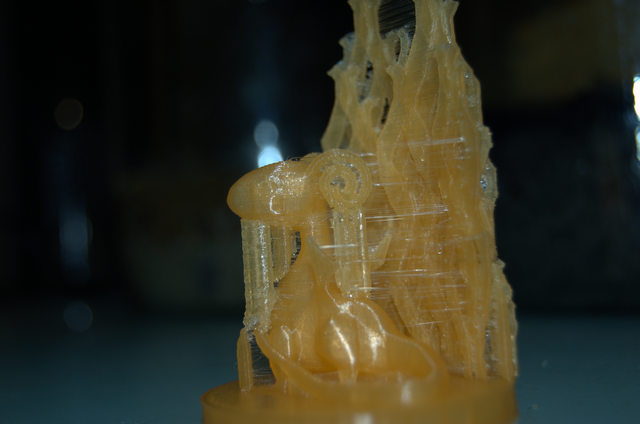
I gently removed all the large supports careful not to hurt her wings or horns, oh how nice she looks in real life, and how irritating it was that the camera couldn't capture her right, and those HAIRS those blasted hairs! I tried cleaning them but this was going to need a better, more drastic approach.
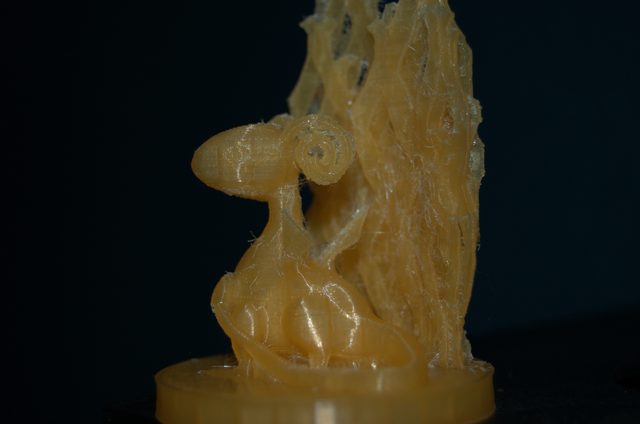
See the hairs?
So I took her around throughout the day, rubbing gently, removing little strands here and there. Everyone seemed to like the little girl, but they couldn't get over the hair either SOMETHING HAD TO BE DONE! That is where everything went wrong.
Death
One of the tricks of the trade, when it comes to 3D printing, is using heat to smooth the model. It can also get rid of hair as the smaller plastic strands will melt and fall back into the model. Most use a heat gun for this, but as I don't have a heat gun I decided that the toaster oven would be a good place to autoclave off the offending fur. I carefully placed the oven on the right temperature, just a hair under the filaments melting point, I waited patiently for it to get to temperature and placed my new work on a saucer to protect it from the metal in the oven. Just a few minutes, that's all it would take....
20 minutes later I remembered the oven... my dragon is gone. All that remains is a plastic puddle of smooth translucent orange plastic. Had I known its life was going to be so short I would have taken more pictures, maybe even avoided the toaster all together. However, I did learn an important lesson in this. Slow down, focus on one thing at a time, and change the settings on the printer to avoid the hairs in the future.
Anyway if you want to follow me you know how to do so, if you want to check out what inspired me check out @kristyglas and do the liking and following if you find it to your liking.
IPFS: Download
Till the next print,
Ben out
Hahahahahahah melting the print. That pain is too real. If you dont have a heat gun, try a hair dryer. Love designing and printing but my printer is currently out of comission.
You know, I don't think I have one of those either. This is my second 3D printer my first died, hope you get yours going again. Do you post any of your 3D work here?
Yeah, I have some stuff up here. I am waiting on a part that my buddy is going to print for me (the little mount that holds the fan)
Hello @bflanagin, thank you for sharing this creative work! We just stopped by to say that you've been upvoted by the @creativecrypto magazine. The Creative Crypto is all about art on the blockchain and learning from creatives like you. Looking forward to crossing paths again soon. Steem on!
wow what a brief life of your beautiful 3D print .... it is interesting to see the process from the 3D modelling to the 3D printing... too bad she's gone so soon !!
This post has been voted on from MSP3K courtesy of @isaria from the Minnow Support Project ( @minnowsupport ).
Bots Information:
Join the P.A.L. Discord | Check out MSPSteem | Listen to MSP-Waves
Hi @bflanagin!
Your post was upvoted by @steem-ua, new Steem dApp, using UserAuthority for algorithmic post curation!
Your UA account score is currently 0.622 which ranks you at #65786 across all Steem accounts.
Your rank has dropped 4 places in the last three days (old rank 65782).
In our last Algorithmic Curation Round, consisting of 441 contributions, your post is ranked at #427.
Evaluation of your UA score:
Feel free to join our @steem-ua Discord server
Congratulations! This post has been upvoted from the communal account, @minnowsupport, by HumbleBeaver from the Minnow Support Project. It's a witness project run by aggroed, ausbitbank, teamsteem, someguy123, neoxian, followbtcnews, and netuoso. The goal is to help Steemit grow by supporting Minnows. Please find us at the Peace, Abundance, and Liberty Network (PALnet) Discord Channel. It's a completely public and open space to all members of the Steemit community who voluntarily choose to be there.
If you would like to delegate to the Minnow Support Project you can do so by clicking on the following links: 50SP, 100SP, 250SP, 500SP, 1000SP, 5000SP.
Be sure to leave at least 50SP undelegated on your account.
Aww it's so cute!
I'm so sorry it got destroyed D:
Maybe try smooth sandpaper in the future? (I've never tried 3D printing, so no idea if this would work)
Also set up alarms if you ever use ovens again, don't want to burn the place :)