Merge 2D and 3D elements
Learn how to create a 3D model in Photoshop and edit multiple images using layers, masks and basic tools
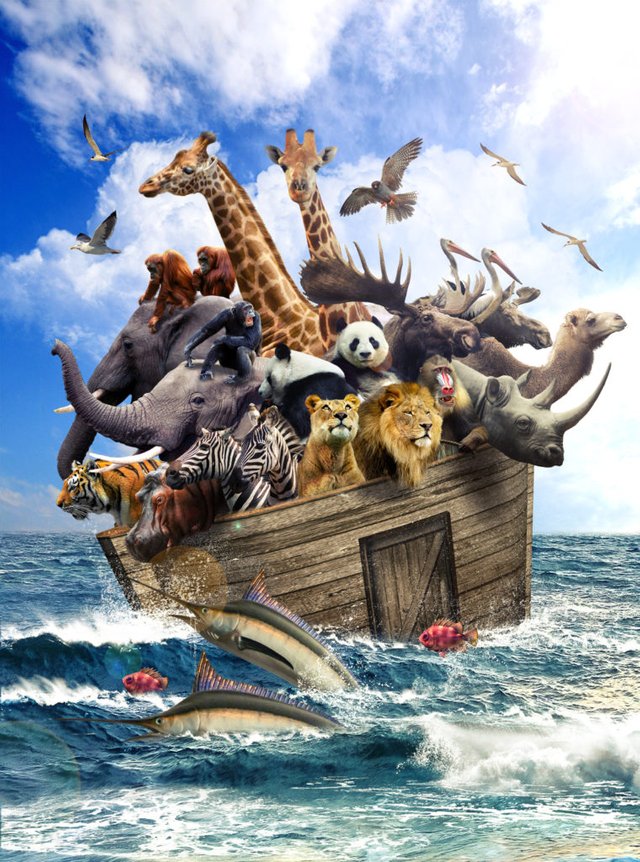
1. Create the background
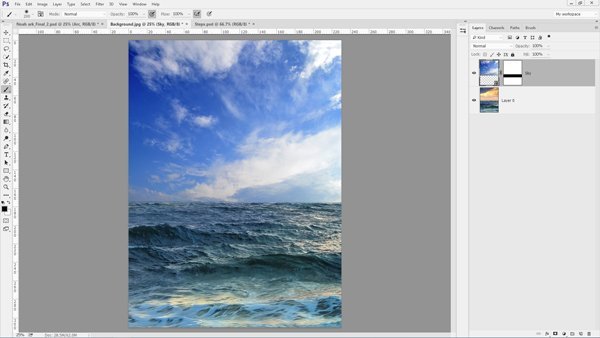
Insert a sky and some sea. Let’s add a layer mask and blend the images. Go to Layer>Layer Mask>Reveal All. Set the Foreground colour to black. Grab a soft-tip Brush (B), hold Shift and paint over the horizon to blend it.
2. Adjust the tones
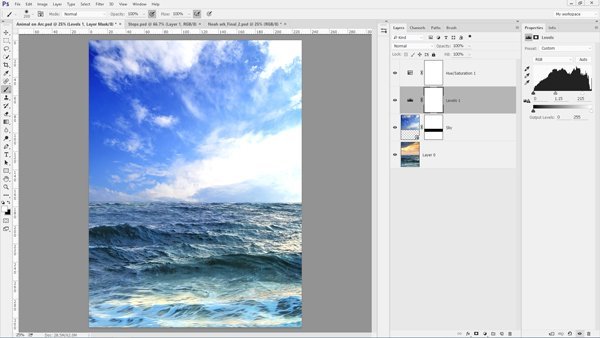
Insert a sky and some sea. Let’s add a layer mask and blend the images. Go to Layer>Layer Mask>Reveal All. Set the Foreground colour to black. Grab a soft-tip Brush (B), hold Shift and paint over the horizon to blend it.
2. Adjust the tones

To adjust the tones go to Layer>New Adjustment Layer>Levels. Set the Input Levels to 0, 1.15, 215. Now go to Layer> New Adjustment Layer>Hue/Saturation. Adjust the Hue to +25 and the Saturation to 10. Save your document. Go to File>Save As. Name it ‘Animals on Boat.psd’ and hit OK.
3. Load custom brushes
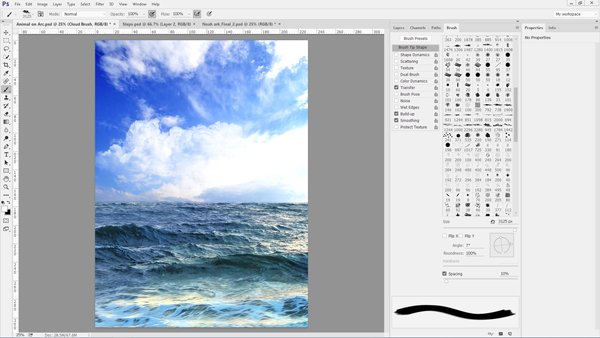
Create a new layer (Cmd/Ctrl+Shift+N) and name it Cloud_Brush. Grab the Brush tool (B), hit F5 and find a cloud brush, set the Foreground colour to white, resize it and paint over the canvas.
4. Open the 3D workspace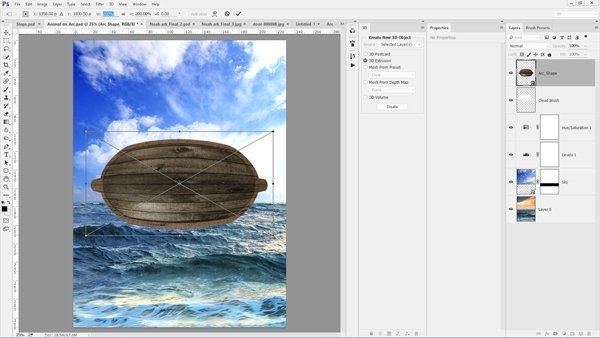
Arrange the 3D workspace to have access to the 3D panels. Go to Window>Workspace>3D. Now go to File>Place Embedded an image a wooden boat shape. From the top Option bar set the Horizontal/Vertical scale to 200% and hit Return/Enter.
5. Create 3D boat
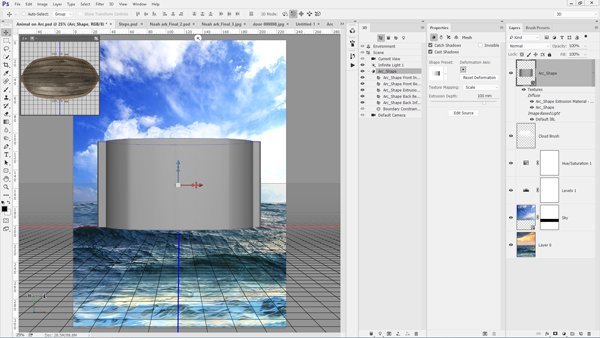
In the 3D panel, check 3D Extrusion and click Create. Grab the Move tool (M). In the Properties panel, set the Extrusion Depth to 100mm. Placing the mouse cursor over the model will activate the on-image controls. Go over the blue controller and Rotate it 90° around the ‘X’ axis.
6. Deform the object
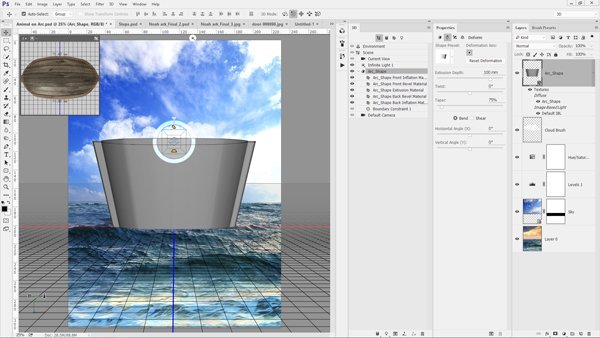
Let’s deform the 3D object. In the 3D panel, click on ‘Ark_Shape’. Now go to the Properties panel and click Deform. Make sure that the centre Deformation Axis is selected. Now adjust the Taper to 75%.
7. Add texture
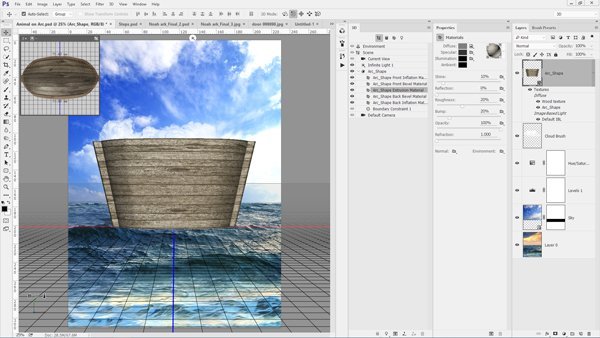
To add texture go to the 3D panel and select ‘Arc_Shape Extrusion Material’. Jump to the Properties panel, click the Diffuse icon and choose Replace Texture, locate the ‘Wood texture.jpg’ and open. Adjust the Shine to 10% and Roughness to 20%.
8. Apply decal
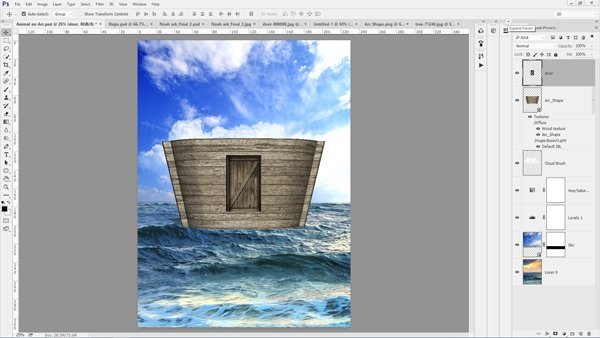
Add a door image directly onto your 3D model. Scale the image, placing it right above the 3D model, and hit Return/Enter. To apply it, go to Layer>Merge Down or press Cmd/Ctrl+E.
9. Modify the bevel settings
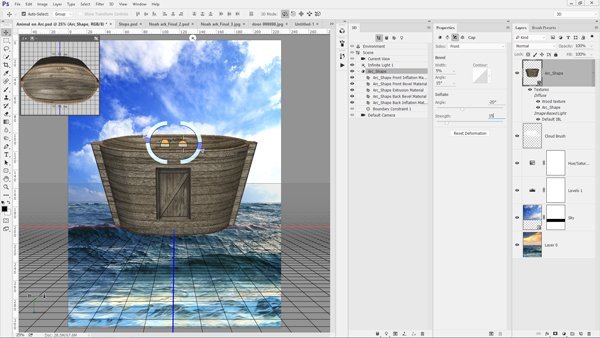
In the 3D panel select ‘Arc-Shape’. Now go to the Properties panel and click on the Cap icon (the third icon from the left). Click on the drop-down menu and choose Front. Set the Bevel Width to 5%, Angle to 15%, adjust the Inflate Angle to -20% and Strength to 10%.
10. Adjust the link
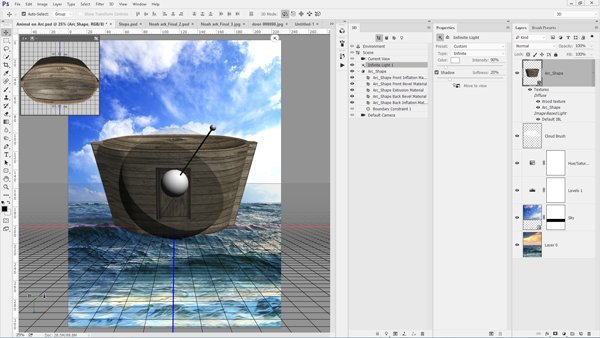
In the 3D panel click Infinite Light. Use the on-image controller to adjust the light, placing it in front of the 3D model and moving it to the top-right corner. Render the image by going to 3D>Render 3D Layer.
11. Mask it
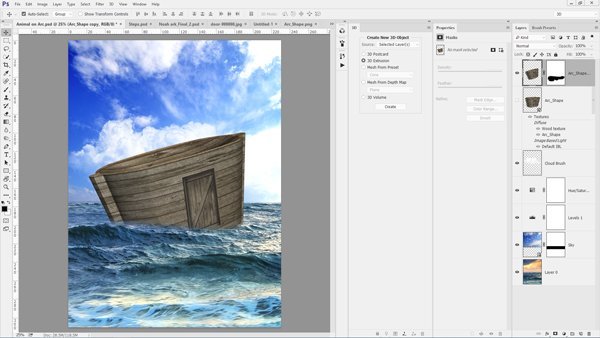
Duplicate the layer (Cmd/Ctrl+J) and then go to Layer>Rasterize>3D. Hide the original 3D layer. Hit Cmd/Ctrl+T. Resize the image and turn the left side down. Create a layer mask (Layer>Layer Mask>Reveal All). Grab a soft brush and paint the bottom to immerse the boat.
12. Enhance contrast and colour
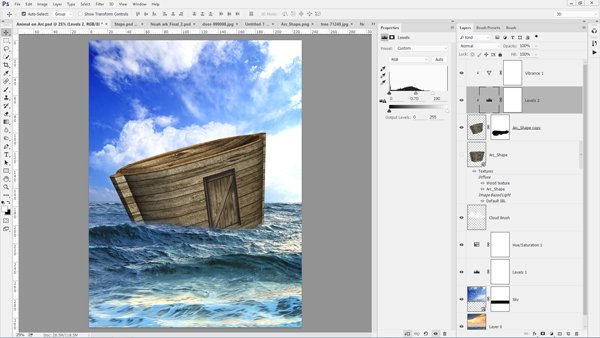
Go to Layer>New Adjustment Layer>Levels. Check ‘Use Previous Layer to Create Clipping Mask’ and hit OK. Adjust the Input levels to 0. 0.70, 190. Now boost the colour. Go to Layer> New Adjustment Layer>Vibrance. Set the Vibrance to +5 and Saturation to +15.
13. Work on the shadows
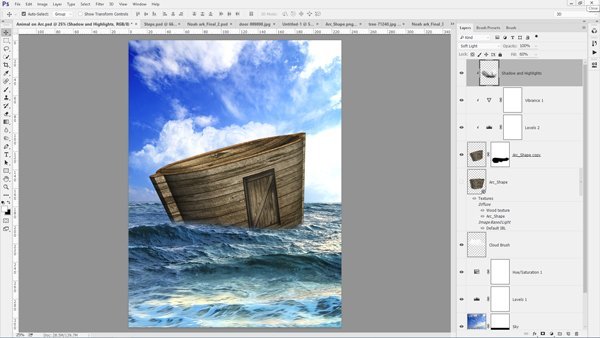
Go to Layer>New>Layer. Name it Shadows/Highlights, check ‘Use Previous Layer to Create Clipping Mask’ and set to Soft Light. Set the default Foreground/ Background colour (D). Grab a soft brush and use black to add shadows on the left side and white to add highlights on the top.
14. Choose splash brushes
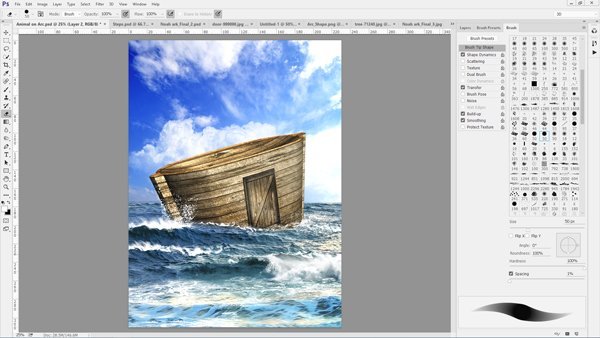
With the Brush tool selected hit F5. Set the Foreground colour to white (press ‘X’). Choose a custom splash/wave brush, set the appropriate size and paint over the waves to create the crest and splash water around the boat.
15. Place the giraffe
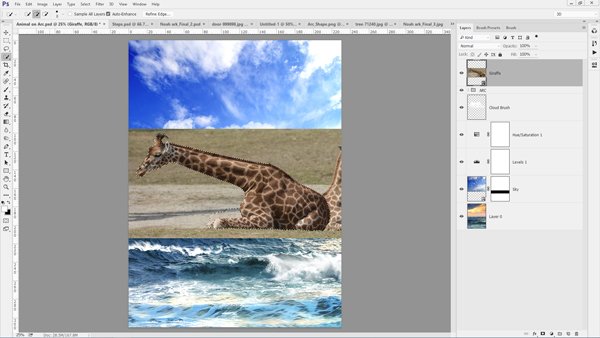
Add a giraffe and select the Quick Selection tool (W). In the Option Bar select ‘Add to Selection’, check Auto-Enhance, choose a small brush and select the giraffe. (If you select the background, press and hold Opt/Alt to switch to Subtract from Selection, click and drag to remove.)
16. Select Refine Edge
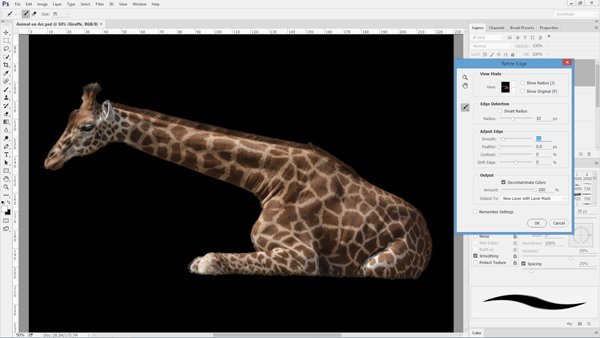
Go to Select>Refine Edge. Adjust the Radius to 10 pixels, Smooth: 10 pixels, check Decontaminate Colours, Amount: 100% and then click OK. (Use the Brush tool to enhance the mask if necessary.) Now go to Layer>Layer Mask>Apply.
17. Use Puppet Warp
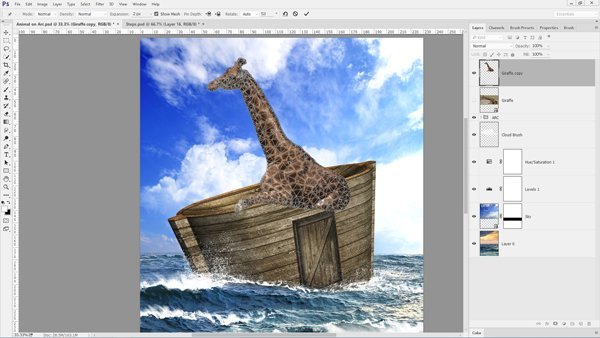
Go to Edit>Puppet Warp. Add few control points over the body and neck and then drag it to straighten the neck. Hit Return/Enter to commit the change. Add a layer mask and mask the body to make it fit in the boat.
18. Make adjustments
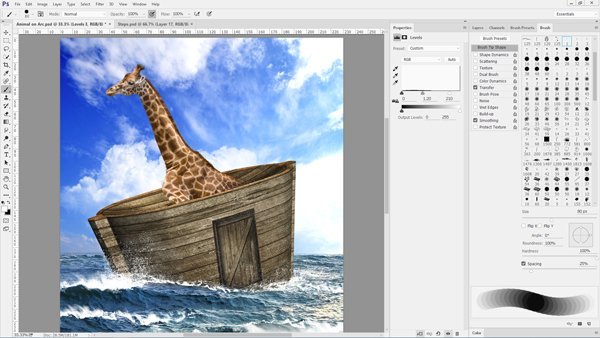
Go to Layer>New Adjustment Layer>Levels. Check ‘Use Previous Layer to Create Clipping Mask’ and hit OK. Adjust the Input levels to 0, 1.20, 210. Now boost the colour. Go to Layer>New Adjustment Layer>Vibrance. Set the Vibrance to +20 and Saturation to +20.
19. Create fur and hair
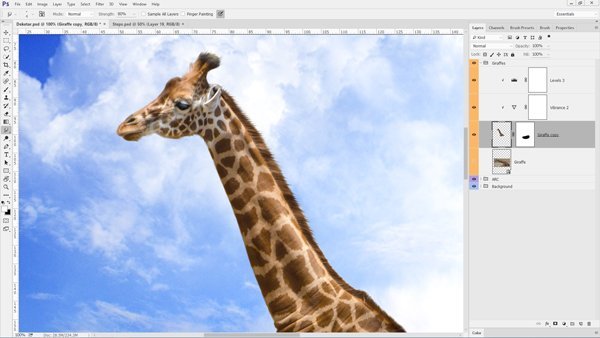
Now hit Z and zoom in. Grab the Smudge tool, and then choose a small, soft-tip brush and set the Strength to 80%. Now with short and quick strokes, start pushing the hair/fur outwards along the neck and the body.
20. Create a neutral layer
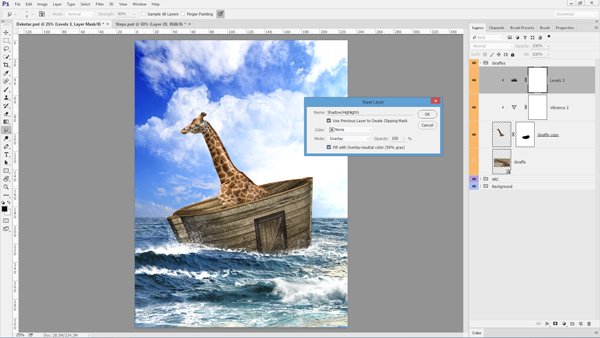
Now hit Shift+Cmd/Ctrl+N. In the dialog box name it Shadows/Highlights, and check ‘Use Previous Layer to Create Clipping Mask’, change the blend mode to Overlay. Check ‘Fill with Overlay-neutral color (50% gray)’ and hit OK.
21. Dodge and burn
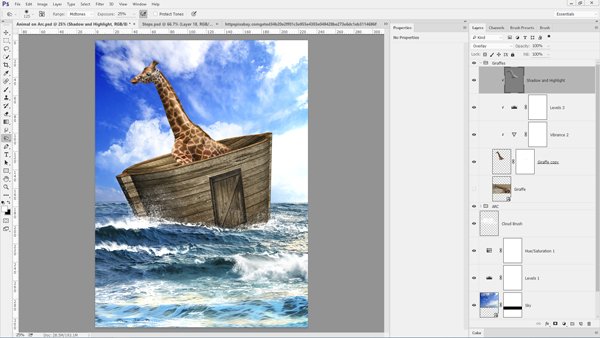
Grab the Dodge tool (O). Set Range to Midtone, Exposure 25%, choose a soft-tip brush and start to paint the shadows under the neck and head. Select the Burn tool (Shift+O) and using the same settings, paint the highlights over the neck and body.
22. Add more animals
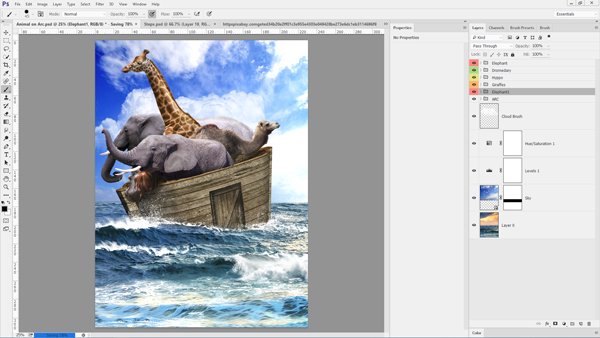
Now start adding more animals. Use the same technique you have just learnt from step 15 through to 21. Start by selecting the animals using the Quick Selection tool, refine the edges, and use the Puppet Warp if necessary. Make the adjustments using the appropriate settings and add shadows and highlights.
23. Add a lens flare
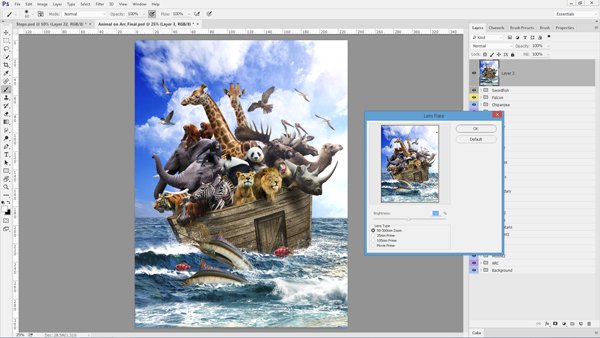
Click on the top layer of the layer stack. Now hit Shift+Cmd/Ctrl+Opt/ Alt+E to create a snapshot. Go to Filter> Render>Lens Flare. Adjust the Brightness to 150%, choose Lens Type 50-300mm Zoom. In the preview window, drag the light to the top-right corner and hit OK. This will add a subtle light effect to enhance your work.
" by Mark White "
Dear friend, you do not appear to be following @artzone. Follow @artzone and get added to our voting list for valuable up-votes!