Awesome Art Fluid Acrylic Pouring Easy Tutorial- Bring Out Your Artistic Side- Part 1
I have been having an awesome time being a part of the Steemit community, visiting some pretty awesome people and their stories, jokes, creations, news and everything in between. Today I thought I would share with you something anyone can do to express their artistic side, even if they think they aren't artistic, this easy technique will bring out your hidden artistic talents. It is an awesome fluid acrylic pouring technique. Anyone can do it; you can create your own masterpiece that shows off your unique style. Every piece created is different and unusual. The more unusual they are, the more awesome they are. Before too long, you will be creating your own gallery full of unique pieces that you will love.
First gather your materials before you get started. It can be a bit messy if you have to stop in the middle of your creation to get something that you forgot.
Note- There are many different ways of doing this technique; I am only showing you one for this tutorial.
Supplies Needed:
- Gloves (It makes cleanup a lot easier) I did not use any this time
- Containers for each paint color (I used empty applesauce cups-these are great for repurposing for art projects)
- Bigger container, cup or canning jar to mix your paints in
- Acrylic paints- Your choice- I have used all different types- Just have fun with it
- Water- The amount will vary depending on how much you use with your paints
- Craft sticks- For mixing your paints
- Newspaper- To cover your working surface
- Canvas- whatever size you would like to use
(Usually I use a wrapped canvas, for this tutorial I used a flat one)
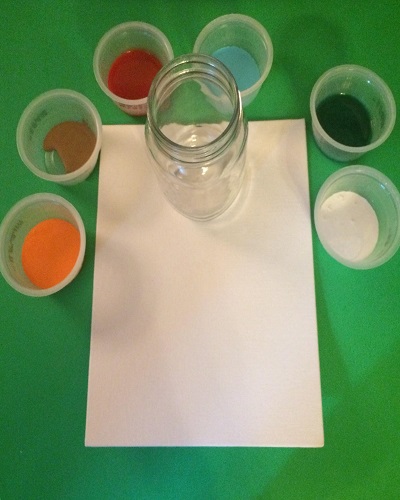
First you will pour some paint in separate cups for each color. As you can see I already have my paints in the cups, I have a canvas I wanted to use for this project and I have my quart size canning jar. Everything is ready to start mixing. I mix the paint and about 20 percent water in each cup. You don't want too much water or everything will just run right off of your canvas.
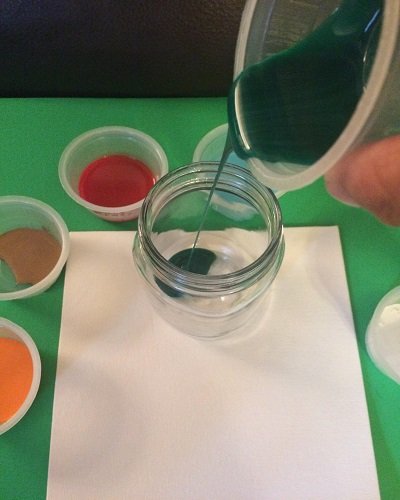
Next step, you start pouring each color into your bigger container, one at a time, holding it a little above the container so the colors add depth. Add each color until you are satisfied with the mix. Don't worry it will look totally different on your canvas.
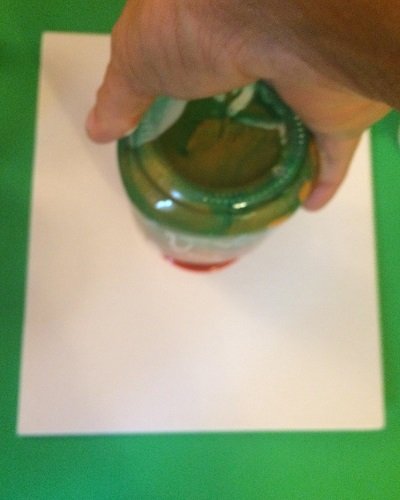
When you have all of your colors added to your container or jar, place your canvas on top of the jar. Then hold one hand on top of the canvas to keep it in place while you flip the canvas and jar over.

Then slowly lift the jar up from the canvas. All the paint is going to start flowing across the canvas. You should keep it level for a few seconds until you can pick it up and start tilting it to get the paint to flow to every side of the canvas.
Tilt the canvas slightly to fill it with the flowing acrylic paint. You will start to notice some cells (looks like little craters) starting to form and the colors will change designs the more you tilt the canvas.
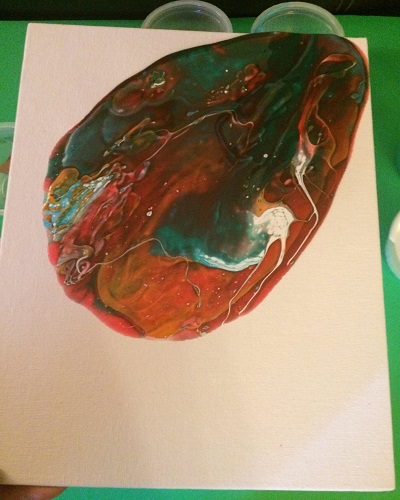
I am starting to see some designs in this one now. You could change the way it looks even more by tilting it halfway one direction and then halfway a different direction. Just play with it until you like the way the design is going.
I could have left this one this way and not filled up the canvas because I liked the design and I like some white space on some things I create. But, I did not leave it. I kept tilting my canvas to fill it with colors and shapes.
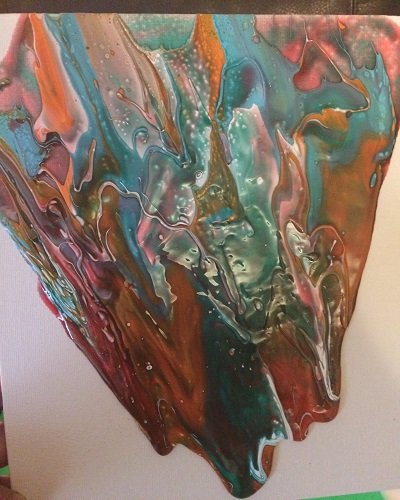
It is ok when the paint starts to run off of the edges, just tilt the canvas another direction to get it flowing and filling in another section.
Now it is almost filled in with the acrylics. I will use some of the pain that ran off while tilting and fill in the white spaces on this one. You may notice it will be a blank space where you have to hold it to tilt it. That is perfectly normal.
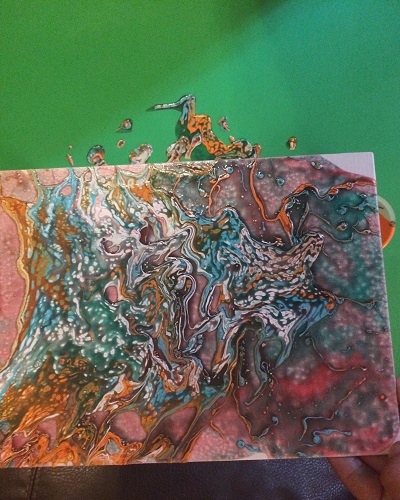
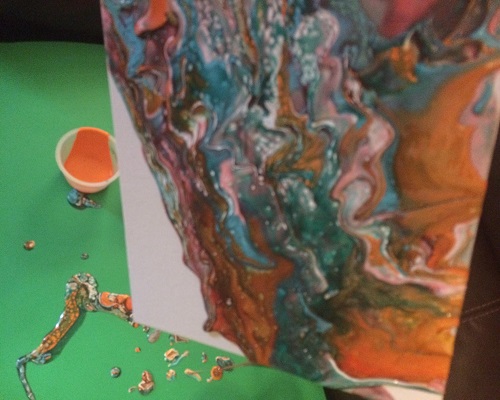
You can see some of the paint that ran off on the green board background. That is what I used to fill in any white spaces and finished by tilting it more towards the corners so it would be blended in well. When you are finished it is a good idea to set the canvas on top of cups or something similar to keep it elevated until the paint dries. I let mine sit a couple of days to dry; sometimes it may take longer depending on the size and depth of your finished canvas. About two weeks after it dries, you can varnish it if you like.
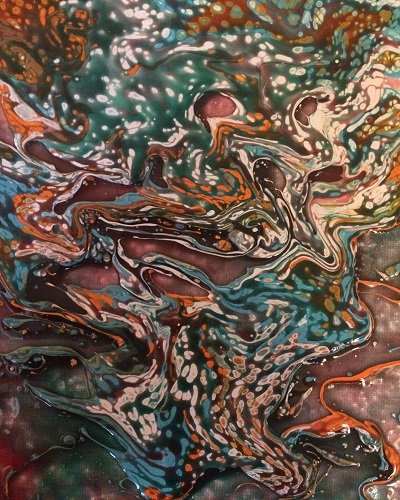
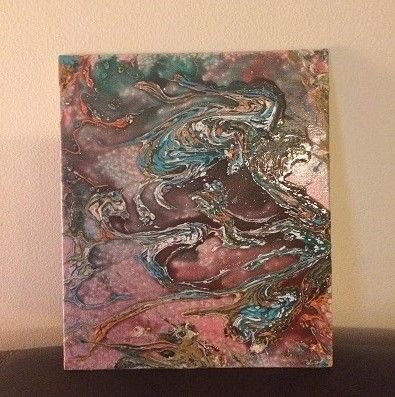
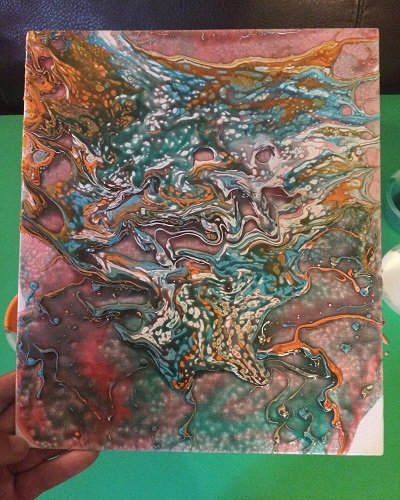
This is a shot a little closer so you can see the detail and how the cells formed on the canvas.
Hope you enjoyed this tutorial. I may be posting more on different techniques and designs as a weekly edition starting soon. If you have any questions, please leave a comment.
Happy Creating :)
Keep Steeming!

Interesting method and effect. I like a lot :)
Thank you for the nice comment. It makes cool designs and different every time. The next one will be a little different.
I love abstract art, I painted a lot of it myself, oil and acrylic.
That’s great, I like all kinds of art but I think abstract, acrylic and pastels are my favorites. :) Do you have your works posted?
Yes I posted a few of my abstracts. I have so much more to post, but got busy with other stuff.
Great I will have to check some of them out. :)
@cryptohustlin has voted on behalf of @minnowpond. If you would like to recieve upvotes from minnowponds team on all your posts, simply FOLLOW @minnowpond.
Great job. This reminds me of colors of Fall very beautiful.
Good post, I am a photographer, it passes for my blog and sees my content, I hope that it should be of your taste, you have my vote :D greetings
Congratulations @beccadeals! You have completed some achievement on Steemit and have been rewarded with new badge(s) :
Click on any badge to view your own Board of Honor on SteemitBoard.
For more information about SteemitBoard, click here
If you no longer want to receive notifications, reply to this comment with the word
STOPCongratulations! This post has been upvoted from the communal account, @minnowsupport, by drakos from the Minnow Support Project. It's a witness project run by aggroed, ausbitbank, teamsteem, theprophet0, someguy123, neoxian, followbtcnews/crimsonclad, and netuoso. The goal is to help Steemit grow by supporting Minnows and creating a social network. Please find us in the Peace, Abundance, and Liberty Network (PALnet) Discord Channel. It's a completely public and open space to all members of the Steemit community who voluntarily choose to be there.