DIGITAL ART TUTORIAL - painting an eye in Photoshop -- 9 steps --
DIGITAL ART TUTORIAL - How to paint an eye in Photoshop in 9 steps
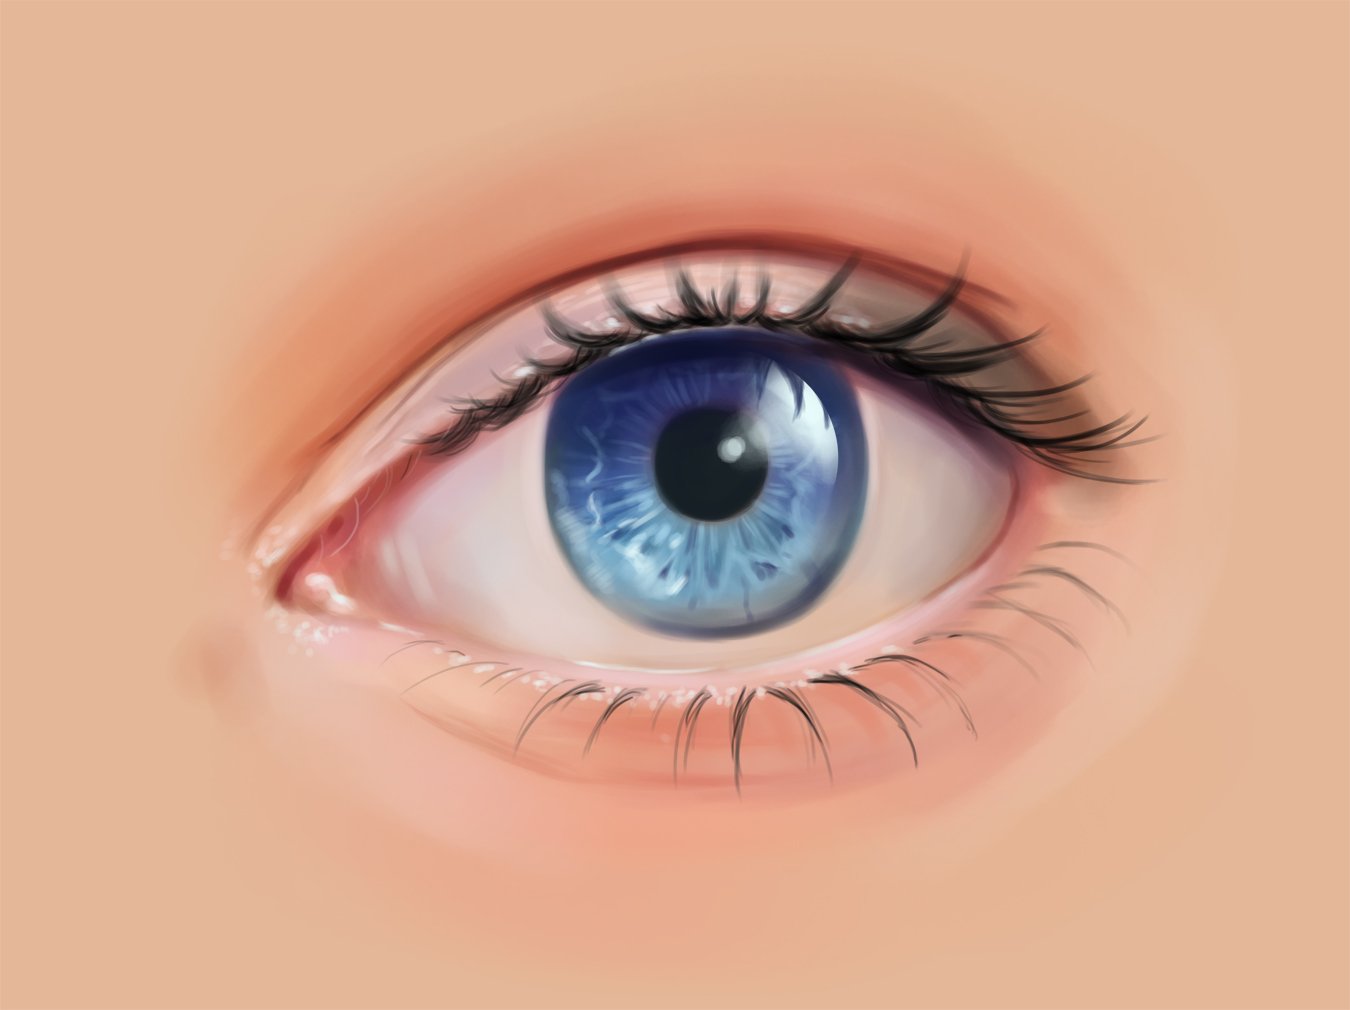
In this step by step digital art tutorial I'll show you how to paint an eye using digital painting software and (preferably) a drawing tablet. Here you can see the end result we'll be working towards.
STEP 1 - Draw the basic shape of the eye

Start out with a basic oval shape and a little circle where the tear duct will be.
During my painting process I always use a simple round brush with slightly ragged edges and opacity set to pen pressure. You'll need a pressure sensitive pen tablet for that, like a Wacom.
STEP 2 - Draw the eyelids, iris and pupil

Use the oval as a guide to draw the eyelids and draw in the iris and pupil. Mind that the iris will be coverd by the upper eyelid a bit, unless you want the eye to express shock or surprise. Don't worry about making tidy lines, that'll be fixed later.
STEP 3 - Lay down the basic colors

Lay down a first layer of color, decide what color you'd like the iris to be. Mind that the white of the eye isn't actually white. I prefer using a greyish tone and move towards pinks in the corners of the eye.
STEP 4 - Define the shapes

Use shadows and highlights to define the shapes. For instance (when the light is coming from above) there will be shadow on the eyeball below the upper eyelid and shadow under the lower eyelid. You will see highlights on the upper eyelid and also on the lower eyelid (mind the volume of the skin there).
STEP 5 - Add color variation

I like using Overlay layers in my paintings to add color variation. In this case I used blue tones for the iris and eyeball and used warm oranges and reds for the skin.
STEP 6 - Add more detail to the iris and eyelids

It's time to add fun little details, like the pattern of the iris and some crease in the skin. Be sure to use reference photos for a realistic feel.
STEP 7 - Draw the lashes

It is starting to look like a real eye already! The lashes really finish it :) I started out with a dark grey tone. Mind the direction and curve of the eyelashes and build up slowly.
STEP 8 - Add more detail and contrast

We're almost there! Add some darker (near black) tones to the lashes and add more contrast to the eye by building up the shadows.
STEP 9 - Final touches and small details
Adding a highlight to the eyeball really finish it! Mind that the lashes will block some of the light, so they'll reflect on the eyeball. If the light hits the eyeball on the upper right part of the iris, the light will pass through and also light the iris on the lower left part.
Keep on detailing til you are satisfied with your eye painting :)
I hope you found this tutorial useful! Let me know what you think. And if you have any questions about the used techniques, be sure to leave a comment!
More tutorials to come soon!
That is so awesome :) Great job :)
Thank you! Glad you like it :)
You're welcome my friend :)
I read your post and it still seems like magic! The eyelashes' reflection on the eye is totally the kicker for me. Well done!
Thanks so much! And yeah, it's sometimes the small details that do it :)
This is a great tutorial for those starting out who have no idea how to proceed!
Wow! What a great tutorial.
Awesome that you have explained all the steps! Looks very professional :)
Thank you so much, I'm glad to hear you like it! I'll be making more tutorials soon :)
beautiful. I like your tutorials.