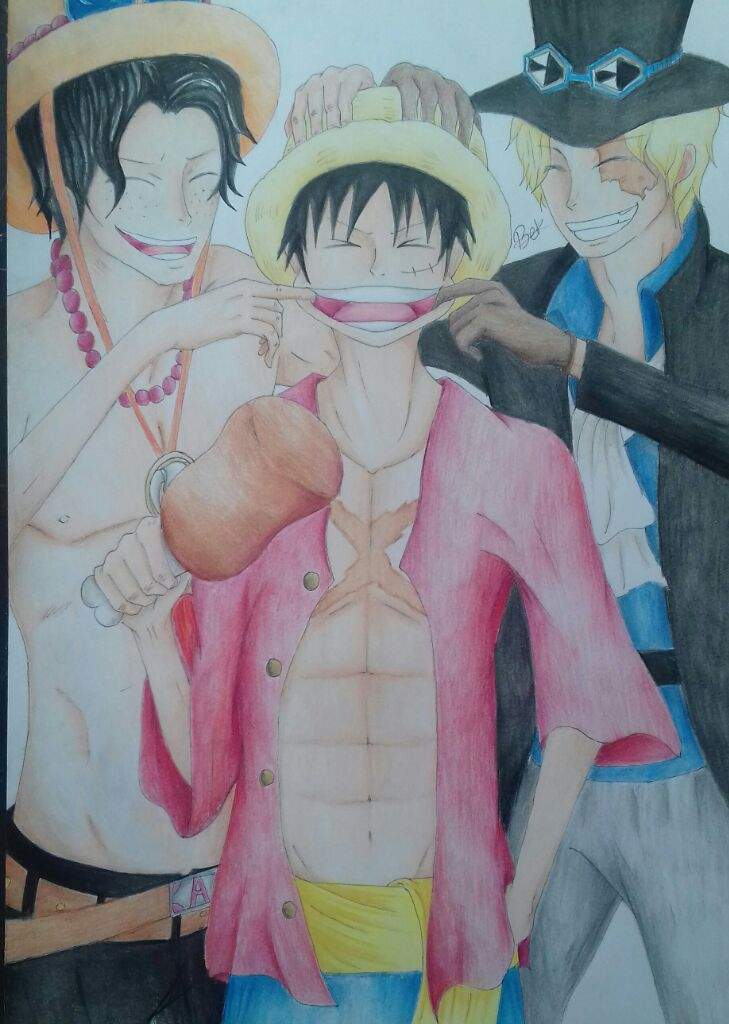
Drawing Art - Ace, Sabo and Luffy "One Piece Series"
Hello Steemit community !! This time I will give you another art from one of my favorite characters and that is Ace, Sabo and Luffy From Anime One Piece Series.
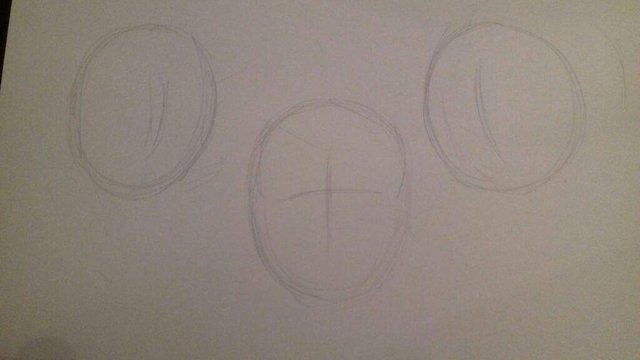
Step 1
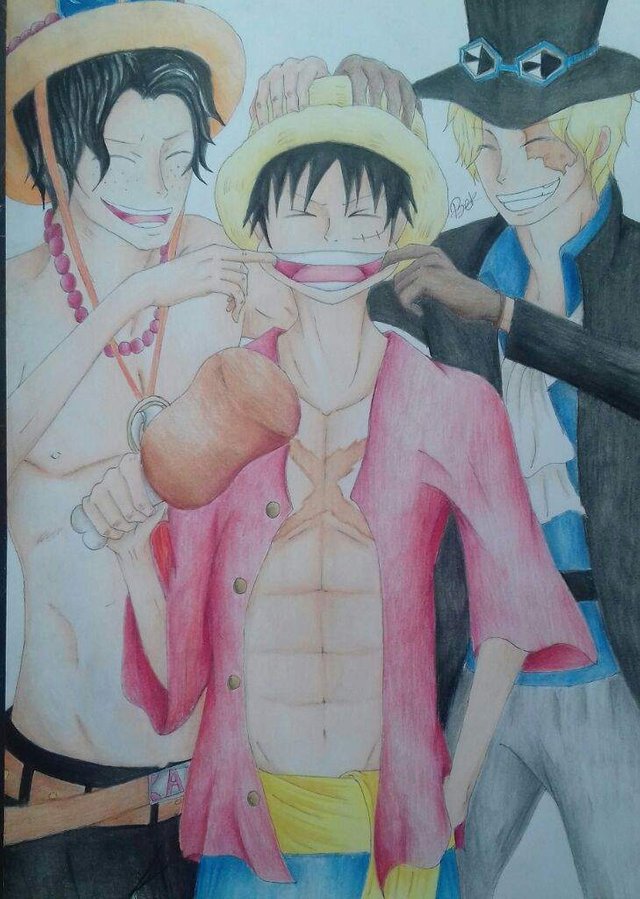
I started by placing it in the form of a head for all three, to give me a ready idea where each character would be placed. I've decided to keep Luffy in the middle, Ace is on his right and Sabo on his left.
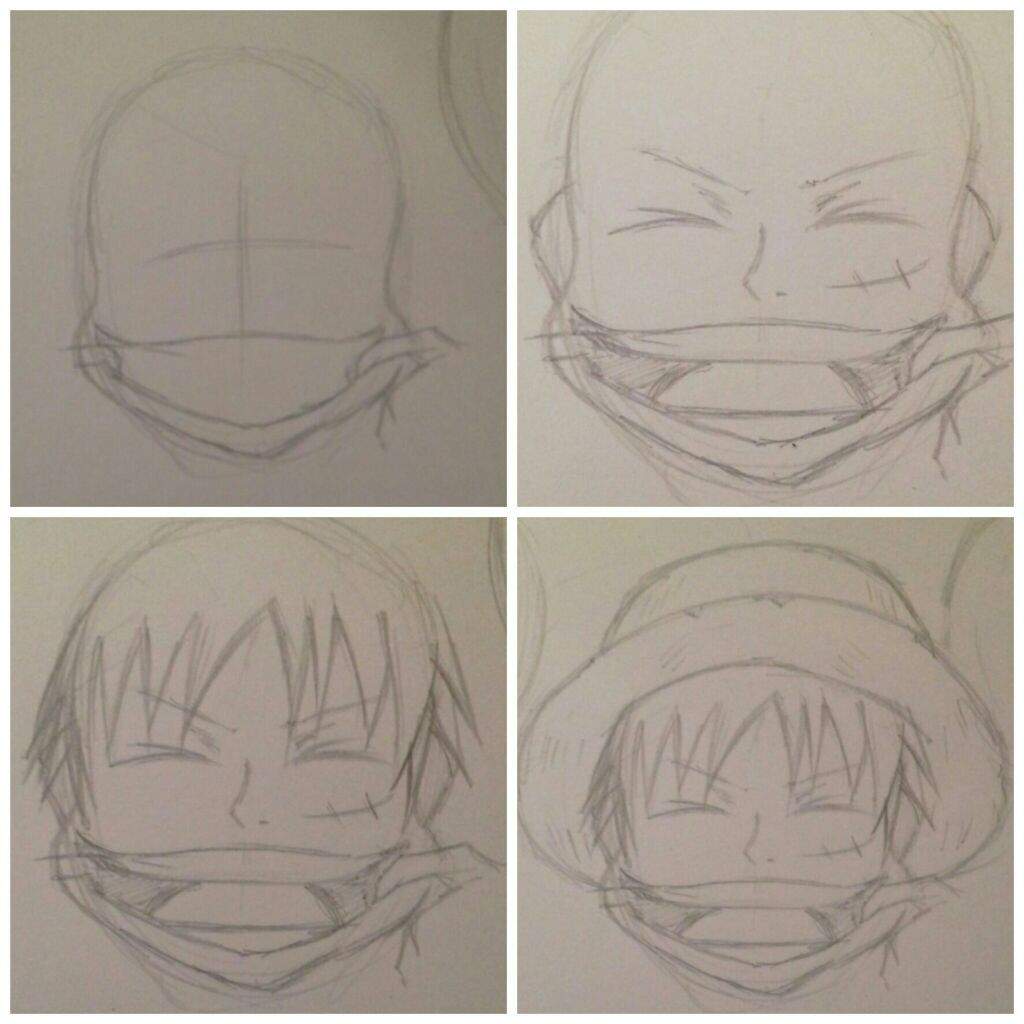
Step 2
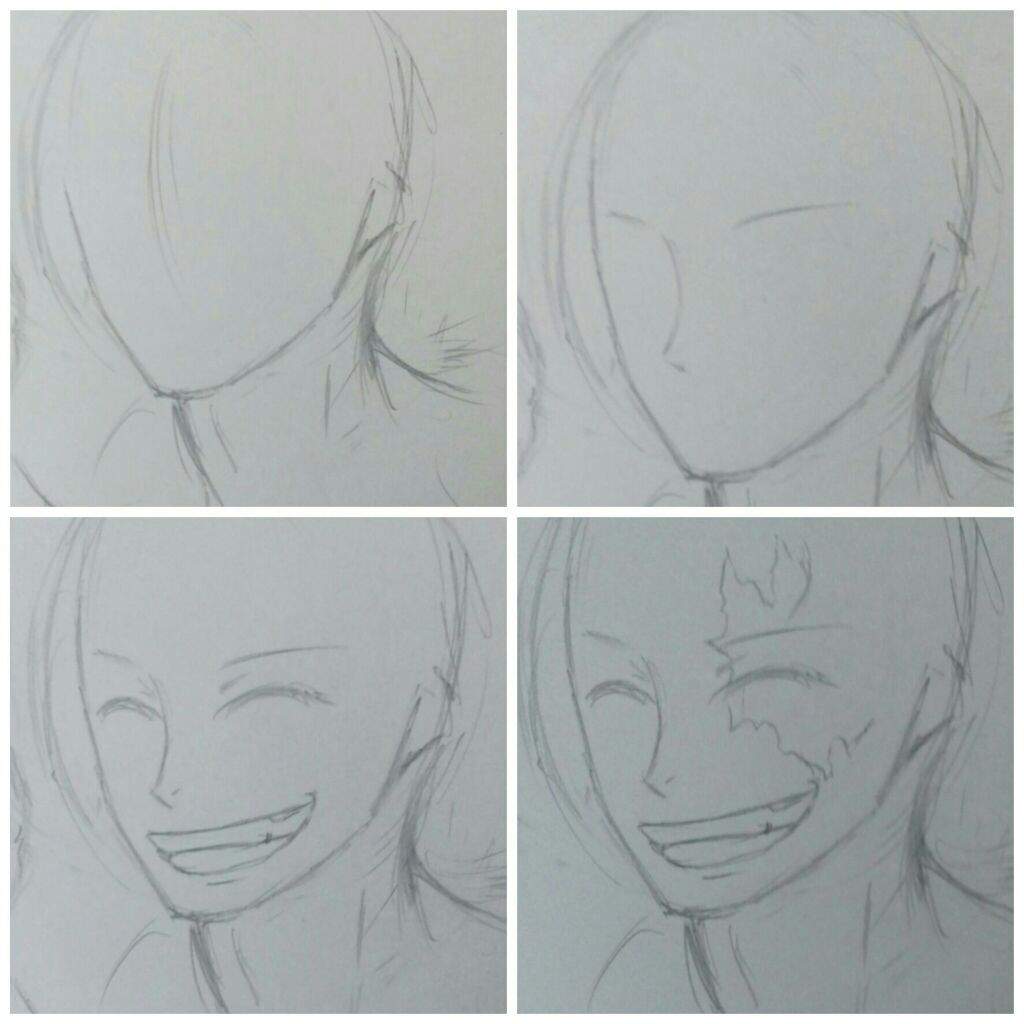
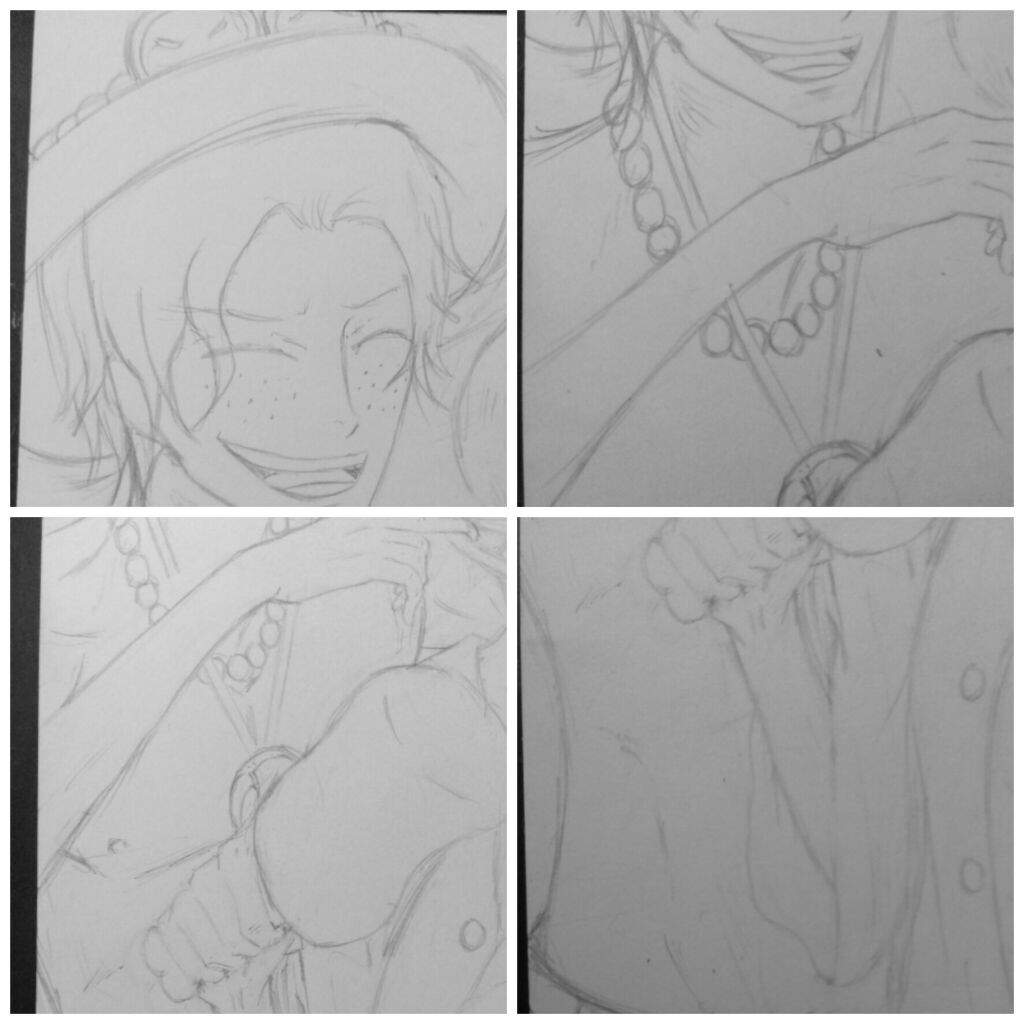
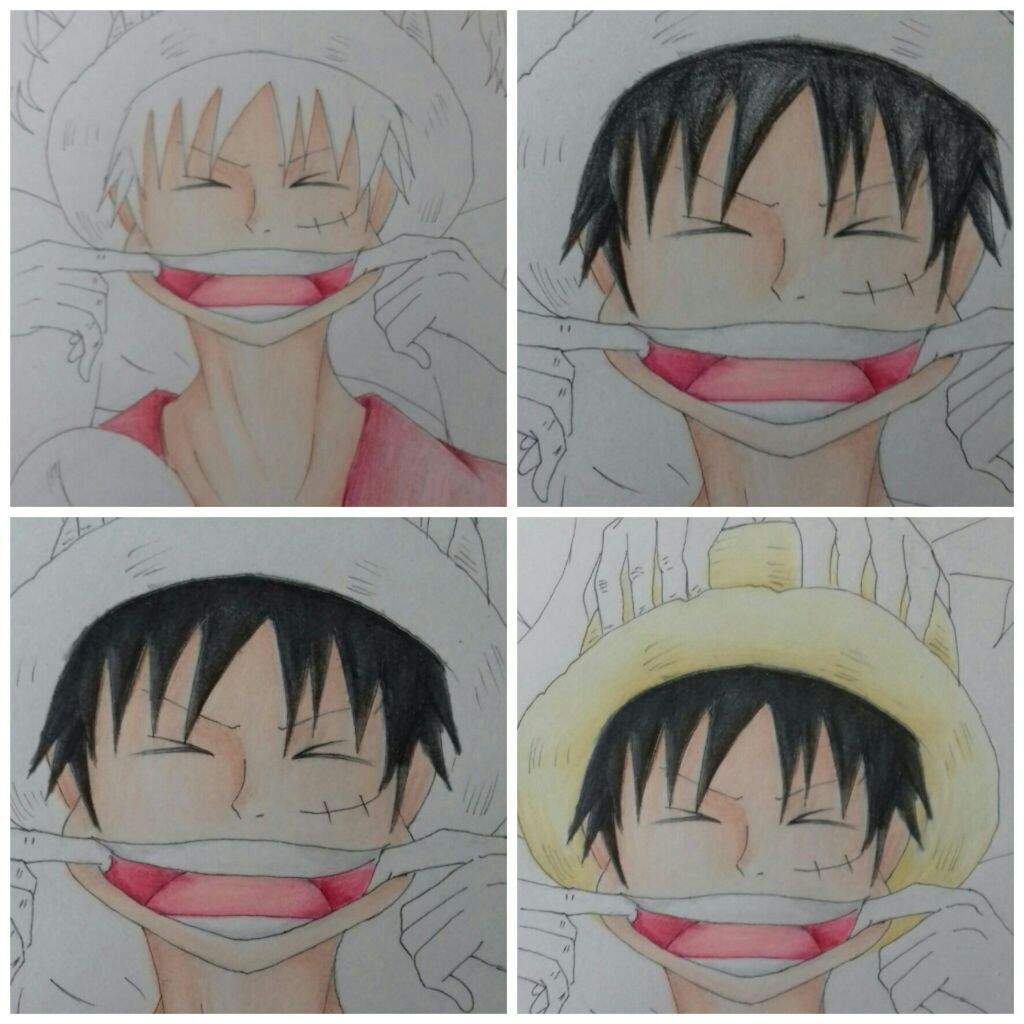
I then started with Luffy, shaping his head so that his bottom was stretched out on both sides, as Ace and Sabo would pull the two corners of his mouth I made on their fingers to represent it for now. Then I started adding facial features, pulling his teeth and tongue, sticking his nose with his chin and sketching with his eyes squinting. It took a little time for me to make it look like he was rejoicing and not in pain.
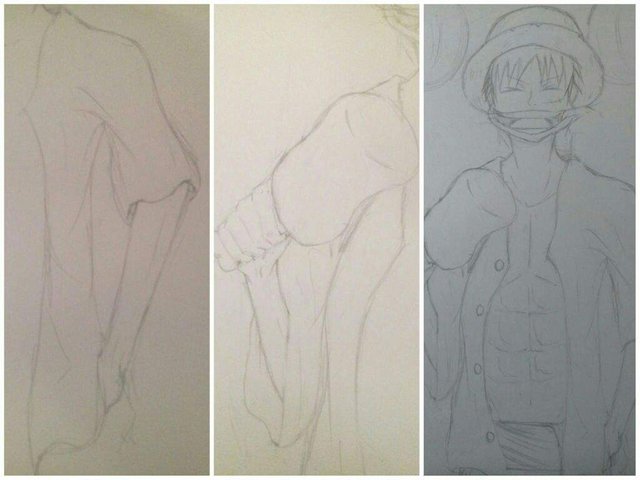
Step 3
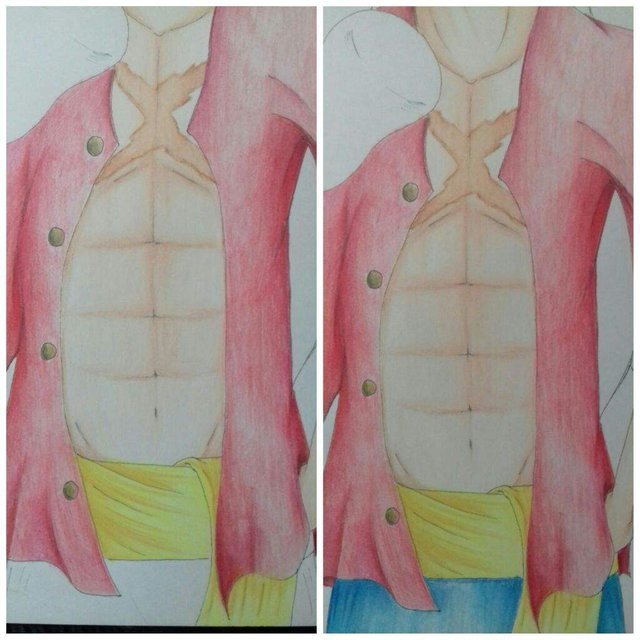
Drawing on his neck, I started moving down and sketching on his shoulders to lower each arm, with his left hand resting on his hips and his right hand holding some meat. Along with the process of sketching his arms, I added details like shirts and sleeves. Then I added detail to his body, pulled his chest and worked into his sash and his shorts. I added details like the folds to the material along with the buttons on his shirt.
Step 4
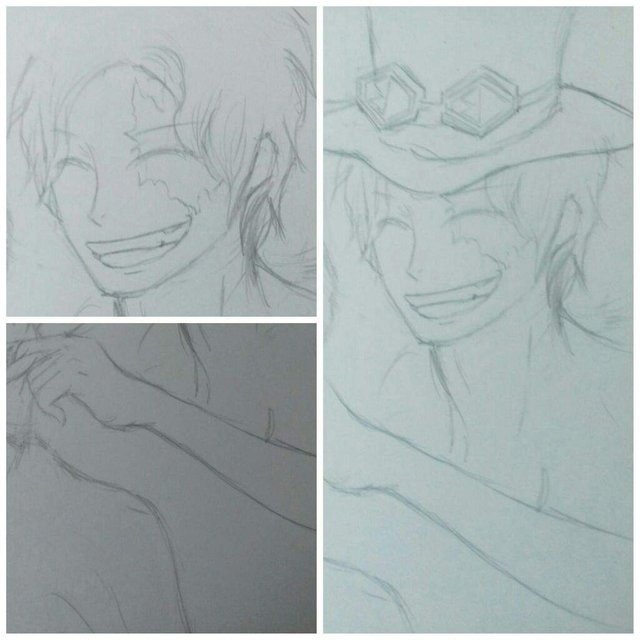
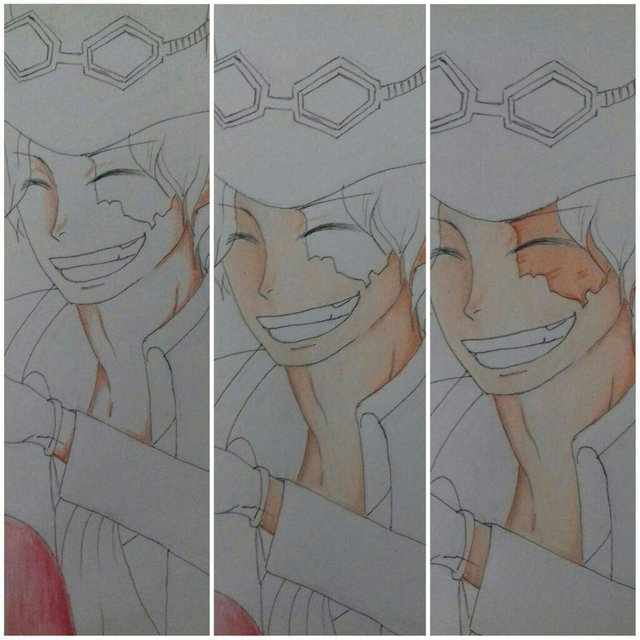
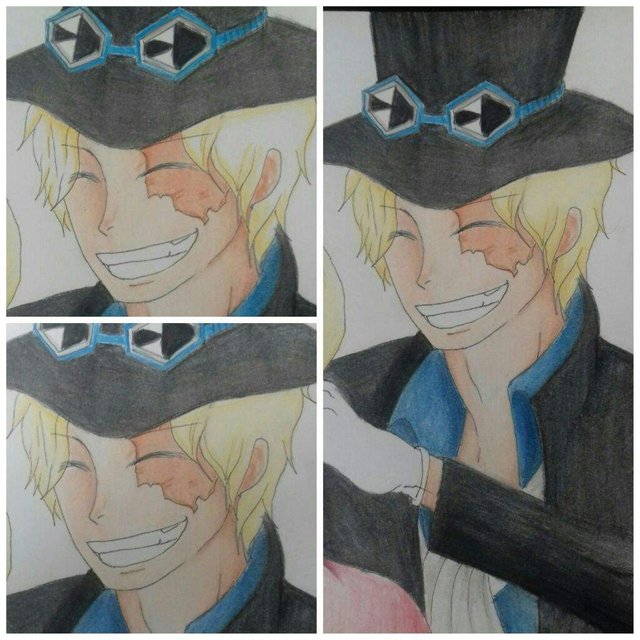
With Luffy sketching, I turned to Sabo, shaping his face, neck and chin until satisfied. I then started drawing on his face, starting with his ears, nose and eyebrows as a guide for his eyes and mouth. Just like Luffy, I quickly made a sketch in his narrowed eyes and for his mouth I pulled him to the edge of his eye. I then start adding his teeth when I want his smile closed. Lastly I added a scar over his left eye.
Step 5
I then added in her hair, making it a bit bumpy and shaggy but not too much so it will change too long and look weird. Again I cut her hair from the top as I added on her hat, starting with the top and working as I pulled my glasses. I also quickly sketched his left hand and arm so I could see how his body was positioned.
Step 6
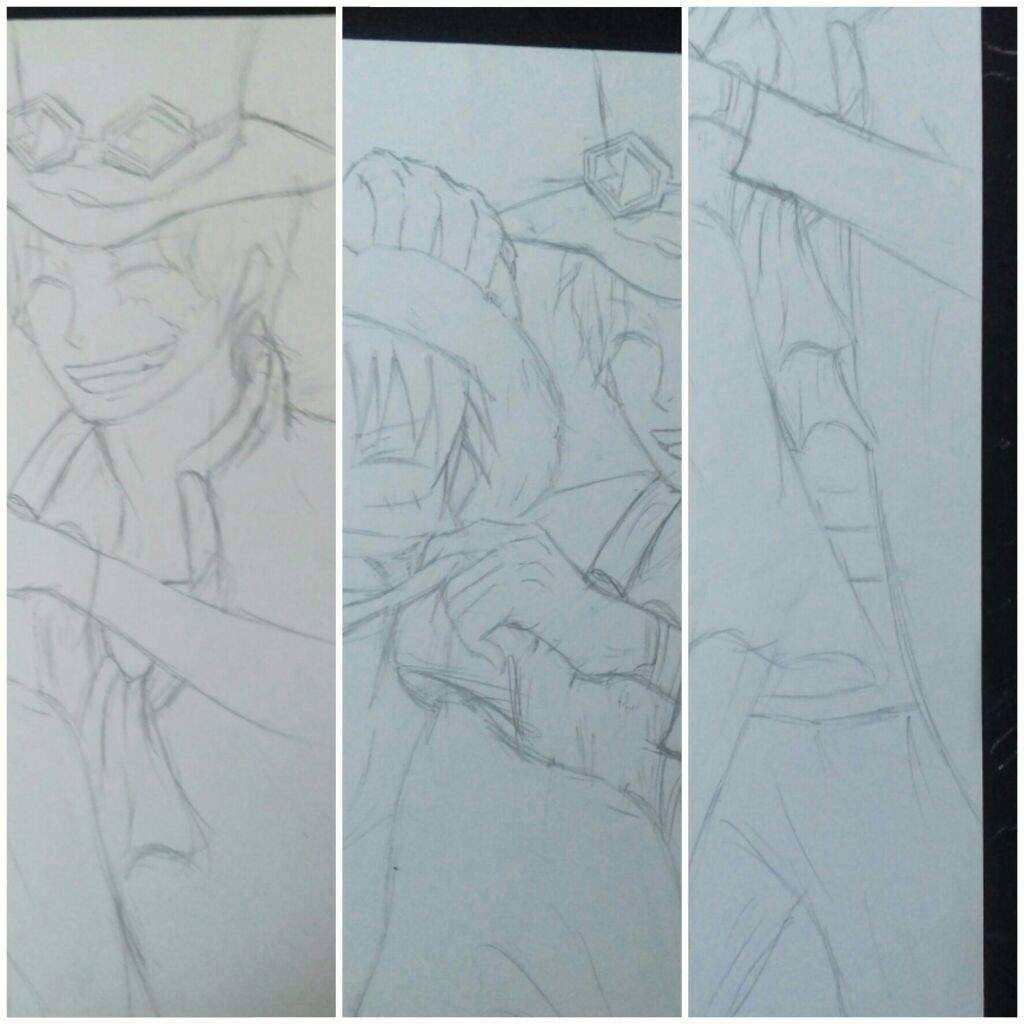
Moving down, I started drawing on his clothes, starting with his coat, adding on his shoulders and working down as I added his shirt underneath. I started adding details as I went down and sketched with his trousers, adding additional folds and lines around the gloves and arms to make it look more realistic.
Step 7
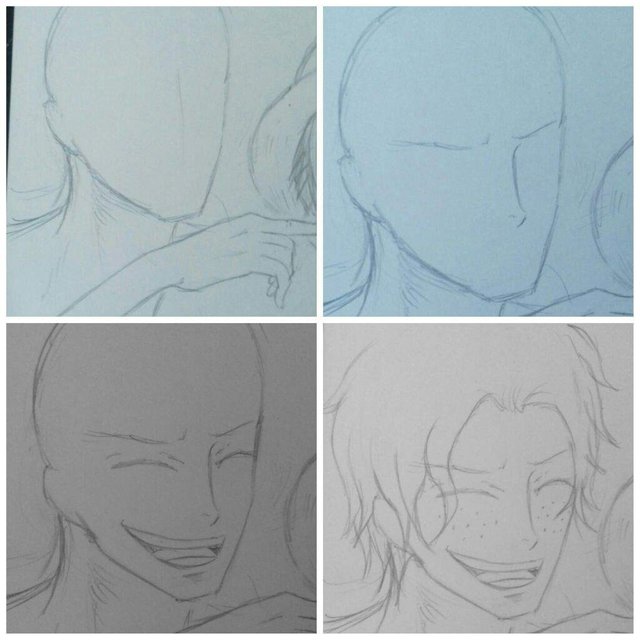
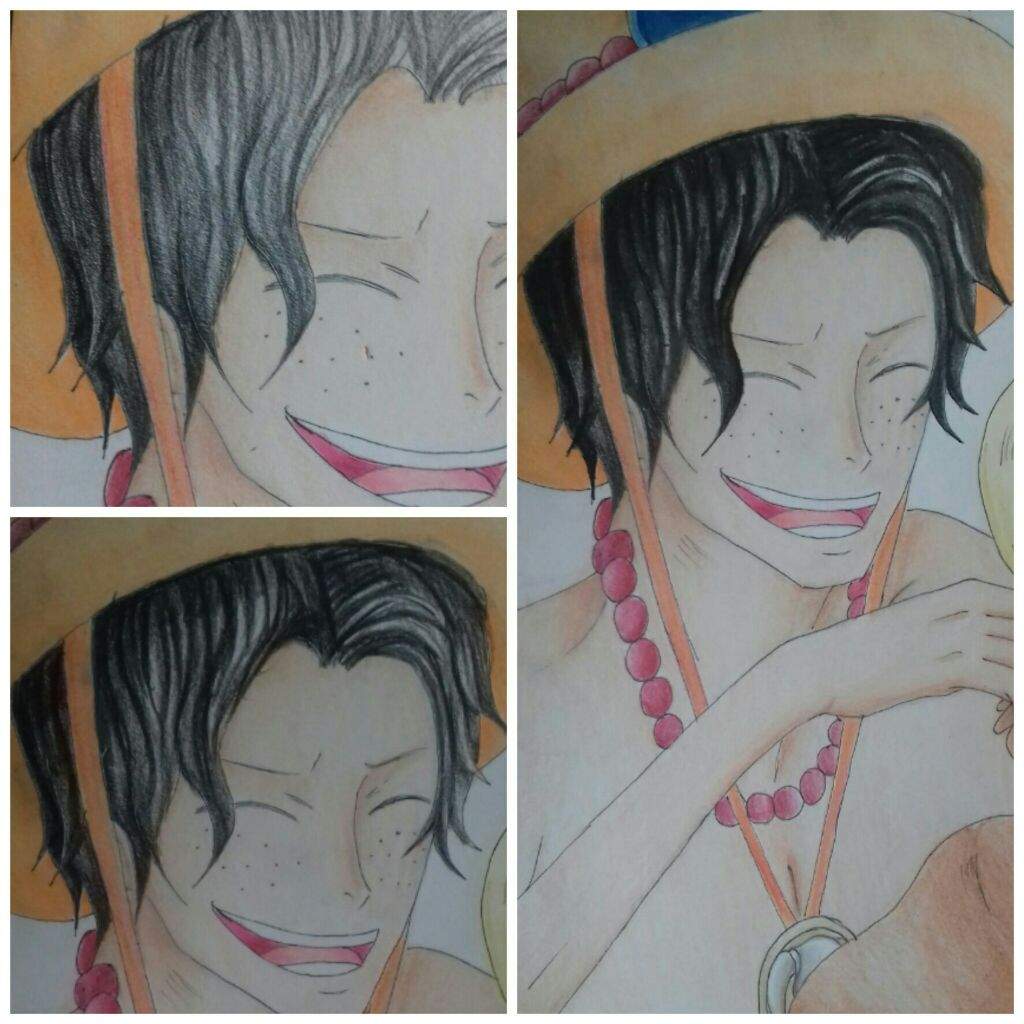
I now start sketchig ace in the same way as I did with Sabo, starting with his head and shaping his chin and neck to fit. I also added in his right hand for body reference later on. After that I started adding her eyebrows and nose, which made her look angry until I added with narrowed eyes and an open smile, drawn similar to Luffy with the placement of teeth and tongue.
Step 8
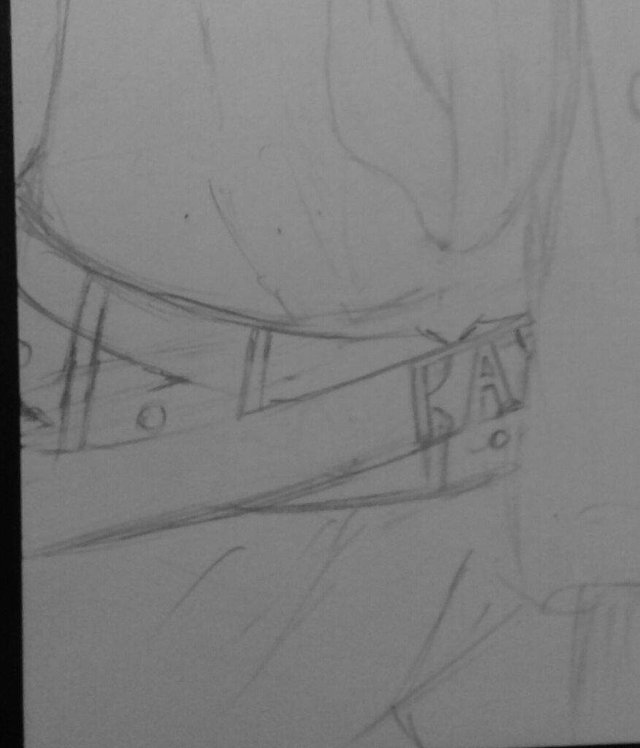
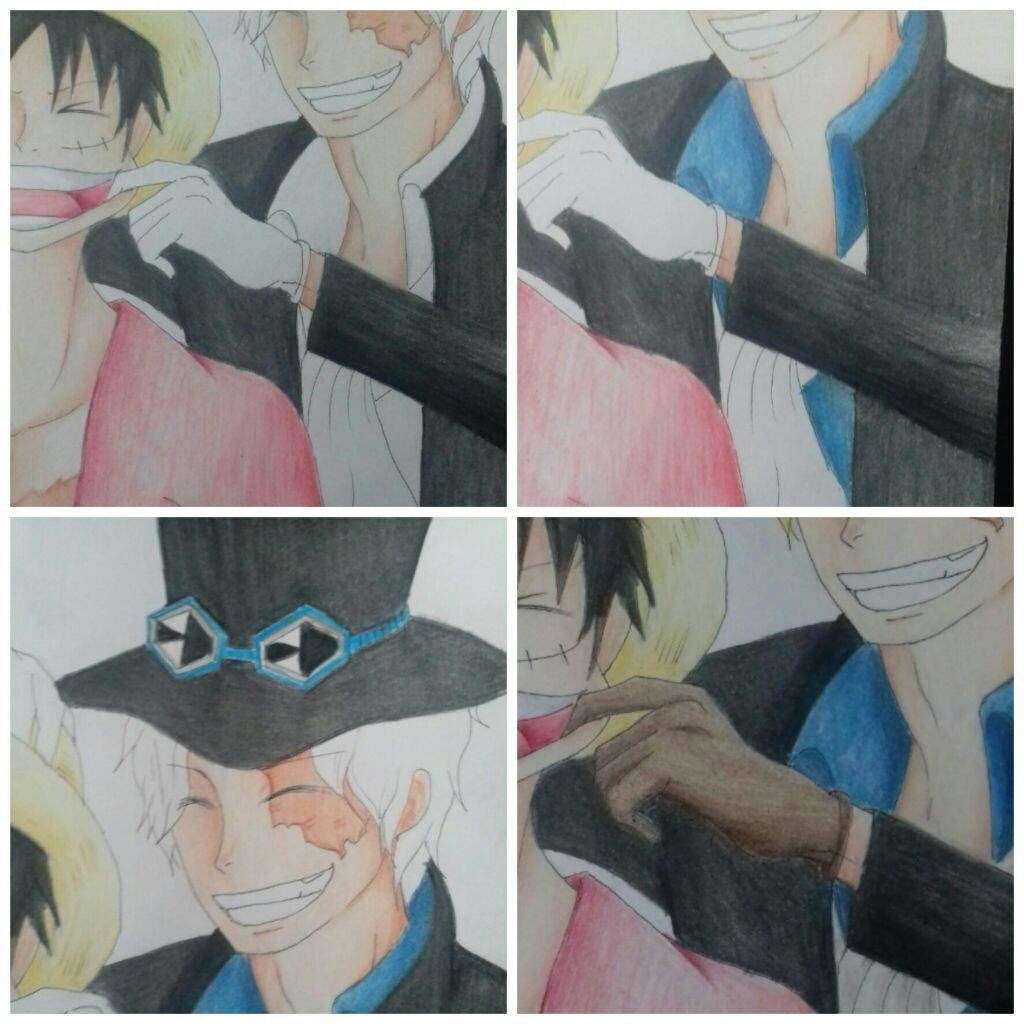
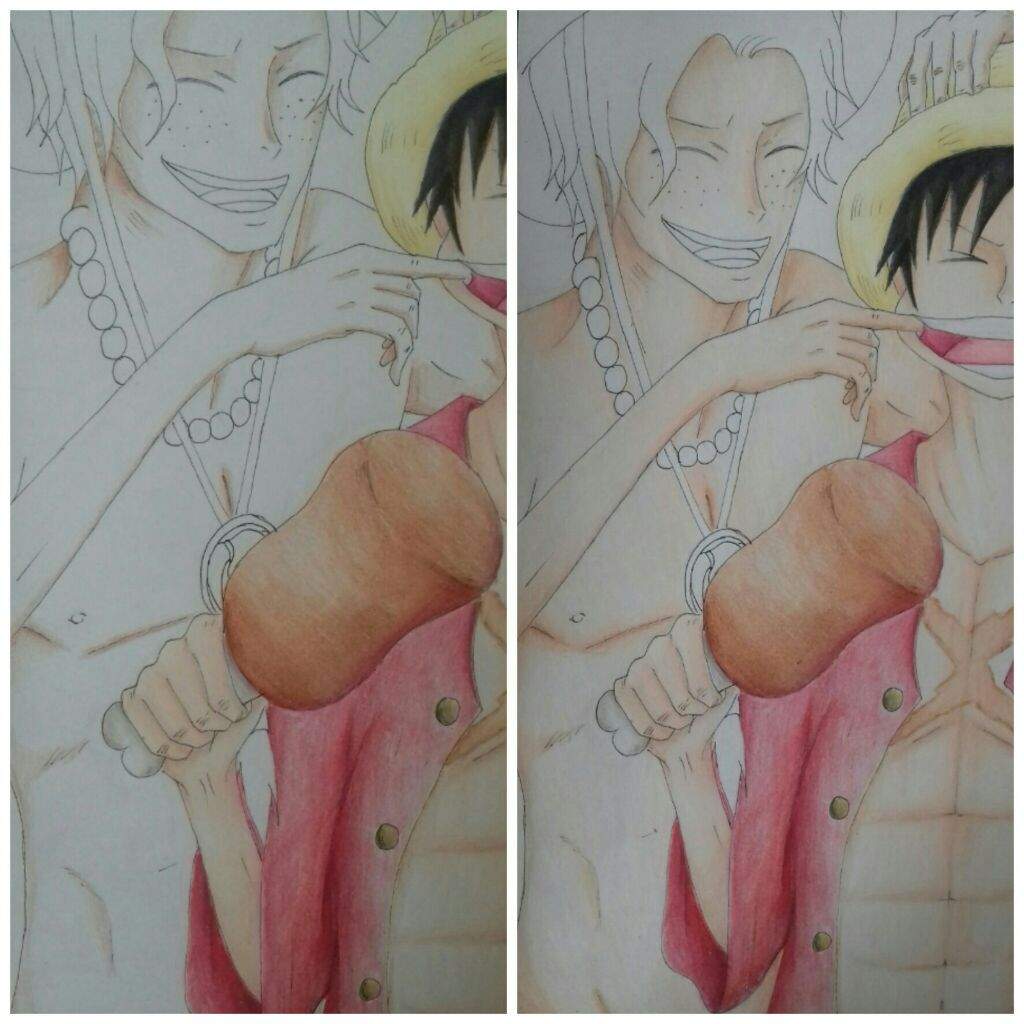
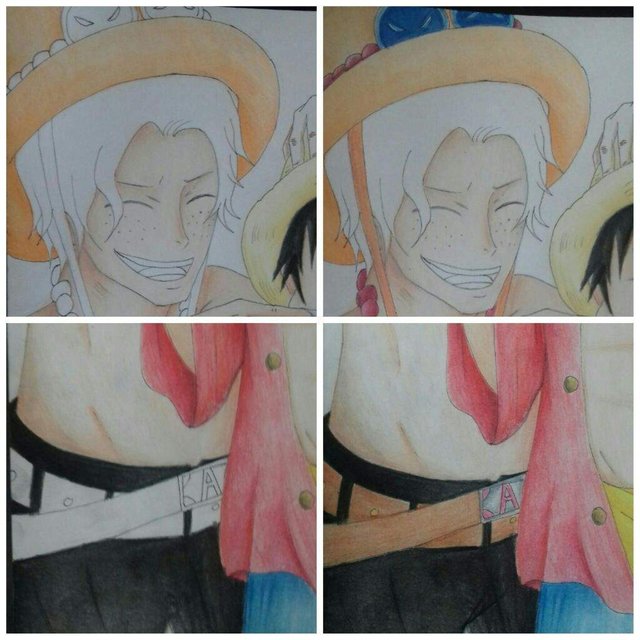
I then went down, as I began to add his shoulders along with a bead and bead necklace that hung from his hat. I started adding details to the chest area and around him as I walked into his shorts, adding his belt and buckle. Ace is the fastest and easiest for me to draw due to lack of clothing.
Step 9
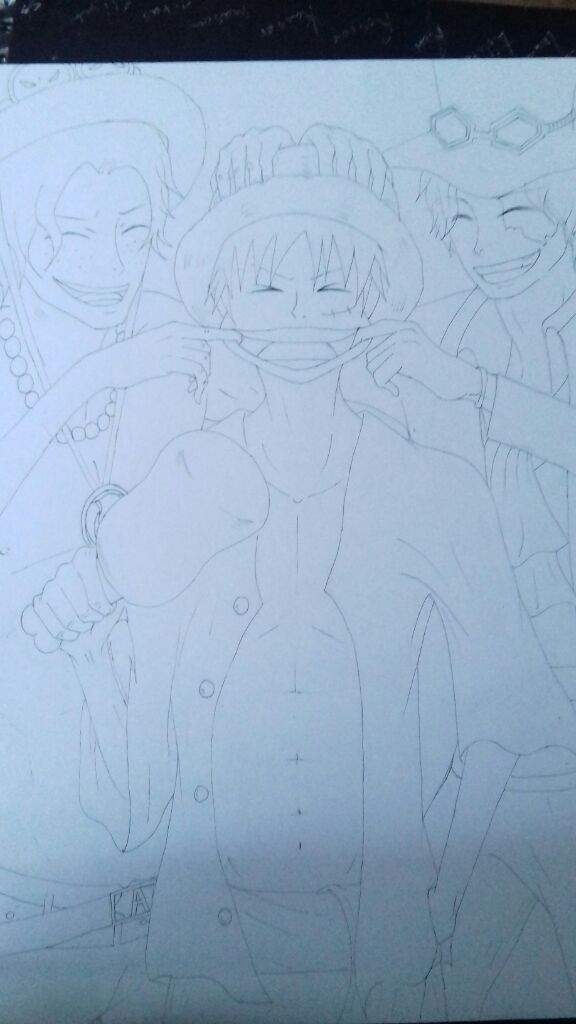
With all the sketches, I began to discuss them using pens and ink. I made a few changes, in addition to clearing some lines and adding some extra details like folds.
Coloring Luffy
Step 10
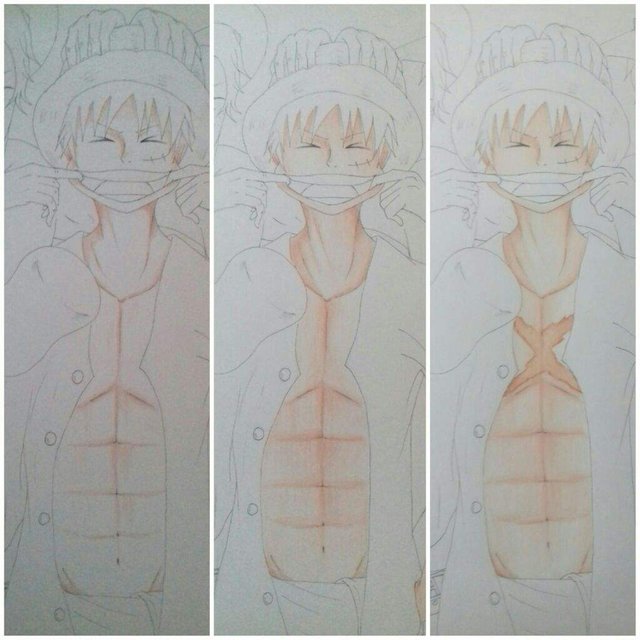
I started by coloring Luffy skin using Light Peach and after being satisfied with the consistency, I used a mixing pencil to make the tone more prominent along with a white pencil to make the appearance of the dye lighter and smoother.
Step 11
I started by lining the most shaded area using CrimsonLake, shrinking slightly. After that I started mingling with CrimsonRed until I felt consistent enough for me to continue. I then used PoppyRed to color the remaining area of the shirt as I started using the mixing pencil so that it made three colors mix and stand out.

Step 12
I use Yellow Ocher to coat the belt and shadow creases using Lemon Yellow. I then moved on to his shorts, using Peacock Blue to shade and line the dark areas and then use Copenhagen Blue to once again blend in. I used a white pencil to make the display look smoother.
Step 13
I then colored the inside of his mouth by using CrimsonLake for darker areas and Pink to mingle with. I lightly look through his teeth using Cool Gray. I then start from left to right filling his hair using Black. I wanted to give hair more detail but it was solid and so I used a mixing pencil to make it smoother in appearance. After that I use Sand to shade the hat and mixed with Cream. I finished coloring the meat he held using Burnt Ocher and Dark umber
Coloring Sabo
Step 14
I started by applying Burnt Ocher to the most shady areas, especially around the neck and hairline. After that I use Peach to blend to some extent, allowing some empty areas to show the reflection of light. Then I slightly colored the two layers, using Light Peach and after being satisfied with the consistency.
Step 15
I colored his coat using Black, with the same method as I did for Luffy hair even though it outlines the area around the mantle that will be more shady. I then used the Indigo blue to shade under it, this time shading more areas and then start applying Copenhagen Blue from above. Lastly I use the same set of colors and methods for coloring hats and glasses. I also use Dark Umber and Dark Brown to color the gloves.
Step 16
I shaded in the area of her hair, mostly around the ends and strand lines using Sand. I then used the cream to fill the rest, acting as the main visual color.
Coloring Ace
Step 17
I started by applying Burnt Ocher to the most shady areas, especially around the neck, hairline and chest and abdomen. After that I use Peach to blend to some extent, letting some areas lighter.
Step 18
I used Orange as a solid colour to shade in the hat, Much like I had done for Sabo's coat, that once I filled in the whole area I added some darker shading and began to use a blending pencil to make it stand out more. For his beaded necklace and the beads on his hat I used CrimsonLake to shade them in.
Step 19
From left to right, using Black alone, I started dyeing her hair starting from tip and working my way back, I was colored until I was satisfied with the consistency and started adding detail to the hair, creating a prominent strand. I also colored the inside of his mouth by using CrimsonLake for the shaded area and Pink to blend.
And Finish
nice tutorial. nice post bro. thanks!
Thanks for viewing..
Hello I am Bek from the Amino app and this piece of art is mine (it even has my signature on it). He has very clearly stolen countless artist's work. Its very despicable to make money from others hard work and drive let alone just steal it and claim as their own. I am appalled.
Nice One. Ace, Luffy, Sabo.