Repost: Hydra Pendragon- 3D Sculpt break down
Hi All,
I am reposting this breakdown that I did for hydra pendragon because I think this definitely deserves more exposure.
The amount of time spent and the details added to this sculpt doesn't justify the kinda response I have received mainly because it didn't reach to many people as I expected it to.
I decided to share more of the breakdown processes of my other digital sculpts. Hydra Pendragon was one of the most viewed and appreciated sculpts on Art station and LinkedIn so makes sense a break down is a must. I sculpted these in Zbrush and rendered using Arnold in Maya.
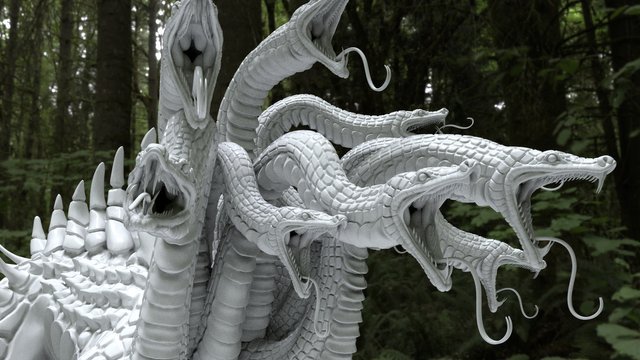
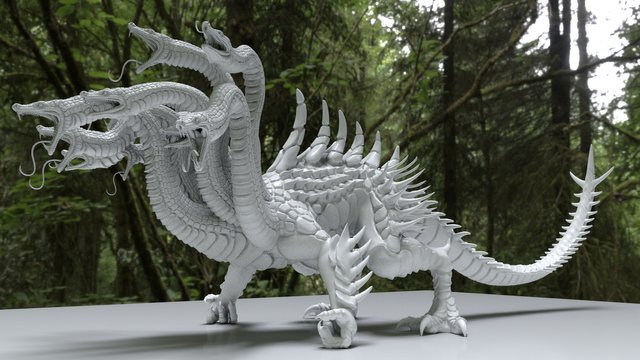
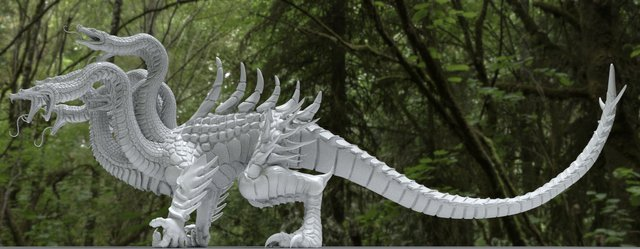
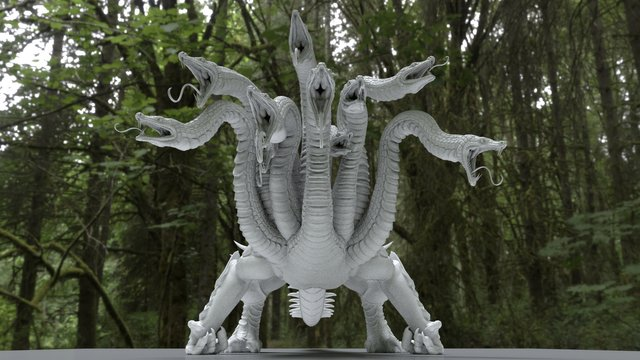
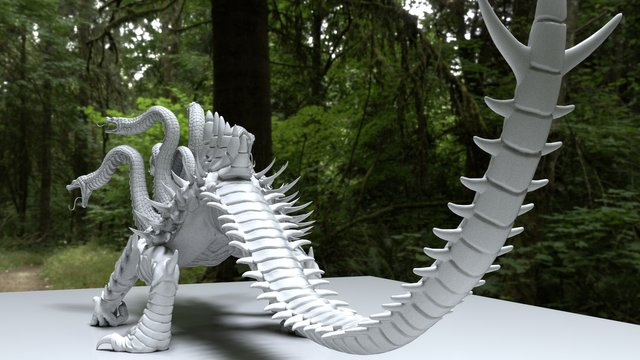
Final render:
Steps:
- First step like always is to get the base shape ready. I use Zsphere to achieve this.
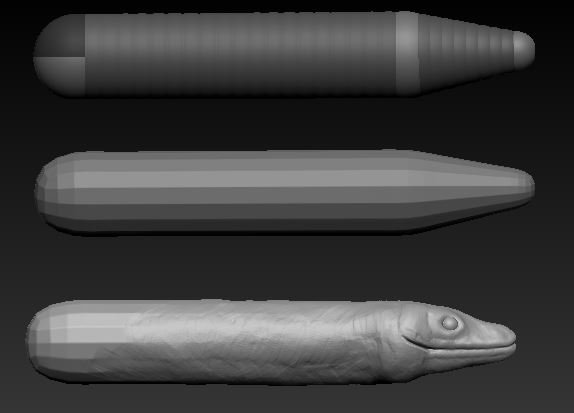
Once I am happy with the shape i sculpt it to highlight the features of the snake head.
You will see there are no details so far because this is still in concept phase and it makes easy for me to change if i wish without spending much time on it.
2)Now to work on the body. I follow the same process as the head using zspheres.
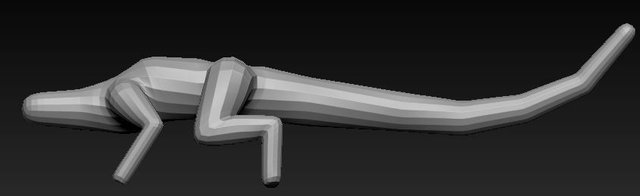
Once the Zsphere shape is satisfying, I convert it to a polymesh and sculpt to resemble a lizard/dragon body.
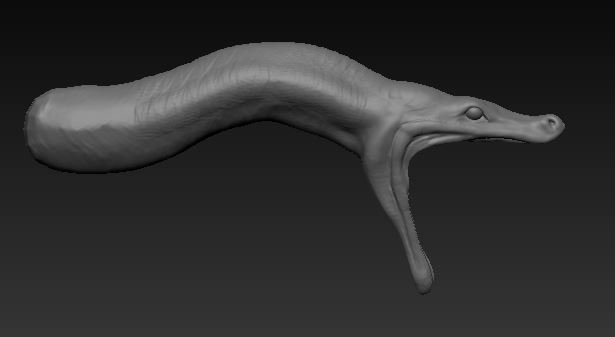
Just a quick note, using lots of references helps in the entire process and then you can mix and match the look you want to achieve.
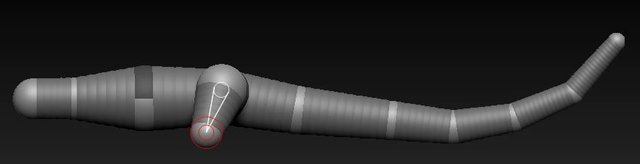
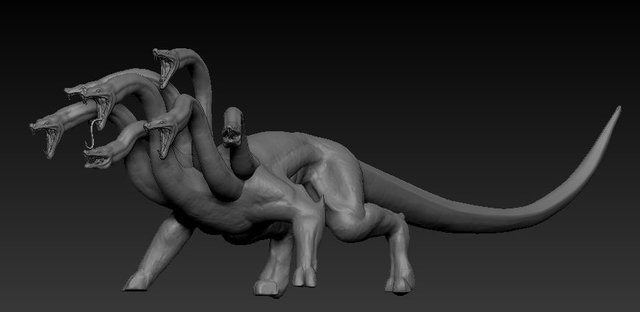
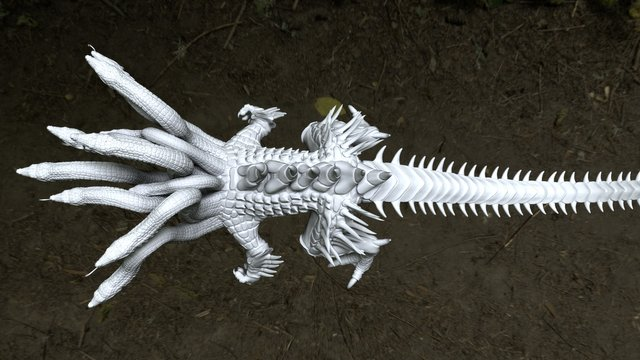
- Now the base head and body is ready , I duplicate the head to create different versions of it.
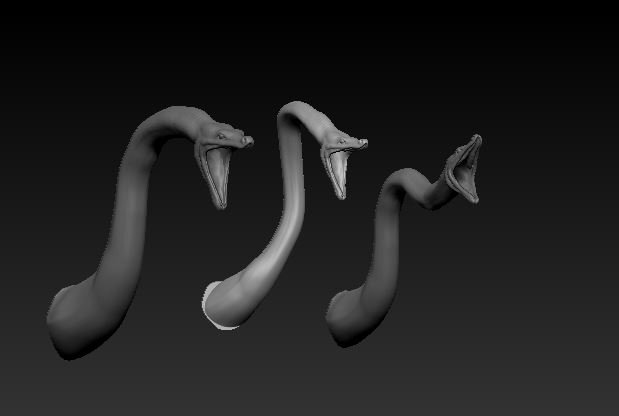
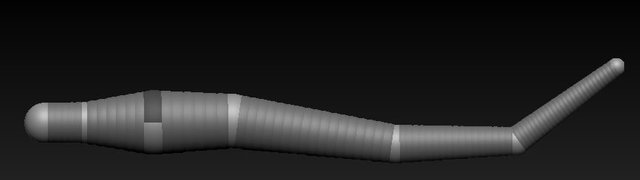
Now its time to play with the placement of the heads on the body. After a few trial and errors, I finally liked something I liked. Its basically duplicating the 3 heads i create previously and placing them.
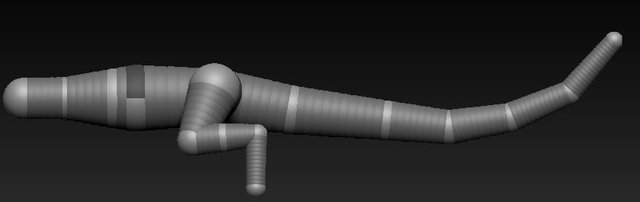
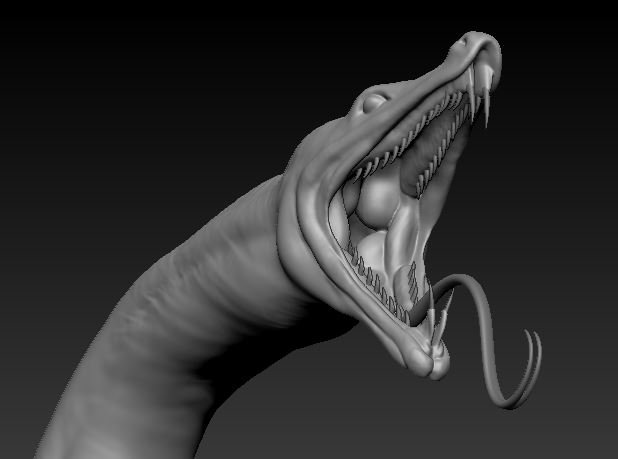
- Next step is to start detailing the head of the hydra. Again the detailing is done only one head which would be duplicated later.
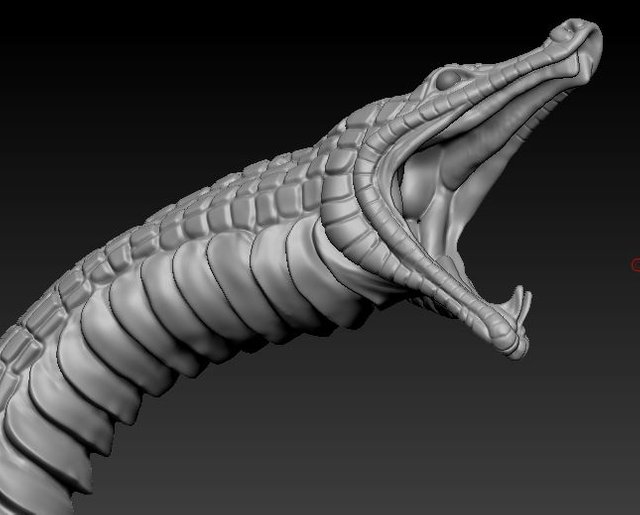
Using references, I start working on the insides of the mouth details.
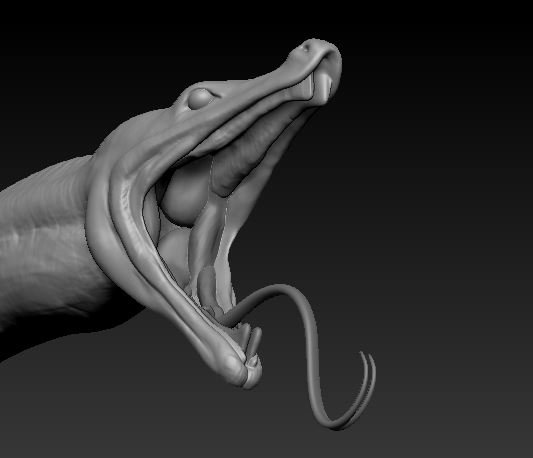
Now adding teeth :)
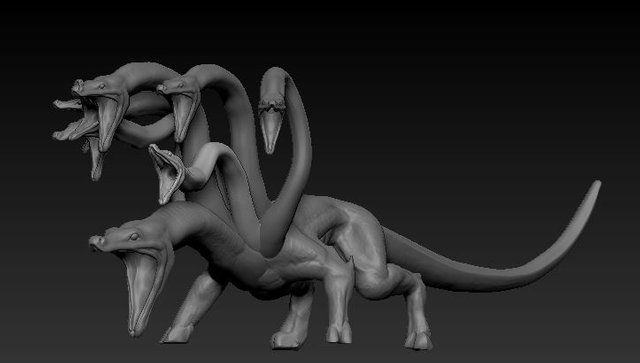
I again test out now the new heads will look on the main body before going ahead.
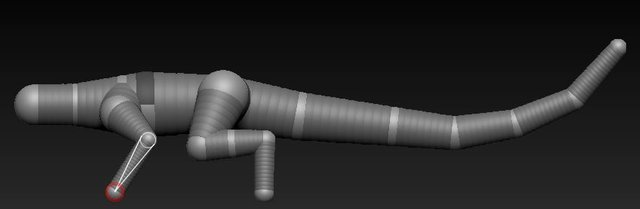
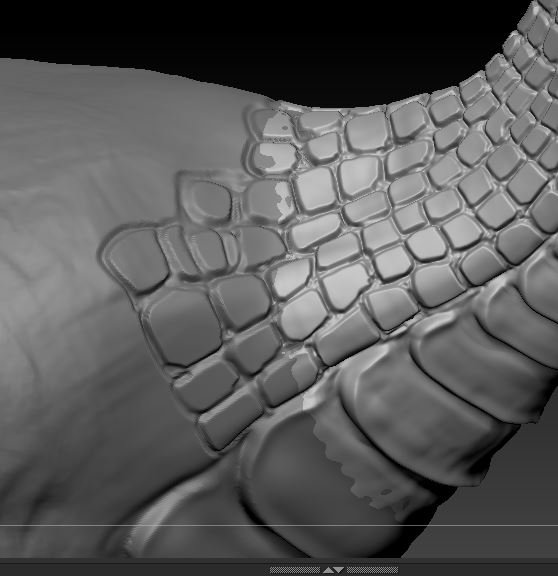
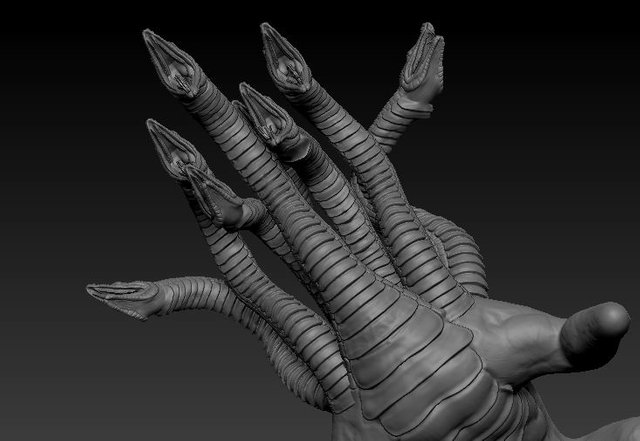
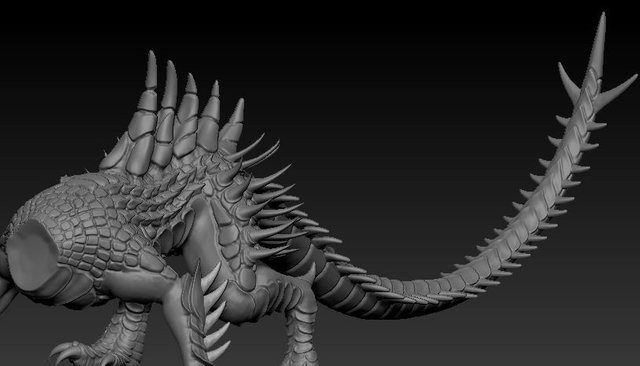
- Since I was happy with the way it looked, I went ahead with adding scales to the head manually. I manually sculpted every detail using various references.
You will notice in the above picture that the head is not merged to the body but is a separate mesh.
I seamlessly add the details on the body so that it appears as one mesh.
Finally I finished the detailing the body.
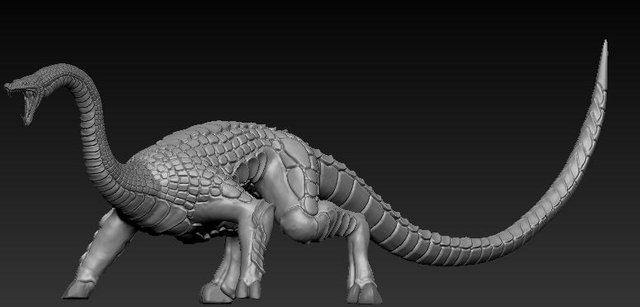
Now I add more spikes just to make it look little dangerous :P
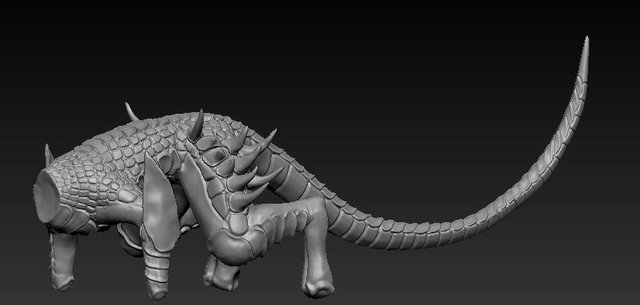
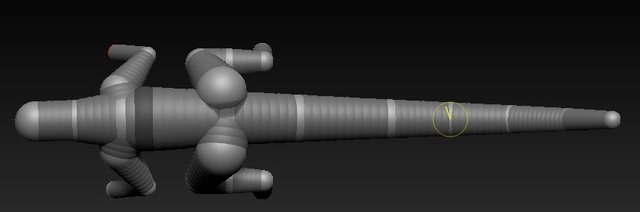
- Even though it looked good, I wasn't happy with the front legs. It just looked not fitting, so I changed it to arms instead of legs. This took some time to accomplish but I just had to
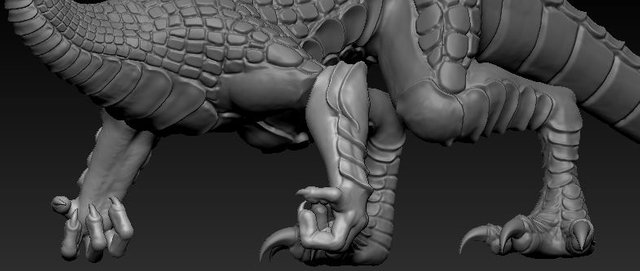
Finally, I added more details on the body.
Final Renders:
Thank you all for going through my post. I hope it gave you a sense how the process works. The purpose of me re-posting this with little edits is just because I dont think I previous post to as many people as I thought it did.
Let me know what you think and feel free to ask questions.
-Allan
Genial
Posted using Partiko Android
I watch tv this moment about Saudi Arabia, Quatar and Yemen. If you see all this guys and a stupid US President you know what your dragon represents. Great work!
Posted using Partiko Android
same agenda, different faces??
Looks like 😱😎
Posted using Partiko Android
Really nice! Good work on the detailing. Aught to think about rigging and setting up for DAZ3D sales. You'd do well.
this one is more like a sculpt but I would retopologize (lower polygon) soon enough...