Adventures in Perennial Propagation
If you've read many of my blog posts, or especially any of the commentary on the articles that I have posted onto the Agsurrection Facebook page, you may have noted that I have a proclivity toward woody perennials. I like trees. I like shrubs. I like not having to prepare a bed and plant them every year.
So... woody perennials are relatively expensive (maybe not so much when one considers how much work actually goes into producing seedlings or transplant-ready specimens) when priced against the cost of annual seeds and even against seedling annuals such as tomatoes or cabbages, etc. There are many ways to propagate woody perennials, but the way that I am focusing on for the purposes of this article is to help inform you about growing from seed.
I started with acquiring the seed, which being a bit harder to find than vegetable seed, is still available from a few sources. I ordered from Sheffield's Seed Company because it had the widest variety of plants which I wanted to propagate, but there are other sources, such as Treeseeds.com and F.W. Schumacher Co. Inc. My interests primarily surround fruit and nut species so I purchased European and Chinese Chestnut, Bartlett Pears, and Antonovka Apples.
Apples from seed you say? Doesn't that just grow up to be crab apples, or unproductive or something? Nay I say. Antonovka apples are what is called "true to type" apples, meaning if you plant an apple seed, they grow a tree that produces apples which are very similar to their parent stock. How is that, you ask? Well it seems that apples originated in Kazakhstan, and there are still wild and land-race type apples which propagate themselves in the wild, from seed. Antonovka's are just one such type, the primary variety available in the United States. They also can serve as a full-sized root stock for other apple cultivars by grafting. However, I digress...
All of the above-mentioned seed requires 60 days of cold stratification. In the case of apple and pear seed, I put the seed out on a wet paper towel, place that in a gallon sized freezer bag, leaving plenty of air in the bag, and put it into the refrigerator for the recommended 60 days. In the case of the Chestnut seeds, it's better because of it's immense size to let it sit in damp peat moss inside a resealable food container for the prescribed scarification time period.
I have grown plants in flats, with or without cells, in peat pots, and so on. However, I thoroughly enjoy the idea behind starting a seed in a container which I rarely have to water, especially in cases where I an looking to the care of hundreds of seedlings. I have seen other posts or videos somewhere on Facebook that showed me how to build them, but I will show you my personal process.
You will need:
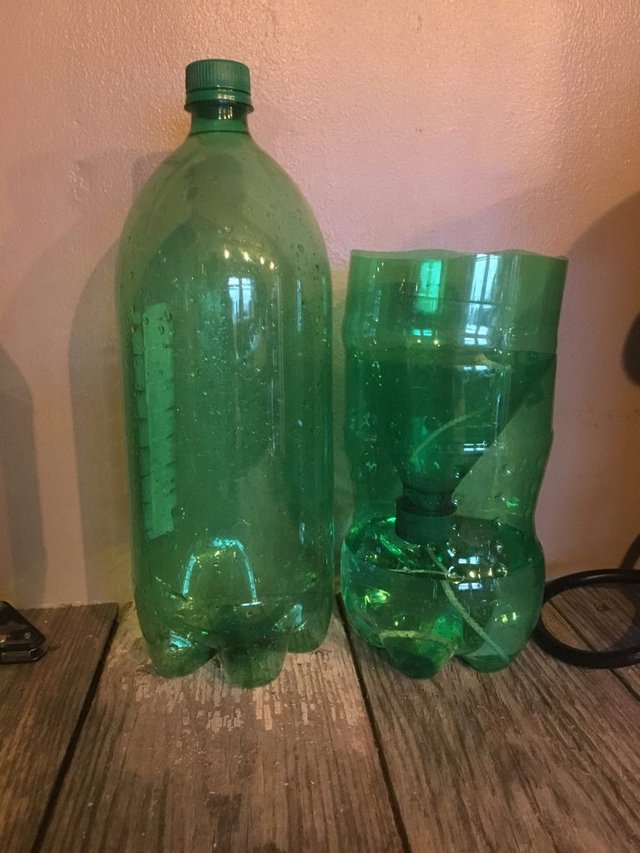
- At least one soda bottle, two liter or three. It is best to choose a bottle with smooth sides, as they nest together for the finished product better than bottles like Sprite or Coca Cola come in. You will note that a majority of mine are Sprite bottles, but that's my family's preference, and I use what I have.
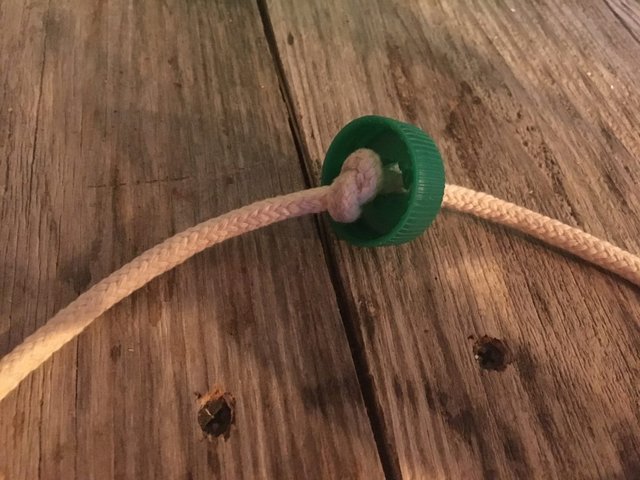
- A length (I use about 1 foot per container) of cotton or some other non-synthetic fiber rope or string. I chose cotton clothesline for this. It's cheap and comes in 100 foot rolls, and has a pretty substantial diameter.
- A sharp knife (I use a box-cutter).
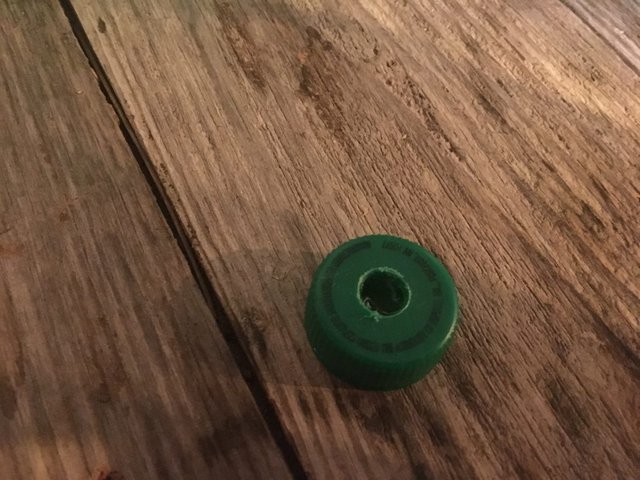
- A means to put a hole through the cap (I used a drill with a 3/8" drill bit).
- Some Seed starter mix.
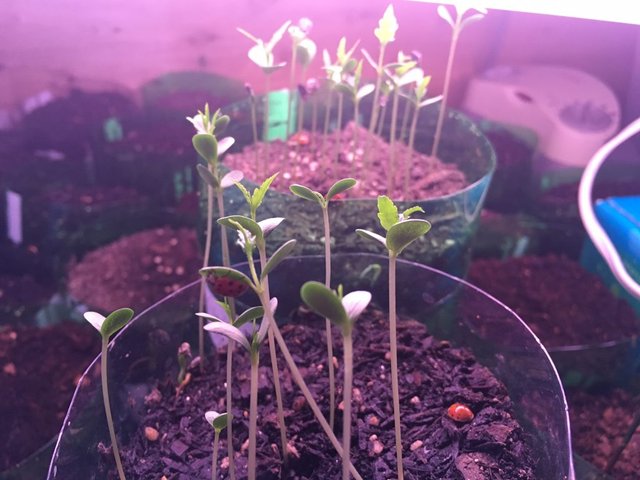
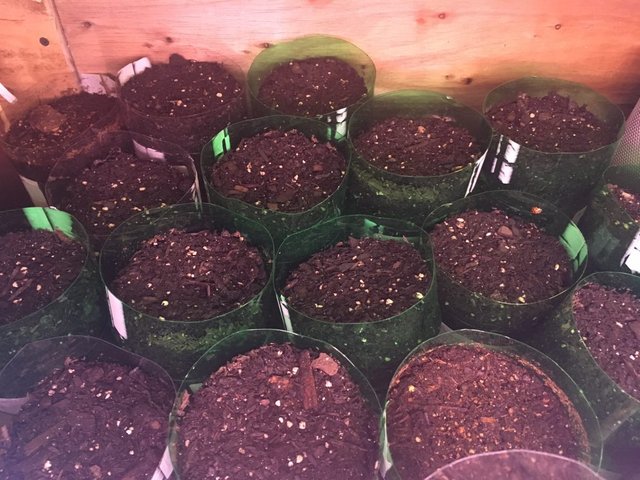
Birch-leaved Pear seedlings in home-made self watering containers.
Step 1: Cut around the diameter of the bottle, removing the top from the base. Where you cut determines how deep the pot will be, and how much water storage is below. That said, it's best to determine how much of each you need, based on what seeds you intend to plant, and measure to make your planters uniform. I did not do this, and I have all variety of sizes.
Step 2: Drill a hole in the middle of the cap. I used a 3/8" drill bit in a cordless drill to do this.
Step 3: Cut off approximately 1 foot of the cotton wicking cord. Tie a square knot in the middle of the cord and slip the cord through the cap, with the knot on the inside of the cap.
Step 4: Screw the cap onto the severed top of the bottle, then invert it upside down into the base of the bottle. At this point I typically fill the top halfway with water to wet the wick at the top. The excess water will drain into the base, which I then fill up to the cap. It may be better to actually soak the wicks beforehand to get the process started better, but I haven't actually done it.
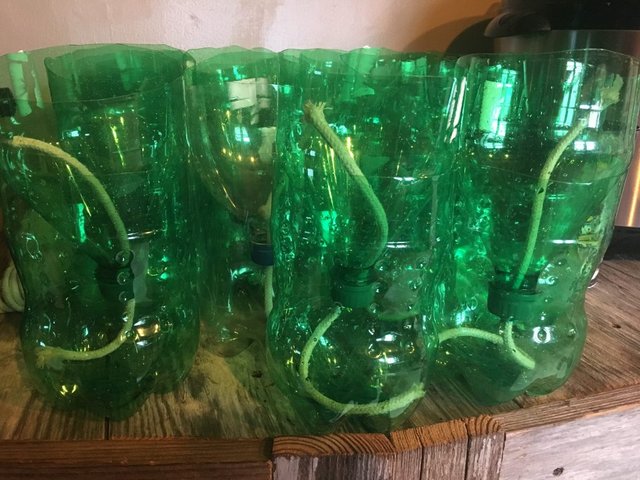
Step 5: Fill the bottle top with seed starter mix and plant your seeds according to their specific needs.
Having planted the seeds that were done scarifying a couple weeks ago, I have some nice results. I stick them under a grow light until the weather warms up and then will transfer them into one of two places: 1. Their final destination in the ground. 2. A specially prepared bed called a "Air Pruning Bed."
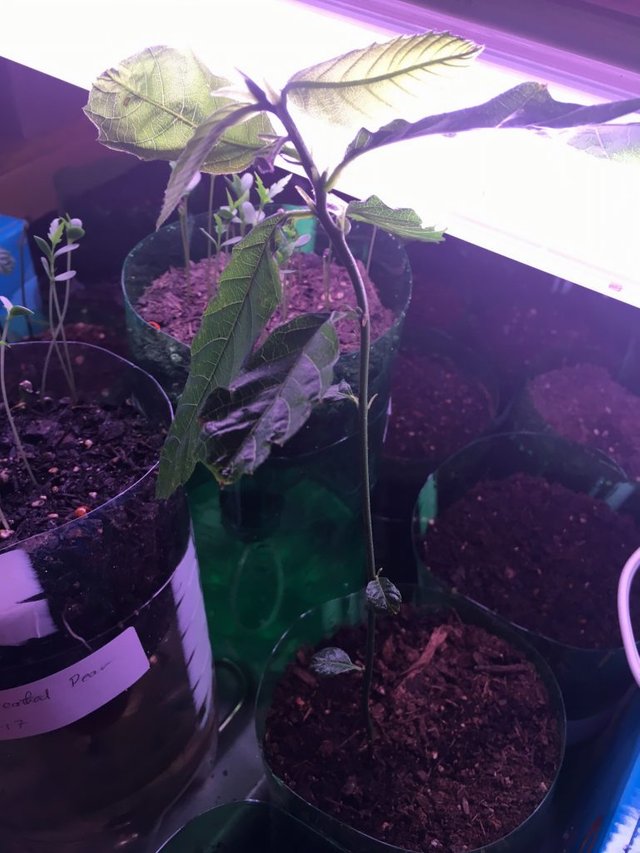
A European Chestnut seedling
For tap-rooted plants like all of the ones described above, it's best to put the plants where they will spend their entire life. This isn't sometimes feasible so typically a nursery would put a tree in place as a seedling and transplant it when it reached it's target size. While this is standard practice, this would sever the taproot and permanently alter the root structure, as well as weakening and shortening the overall lifespan of the tree. One alternative is to grow out the bare root seedlings in a air pruning bed.
In essence, an air pruning bed is a box, filled with soil. It sits atop a structure of some kind to keep it off of the ground, where air can circulate. Rather than outfitting the container with a solid bottom like a pot or planter, the floor is covered with heavy mesh, then finer mesh, then finally something like weed blocker. What all that accomplishes is to produce a situation wherein burrowing roots reach a point of dry, aerated soil. Since roots from most species cannot grow through empty air or extremely dry soil, the plant doesn't set such a large taproot, and instead sends out a series of roots in every direction, making a more robust root ball closer to the surface. Or at least that is the theory. I plant to test it out this spring with the construction of my own air pruning bed. More to come on that later.
I know this is only an overview, but hopefully I can fill in details as I flesh out different parts of this experiment. Hopefully many great things to come in this space.
Posted from my blog with SteemPress : http://www.agsurrection.com/2017/04/06/adventures-in-perennial-propagation/
Great I need to start doing this getting tired of my pine forest. pine pine pine everywhere. :D
You may have to clear out the pine needles to plant fruit trees.
Wow, it so many steps ,,
Don't forget to give your vote in my post @agsurrection
Nice sharing @agsurregtion😊 dont forget to check my post and upvote ya😊
Que maravilloso, ojala en mi pais se pudieran cultivar! @agsurrection tienes una nueva seguidora