Copic Markers Tutorial
Hello fellow steemians this is my more recent copic work. Feeling a little more confident in my copic skills I decided to write down a tiny tutorial on how to use copic marker. Copic markers are most well known as manga markers, made in Japan they are still a favored tool by many manga artists.
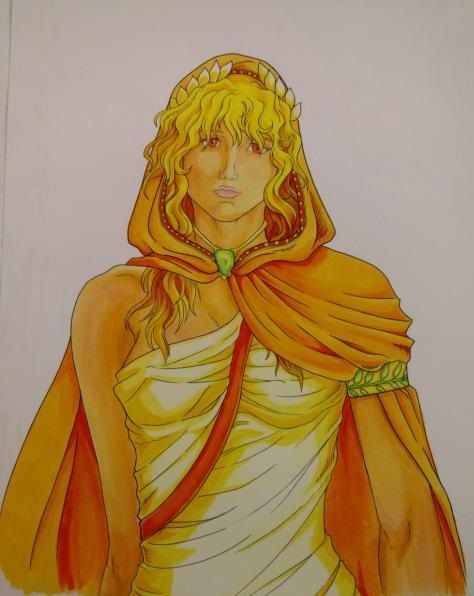
I actually started this drawing last friday but finished it up today on my birthday hehe. XD I wanted it to be for the most part monochromatic. I stuck around the more yellowish tones which I felt gave it a nice vibrancy of life and a bit of divinity.
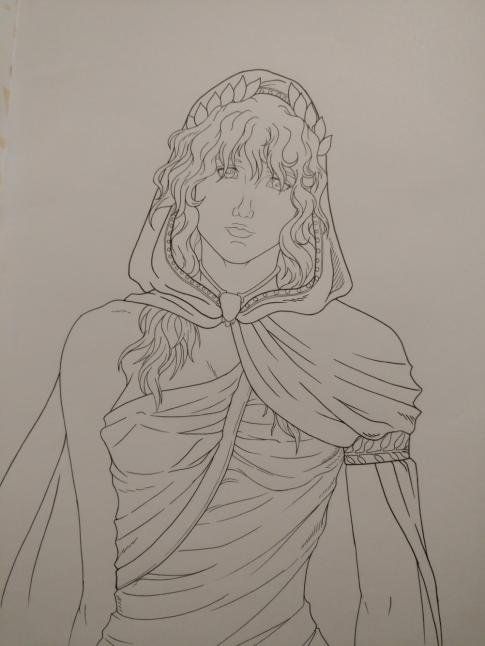
I started by drawing then inking. I use copic multi liners because they are an alcohol based multiliner which means they are 'more' waterproof than multiliners that are made of indian ink. So when I run over these black lines with my copic markers I don't accidentally smudge the lines into oblivion. The multiliner sizes I use for this standard paper size are .35mm, 0.2mm, 0.1mm, and .03mm.
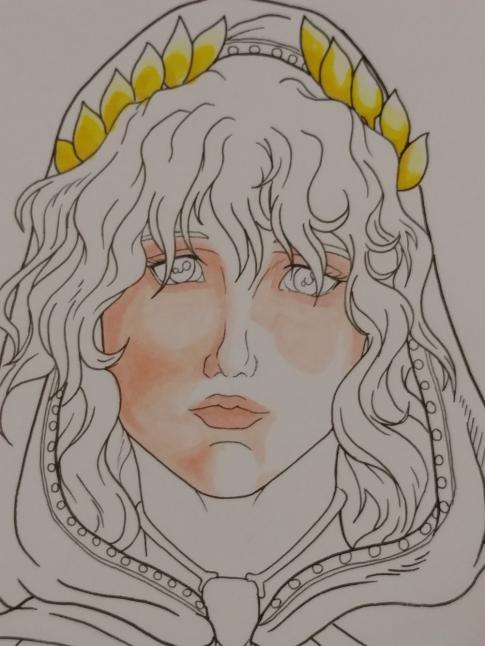
Coloring in the skin in was the most tricky part to color because I wanted her to have warm cheeks. I used a R00 and R20 to bring the warmth into her face by adding this subtle red to regions of the face that had more blood vesselse. Such as around the eyes, cheeks, lips and nose. The order in which you apply your copic marker is also important, start with the R00 (lighter color) then add the R20(deeper color) on top. Once you have the warmth layer added you can go to the skin color.
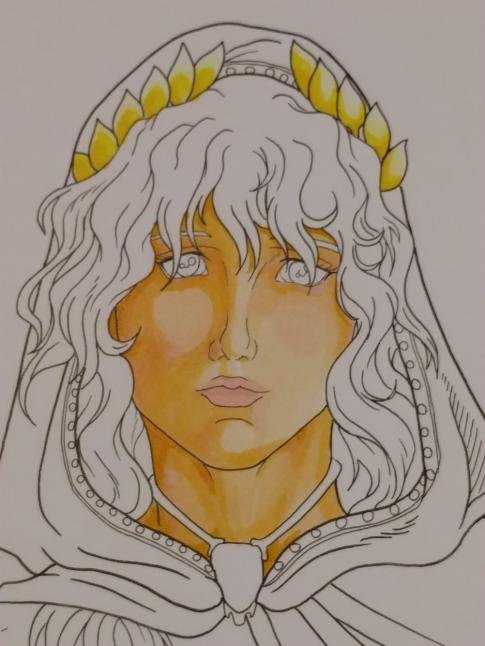
Next I use my normal technique of applying three simliar shades to create the illusion of the highlight, midtone and shadow. In the Case of her skin I used YR20, YR21 and YR23. I started first by adding a full coat of YR20 on all the skin this served as my highlight. Then I went into the YR21 and this became my midtones, and finally YR23 was added last as recessed shadows. You could stop your flesh coloring here but I added a final layer to unify the colors I choose.
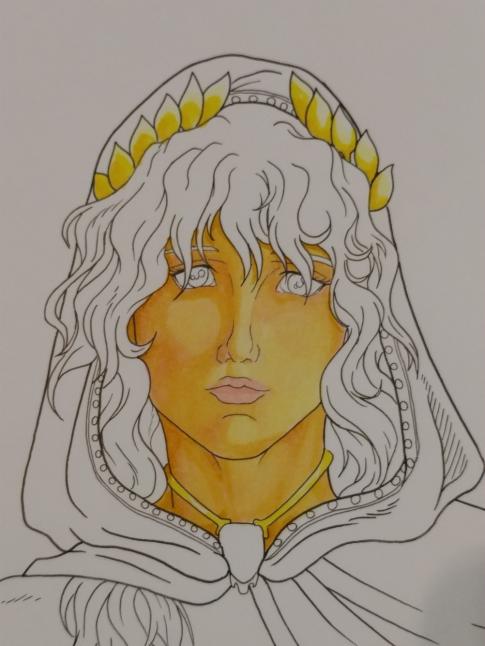
I used a Y00 to unify all the colors in her face. For the next part I mostly used the the three color technique for filling out the rest of her clothing.
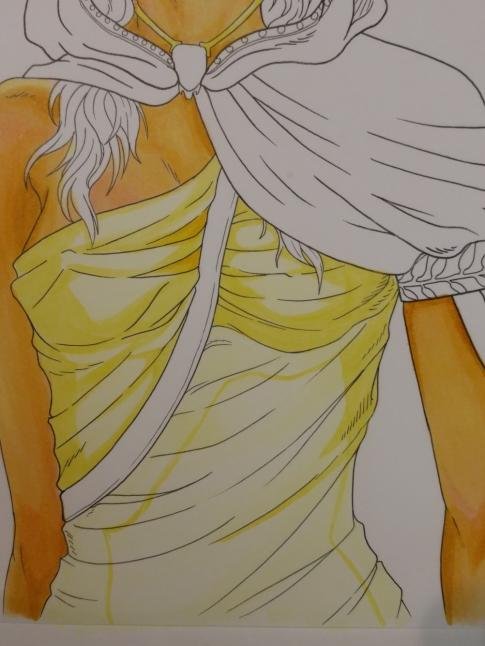
I start with the most lightest and desatured color as the highlight, then I move to a slightly more satured and darker color as the mid tone and finally the darkest color for the shadows. Order is important when working with copic markers.
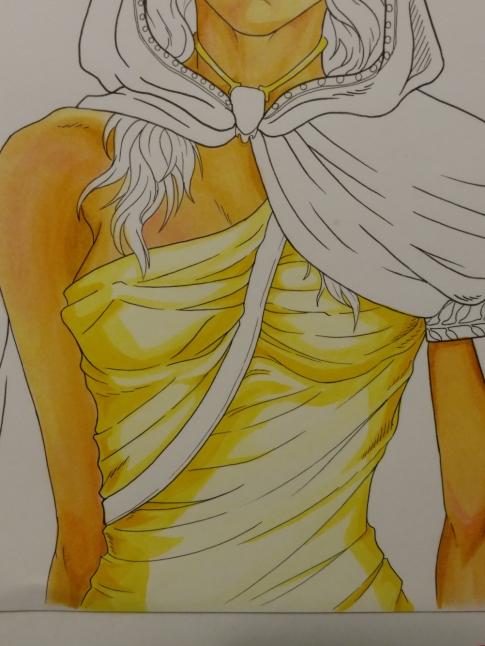
This sort of coloring can also be used in digital applications and color pencils as well.
I made a gift for you on my bithday! :P I hope you enjoyed the mini tutorial and steem on my friends.
This upvotes for you.

happy birthday have a good 1! & nice drawing
Congratulations @ladygray! You have completed some achievement on Steemit and have been rewarded with new badge(s) :
Click on any badge to view your own Board of Honor on SteemitBoard.
For more information about SteemitBoard, click here
If you no longer want to receive notifications, reply to this comment with the word
STOPOow, I like that. I'm going for a similar style on my next one. It's going to be digital but I'll try and keep it traditional comic style.
She looks very good. Well done!
I up voted this because Lady Grey is my favourite tea, Nice drawing too.
Congratulations @ladygray! You received a personal award!
You can view your badges on your Steem Board and compare to others on the Steem Ranking
Vote for @Steemitboard as a witness to get one more award and increased upvotes!