Silence to Sound Album Cover: Step-by-Step with animated GIF!
Hello! I've been swamped with lots of art-related work and events, and am excited to finally be back to post about them. I have a big series coming up about making money with your art by participating in art festivals, as well as more process posts for book illustrations that will hit the shelves in the next two weeks.
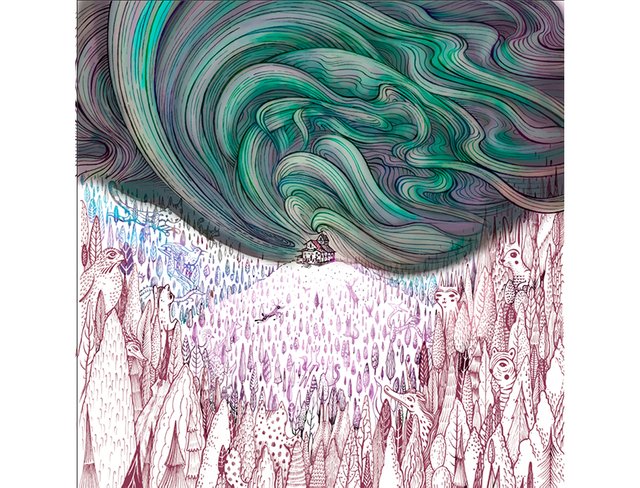
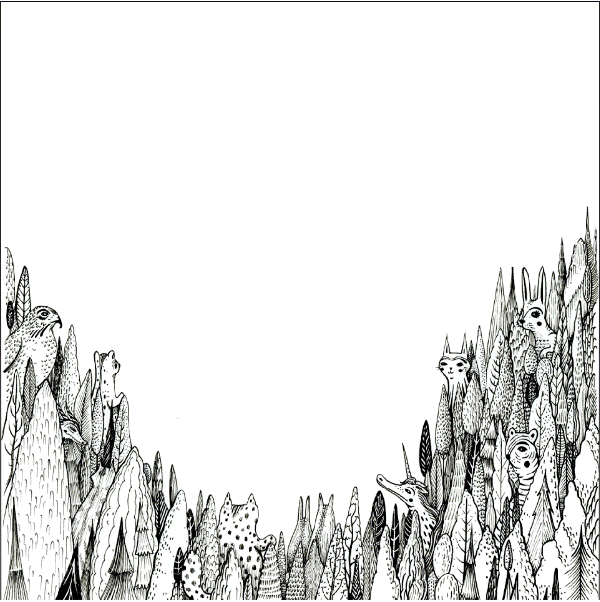
Today I'll be taking you through the process of my latest piece, an album cover for the band Porch Light Apothecary. I also created my first step-by-step animated GIF so you can see the image as a 32-step process!
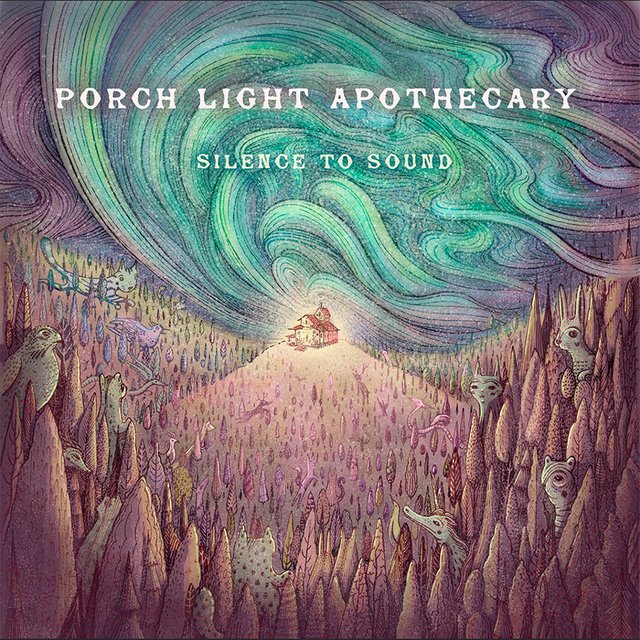
The final piece, above, started to come to life when I listened to the band's music. I could hear something timeless in their songs and started leaning toward a look of magical realism. Then I read a blurb on their website that inspired my sketches:
"Porch Light Apothecary's musical collaboration is sure to stir something inside of you; drawing you in from different roads of life; calling you up to the music being played by the front porch lights; taking you on a magical musical journey."
I like the idea of a magical musical journey. So I began with concept sketches based on this idea.
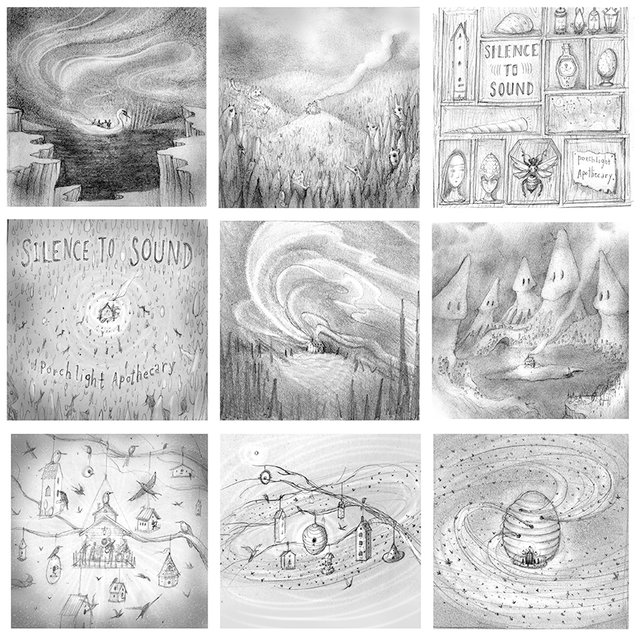
One thought kept presenting itself - a little light coming from a small home to illustrate the quaintness of a porch light, and the music pouring out to create a magical space. The client decided to combine the top center sketch of the cabin in the woods with the middle sketch of the northern lights. I combined the two, copied it several times, and used the multiply layer function in Photoshop, making the whites transparent. I digitally painted on a new layer underneath the drawings to show different color options. Because I paint under the drawing, I can make messy broad strokes and get a pretty good color sketch without too much work.
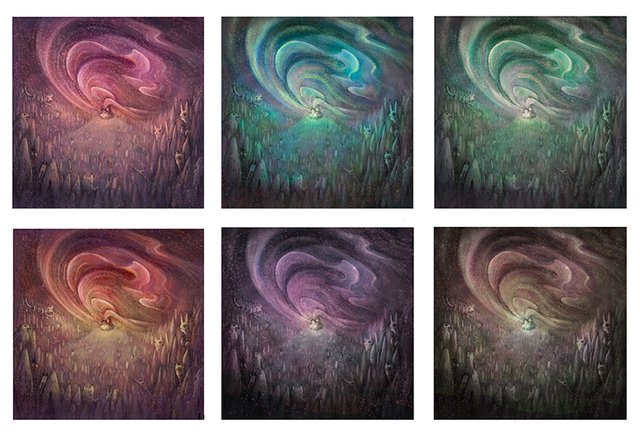
The band chose the greens for the sky and the warm colors for the forest. At this point it was time to get started on the drawing!
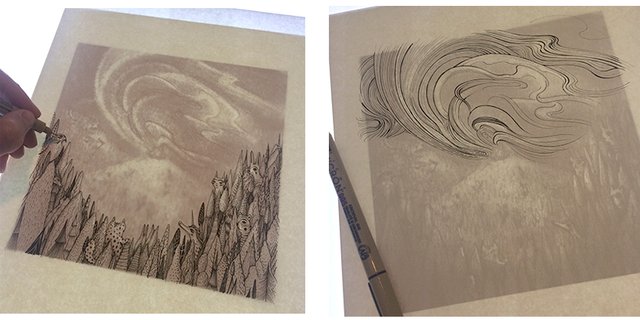
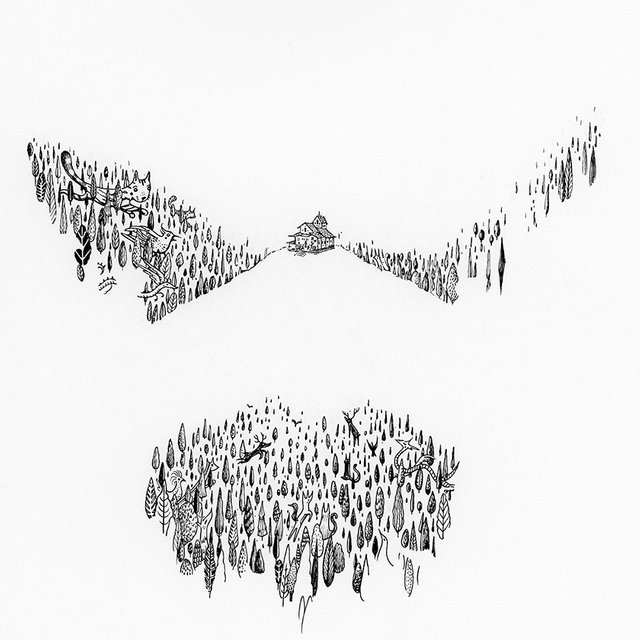
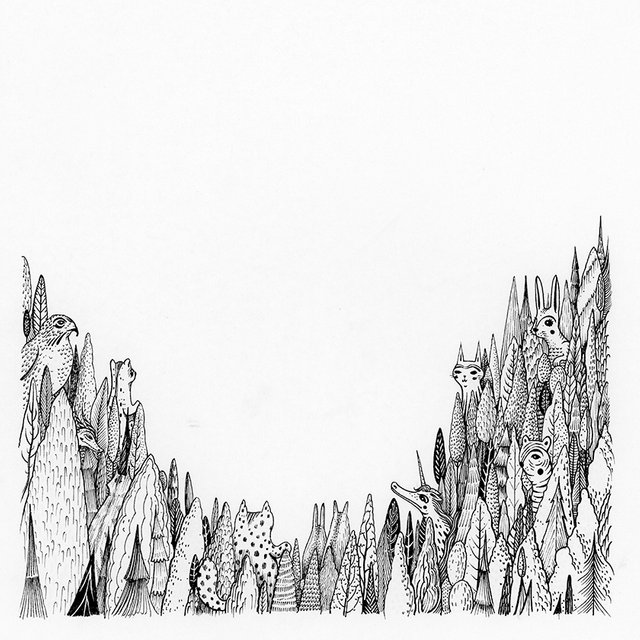
I decided to separate this image into three separate ink drawings. Splitting up the drawing helps me later so that I can work with each section of the piece individually. I blew up my sketch and used a light table to translate my sketch into ink. I like using Micron pens in sizes oo5 and 01.
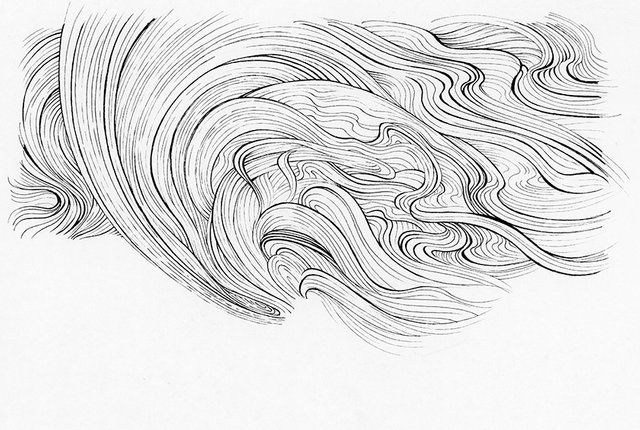
Then I scanned and stacked the ink layers together in Photoshop and applied the Multiply function again to each layer so that I could start working with color behind the drawing. I wanted the image to feel magical, so I also decided to colorize the line work. In the brush palette, I chose the brush option called "screen". This option allows you to colorize the drawing with your digital paintbrush. I laid down the general colors for the sky and the forest on the drawing itself.
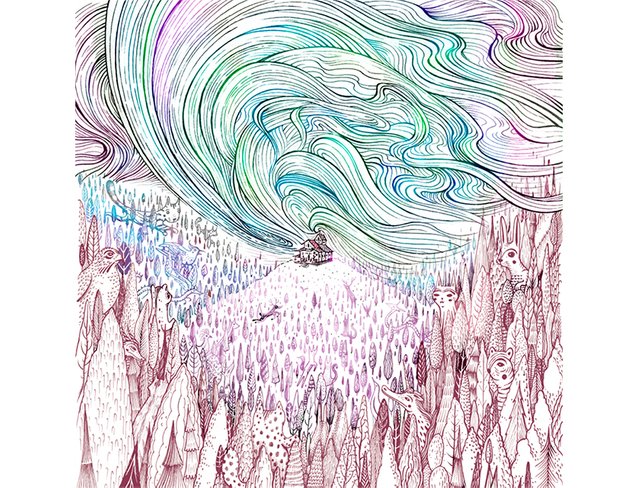
Next, I started laying in color behind the drawing, starting with my darkest hues.
I keep the color behind each section on a separate layer so that I can choose to manipulate each section of the piece independently.
Once the color base is all there, I start to pull out all of the highlights. It is important that the light from the cabin and the Northern Lights reflect off of the forest and creatures within. This really adds some of the magical feel I'm after.
I then add a little "sparkle" to the piece by using a Photoshop brush created by Kyle Webster. His watercolor salt texture brushes do a good job of adding a bit of fairy dust to the landscape.
Finally, I added the text and darkened the area around the text so that it reads better. You can see all of the major steps in the GIF below. It may take a minute to load, but hopefully it gives you a bit more insight into the process! The GIF was fun to make and hopefully I'll make more of them to break down future projects.
I look forward to posting more artwork and process stories soon!
Images copyright Jaime Zollars 2016
Excellent article and piece in itself! Thank you for sharing such quality work with us all. Namaste :)
Thanks for the nice comment!
It is definitely my pleasure, namaste :)
spectacular work! just love seeing this world you've created for this album cover come to life. oo lala!!
oh thanks! I'm teaching myself slowly but surely how to capture that "life" in digital work, so I appreciate the comment.
Masterful, @storyseeker, as always! I wish I could wield a pen with such ease! And now I know there's a fairy dust brush. Of course I must investigate. :)
What a beautiful album cover.
Thanks! The fairy dust brush is seriously my biggest secret ;) I have used it for all of my recent art assignments. I believe it is part of Kyle Webster's watercolor set! I have all of his brushes so I can't always remember in which set each one came.
Awesome work!
thanks so much @kimal73 !
Awesome! We want more.
Thanks so much! I plan to post several pieces this month :)
Love it! This is an absolute masterpiece, @storyseeker.
Thanks so much! Every time I finish a piece I feel pretty indifferent to it because I've been staring at it so long. I wasn't sure about this one at first, but it had grown on me this week. Your comments are appreciated!
You bet!
I totally understand. I was talking to someone just the other day about how, as artists or writers, we are our own worst critics. Every fault in our works are so magnified, but to someone else, they see our talents for what they truly are.
This piece is stunning, and in my eyes, flawless.
This is an amazing album cover!
Thanks so much! I don't do many of them, but this was fun :)
This is beautiful work @storyseeker well done!
thank you !
@storyseeker I always find the details of your work pretty impressive.
It takes much patience to achieve such work. I hope your fingers, arm and shoulder of which ever hand you are using are all okay - achieving something like this doesn't come in an abracadabra . Kudos!
Interesting work! thanks for sharing